QuickBooks for LLC: How to Set It up for Your Business
Starting a business involves many decisions, including selecting the right accounting software. QuickBooks is an accounting software powerhouse offering four versions: QuickBooks Online, QuickBooks Self-Employed, QuickBooks Desktop, and QuickBooks Mac. We have curated the information into a step-by-step guide to help you set up QuickBooks for your LLC.
Contents
Why Choose QuickBooks for Your LLC?
Why Choose QuickBooks for Your LLC?
QuickBooks provides an array of automated accounting procedures. By integrating QuickBooks into your LLC's operations, you can easily organize receipts, create invoices, accept online payments, track inventory, and cater to customer needs promptly. In addition, the software enables you to track employee hours, calculate and manage taxes, and process payrolls.
How to Set up QuickBooks for Your LLC?
Registration and Initialization of QuickBooks Account
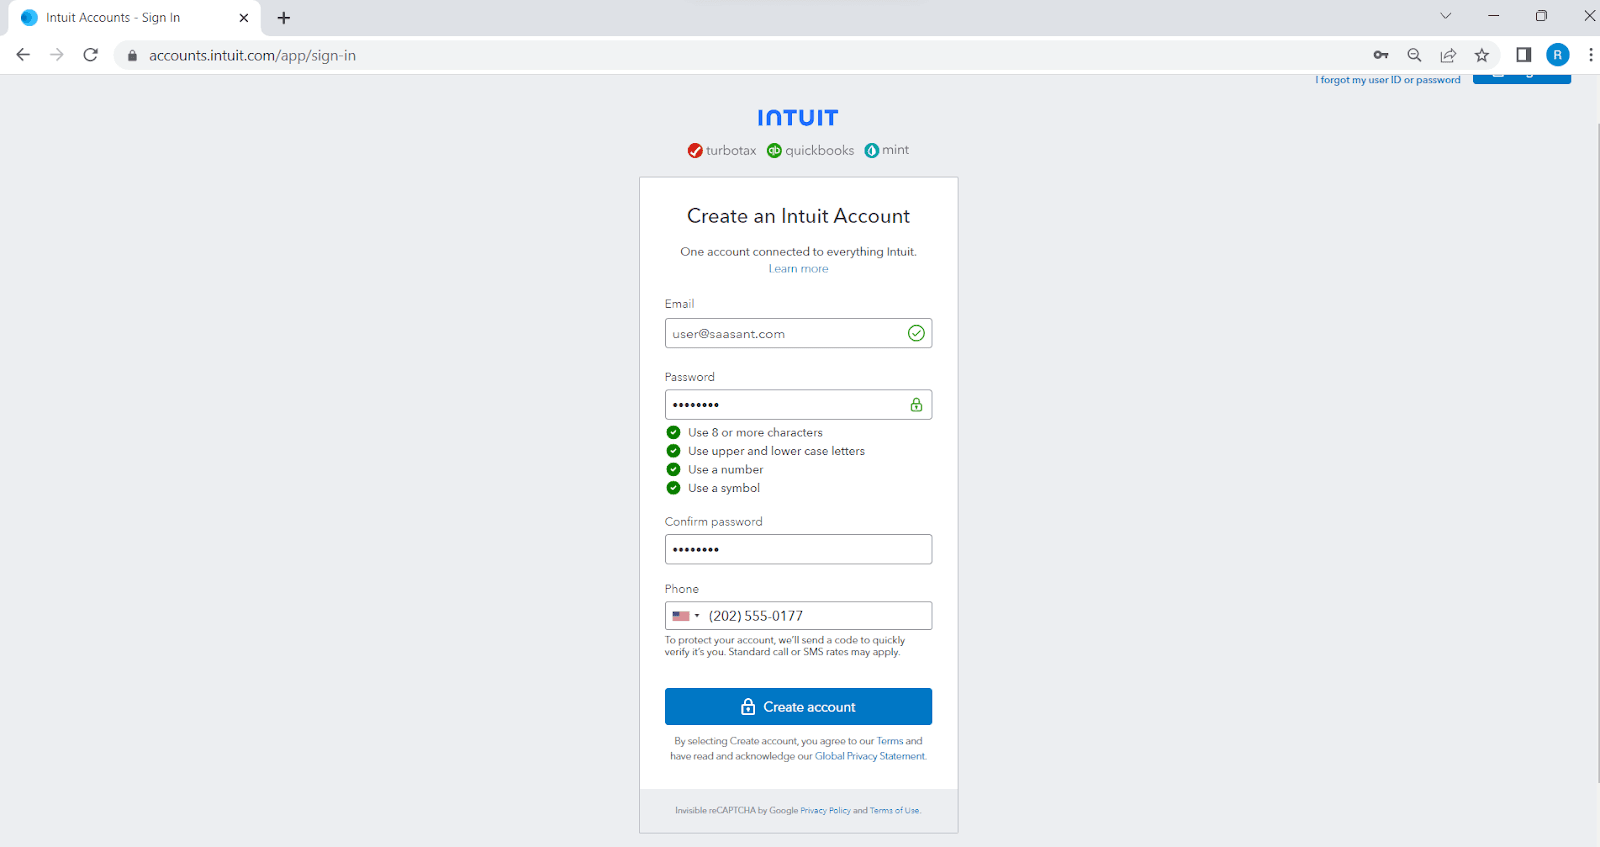
The first step is to create a QuickBooks account for your LLC. Providing email ID, password, and contact number in the necessary fields is vital to this step.
Assemble Crucial Business Information
The next step in the QuickBooks setup process is gathering crucial business information. This information encompasses your LLC's structure, physical address, official mail ID, business website, tax identification number, preferred accounting method, and most recent bank and credit card statements.
Know-How
Step 1: Access the Company Preferences
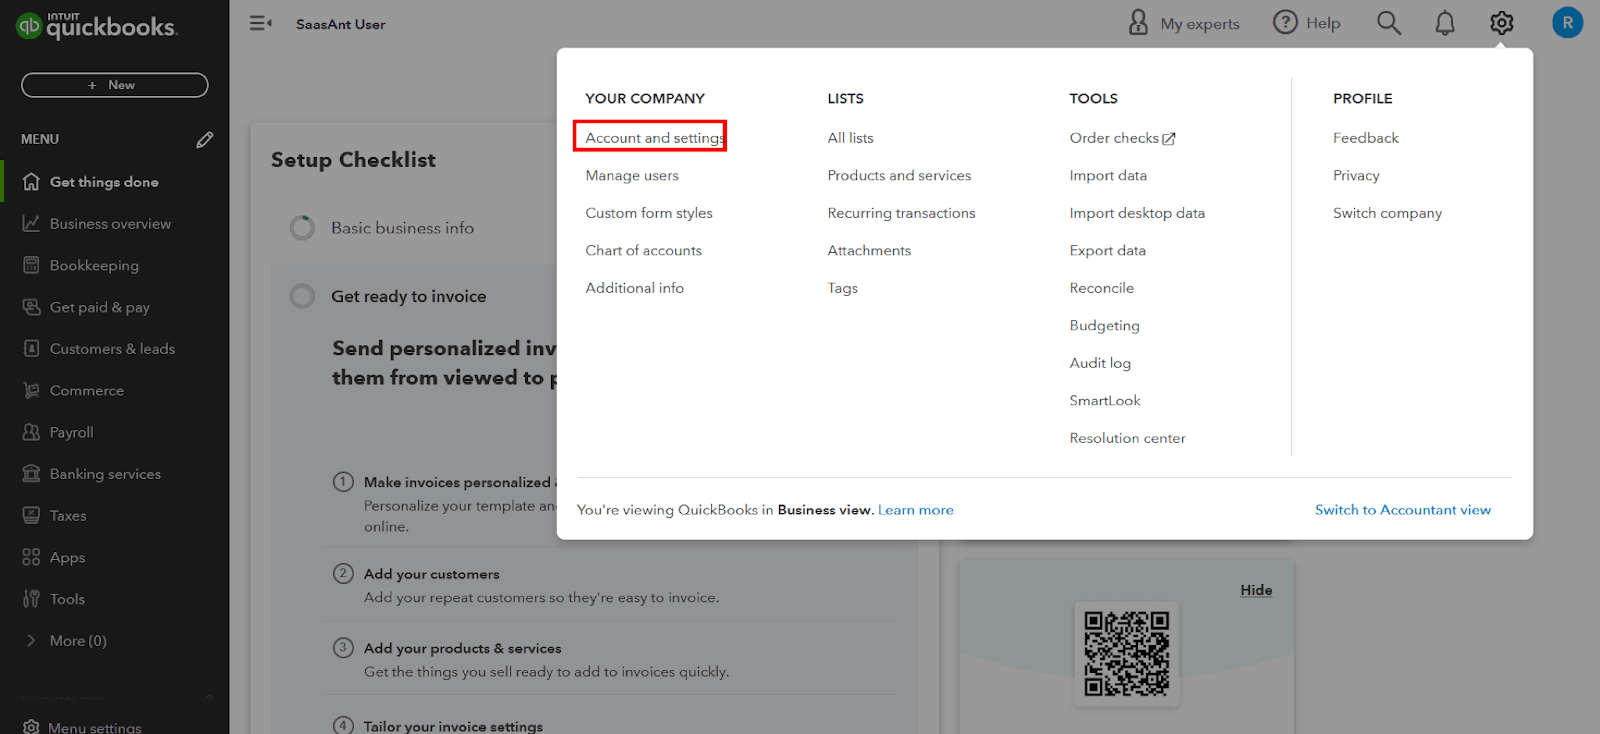
Once you're signed in and your business profile is set up in QuickBooks, click on the "Gear" icon in the top-right corner of the screen. From the dropdown menu, select "Account and Settings."
Step 2: Navigate to Company Settings
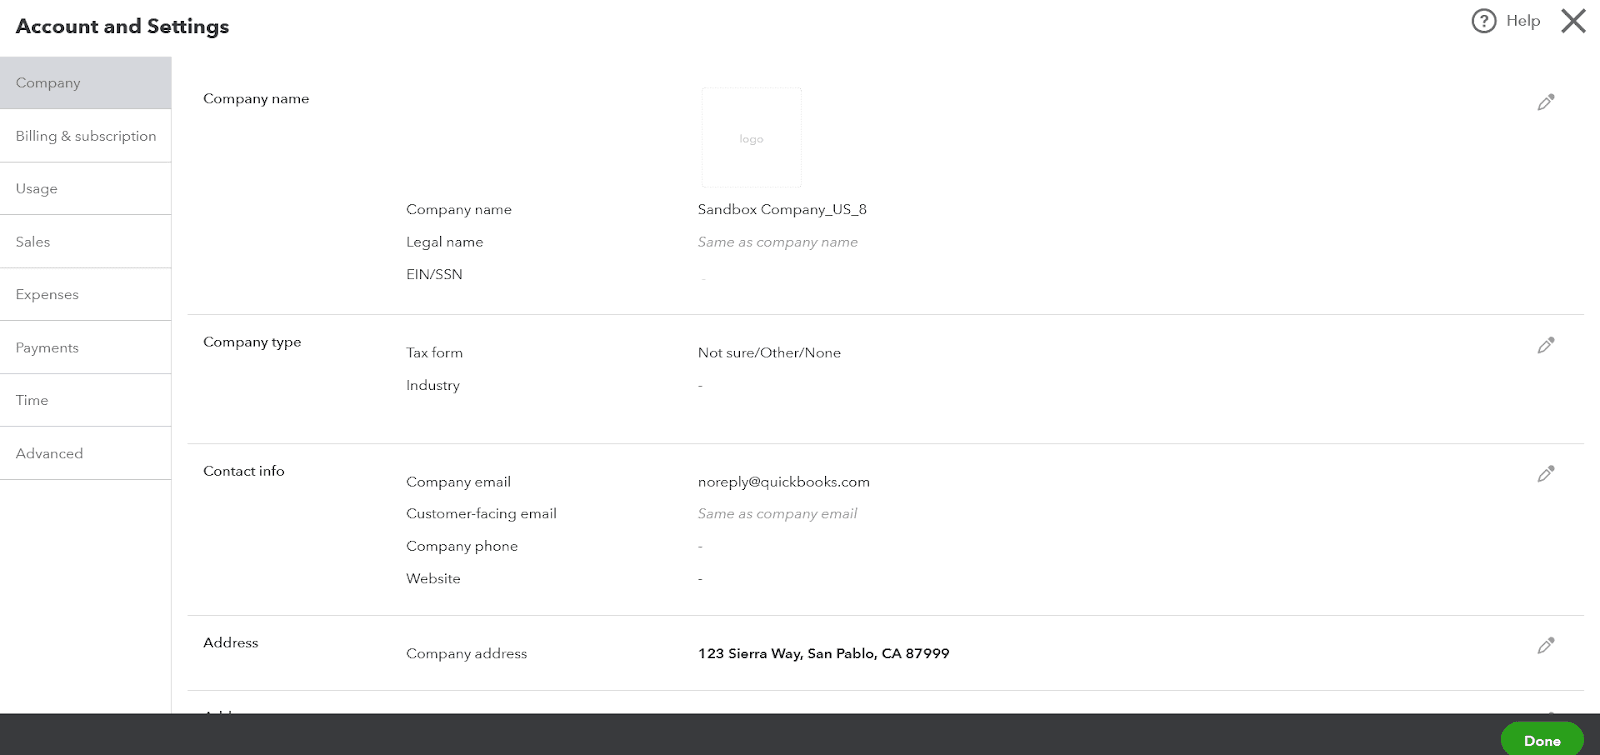
In the “Account and Settings” menu, you'll find various tabs and options related to your business. Click on the "Company" tab.
Step 3: Edit Business Details
Look for the fields that contain your business information, such as business name, address, phone number, email, website, and other relevant fields. Make the necessary changes or additions to update your business details.
Step 4: Save Your Changes
After making the necessary modifications, click on the "Done" button to save your updated business details.
Customizing Invoices, Sales Receipt, Estimates
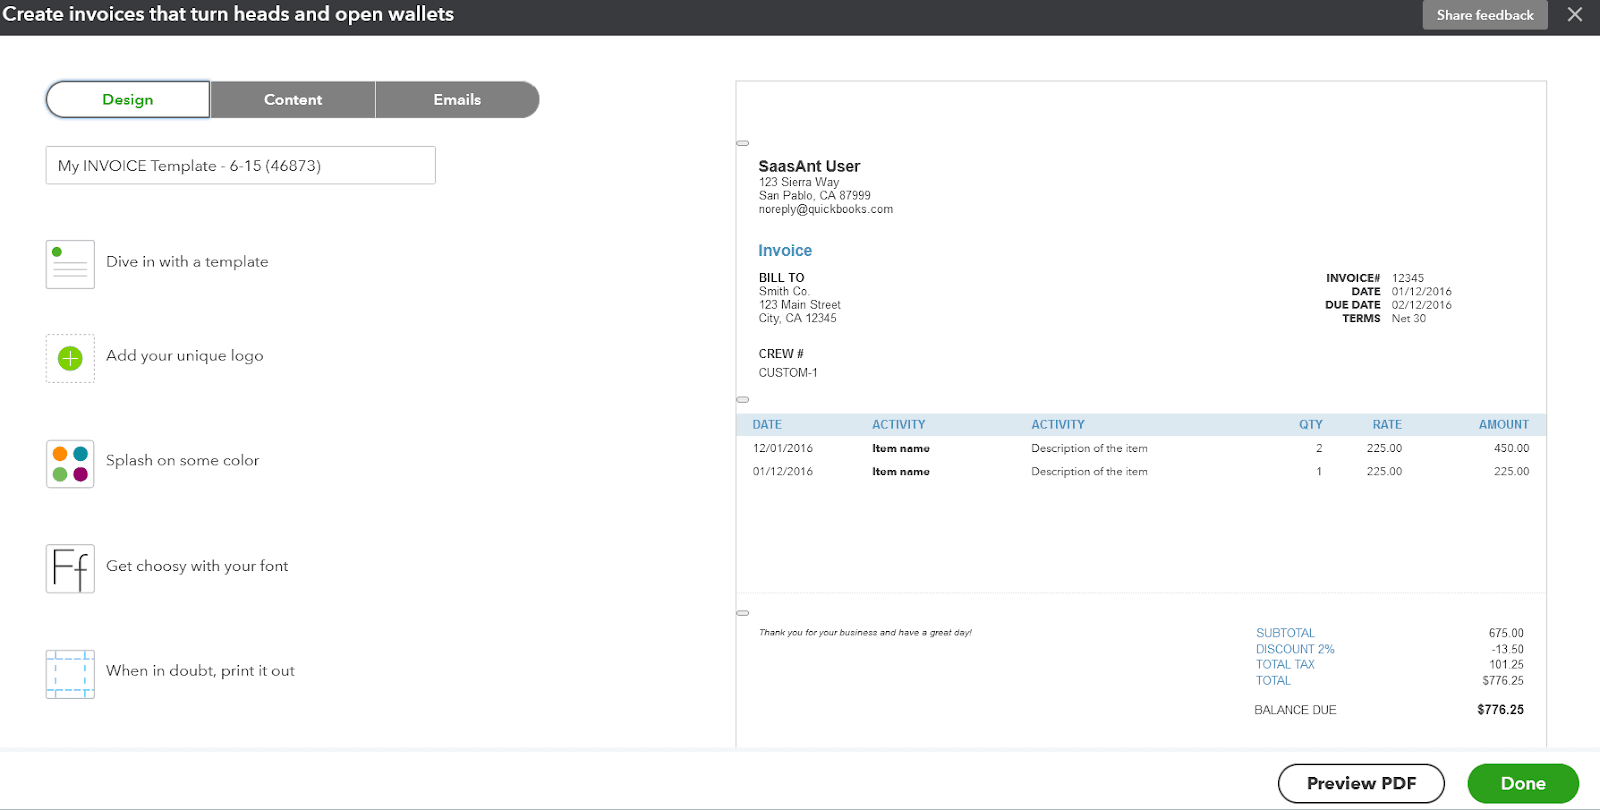
Customizing your invoices, sales receipt, and estimates by adding your company's logo, adjusting the style, color, and font helps build a consistent brand identity.
Know-How
Step 1: Access Customization Settings
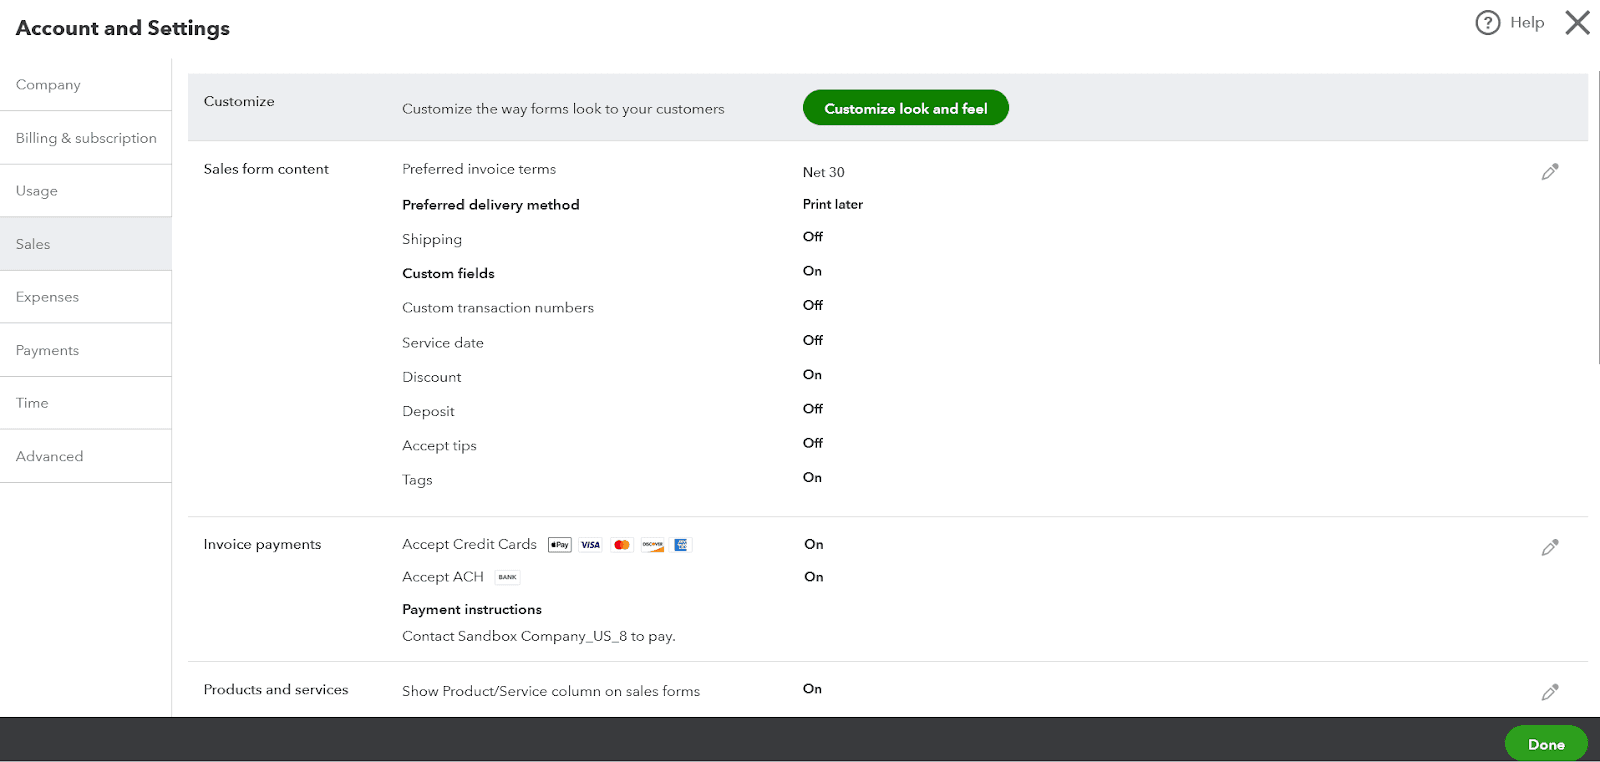
Click on the "Gear" icon in the top-right corner of the screen. From the dropdown menu, select "Sales" and under “Sales” you can select “Customize look and feel.”
Step 2: Choose the Form to Customize
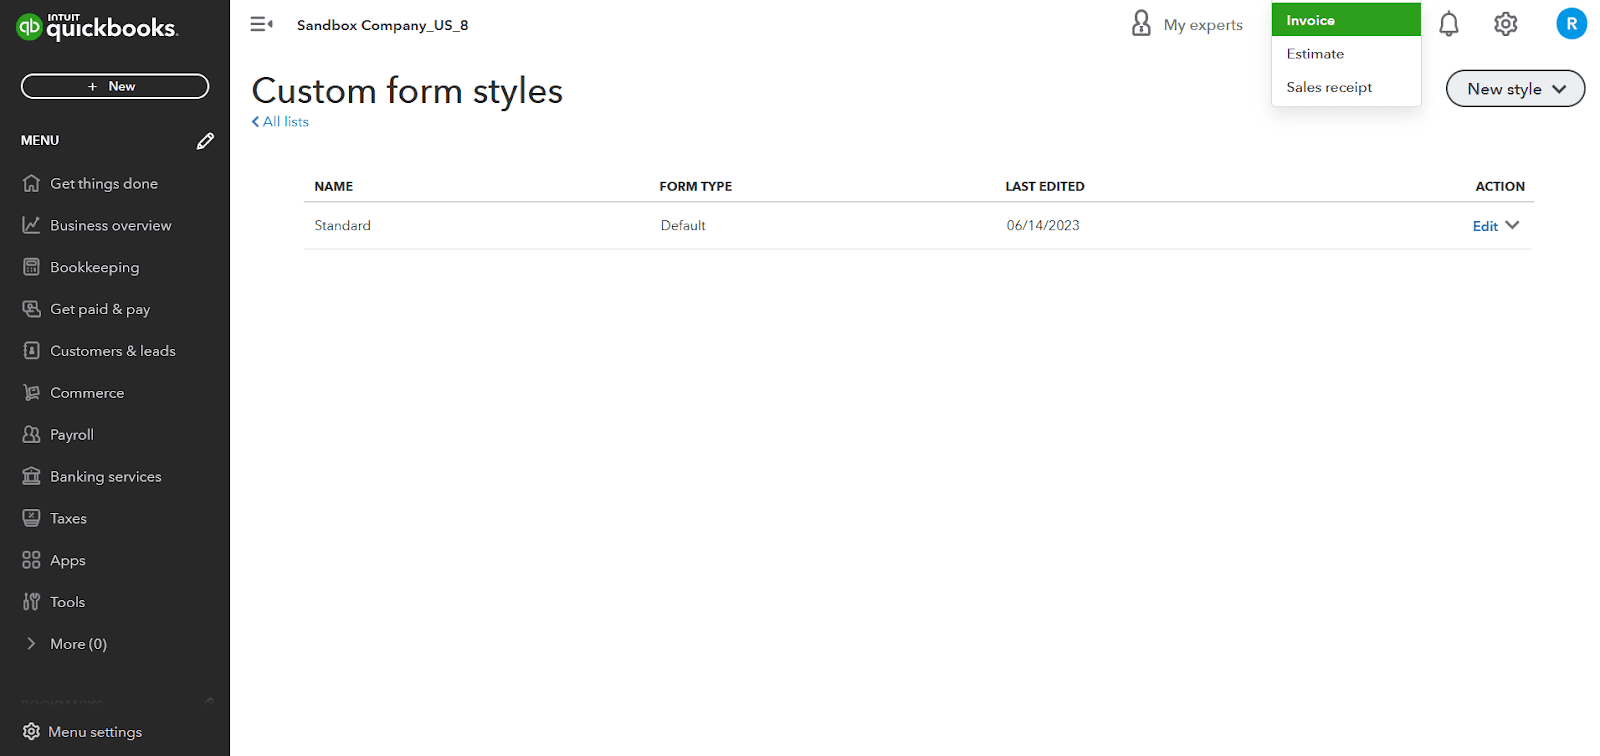
In the Custom Form Styles, at the top right, you'll see a list of forms such as invoices, sales receipts, and estimates. Select the form you want to customize by clicking on it.
Step 3: Customize the Form Layout
QuickBooks provides various customization options to modify the layout and appearance of your form. You can make changes to the following elements:
Determining Customer Payment Terms
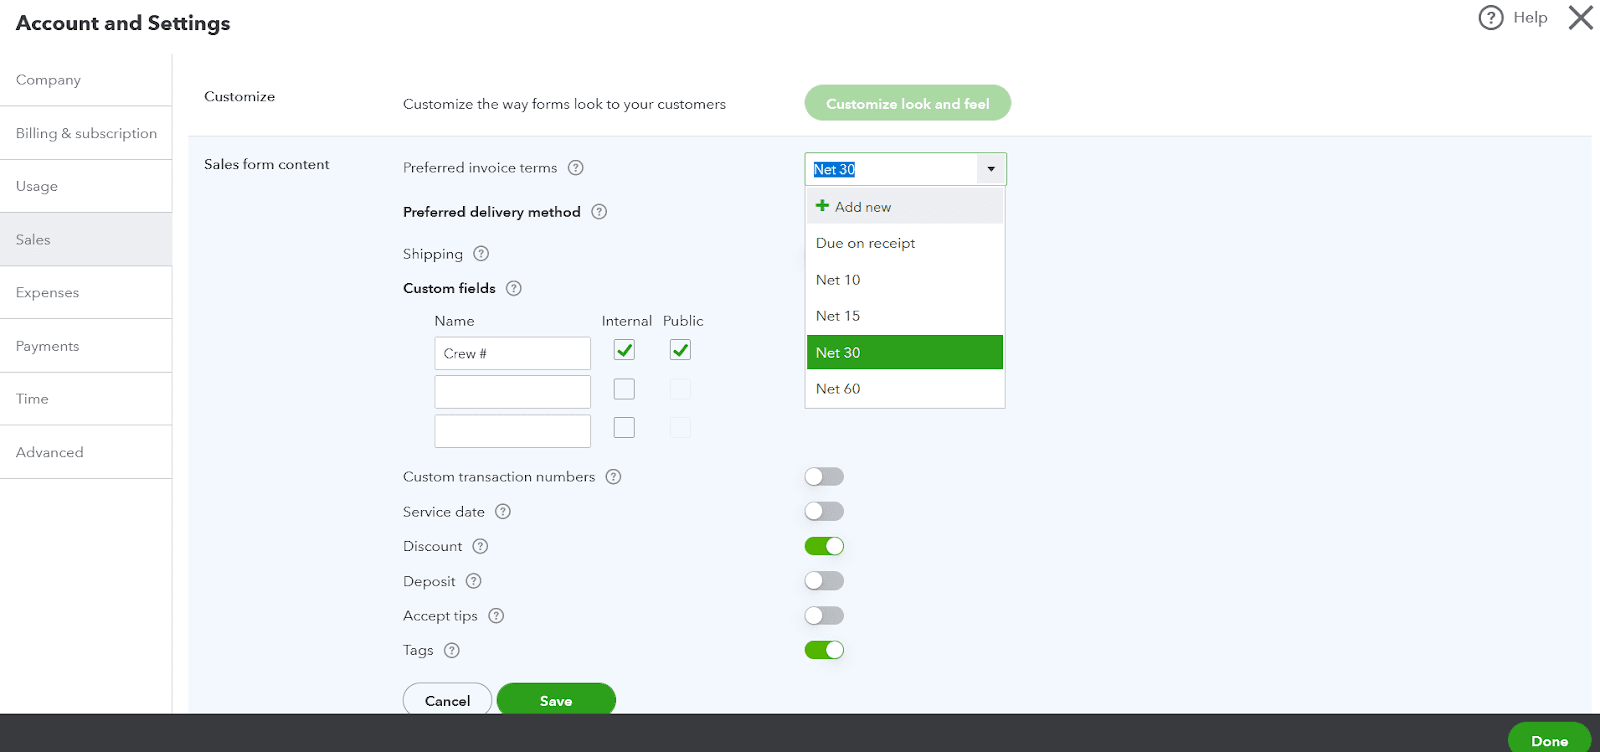
A necessary step for maintaining financial liquidity, setting payment terms dictates the conditions under which you complete a sale. These could include payment “Due on receipt”, “Net 30”, or “Net 60”.
Know-How
Step 1: Access Customer Payment Terms
Click on the "Gear" icon in the top-right corner of the screen. From the dropdown menu, select "Accounts and Settings.” Click on “Sales” on the left panel.
Step 2: Select Sales Form Content
Below the “Customize” section you’ll find the “Sales form content” section. You can make any necessary edits or additions for setting payment terms.
Activation of Multi-Currency Feature for International Transactions
For LLCs dealing in multiple currencies, activating QuickBooks’ Multi-currency feature is essential to handle varied currency transactions effortlessly.
Know-How
Step 1: Access Company Settings
Click on the "Gear" icon in the top-right corner of the screen. From the dropdown menu, select "Account and Settings."
Step 2: Navigate to Advanced Settings
In the “Account and Settings” menu, you'll find various tabs and options related to your business. Click on the "Advanced" tab.
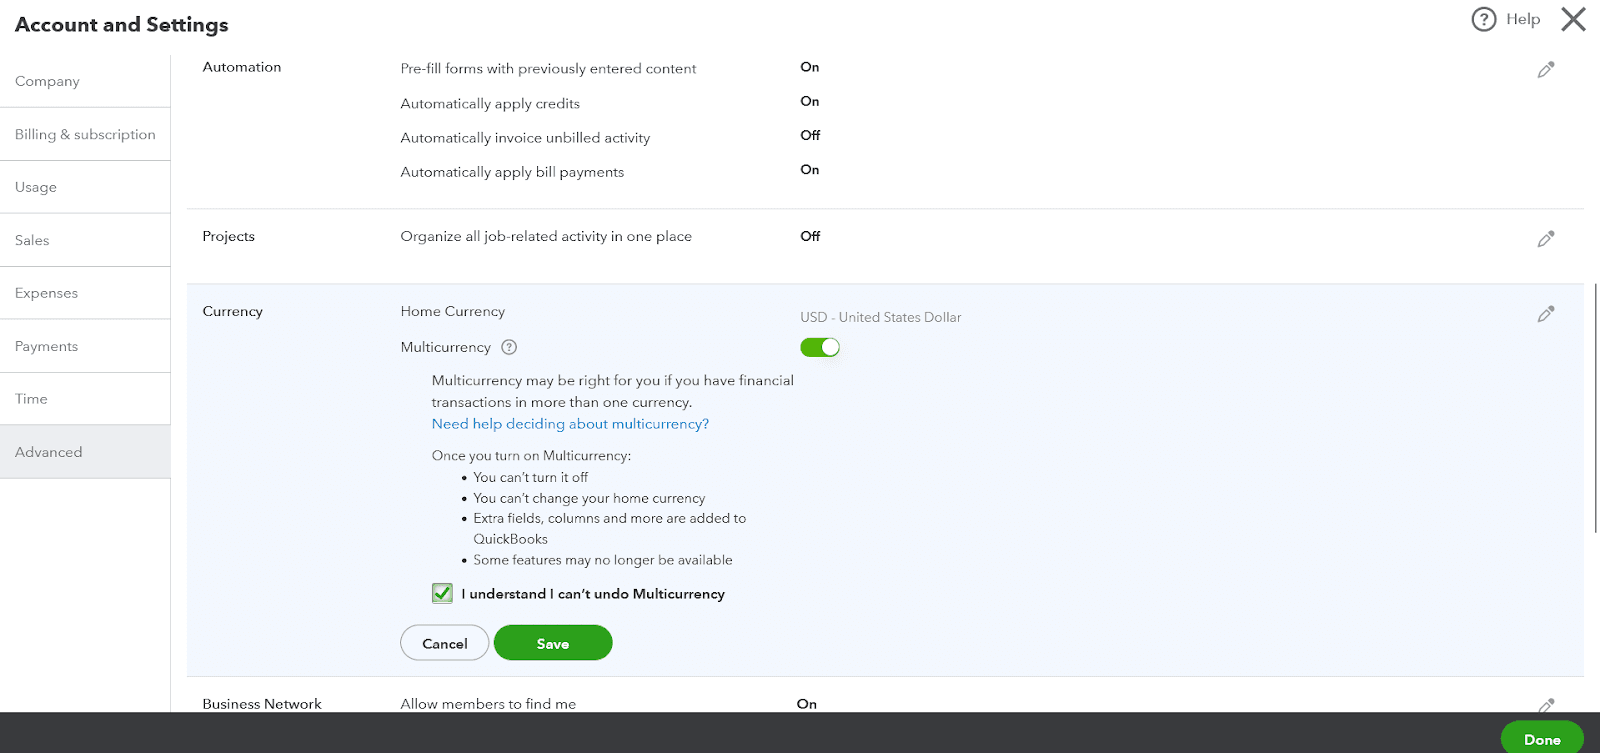
Step 3: Enable Multi-Currency
Look for the "Currency" section in the Advanced settings. Within the Currency section, you'll find an option to turn on the multi-currency feature.
Note: Once the multi-currency option is enabled, you can’t undo this feature.
FAQs
Q1: What Information Should I Gather before Setting up QuickBooks for My LLC?
You should gather essential business information like your business type, address, email ID, website, tax identification number, federal employer identification number, your preferred accounting method, and your latest bank and credit card statements.
Q2: How Do I Register for a QuickBooks Account?
You can register for the QuickBooks account by accessing the below link:
https://accounts.intuit.com/app/sign-in.
Ensure you fill in the required fields with various information, including email ID, password, and contact number.
Q3: What Accounting Methods Does QuickBooks Offer?
QuickBooks offers two accounting methods: cash accounting and accrual accounting. Cash accounting recognizes revenue and expenses when money changes hands, while accrual accounting recognizes income and expenses when earned and billed.
Q4: How Can I Manage International Transactions in QuickBooks?
If your LLC operates internationally, you can activate the Multi-currency feature in QuickBooks to handle transactions in multiple currencies. You’ll have to look for the "Currency" section in the Advanced settings and within the Currency section, you'll find an option to turn on the multi-currency feature.
Q5: Can I Customize Invoices in QuickBooks?
You can personalize your invoices by adding your company's logo and adjusting the style, color, and message to match your brand.
Q6: How Do I Input My Business Data into QuickBooks?
You can import or manually input your business data into QuickBooks, such as customer information, vendor details, products or services, and initial business transactions.
Q7: What Support Is Available during the QuickBooks Setup Process?
QuickBooks provides many resources and support to assist you in the setup process. You can access tutorials, articles, and community forums or contact QuickBooks support for assistance.