What is Billable Expense Income in QuickBooks and How to Track it?
Billable expense income refers to operational expenses while selling a product or service to a customer. For instance, when a caterer purchases trays and burners for an event organized for your company, the expenses are itemized on your invoice, constituting billable expense income.
Various expenses can be billed to clients, including research and planning costs, online payment processing fees, client engagement tools, material expenses, subscriptions, service provider fees, and travel expenses. These expenses are considered billable because they are directly related to providing services or goods to the client.
In simple terms, billable expense income is the money you earn from charging clients for expenses you've incurred while doing work for them. This could include various costs related to providing services to the clients.
Contents
Steps to Track Billable Expense Income in QuickBooks
Frequently Asked Questions: Billable Expense Income
Steps to Track Billable Expense Income in QuickBooks
Step 1: Enable Billable Expenses
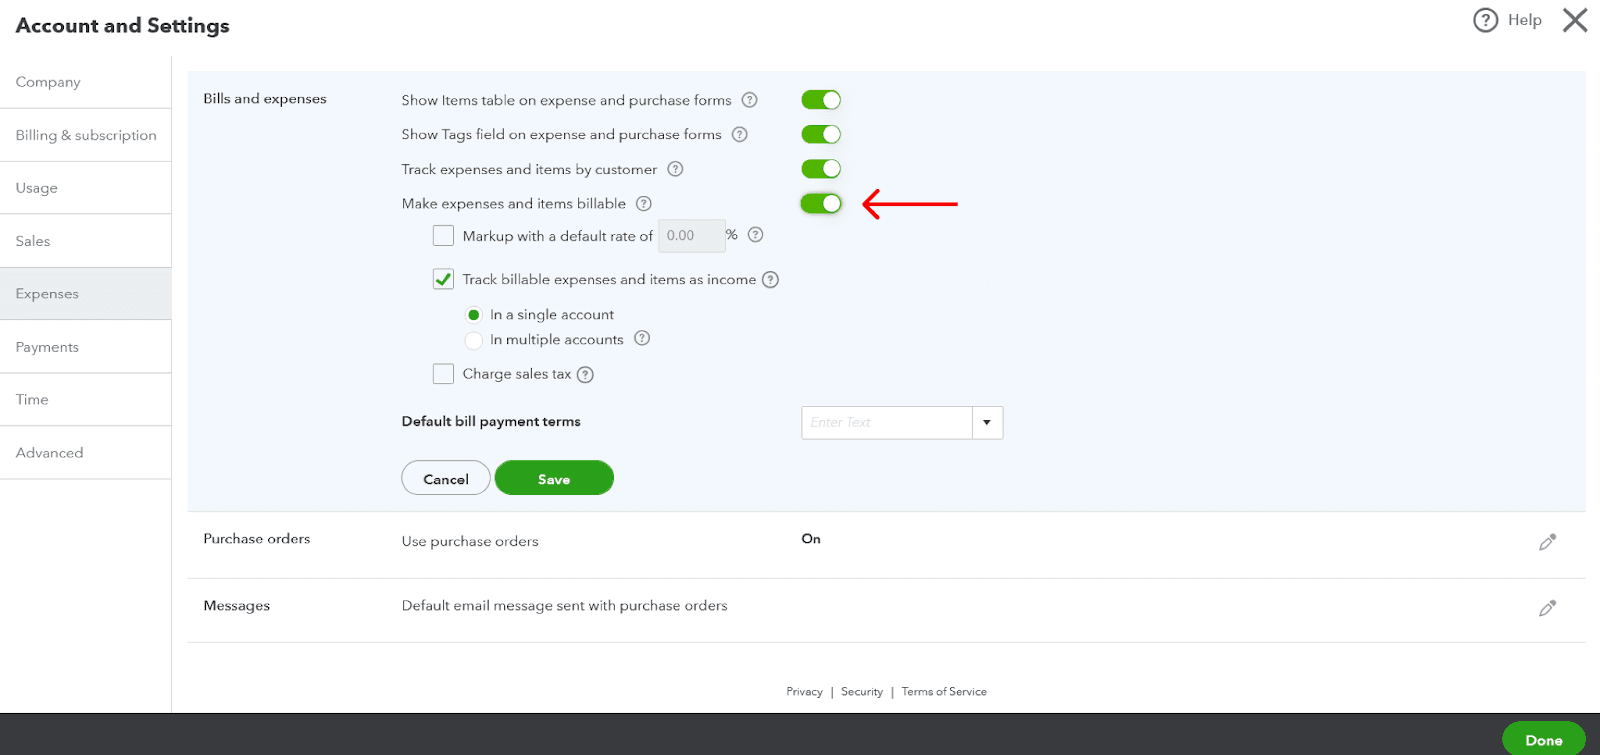
Navigate to “Settings” (Gear icon).
Click on Account and Settings -> Select “Expenses”
Click the pencil (edit) icon in the Bills and Expenses section.
Check the box for “Make expenses and items billable.”
Click Save and then Done.

Step 2: Enter the Billable Expense
Click the “+ New” tab.
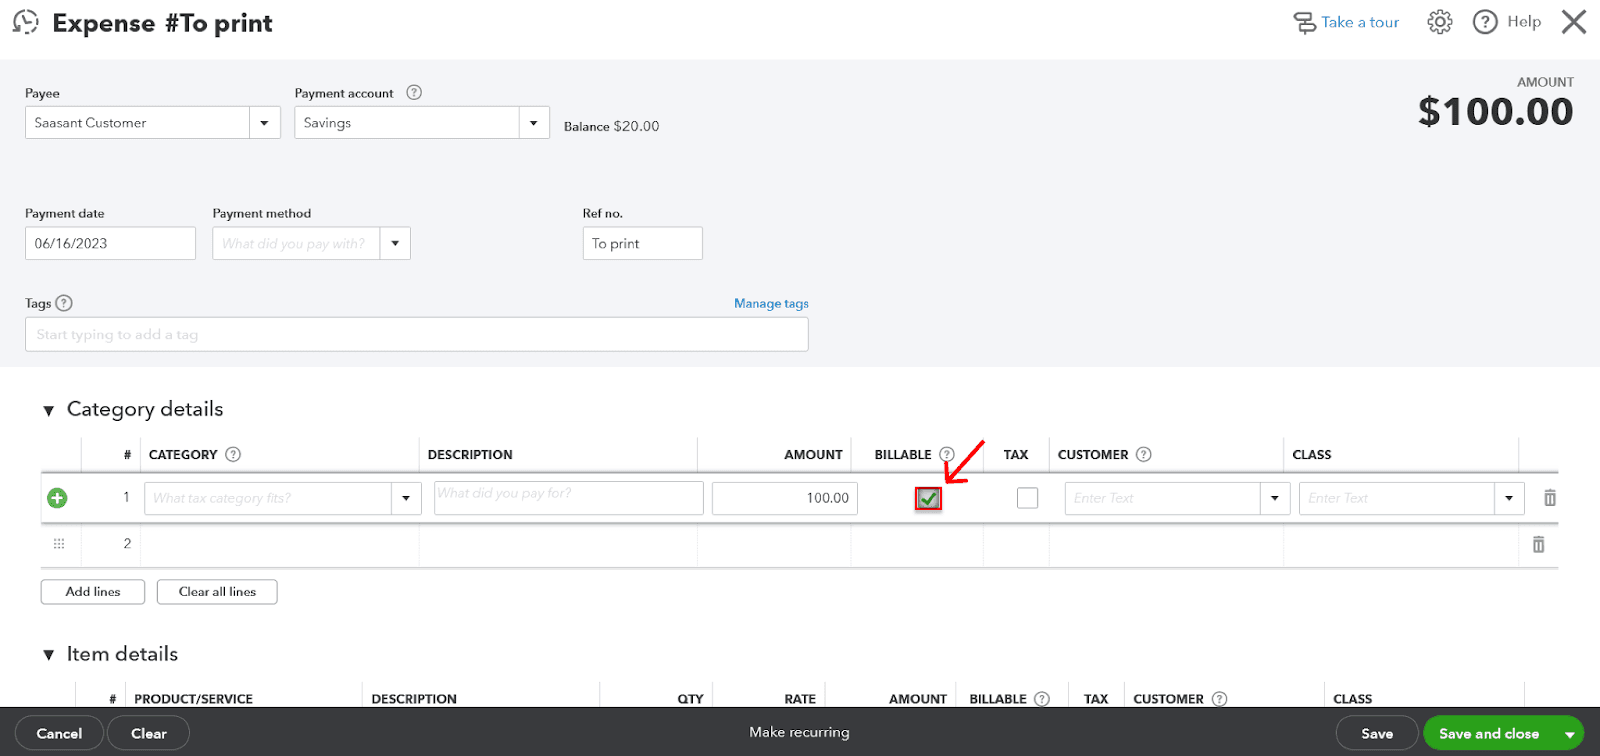
Under “Vendors,” select “Expense.”
Enter the necessary information, such as the supplier name, date, etc.
Select the expense account in the “Category” column to categorize this expense transaction.
In the “Customer” column, select the customer you're billing this expense to.
Check the box under the “Billable” column.
Click on Save and Close.

Step 3: Invoice the Customer
Click the “+ New” tab.
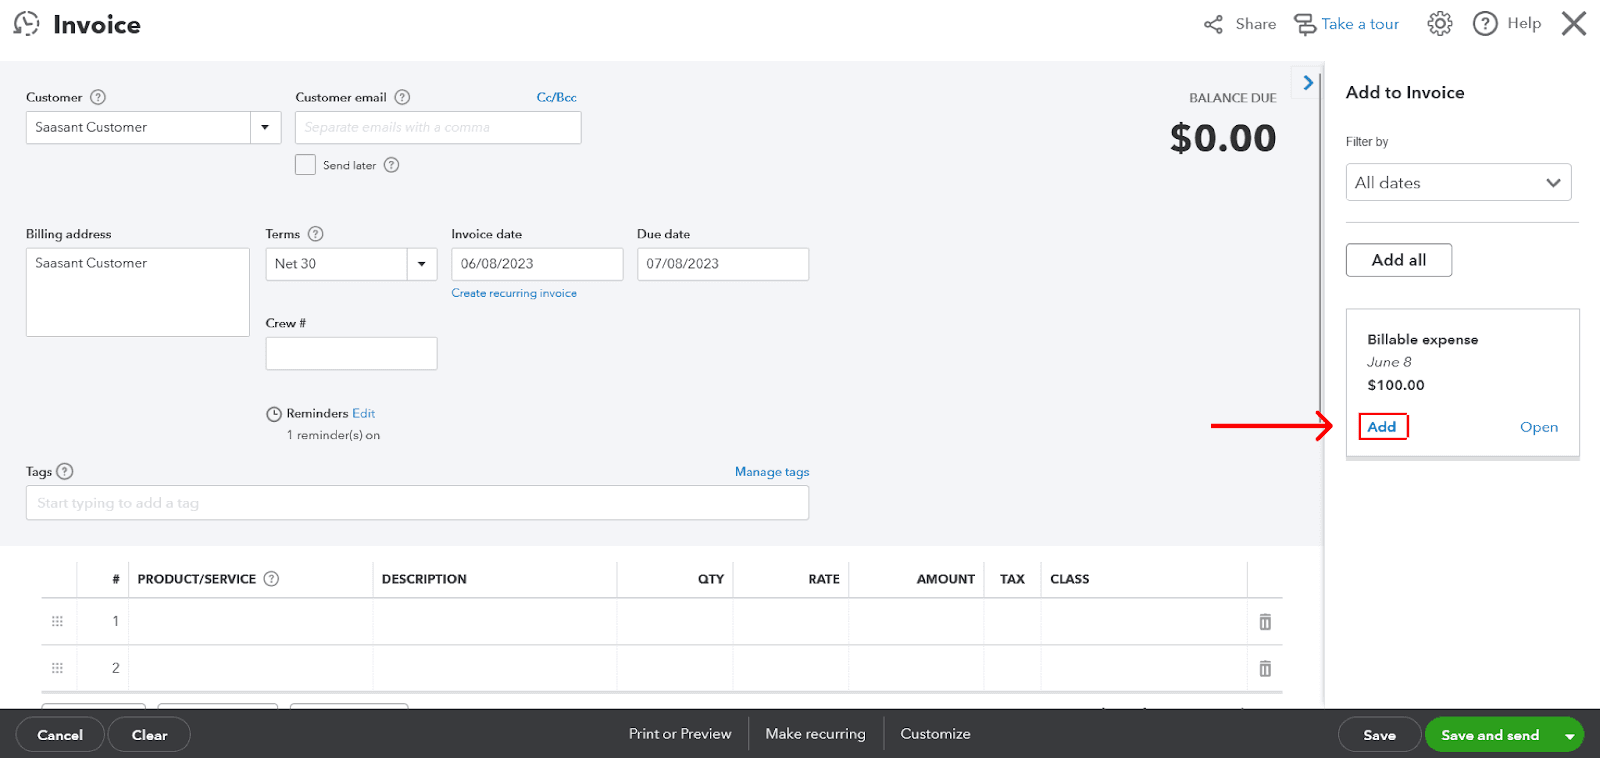
Under “Customers,” choose “Invoice.”
In the Customer dropdown, select the customer you want to invoice.
QuickBooks should automatically prompt you to add any outstanding billable time and costs for that customer to the invoice.
Complete the invoice as necessary, then click Save and Close.

You can track billable expense income separately from your other income in QuickBooks using the above process. Thus, helps you calculate the amount of income from reimbursed expenses.
Remember, you may also want to consult with a QuickBooks ProAdvisor or accountant to ensure you're tracking your income in a way that makes sense for your business.
Frequently Asked Questions: Billable Expense Income
What is billable expense income, and how does it differ from regular income?
Billable expense income refers to income earned from reimbursing expenses you incurred on behalf of a client. This could include materials, travel, shipping costs, subcontractor labor, or fuel costs. Unlike regular income from selling goods or services, billable expense income is reimbursement for costs you have already paid.
How do I ensure that my billable expenses are correctly categorized in QuickBooks?
When you input a billable expense in QuickBooks, choose the customer and check the box in the "Billable" column. This ensures that the expense is correctly categorized and will appear as an available billable expense to link when you create an invoice for that customer.
What happens if a client doesn't pay for a billable expense?
If a client doesn't pay a billable expense, you may need to write off the cost as bad debt, depending on the circumstances and your company's accounting practices. It's advisable to consult with an accountant or a QuickBooks ProAdvisor to understand how to handle these situations.
Need a step-by-step guide? Watch this video
https://youtu.be/fY3DG8VMzDs
Tags
Read also
How to Enter Expenses in QuickBooks: Step-by-Step Guide
How to Export Expenses from QuickBooks to Excel
How to Delete Multiple Expenses in QuickBooks Online
How to Edit Expenses in QuickBooks Online: Step-by-Step Guide