How to Cancel QuickBooks Online Subscription
QuickBooks Online is a cloud-based accounting software that helps you manage your business finances. You can cancel your subscription at any time. In this article, you’ll learn how to cancel a QuickBooks Online subscription purchased from Intuit, the Apple App Store, or the Google Play Store.
Canceling your QuickBooks Online subscription is straightforward, regardless of where you initially purchased it. Whether you've outgrown your current plan, found an alternative solution, or simply no longer require the service, we'll guide you through the steps to ensure a smooth cancellation experience. Follow along as we outline the steps for terminating your QuickBooks Online subscription and provide helpful tips for managing your account effectively.
Contents
Canceling QuickBooks Online Subscription Purchased from Intuit
Canceling QuickBooks Online Subscription Purchased from the Apple App Store
Canceling QuickBooks Online Subscription Purchased from the Google Play Store
Canceling a Suspended Subscription
Canceling a Free Trial
FAQs
Canceling QuickBooks Online Subscription Purchased from Intuit
If you purchased your QuickBooks Online subscription directly from Intuit, follow these steps:
Sign in to the Intuit Account Manager.
Go to the menu screen and select the gear icon to reach the Settings page.
On the Settings page, choose your email. (Note: You may need to log in again.)
Select Manage your Intuit account.
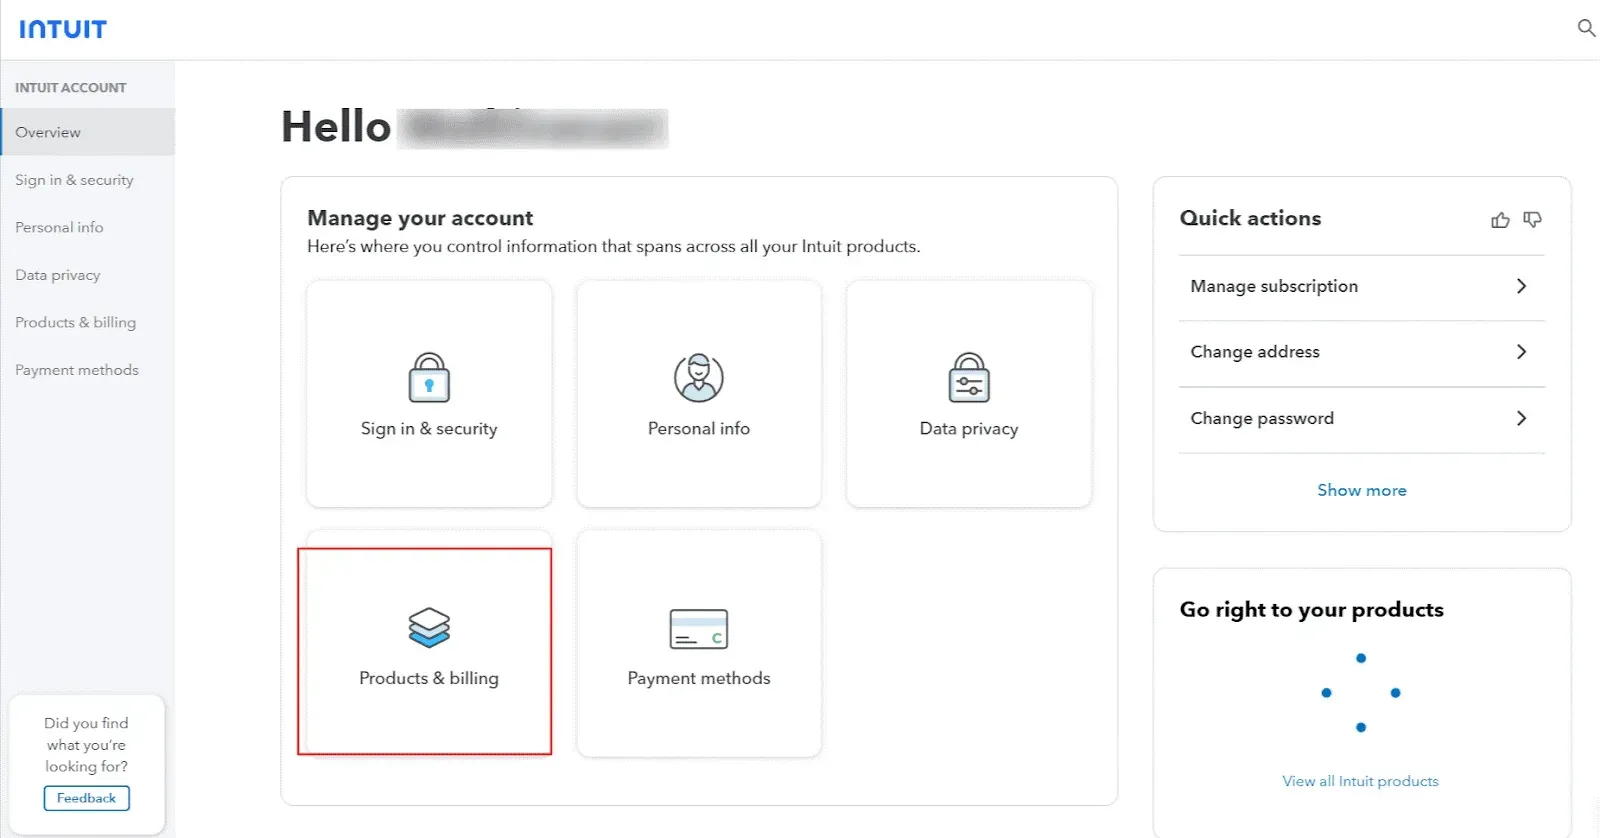
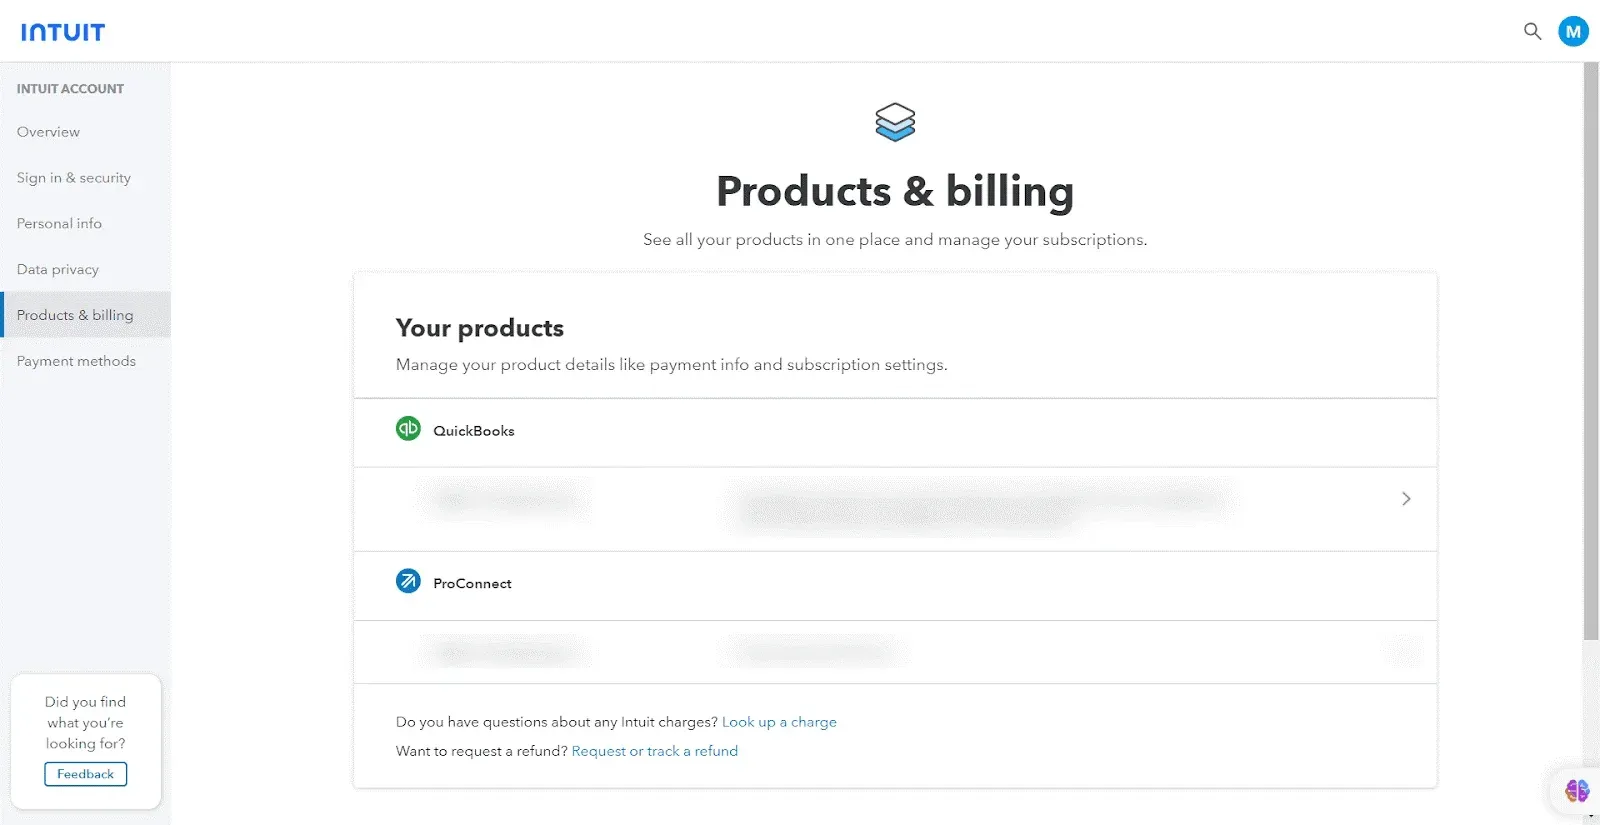
Select Products & Billing, then select your company name. This takes you to your subscription page.
Find the product you wish to cancel, then select Cancel subscription.
You’ll see a multiple-choice survey on why you’re canceling your subscription. Once you’ve filled it out, select Continue to cancel.
You’ll see a page detailing product benefits and the last day you can use your subscription. Select Continue to cancel.
You’ll see a pop-up confirming your subscription is canceled. Select Got it.
Note: If you are within the billing period you last paid for, you can resume your subscription and stay on the same billing by selecting Resume subscription. If you are outside the billing period, you must go to the web to re-subscribe.
Canceling QuickBooks Online Subscription Purchased from the Apple App Store
If you purchased your QuickBooks Online subscription from the Apple App Store on your iOS device (iPhone or iPad), follow these steps:
Open the Settings app on your device.
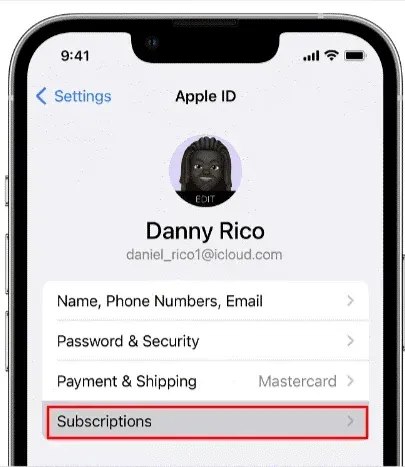
Tap your name at the top of the screen.
Tap Subscriptions. (If you don’t see this option, tap iTunes & App Store, tap your Apple ID, and select View Apple ID. Sign in if prompted, then scroll down and tap Subscriptions.)
Tap your QuickBooks Online subscription.
Tap Cancel Subscription at the bottom of the screen. (If you don’t see this option, you have already canceled your subscription.)
Confirm your cancellation.
Canceling QuickBooks Online Subscription Purchased from the Google Play Store
If you purchased your QuickBooks Online subscription from the Google Play Store on your Android device (phone or tablet), follow these steps:
Open the Google Play Store app on your device.
Tap the menu icon in the top left corner of the screen.
Tap Subscriptions.
Tap your QuickBooks Online subscription.
Tap Cancel subscription at the bottom of the screen.
Follow the on-screen instructions to complete the cancellation process.
Canceling a Suspended Subscription
If your QuickBooks Online subscription is suspended due to payment issues, you must resubscribe and reactivate it before you can cancel. To do this, follow these steps:
Sign in to QuickBooks Online as an admin user.
Go to Settings ⚙ and select Account and Settings.
Go to the Billing & Subscription tab.
In the QuickBooks section, select Resubscribe and update your payment information.
After your account is reactivated, follow the steps above to cancel your subscription based on where you purchased it from.
Note: Intuit will also automatically cancel your QuickBooks subscription after three failed attempts to charge your payment method.
Canceling a Free Trial
If you use QuickBooks Online on a free trial basis, you can cancel your trial any time before it ends. To do this, follow these steps:
Sign in to QuickBooks Online as an admin user.
Go to Settings ⚙ and select Account and Settings.
Go to the Billing & Subscription tab.
In the QuickBooks section, select Cancel Trial.
Follow the onscreen steps.
Note: If you cancel your trial at any time during your 30-day free trial, you’ll still be able to access QuickBooks until your next billing date. After that, you’ll have read-only access to QuickBooks for one year when you cancel your trial.
FAQs
What Happens to Your Data After Canceling QuickBooks Online?
After canceling your QuickBooks Online subscription, you'll still have access to your data in read-only mode for one year. This means you can view your data but cannot make any changes. After this one year, QuickBooks Online will permanently delete your data.
Here's what you need to do to save your data before canceling:
Export your data: You can export your data to various formats like Excel, PDF, or CSV. This allows you to download and save a copy of your data for future reference.
Download a backup file: QuickBooks Online also allows you to download a complete data backup file. This is a more comprehensive option compared to exporting specific reports.
It's crucial to back up your data before canceling your subscription to avoid permanent data loss.
How to Access Your Data After Canceling QuickBooks Online
Even after canceling your subscription, you can still access your data in read-only mode for one year. This lets you view your financial records, reports, and other information. However, you cannot make any changes or edit any data.
To access your data:
Sign in to QuickBooks Online using your login credentials.
You'll be able to view your data in a limited capacity.
Remember, QuickBooks Online will permanently delete your data after one year.
How to Cancel a Free Trial of QuickBooks Online
You can cancel your QuickBooks Online free trial anytime before it ends. Here's how:
Sign in to QuickBooks Online as an admin user.
Go to Settings ⚙ and select Account and Settings.
Navigate to the Billing & Subscription tab.
In the QuickBooks section, click on Cancel Trial.
Follow the on-screen instructions to complete the cancellation process.
Even though you cancel your trial, you can still use QuickBooks Online until your trial period ends. After that, you'll have read-only access to your data for one year.
How to cancel your Quickbooks online subscription?
Here's a step-by-step guide on canceling your QuickBooks Online subscription depending on where you purchased it:
Purchased from Intuit directly:
Sign in to the Intuit Account Manager.
Go to Settings (gear icon) and select your email.
Choose Manage your Intuit account.
Select Products & Billing, then choose your company name.
Find the desired product and click Cancel subscription.
Complete the survey and click Continue to cancel.
Review the details and click Continue to cancel again.
A confirmation pop-up will appear; click ‘Got it.’
Purchased from the Apple App Store:
Open the Settings app on your iPhone or iPad.
Tap your name at the top.
Select Subscriptions. (If unavailable, tap iTunes & App Store, then your Apple ID and choose View Apple ID. Sign in if prompted, then scroll down and tap **Subscriptions.)
Tap your QuickBooks Online subscription.
Tap Cancel Subscription at the bottom. (If not available, it's already canceled.)
Confirm your cancellation.
Purchased from the Google Play Store:
Open the Google Play Store app on your Android device.
Tap the menu icon (three horizontal lines) in the top left corner.
Select Subscriptions.
Tap your QuickBooks Online subscription.
Tap Cancel subscription at the bottom.
Follow the on-screen instructions to complete the cancellation.
How can I proceed with canceling QuickBooks Online?
To cancel your QuickBooks Online subscription, access your account and navigate to the billing or subscription settings. Look for the option related to cancellation, which may vary depending on where you initially signed up for QuickBooks Online. Follow the provided instructions to initiate the cancellation process. Review any terms or conditions associated with cancellation to understand the implications fully.
Does the cancellation process vary based on the subscription source?
Yes, the procedure for canceling QuickBooks Online may vary depending on where you obtained your subscription. The cancellation steps may differ slightly if you subscribed directly through QuickBooks Online or a third-party platform, such as the Apple App Store or Google Play Store. However, regardless of the source, you can typically cancel your QuickBooks Online subscription through your account settings. Always check the specific guidelines your subscription source provides for accurate cancellation instructions.
How can I cancel a suspended subscription in QuickBooks?
While you cannot directly cancel a suspended subscription in QuickBooks Online, you can follow these steps to reactivate and then cancel it:
Sign in to QuickBooks Online as an admin user.
Go to Settings (gear icon) and select Account and Settings.
Navigate to the Billing & Subscription tab.
In the QuickBooks section, click on Resubscribe and update your payment information. This will reactivate your suspended subscription.
Once your account is reactivated, follow the cancellation steps mentioned in my previous response based on where you purchased the subscription (Intuit, Apple App Store, or Google Play Store).
What happens to your data after you cancel your QuickBooks subscription?
Here's what happens to your data after you cancel your QuickBooks Online subscription:
Data Access:
One year of read-only access: After canceling your subscription, you can still access your data in read-only mode for one year. This means you can view your data, such as financial records and reports, but you cannot edit or make any changes.
No editing or changes: During this one year, you cannot modify, update, or delete any existing data within QuickBooks Online.
Data Retention:
Permanent deletion after one year: After the one-year period of read-only access expires, QuickBooks Online will permanently delete your data. This includes all your financial records, reports, and other information stored within the application.
Importance of Backup:
Export or download data before cancellation: If you want to retain your data permanently, it's crucial to export or download a backup before canceling your subscription. QuickBooks Online allows you to export data in various formats, such as Excel, PDF, or CSV, or download a complete backup file.
Additional Notes:
Free trial: If you were using QuickBooks Online on a free trial, you'll still have access to your data in read-only mode for one year after the trial period ends. The same data retention policy applies after that one year.