How to Set Up Progress Invoicing in QuickBooks Desktop
Progress invoicing in QuickBooks Desktop benefits businesses, especially those involved in long-term projects. It allows companies to invoice clients incrementally as work is completed rather than waiting until the end of the project to send a single invoice. It ensures a steady cash flow, which is crucial for the smooth operation of any business.
Contents
Step-by-Step Guide to Set Up Progress Invoicing in QuickBooks Desktop
Frequently Asked Questions
Step-by-Step Guide to Set Up Progress Invoicing in QuickBooks Desktop
Step 1: Enable Progress Invoicing
Open your QuickBooks Desktop company file as an admin user.
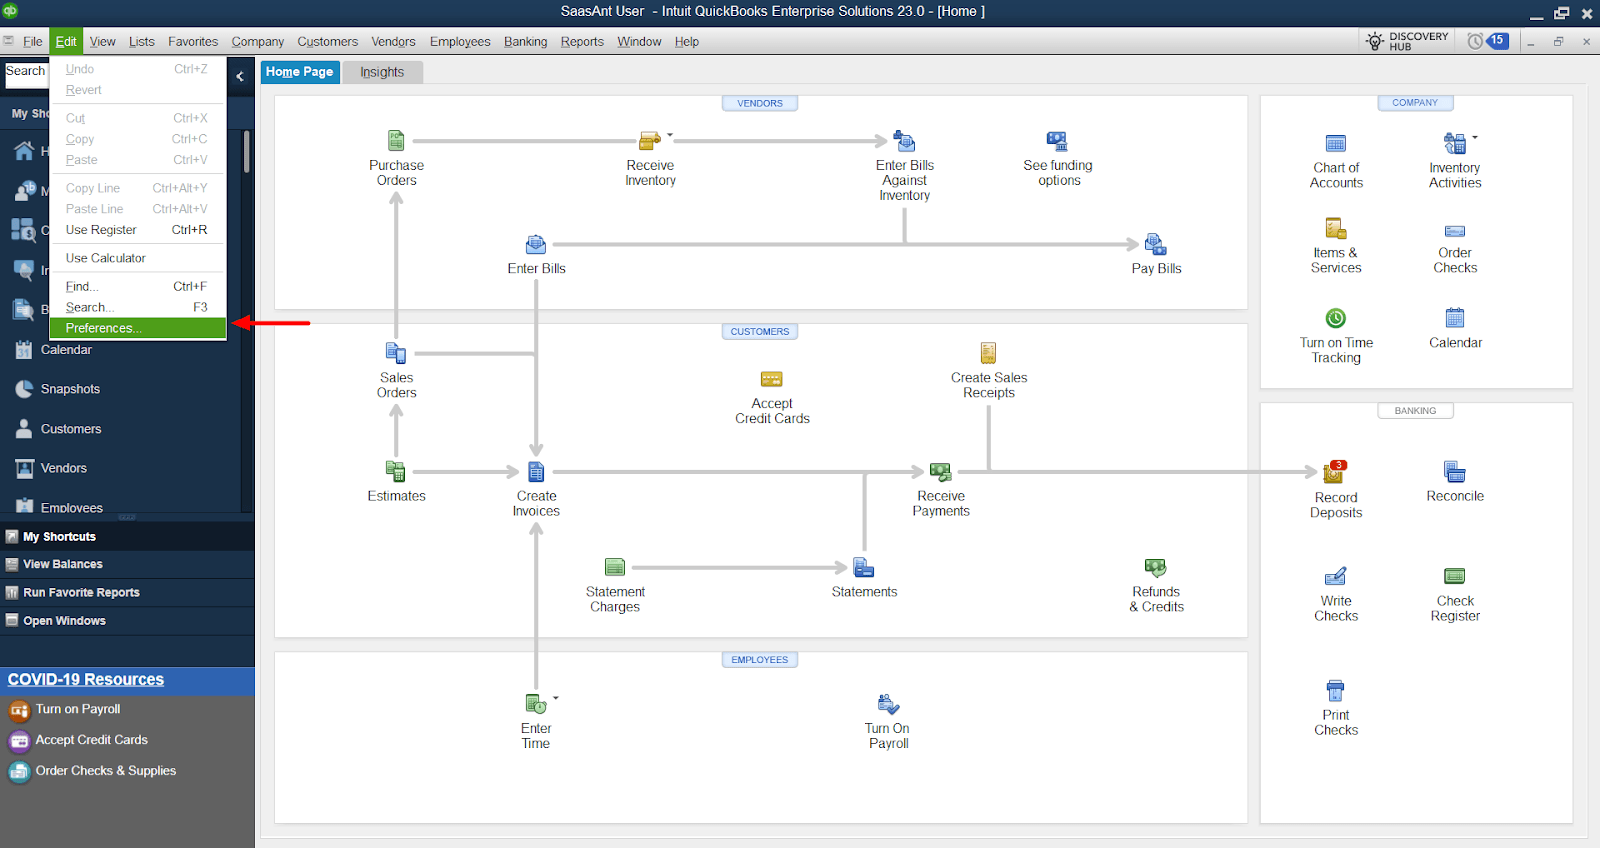
Navigate to the 'Edit' menu and select 'Preferences.'
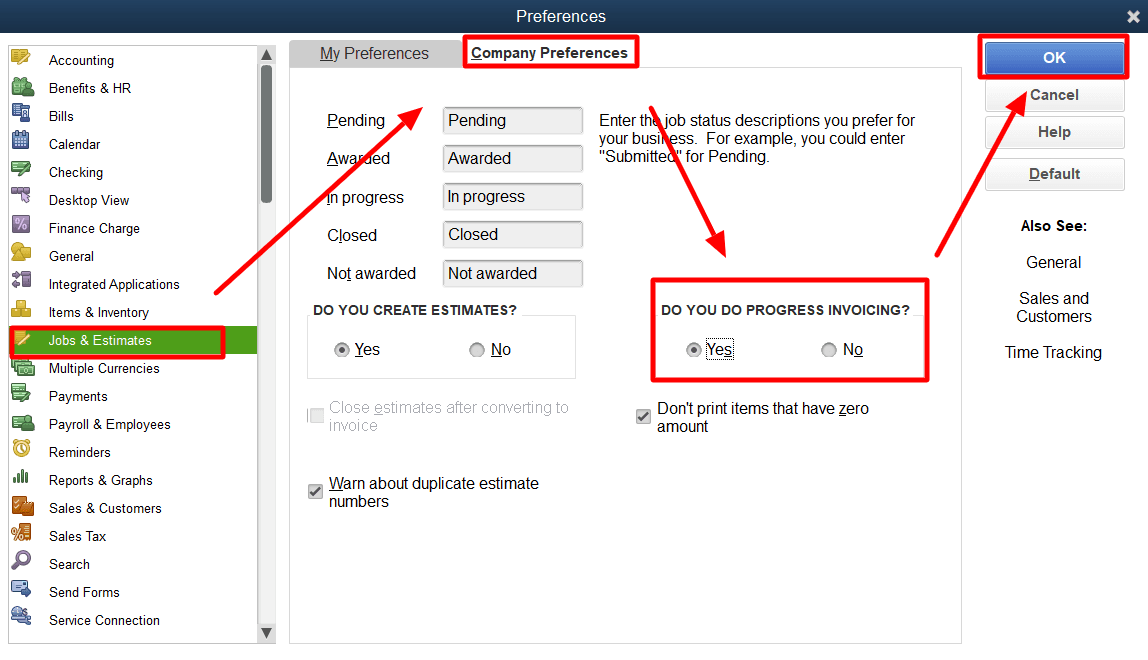
Under 'Jobs & Estimates' > 'Company Preferences,' enable 'Progress Invoicing.'
Select 'OK' to update settings.
Step 2: Create an Estimate
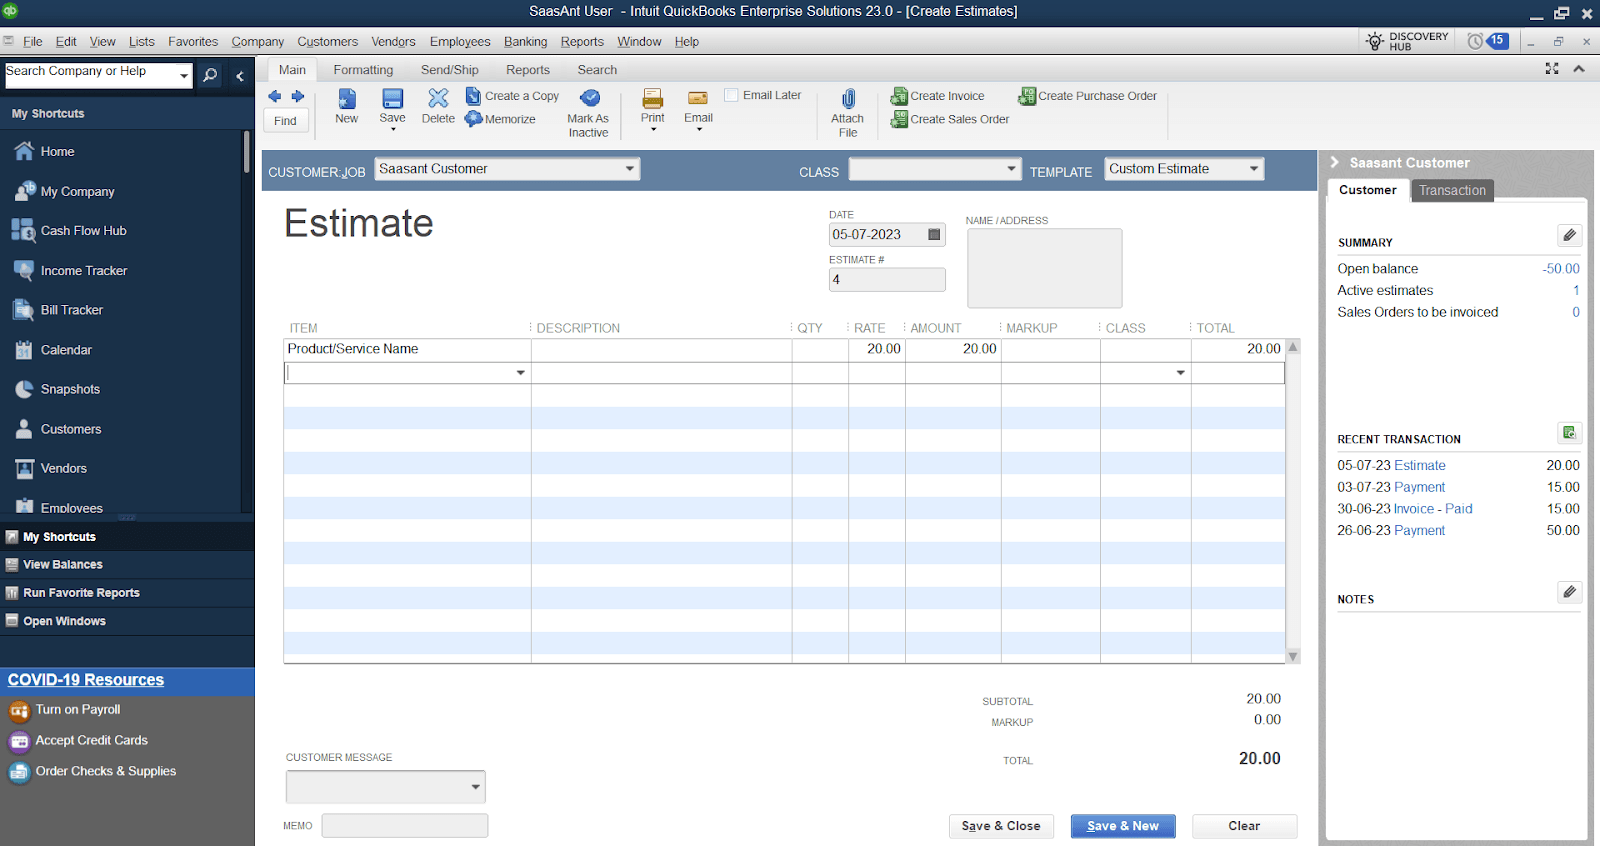
Before you can start progress invoicing, you need to have an estimate to invoice against. Once you have agreed upon pricing terms with your client and created an estimate in QuickBooks Desktop, you're ready to start progress invoicing.
Step 3: Navigate to the Estimate
From the QuickBooks home screen, navigate to 'Customers.'
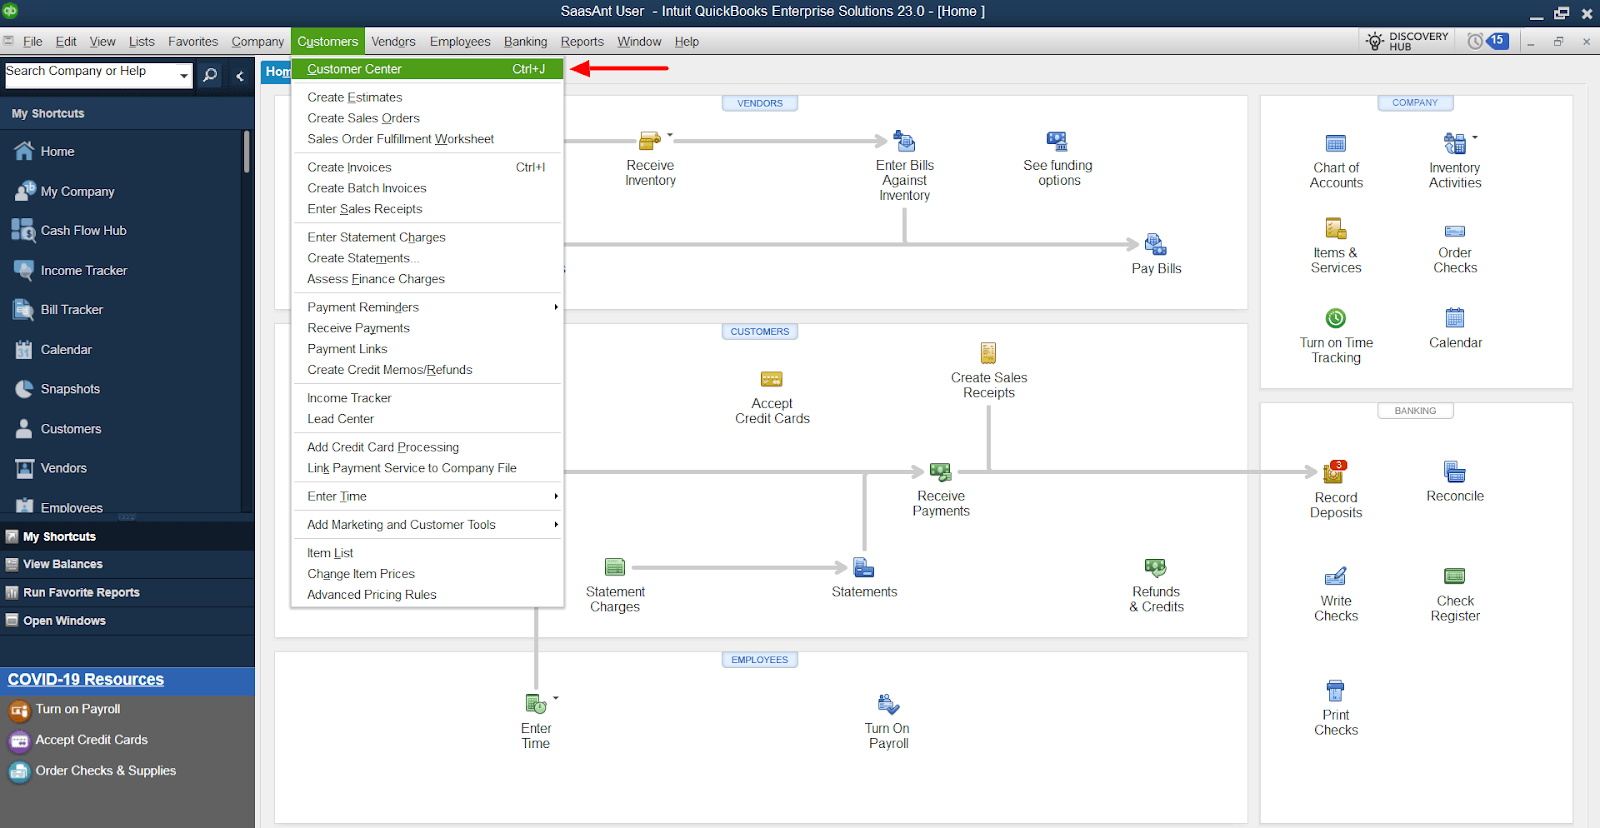
Select the appropriate Customer/Job name and find the corresponding estimate under 'Transactions.'
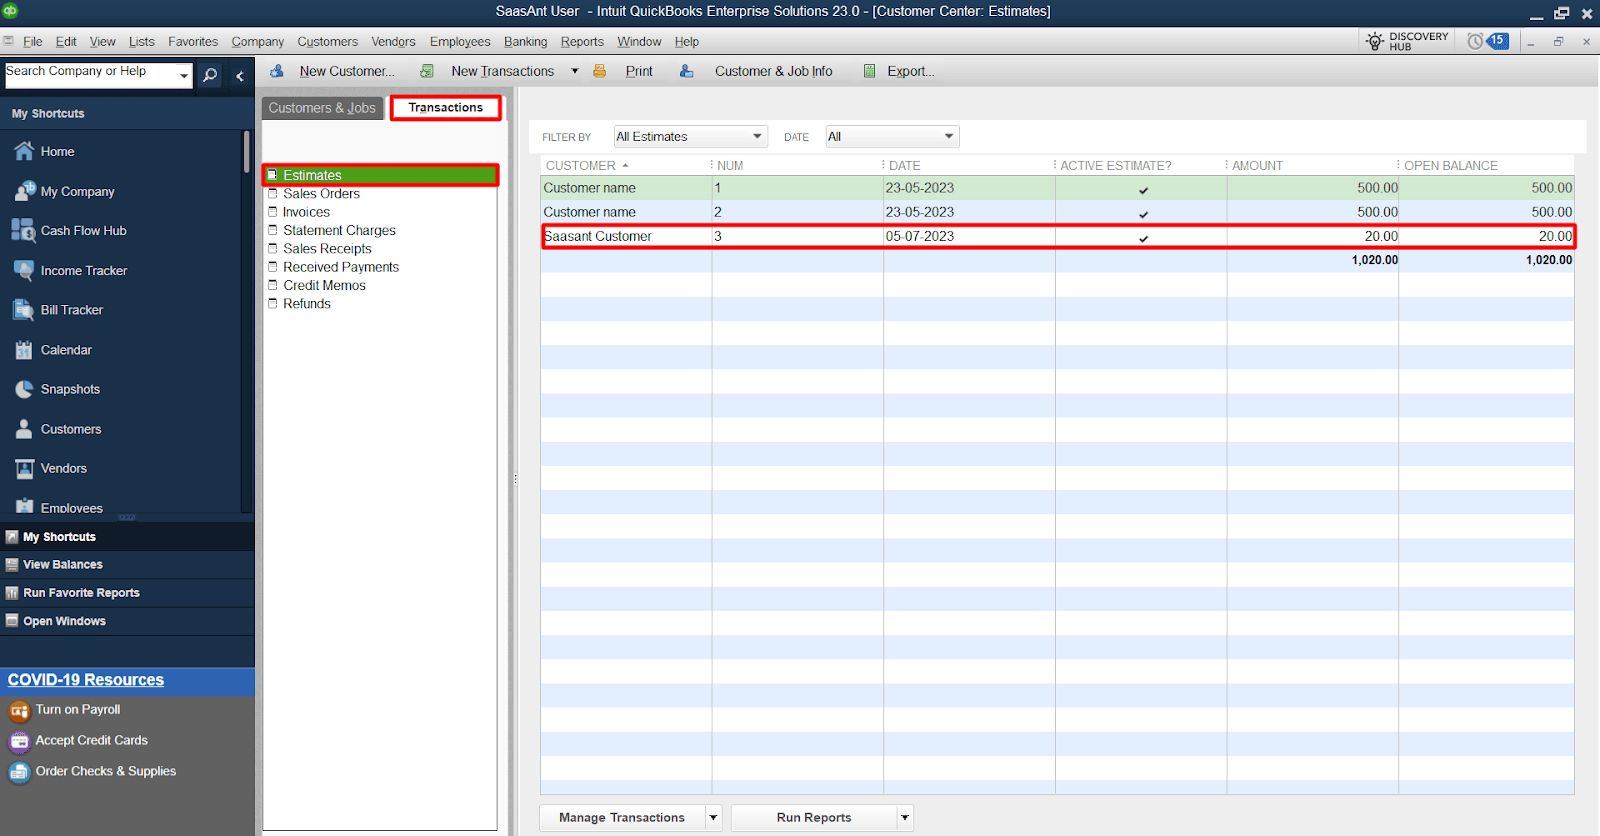
Step 4: Create an Invoice
Double-click to open the estimate in QuickBooks. At the top of the estimate, select the 'Create Invoice' button.
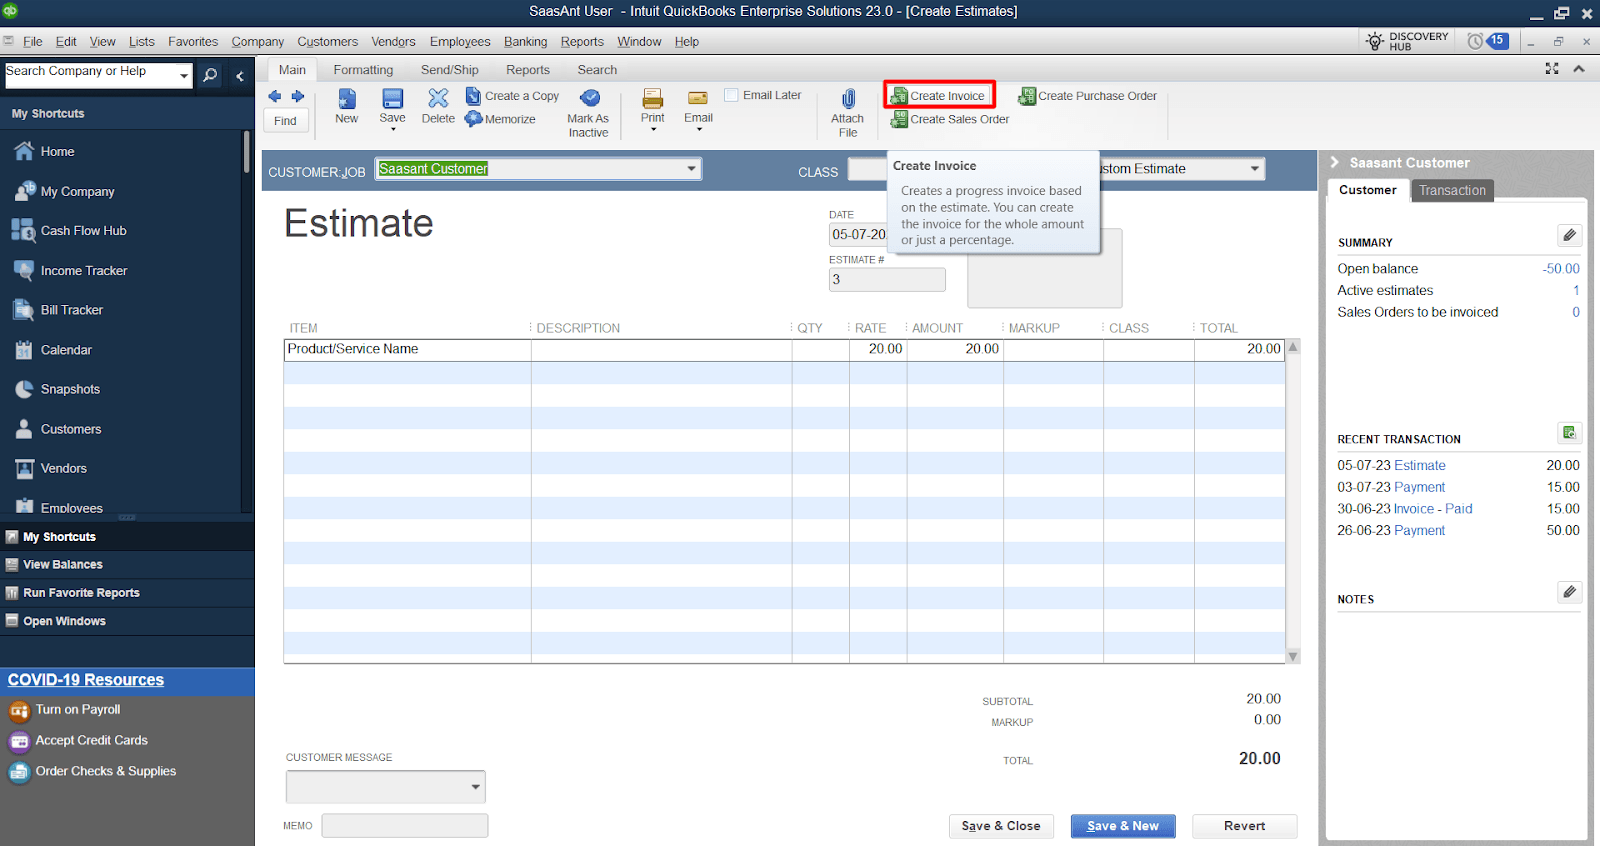
Step 5: Select an Amount to Invoice
QuickBooks provides three options for invoicing from the estimate:
- Create an invoice for the entire estimate.
- Create an invoice for a percentage of the entire estimate.
- Create invoices for selected items or different percentages of each item.

Choose the appropriate option based on how you invoice your clients. If you choose the third option, you can invoice each line according to a specified quantity or percentage rate.
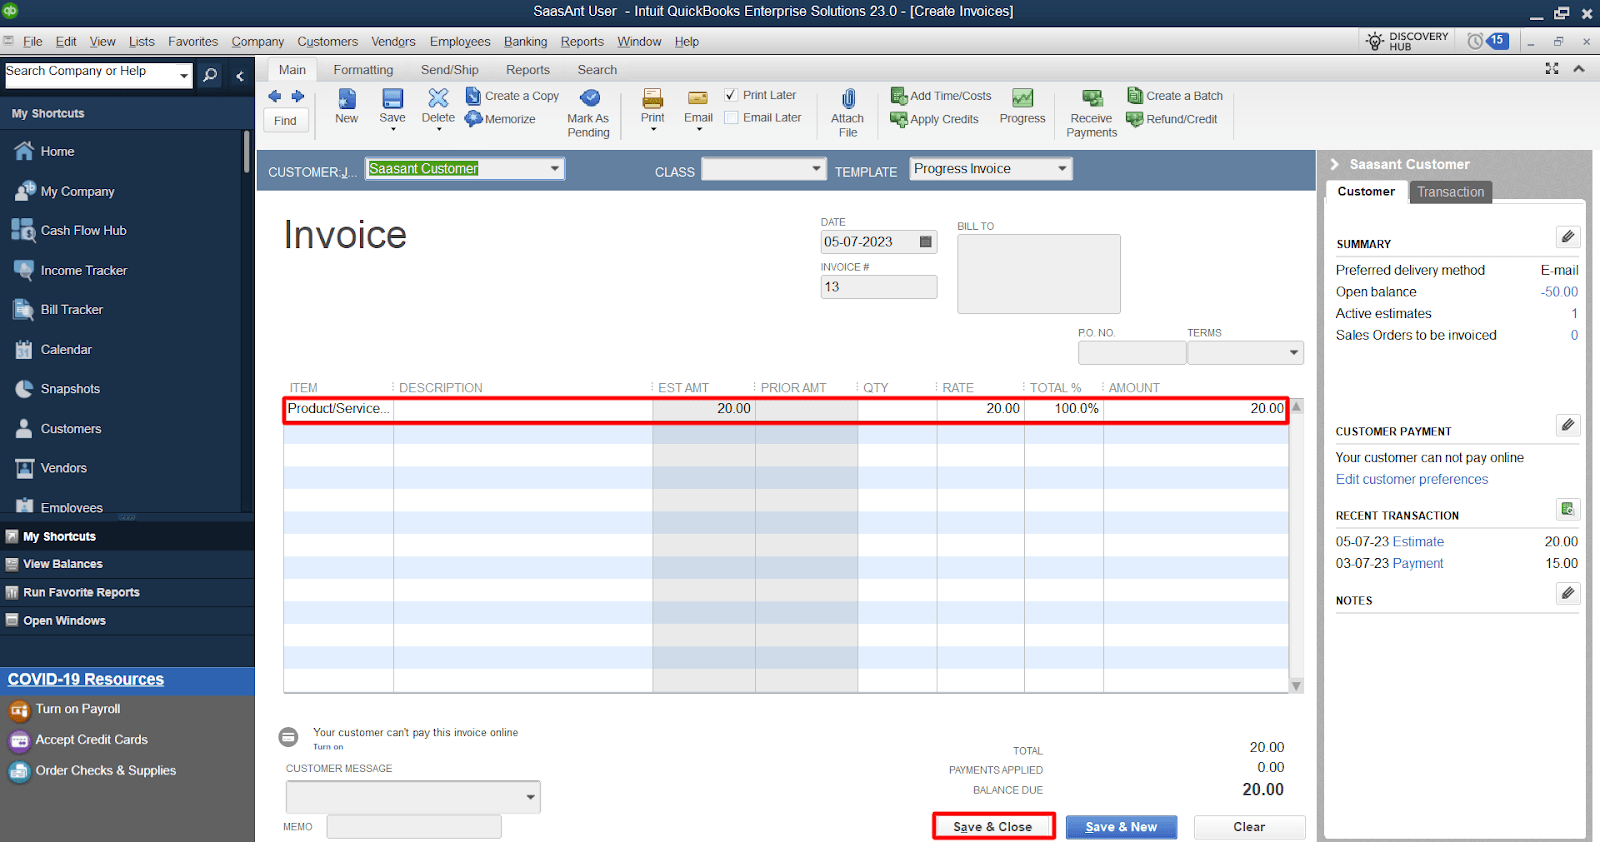
Step 6: Save and Send the Invoice
Save the invoice and send it off to your client for payment! You can repeat the process for future progress invoices, and QuickBooks will keep track of which estimate items have already been invoiced for you.
You can check out this guide import invoices into QuickBooks, for a seamless import of bulk invoices into QuickBooks.
Frequently Asked Questions
How to create a progress invoice in QuickBooks Desktop?
To create a progress invoice in QuickBooks Desktop, you need to have an estimate to invoice against. Once you have an estimate, you can navigate to the estimate, create an invoice, select an amount, and save and send the invoice.
How to turn on progress invoicing in QuickBooks Desktop?
To turn on progress invoicing in QuickBooks Desktop, open your QuickBooks company file as an admin user, navigate to the 'Edit' menu, and select 'Preferences.' Under 'Jobs & Estimates' > 'Company Preferences,' enable 'Progress Invoicing.' Select 'OK' to update settings.
How to set up progress invoicing in QuickBooks Online?
Progress invoicing can also be set up in QuickBooks Online. The process is similar to QuickBooks Desktop, but you'll need to navigate to 'Account and Settings' under the gear icon, then to 'Sales,' and enable 'Progress Invoicing' under 'Company Preferences.'
How do I add a custom field to an invoice in QuickBooks Desktop?
To add a custom field to an invoice in QuickBooks Desktop, navigate to the 'Lists' menu and select 'Templates.' Double-click the invoice template you want to change. Go to the 'Additional Customization' section in the ‘Customize Invoice' window. Here, you can add or change custom fields.
What is progress invoicing in QuickBooks Desktop?
Progress invoicing, also known as progress billing, is a feature in QuickBooks Desktop that allows you to invoice your clients incrementally as you complete work. This is particularly useful for long-term projects where you must maintain a steady cash flow.