How to Use Payment Links in QuickBooks: A Step-by-Step Guide
QuickBooks, a popular accounting software, offers a convenient ‘Payment Links’ feature that allows users to generate and share links for receiving payments from clients or customers. These payment links streamline the invoicing and payment collection process, making it easier for businesses to get paid. This article will explore how to generate and use payment links in QuickBooks, both on the desktop and online versions.
Contents
Quick Instructions on How to Use Payment Links in QuickBooks Online
Using Payment Links in QuickBooks Online: A Detailed Step-by-Step Guide
Quick Instructions on How to Use Payment Links in QuickBooks Desktop
Using Payment Links in QuickBooks Desktop: A Detailed Step-by-Step Guide
FAQs
Quick Instructions on How to Use Payment Links in QuickBooks Online
Log in to QuickBooks Online.
Navigate to the ‘Get paid & pay’ tab.
Click on ‘Payment Links.’
Create a payment link using QuickBooks Payments.
Optionally customize the link with your business name.
Enter payment details, customer info, and preferred payment method.
Send the payment link via email.
Optionally, use alternate sending options like copying the link or displaying a QR code.
Customers click the link, choose payment method, and complete the payment.
Receive a confirmation email once payment is made.
Check the payment link status in "Payment Links."
Manage links, send reminders, and view details in the Payment Links section.
Using Payment Links in QuickBooks Online: A Detailed Step-by-Step Guide
QuickBooks Online offers an intuitive process for generating payment links. Here’s how you can use payment links in QuickBooks Online:
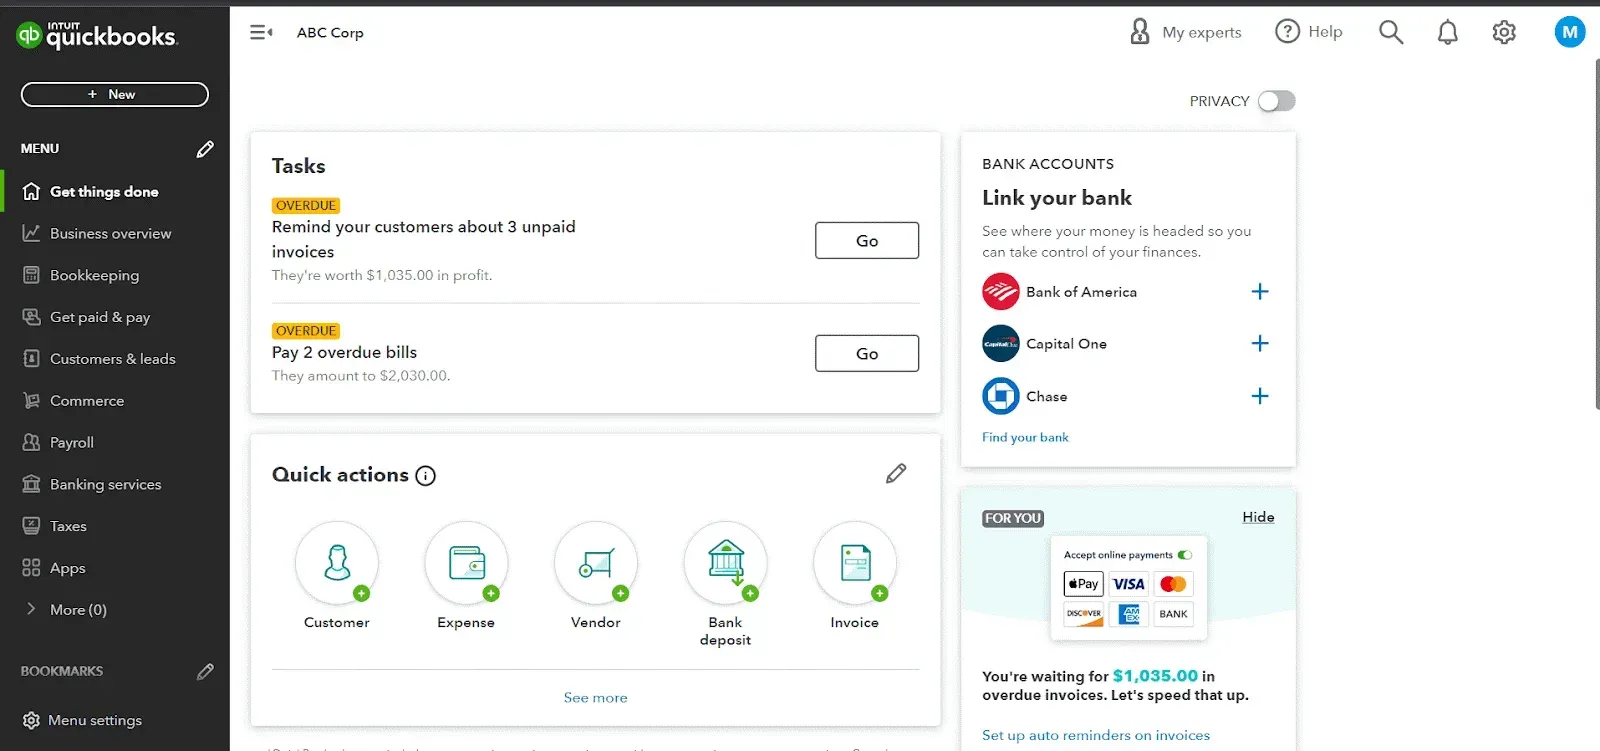
Step 1: Log in to Your QuickBooks Online Account
Log in to your QuickBooks Online account using your credentials.
Step 2: Select the “Get Paid & Pay” Tab
Navigate to the "Get paid & pay" tab on the left-hand panel of the QuickBooks Online interface.
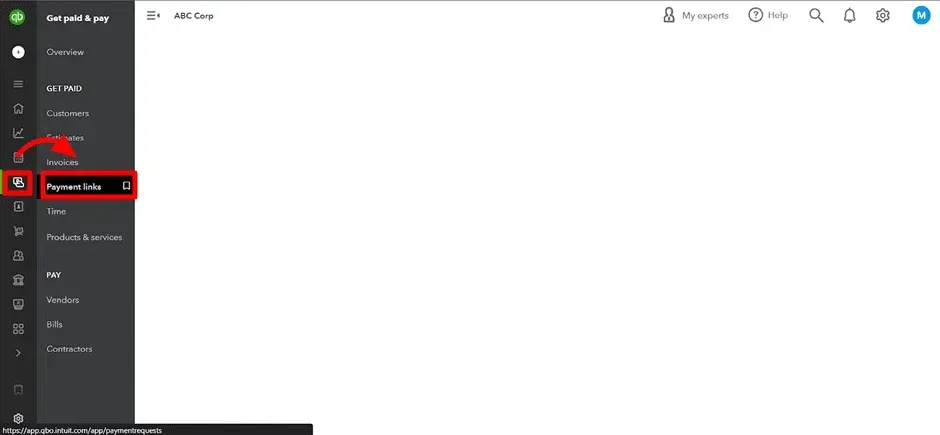
Step 3: Accessing Payment Links
Click "Payment Links" in the "Get Paid & Pay" tab.
Step 4: Create a Payment Link with the QuickBooks Payments Account
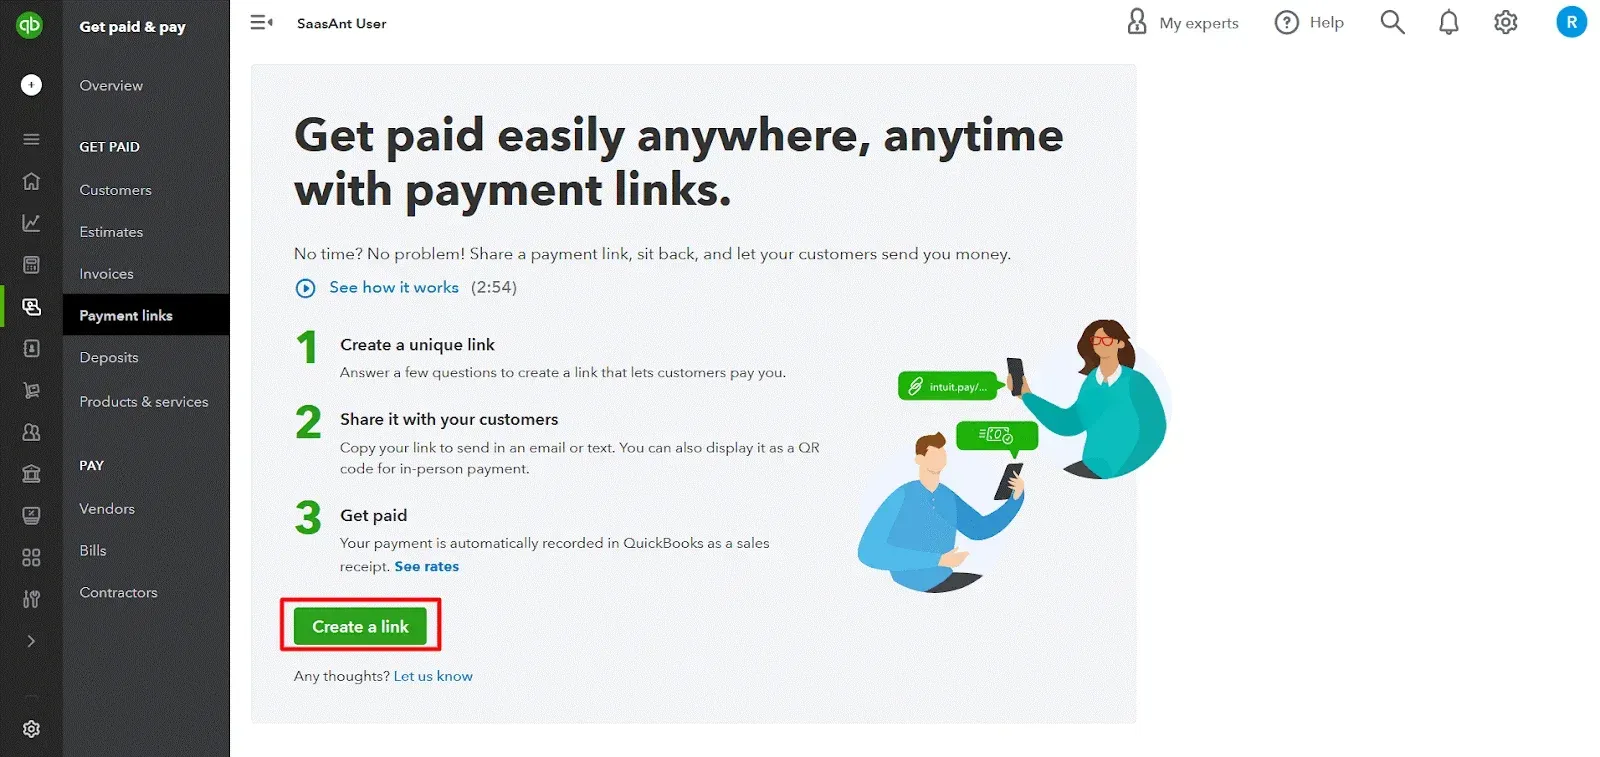
Choose "Create my link" to generate your first payment link.
Step 5: Customizing the Payment Link URL (Optional)
Optionally, personalize the payment link URL by entering your business name.
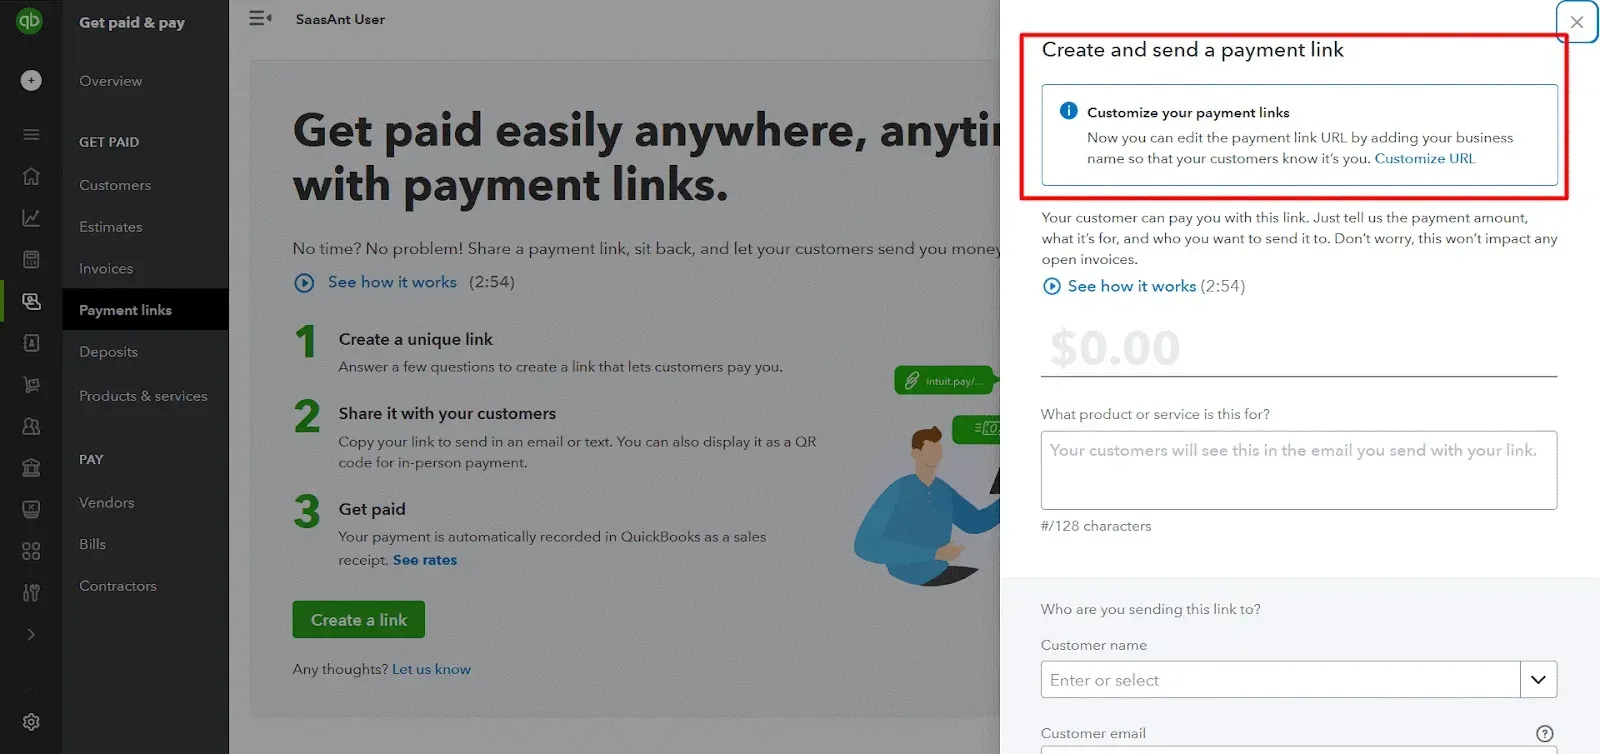
Step 6: Entering the Payment Details
Enter the amount you want your customer to pay
Provide a clear description of what the payment is for
Choose a customer name from the dropdown menu or click "Add new" to add a new customer
Input the customer's email address to send the payment link
Select the preferred payment method for your customer, either by card or bank transfer
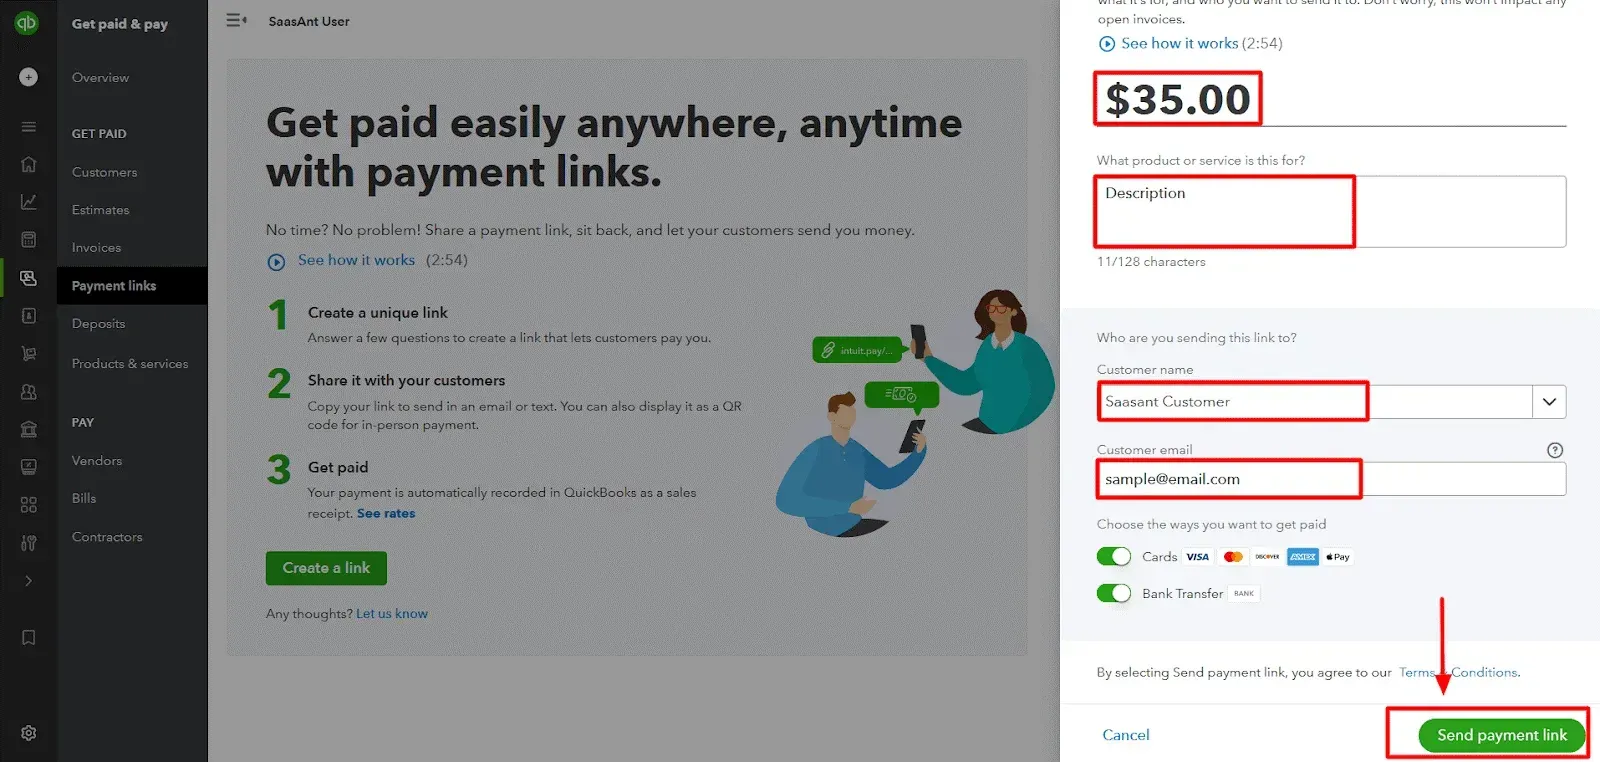
Step 7: Sending the Payment Link
Click on "Send Payment Link" to email the payment link to the customer.
Step 8: Alternate Sending Options
Optionally, you can copy the payment link and send it through an alternate email or text message, or you can choose to display the payment link as a QR code for customers to scan and pay through their smartphones.
Step 9: Customer Payment Process
Customers will be redirected to a payment page when they click the payment link to select their preferred payment method.
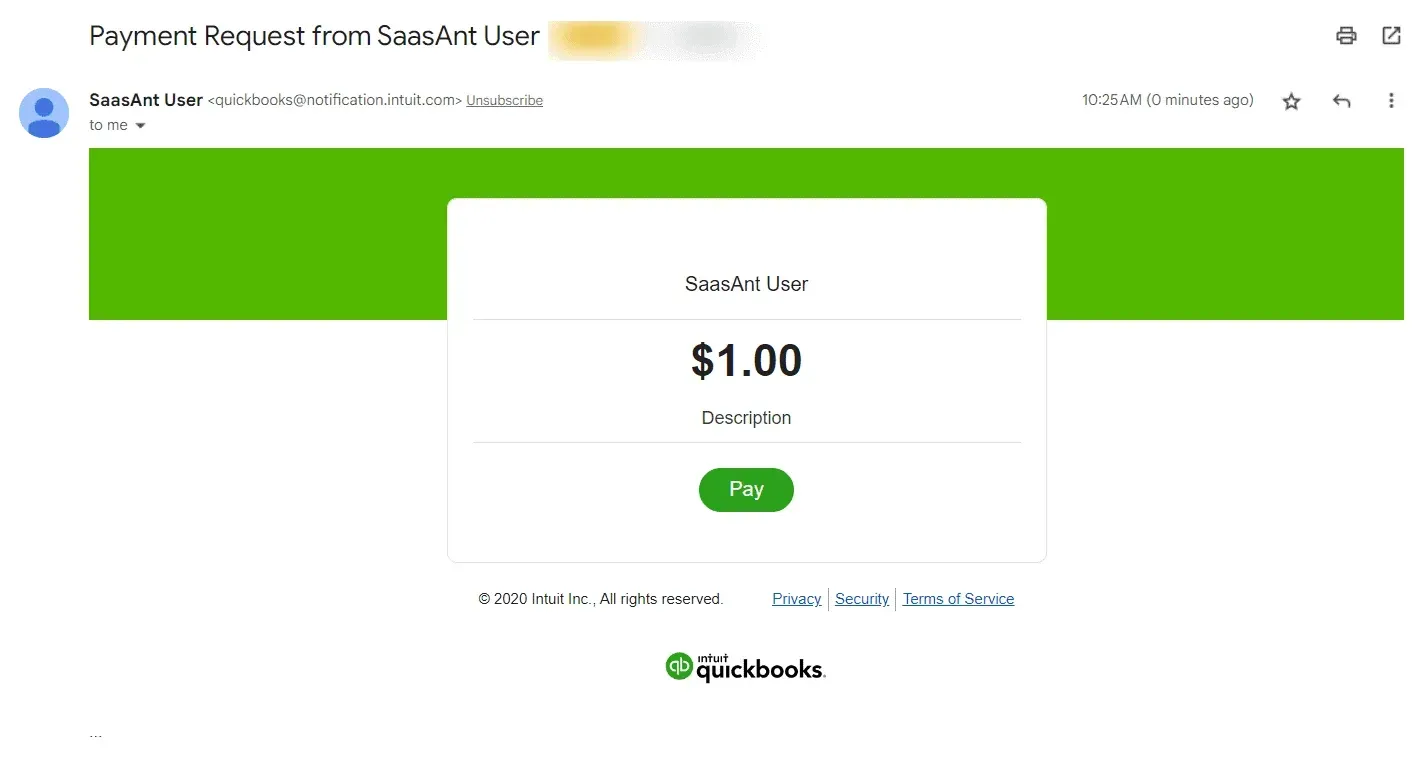
Note: It's not mandatory to have a QuickBooks account for the customer to pay.
Step 10: Email Confirmation
Once the customer completes the payment, you will receive a confirmation email.
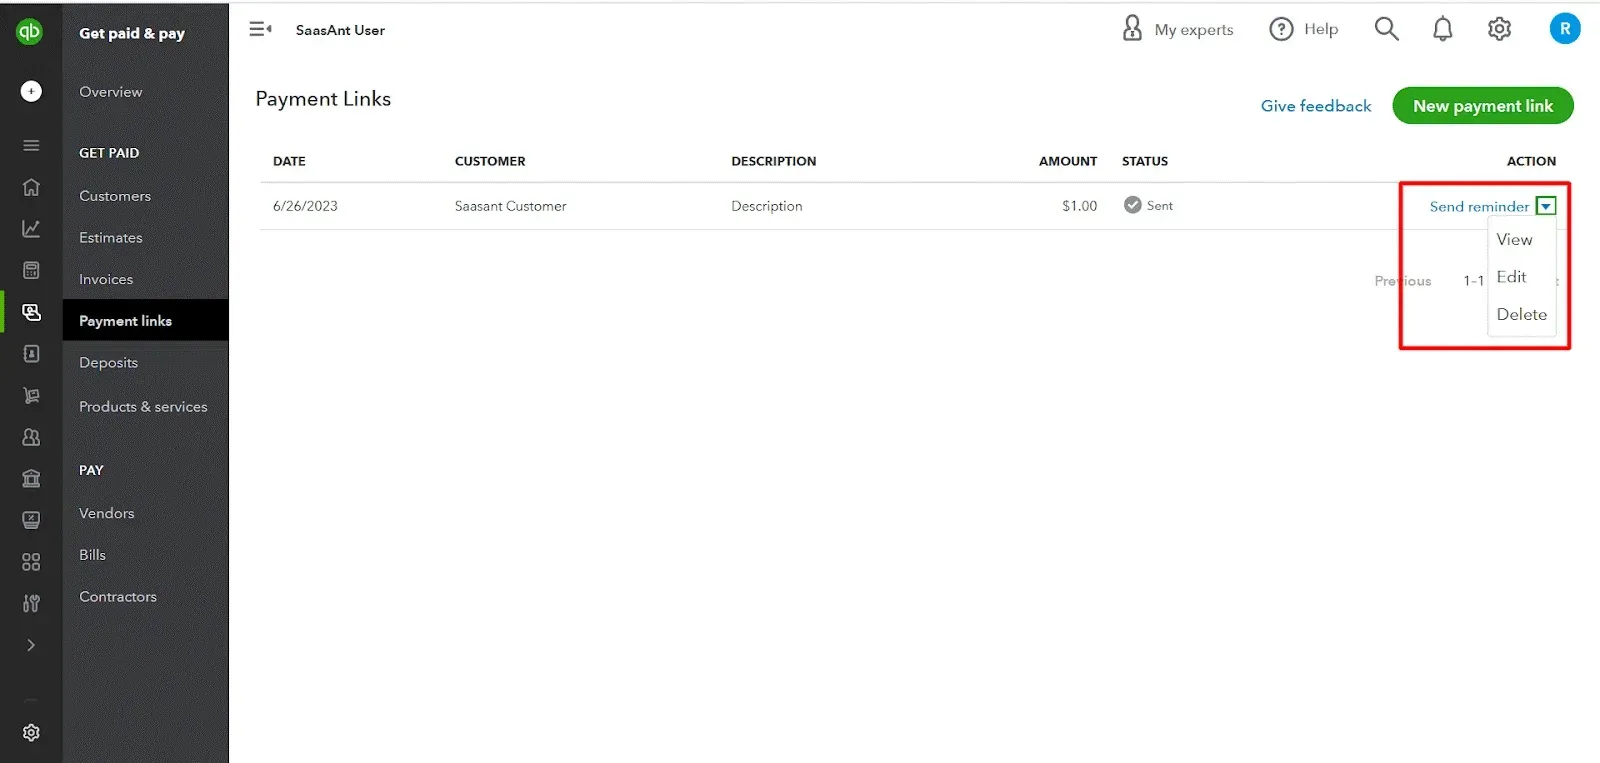
Step 11: Viewing Payment Link Status
To check the status of your payment links (e.g., pending, sent, paid, deposited), select "Payment Links."
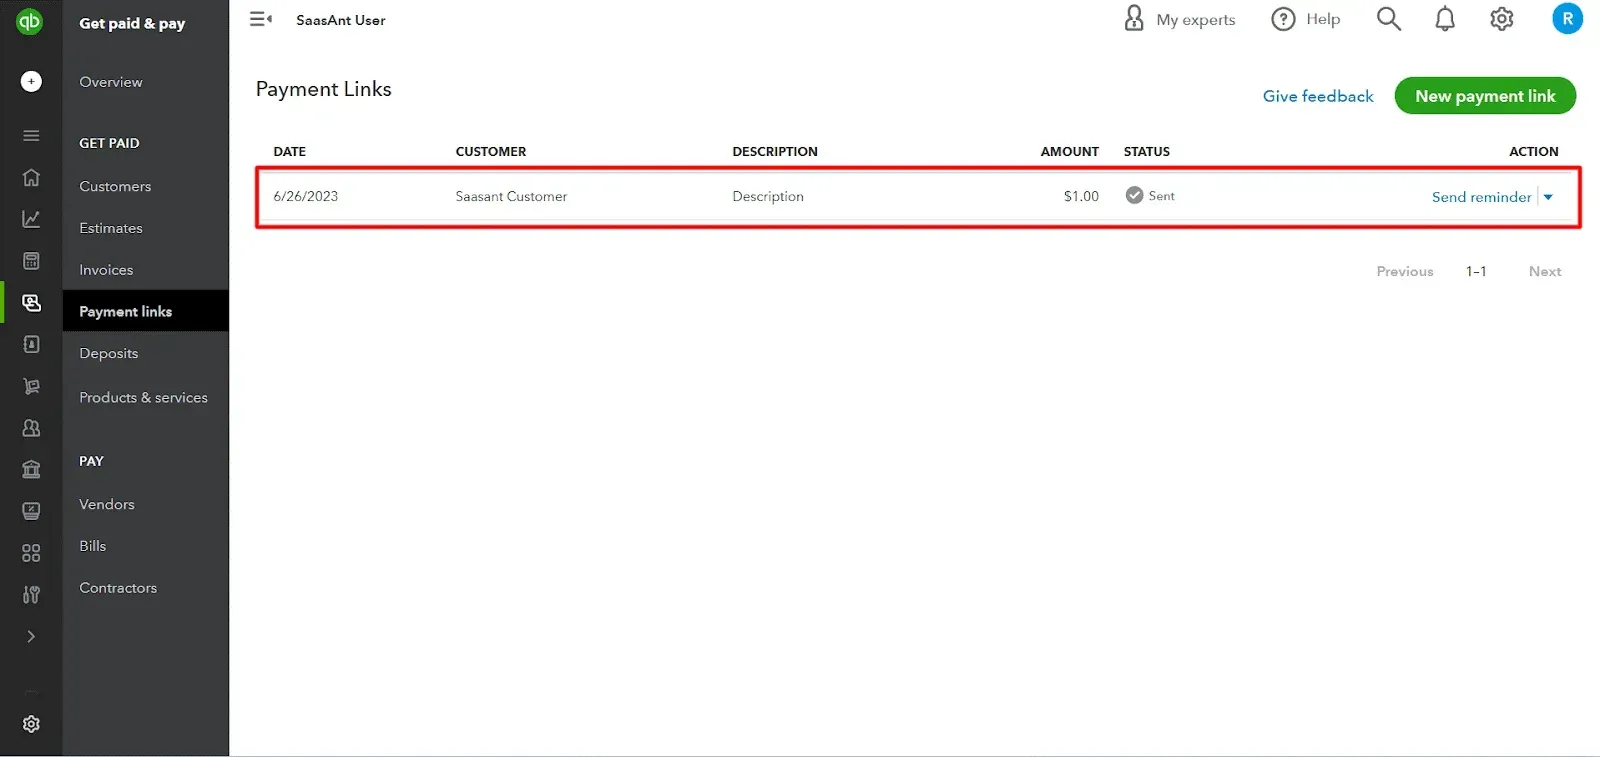
Step 12: Additional Actions with Payment Links
You can send reminders, view link details, and edit your payment links from the Payment Links section.
Quick Instructions on How to Use Payment Links in QuickBooks Desktop
Launch QuickBooks Desktop, login, and navigate to the ‘Customers’ tab in the top menu bar.
Access ‘Payment Links’ from the dropdown menu under the ‘Customers’ tab.
In the redirected window, click on ‘Create payment link’ to input payment details such as amount, description, customer details, and preferred payment method.
Use the ‘Send payment link’ option to email the link directly or copy it to share through text, additional emails, or other communication channels.
Using Payment Links in QuickBooks Desktop: A Detailed Step-by-Step Guide
In the following paragraphs, we will walk you through accessing payment links in QuickBooks Desktop.
Step 1: Launch QuickBooks Desktop
Launch the QuickBooks Desktop application and log in to your company file.
Step 2: Accessing the “Customers” Menu
In the top menu bar, locate and click on the “Customers” tab.
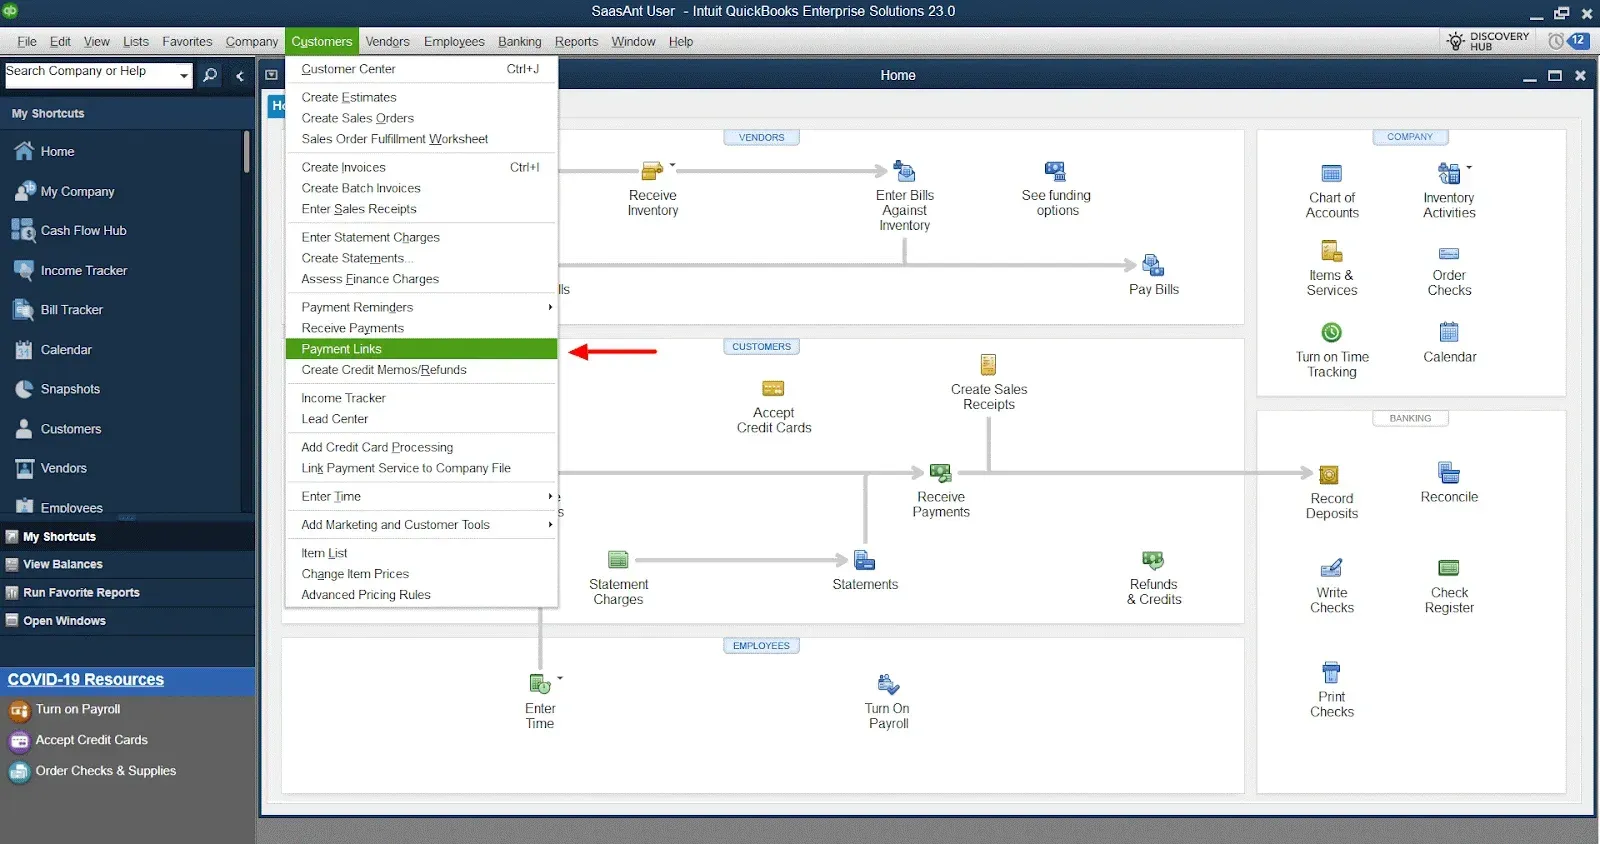
Step 3: Select Payment Links
Select "Payment Links" from the "Customers" tab dropdown menu.
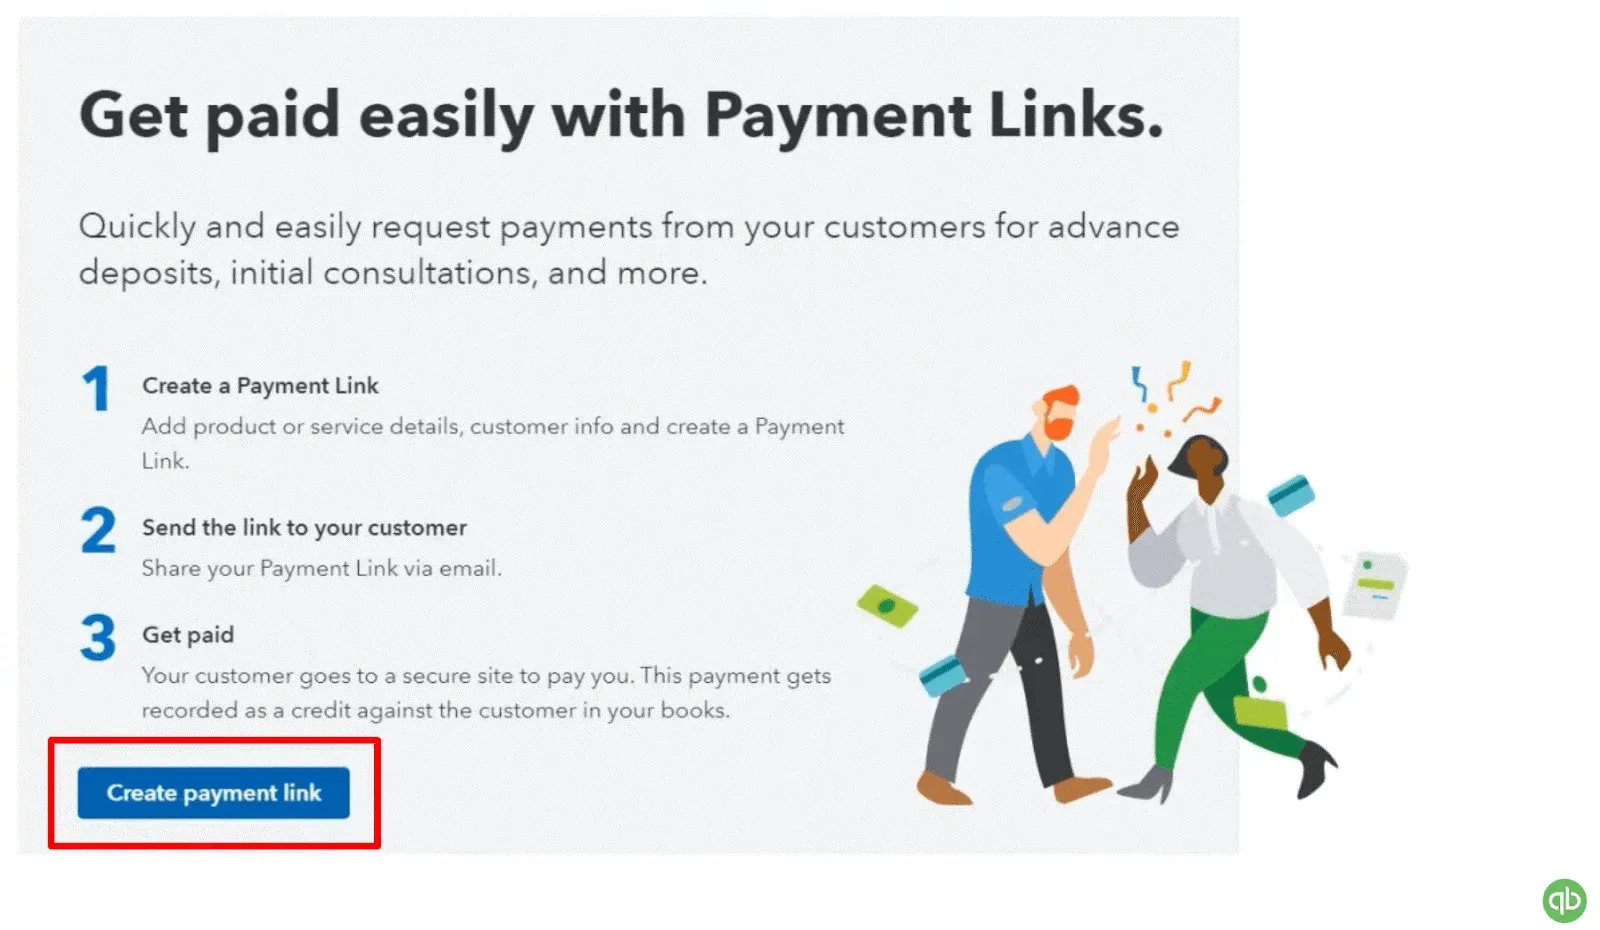
Step 4: Create a Payment Link
Once you click the “Payment Links,” you’ll be redirected to a new window, where you’ll find the “Create payment link” button. Click on the same.
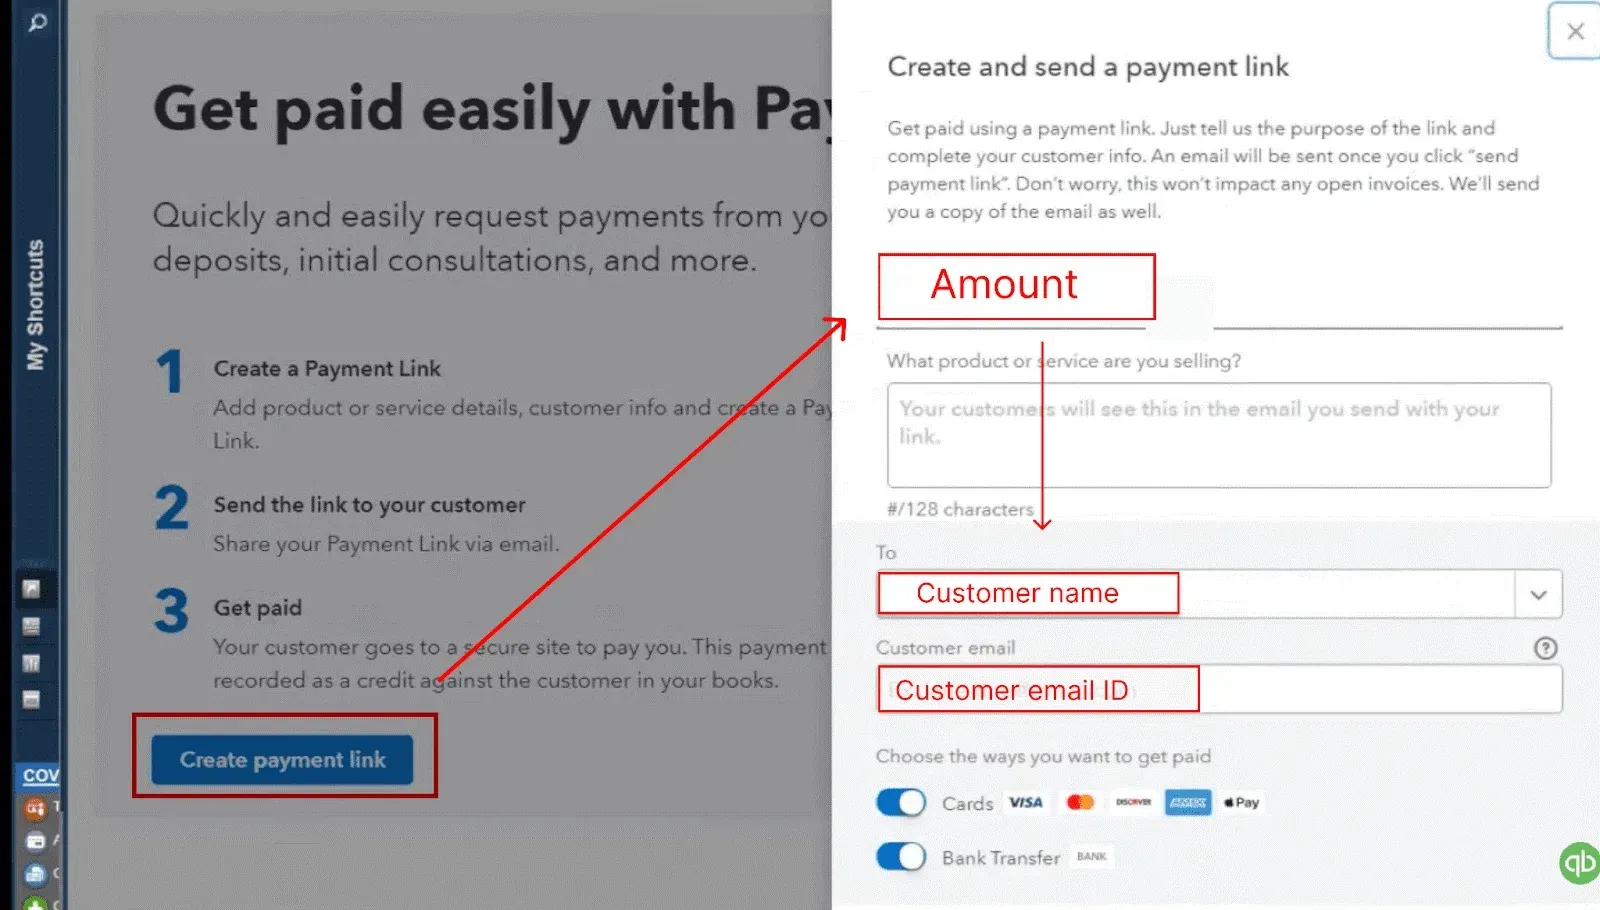
Step 5: Enter Payment Details
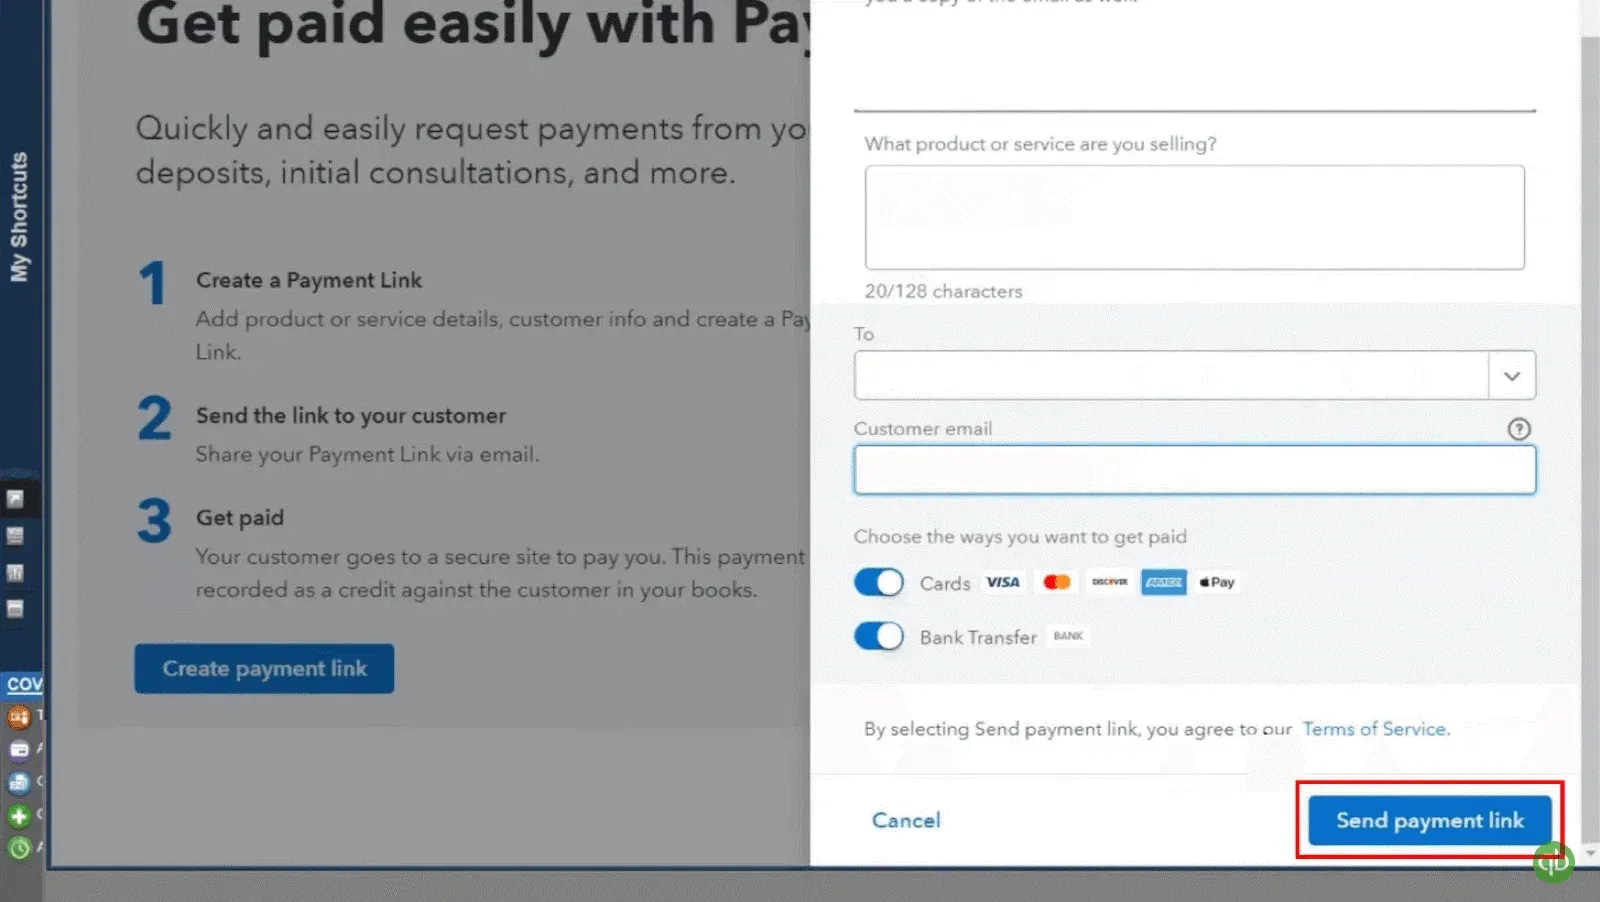
Once you click the "Create payment link" button, you can input the payment details, such as the amount, description, customer name, email address, and preferred payment method.
Step 6: Send Payment Link
Next, you'll find the "Send payment link" option below; click on the same to send the payment link through email.
Step 7: Alternate Sending Options
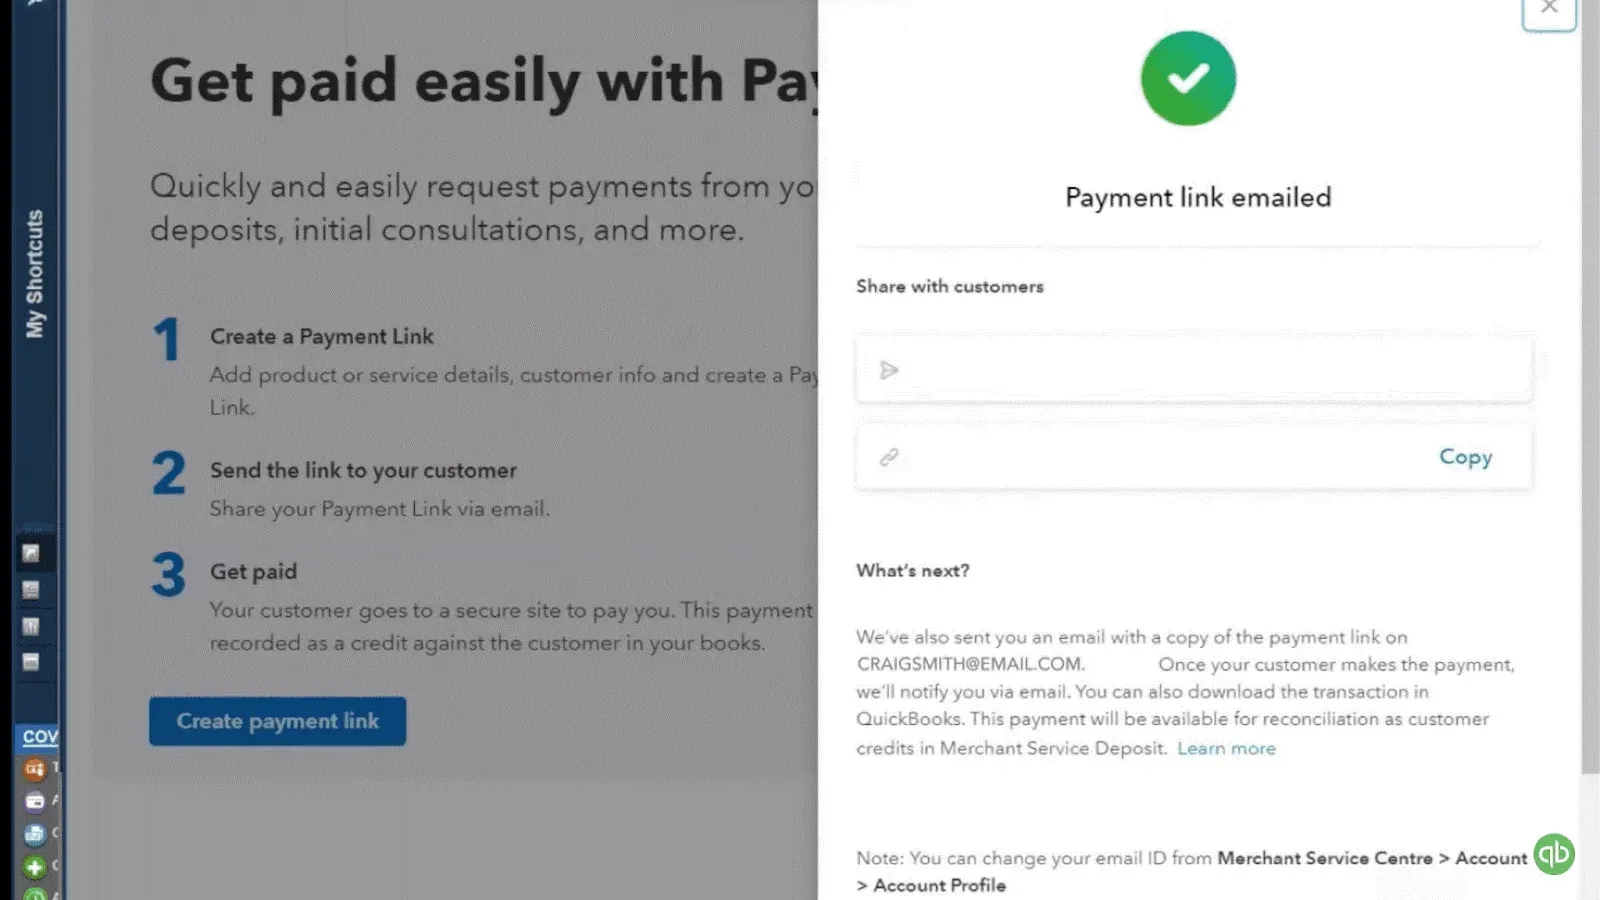
Once you click the "Send payment link" button, the payment link will be promptly delivered to the customer's email address. If preferred, you can copy the payment link and share it through text messages, additional email accounts, or other communication channels.
FAQs
What Are Payment Links in QuickBooks?
Software-generated payment links are URLs that can be included in invoices as clickable links. These links provide customers with a convenient way to make online payments for the invoices they receive
Can I Customize the Payment Links in QuickBooks Online?
QuickBooks Online lets you personalize the payment links by adding your business name to the URL.
How Do Customers Use the Payment Links to Make Payments?
Customers can click on the payment link they receive. It will redirect them to a secure payment page where they can enter their payment details, such as credit card information, or use their preferred payment method.
Can I Track Payments Made through Payment Links in QuickBooks?
Both QuickBooks Online and Desktop automatically record payments made through payment links. To view their status, such as pending, sent, paid, or deposited, navigate to the "Payment Links" section.
Can I Use Payment Links for International Transactions?
Yes, payment links in QuickBooks can be used for international transactions, depending on the payment service provider you have connected to. Ensure that your payment service provider supports international payments.
Are Payment Links Secure for Customers to Use?
Yes, QuickBooks-generated payment links are designed to provide a secure payment experience for customers. The payment pages are encrypted and follow industry-standard security protocols to protect sensitive customer information.