How to Print Deposit Slips in QuickBooks Online
Running a business comes with numerous responsibilities, including the intricate task of managing finances. Preparing deposit slips manually can be time-consuming and prone to errors, potentially causing delays in deposits and disruptions in cash flow.
Luckily, QuickBooks Online offers a streamlined solution with a feature to print deposit slips directly from the platform. This eliminates manual data entry, reduces errors, and enhances efficiency. This guide provides a step-by-step process to print deposit slips in QuickBooks Online. It offers a valuable tool for small business owners and bookkeepers aiming to optimize their financial processes.
Contents
Step 1: Print Deposit Slips - Setup
Set Up Adobe Reader
Fine-tune Alignment
Step 2: Print the Deposit Slip
Frequently Asked Questions
Step 1: Print Deposit Slips - Setup
Before you print your first deposit slip, you must ensure that the information on your deposit slips will print in the correct areas of your pre-printed forms. Here's how to do it:
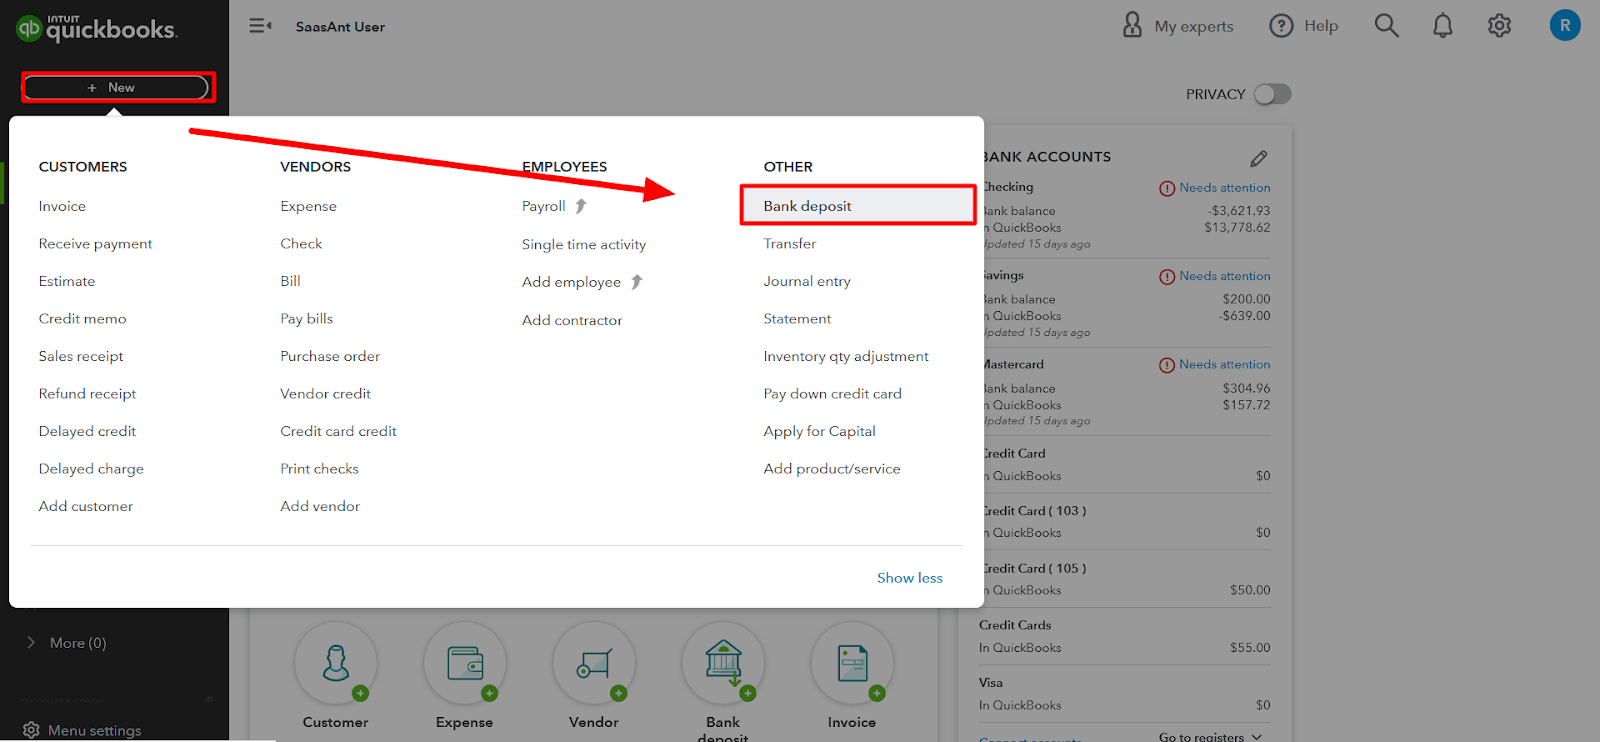
Select + New.
Under Other, select Bank Deposit.
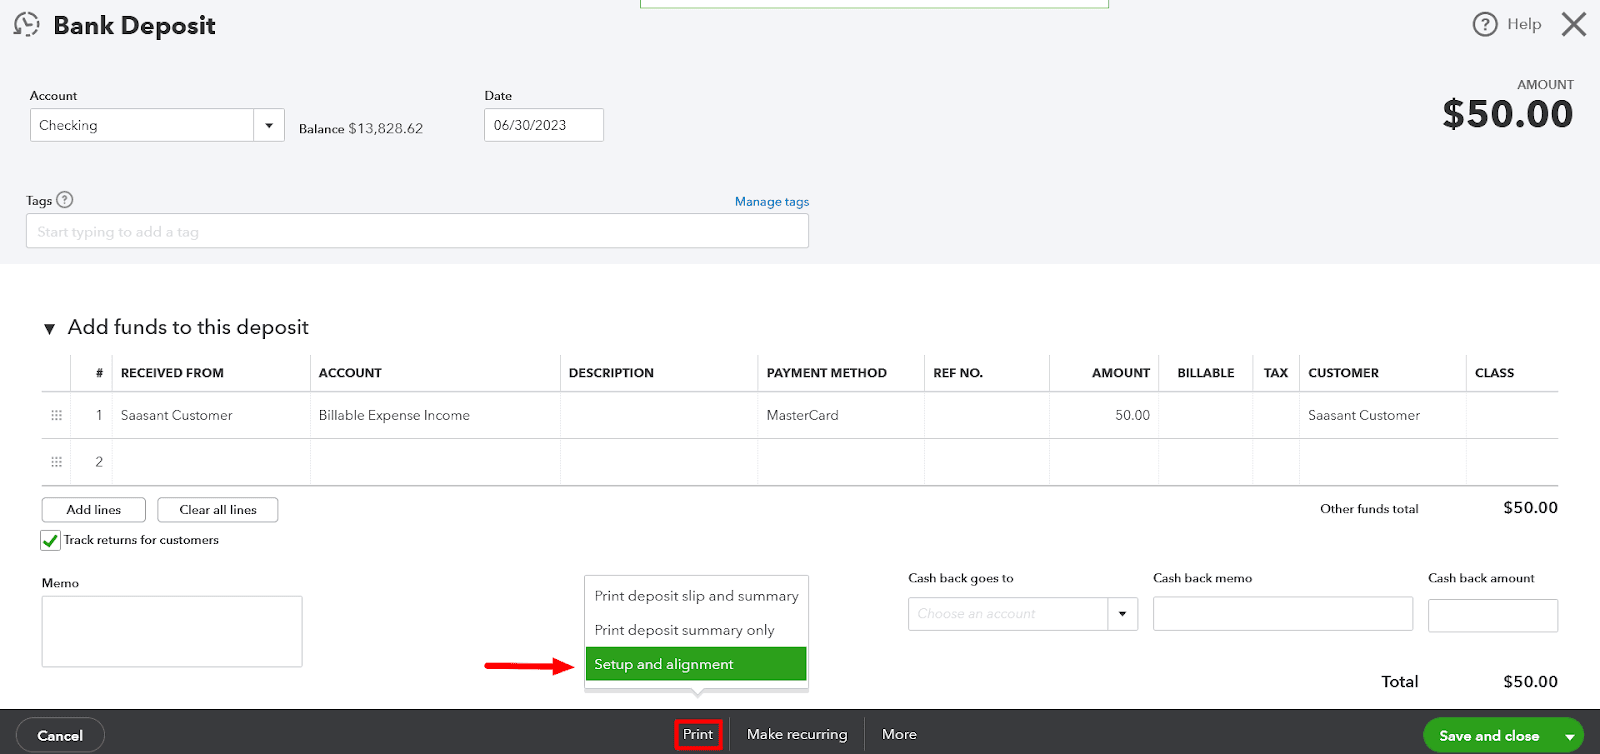
Select Print.
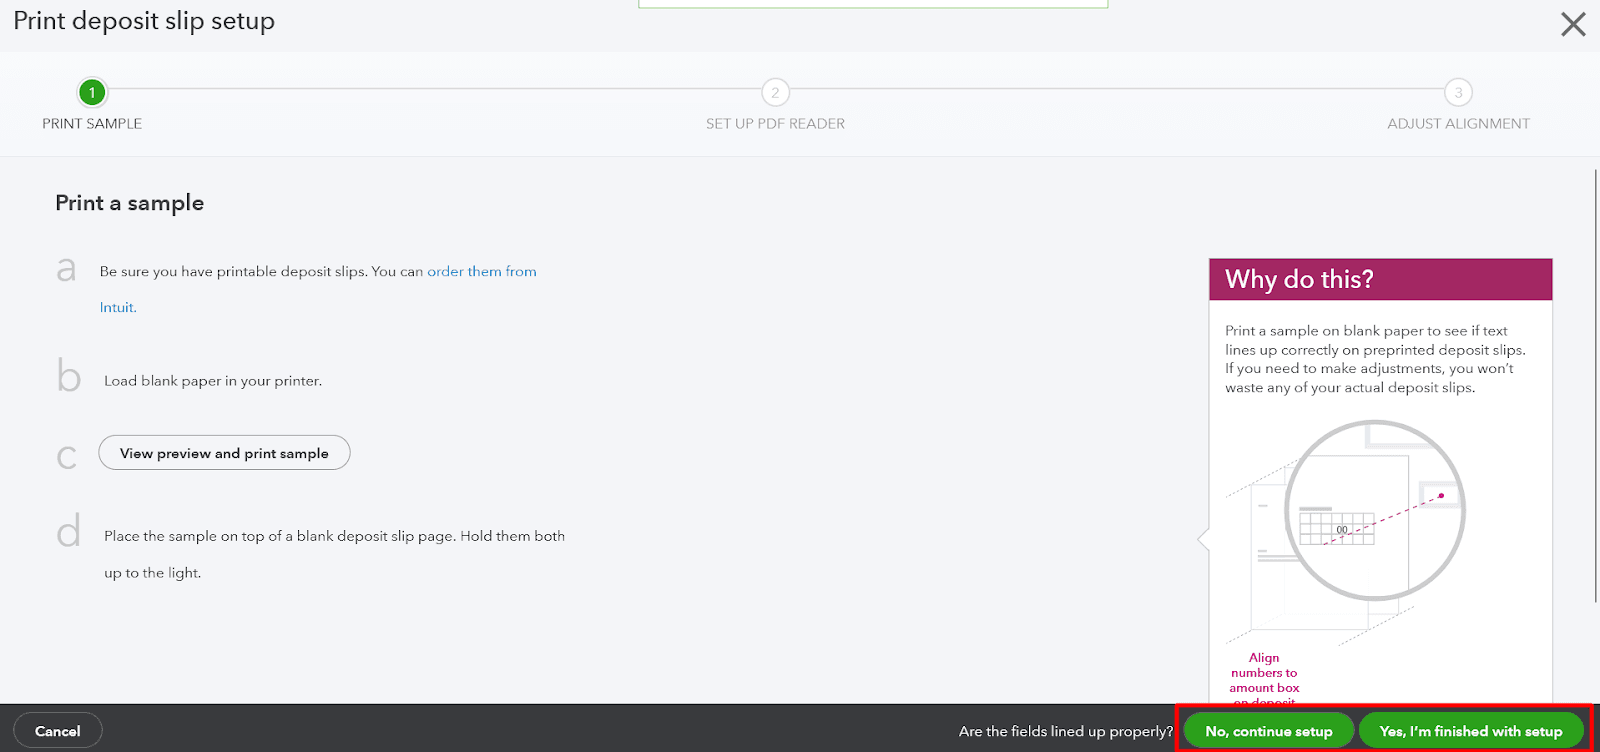
Select Setup and Alignment to open the Print deposit slip setup page.
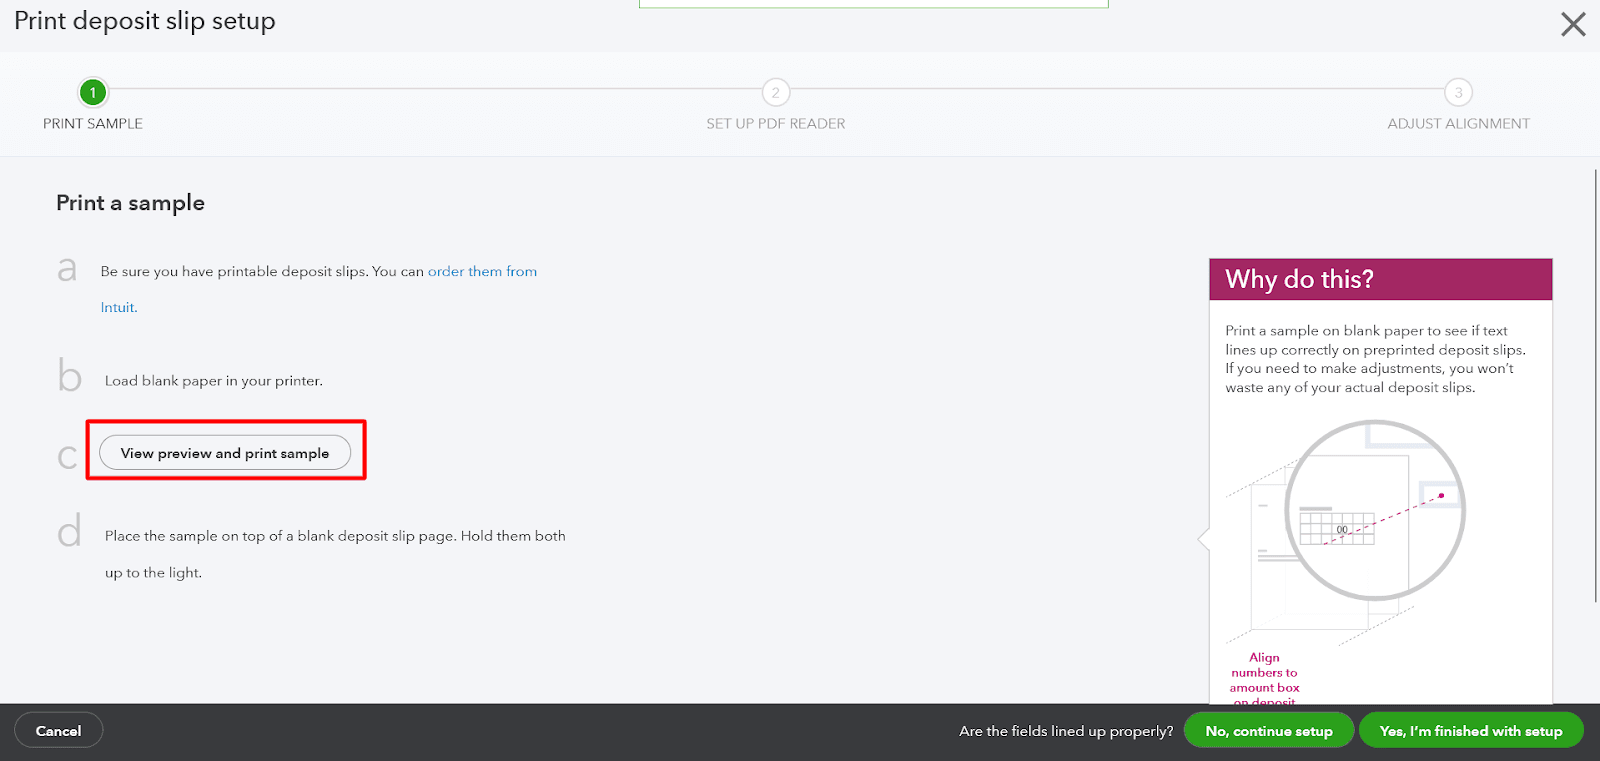
Select View Preview and print sample.
Select Print.
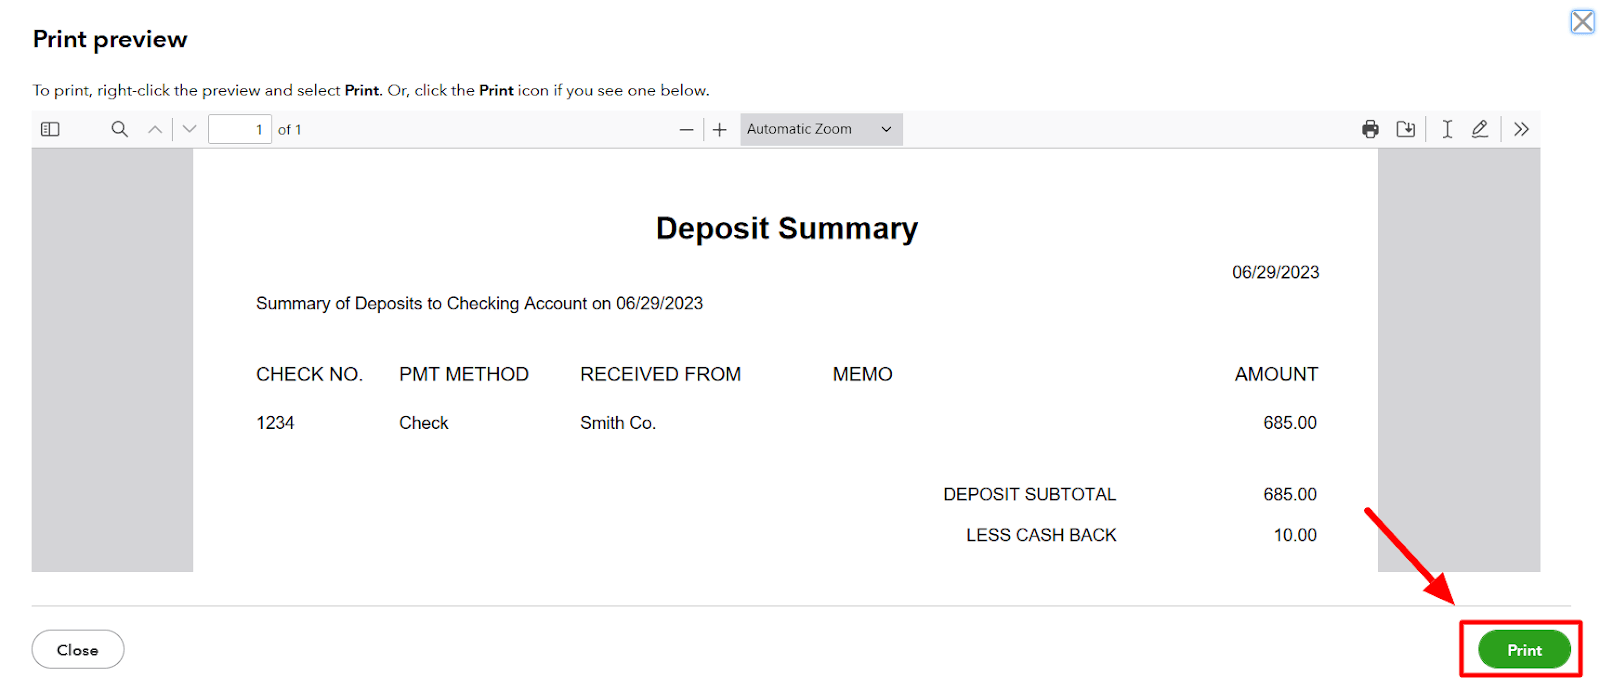
Place your printed sample deposit slip on a blank pre-printed form and hold both to the light. If the printed information aligns with the correct areas of the form, select Yes, I'm finished with setup in the Print window. If not, select No, and continue with the setup.
Set Up Adobe Reader
For more consistent results, you can download and use Adobe Reader to control printing in QuickBooks Online:
Select the on-screen link to download the latest version of Adobe Reader.
Set Adobe Reader as your default PDF viewer.
Select View Preview and print sample and select Print.
Compare the print to the pre-printed form and select Yes, I'm finished with setup if the information aligns with the form. If not, select No, and continue setup.
Fine-tune Alignment
To fine-tune your printed page's alignment to match your pre-printed forms, follow these steps:
Compare the alignment grid in the Preview window with the grid on the Fine-tune alignment page.
Drag the on-screen grid to match its location on your printout. From this position, QuickBooks Online determines how to adjust the alignment and changes the Horizontal and Vertical offsets as necessary. You can select "What do these numbers mean?" to learn more about horizontal and vertical offsets.
Select View Preview and print sample and select Print to ensure the information on your printed sample deposit slip lines up with the correct areas of your pre-printed form.
If the alignment tool is not saving your changes, do the following:
Go to the fine-tune alignment screen.
Drag the on-screen grid to match its location on your printout.
Select Finish setup, then try printing a sample.
Repeat steps 1 to 3 until the sample print matches your form.
Step 2: Print the Deposit Slip
Once you have set up deposit slip printing, you can print a deposit slip. Ensure you have created a deposit transaction from the Bank Deposit window and specified Undeposited Funds as the account when receiving payment against an invoice or creating a sales receipt. Also, ensure you have printable deposit slips loaded in your printer.
To print deposit slips:
Select + New.
Under Other, select Bank Deposit.

Select the customer payments you want to deposit in the Bank Deposit window.
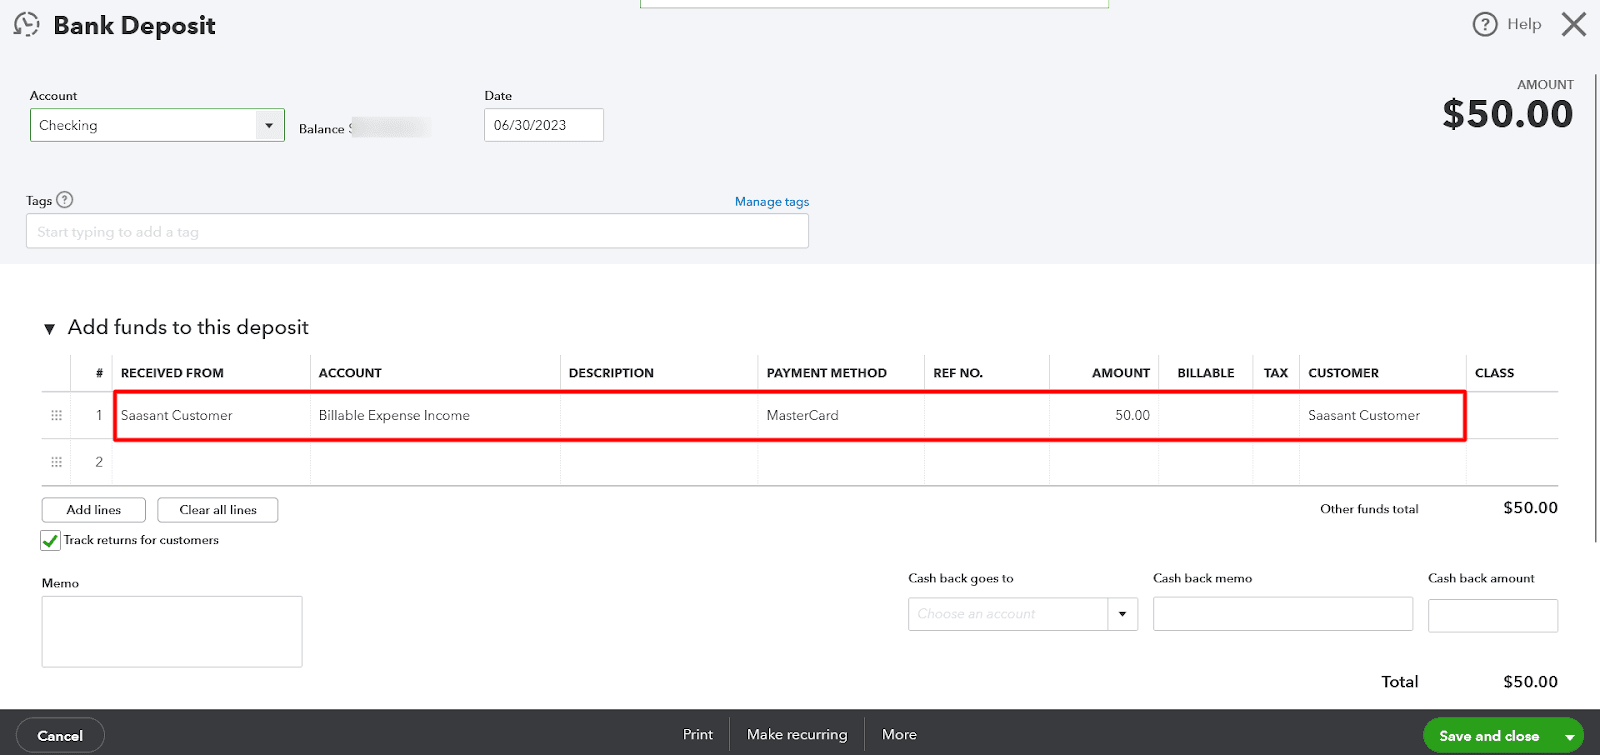
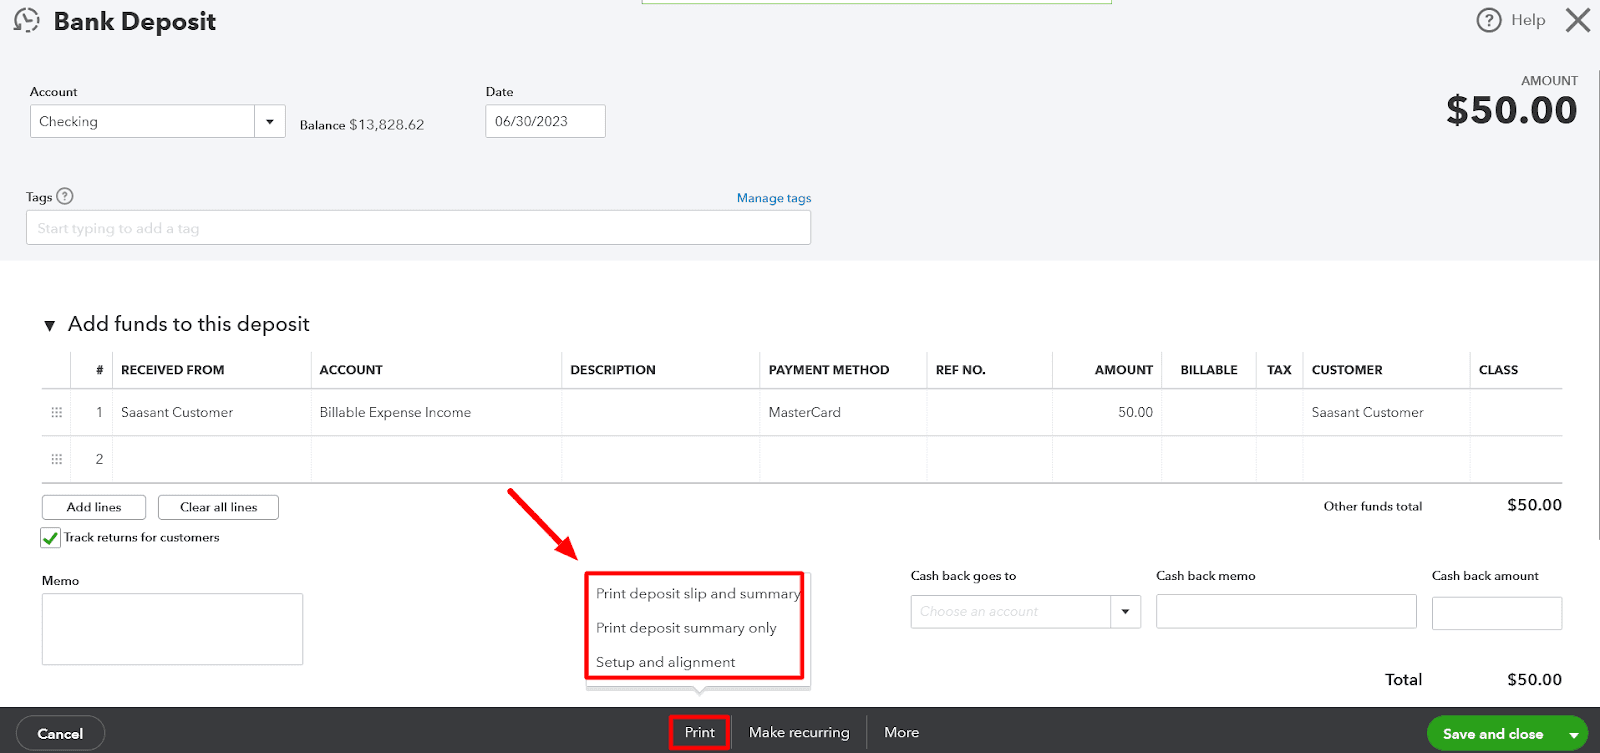
Select Print and specify whether to Print the deposit slip and summary or Print the deposit summary only (useful if you've filled out deposit slips by hand). You can also select Setup and Alignment to check your print alignment.
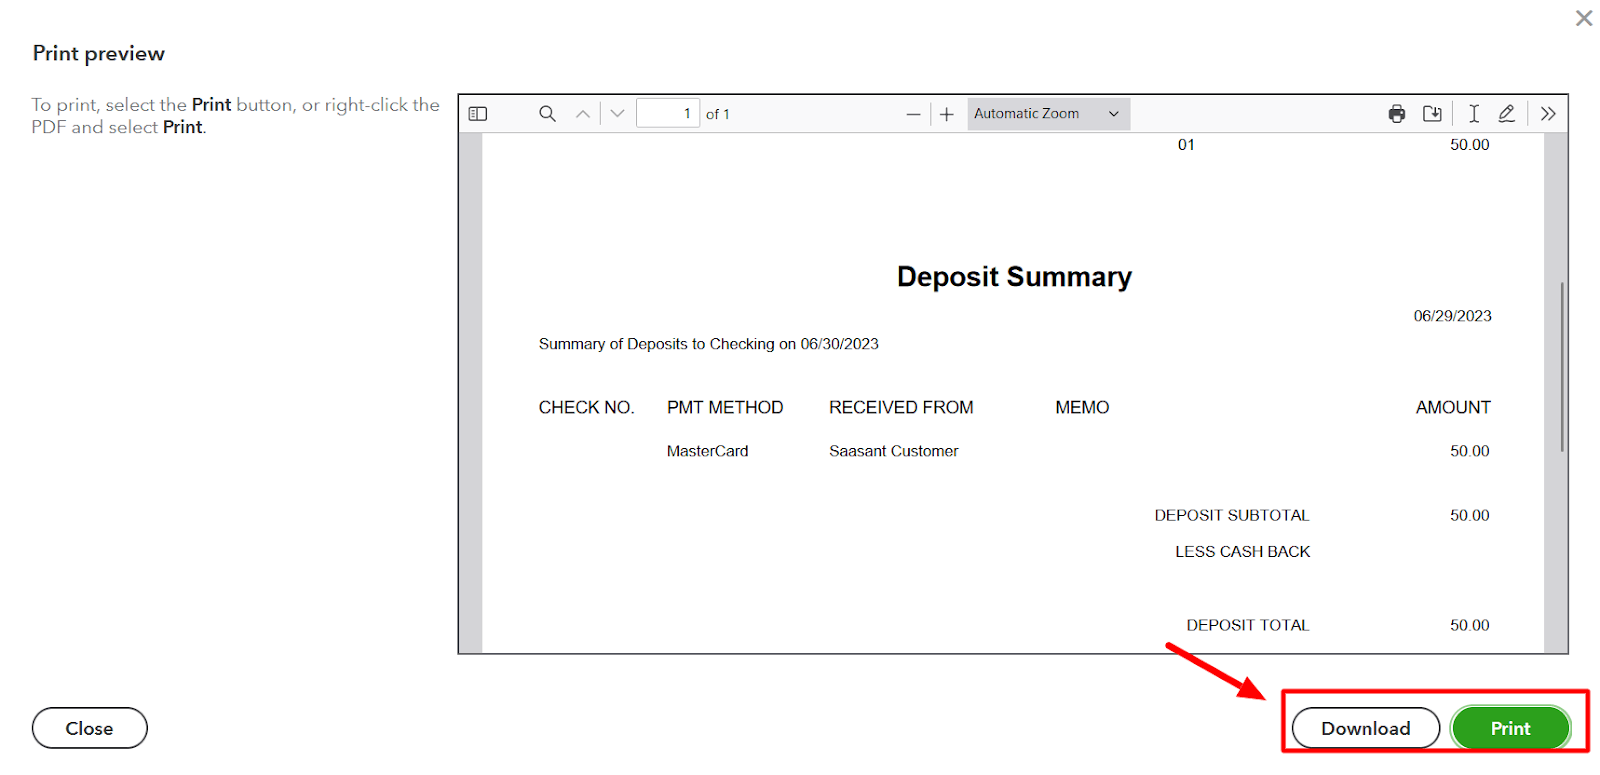
Select Print, and, depending on your browser, select the Print icon from the floating toolbar on the Preview page or the toolbar on the separate Preview window. If the preview appears blank, or if you are prompted to download the PDF file manually, and no Print icon appears on screen, download the PDF file, open it, and print it from there.
Frequently Asked Questions
How do I enable the option to print deposit slips in QuickBooks Online?
To enable the option to print deposit slips in QuickBooks Online, follow these steps:
Sign in to your QuickBooks Online account.
Navigate to the Gear icon in the upper right corner and select "Account and Settings."
Choose "Sales" from the left menu, then click on the "Sales form content" section.
Under the "Deposit" section, make sure the checkbox next to "Custom transaction numbers" is selected.
Click "Save" and "Done" to save your changes. You can now print deposit slips.
How do I generate deposit slips for specific transactions in QuickBooks Online?
To generate deposit slips for specific transactions in QuickBooks Online, follow these steps:
Sign in to your QuickBooks Online account.
Navigate to the "Banking" or "Accounting" tab, and select "Deposits" or "Make a deposit."
Choose the bank account where the deposit will be made.
Select the transactions you want to include in the deposit by checking the boxes next to them.
Click the "Print" button to generate the deposit slip, and choose your desired printing options.
Can I customize the format of my printed deposit slips in QuickBooks Online?
Yes, you can customize the format of your printed deposit slips in QuickBooks Online by following the below steps:
Sign in to your QuickBooks Online account.
Navigate to the Gear icon in the upper right corner and select "Account and Settings."
Choose "Sales" from the left menu, then click on the "Sales form content" section.
Under the "Deposit" section, click "Customize" to modify the appearance of the deposit slip.
Make the desired changes to the layout, fonts, logo, and other settings.
Click "Save" and "Done" to save your customizations.
Can I preview the deposit slips before printing them in QuickBooks Online?
You can preview the deposit slips before printing them in QuickBooks Online. After selecting the transactions for the deposit and clicking on the "Print" button, QuickBooks Online will display a preview of the deposit slip on your screen. You can review the information and layout to ensure everything looks correct before proceeding with the actual printing.
Can you email deposit slips instead of printing them in QuickBooks Online?
Typically, users print deposit slips directly from QuickBooks Online. If you want to email a deposit slip, you should print it as a PDF first and then attach that PDF to an email. However, ensuring that this process complies with your local regulations and privacy standards is vital.
Tags
Read also
How to Import Deposits in QuickBooks Online
How to Export Deposits in QuickBooks Online
How to Delete a Deposit in QuickBooks Online
How To Make a Deposit in QuickBooks Online?