QuickBooks for Restaurants: Complete Guide 2025
Restaurants have unique accounting needs compared to other businesses. Here's a summary
1. 13-Period Accounting: Many restaurants adopt a 13-period calendar, dividing the year into 13 four-week periods. This structure facilitates consistent financial comparisons and aligns with weekly operational cycles, offering a more accurate reflection of performance.
2. Custom Reporting: Specialized reports are essential for analyzing profitability in restaurants. Key metrics include food cost percentage, beverage cost percentage, labor cost breakdowns (front-of-house vs. back-of-house), prime cost, and distinctions between controllable and non-controllable costs. These reports provide insights into operational efficiency and cost management.
3. POS Integration: Integrating the Point of Sale (POS) system with accounting software is crucial. This integration streamlines the transfer of sales data, inventory tracking, and payment management, enhancing overall operational efficiency.
4. Inventory Management: Effective tracking of food and beverage inventory is vital for cost control and waste reduction. Features such as recipe costing and theoretical food cost analysis are beneficial in managing inventory efficiently.
5. Multiple Locations (if applicable): For restaurants with multiple branches, it's important that the accounting system can manage finances across various locations, ensuring consolidated financial reporting and analysis.
QuickBooks for Restaurants: Compatibility and Versions:
QuickBooks Online: This cloud-based version is often recommended for restaurants due to its accessibility and integration capabilities. It offers various pricing tiers with differing features. However, some users find that its custom reporting, particularly for 13-period accounting, may not be as flexible as other platforms like Xero.
QuickBooks Desktop: The desktop versions (Pro, Premier, Enterprise) provide robust features but lack the cloud accessibility and direct integrations with many modern POS systems that QuickBooks Online offers.
QuickBooks POS (Discontinued): Intuit has discontinued QuickBooks POS, making it unsuitable for new setups. Existing users might continue using it, but it lacks ongoing support and updates.
QuickBooks Features for Restaurants:
Class Tracking: Allows categorization of income and expenses by different areas of the restaurant (e.g., dine-in, takeout, bar, catering).
Inventory Tracking: QuickBooks can track inventory, though it may not be as specialized as restaurant-specific systems.
Sales Tax Tracking: Enables management of sales tax collection and reporting.
Payroll: Integration with payroll services or using QuickBooks Payroll to manage employee wages and tips.
Multiple Locations: QuickBooks Online can handle accounting for multiple locations.
Reporting: Offers various reports (profit and loss, balance sheet, etc.) that can be customized to some extent.
Integrations: QuickBooks integrates with many third-party apps, including some POS systems, payroll providers, and inventory management tools.
Setting Up QuickBooks for Restaurant Accounting:
Choose the Right Version: QuickBooks Online is generally recommended for its flexibility and integrations. Select a plan that meets your reporting and user needs.
Chart of Accounts: Customize to include restaurant-specific accounts (e.g., food sales, beverage sales, liquor costs, food costs).
Class Tracking: Set up classes to categorize income and expenses by different areas of your restaurant.
Inventory Tracking (if applicable): If using QuickBooks for inventory, ensure items are set up correctly and inventory tracking is enabled.
POS Integration: Research and choose a POS system that integrates seamlessly with QuickBooks Online for efficient data transfer.
Payroll Integration: Connect QuickBooks to your payroll provider or set up QuickBooks Payroll.
Recurring Journal Entries (for Non-Integrated POS): If your POS doesn't integrate directly, create recurring journal entry templates to manually import sales data
Custom Reporting: Explore QuickBooks' reporting capabilities and customize reports to track key restaurant metrics. Be prepared to invest time in setup and customization.
Consult with an Accountant: It's highly recommended to consult with an accountant specializing in restaurant accounting to ensure proper setup, compliance, and best practices.
Alternatives to QuickBooks
Consider alternatives specifically designed for restaurants, such as Restaurant365, TouchBistro, ZipBooks, and FreshBooks. These options may offer features like 13-period accounting, integrated inventory management, recipe costing, or a simpler user interface.
By carefully considering your restaurant's specific needs, budget, and technical expertise, you can choose the best accounting system to manage your finances effectively. Don't hesitate to take advantage of free trials and demos to test different software options before making a final decision.
How to use QuickBooks for Restaurants?
Here's a step-by-step guide to setting up QuickBooks for your restaurant:
Establishing Company Lists:
For new users, click on the Express Start button. Existing users can click on the File menu and select New Company.

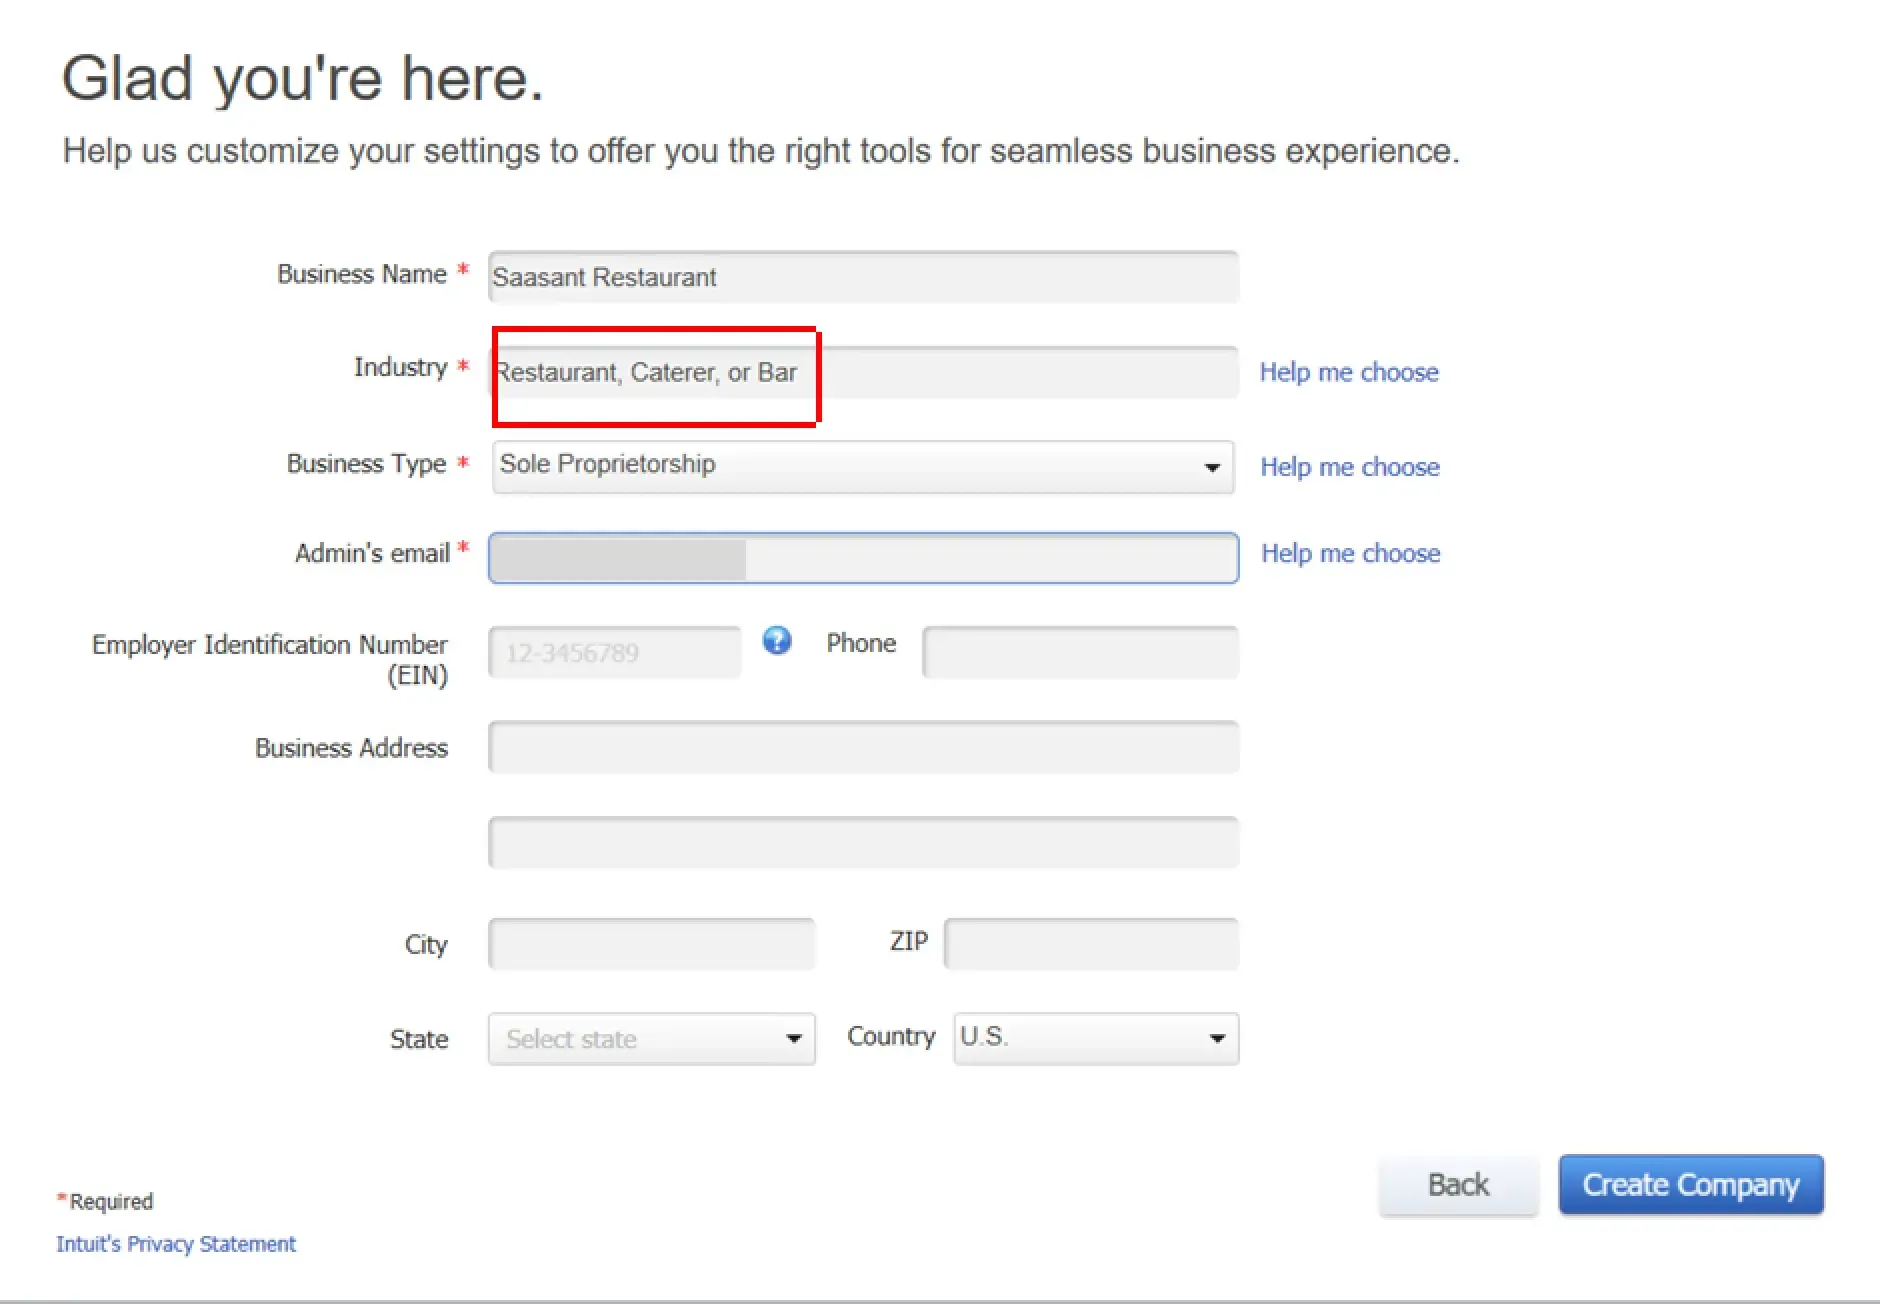
Input all the necessary details about your business, such as Company Name, Street Address, Phone Number, City, Country, Email Address, Tax ID, Website ID, etc... Click Next.
From the Industry Type field, select Help Me Choose and then choose Restaurant, Bar, or Caterer. Click Next
Choose the appropriate company type for your restaurant (for example, S-Corporation, Partnership Corporation, etc.). Click Next.
Select My Fiscal Year Starts from the drop-down menu and pick the month your fiscal year starts. Click Next.
Click Create Company File and then Start Working.
Adding Customers
Open QuickBooks Desktop - Launch the QuickBooks Desktop software on your computer.
Navigate to the "Customer Center - From the top menu, select "Customers" and then "Customer Center."
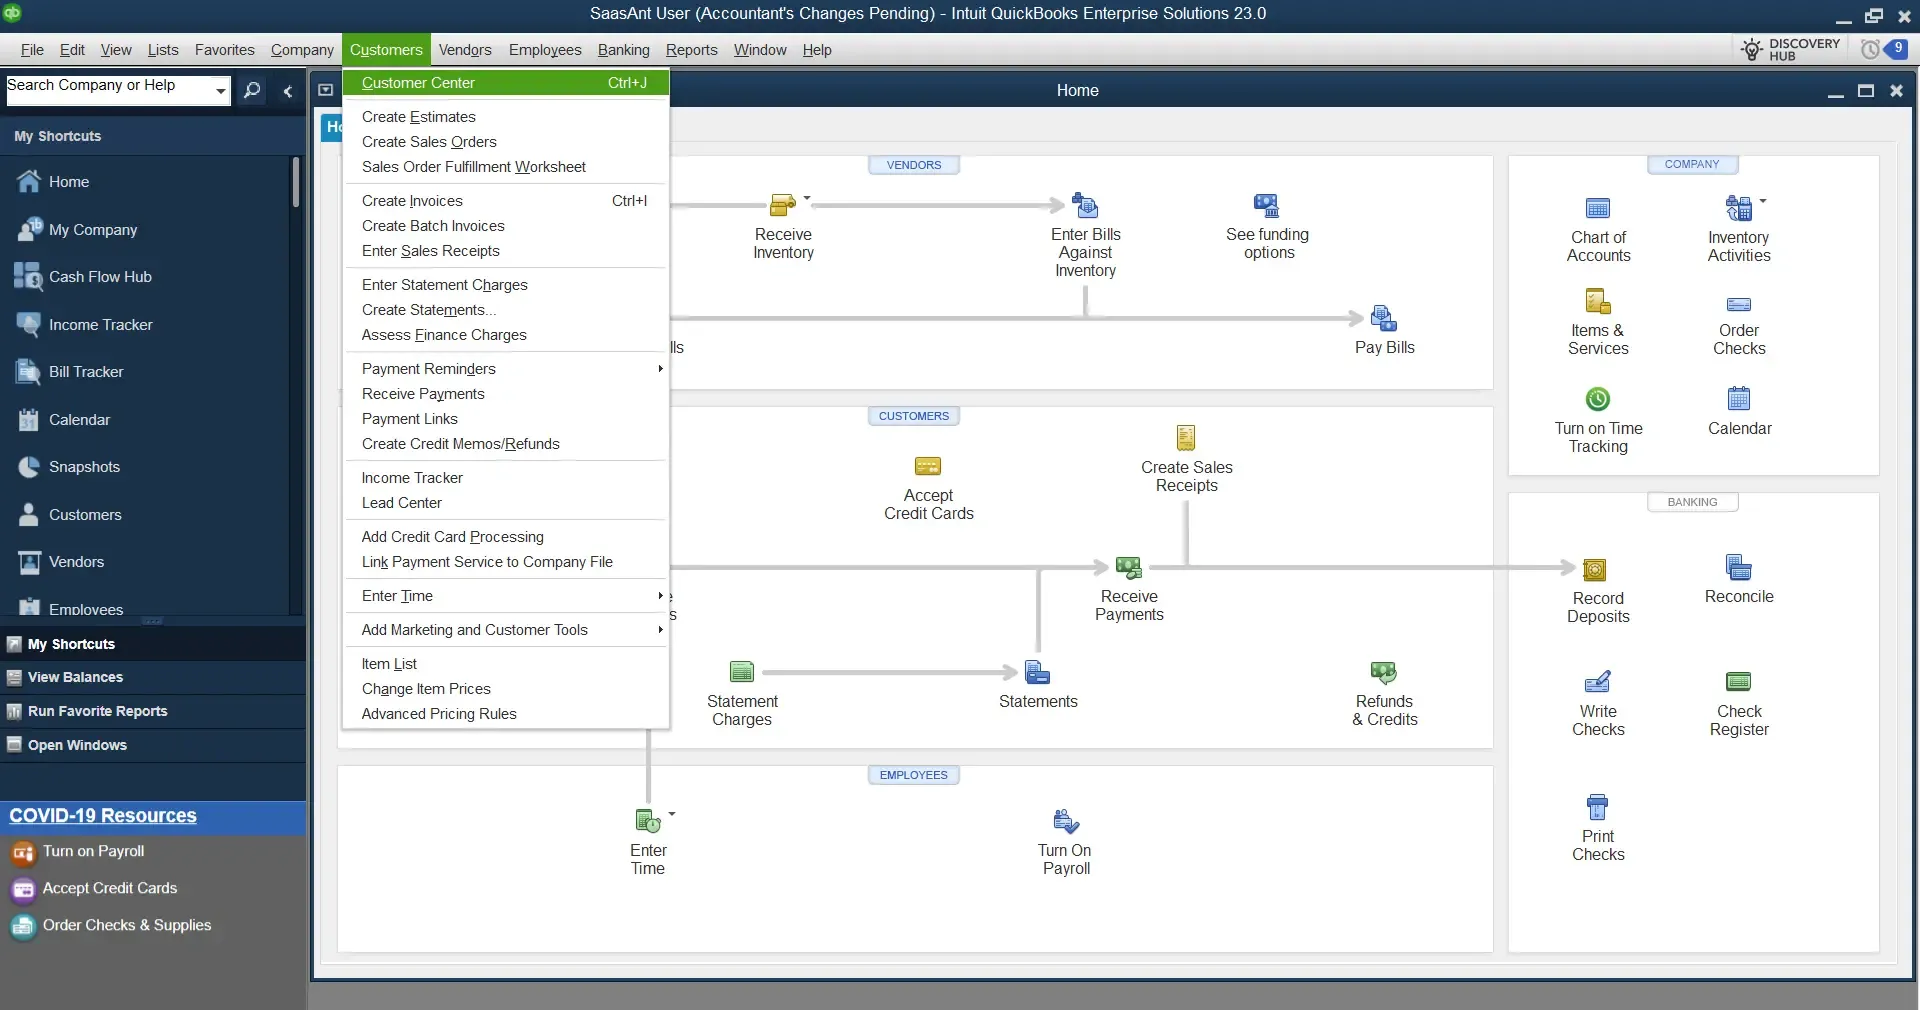
Create a New Customer- On the Customer Center screen, click "New Customer & Job," then select "New Customer."
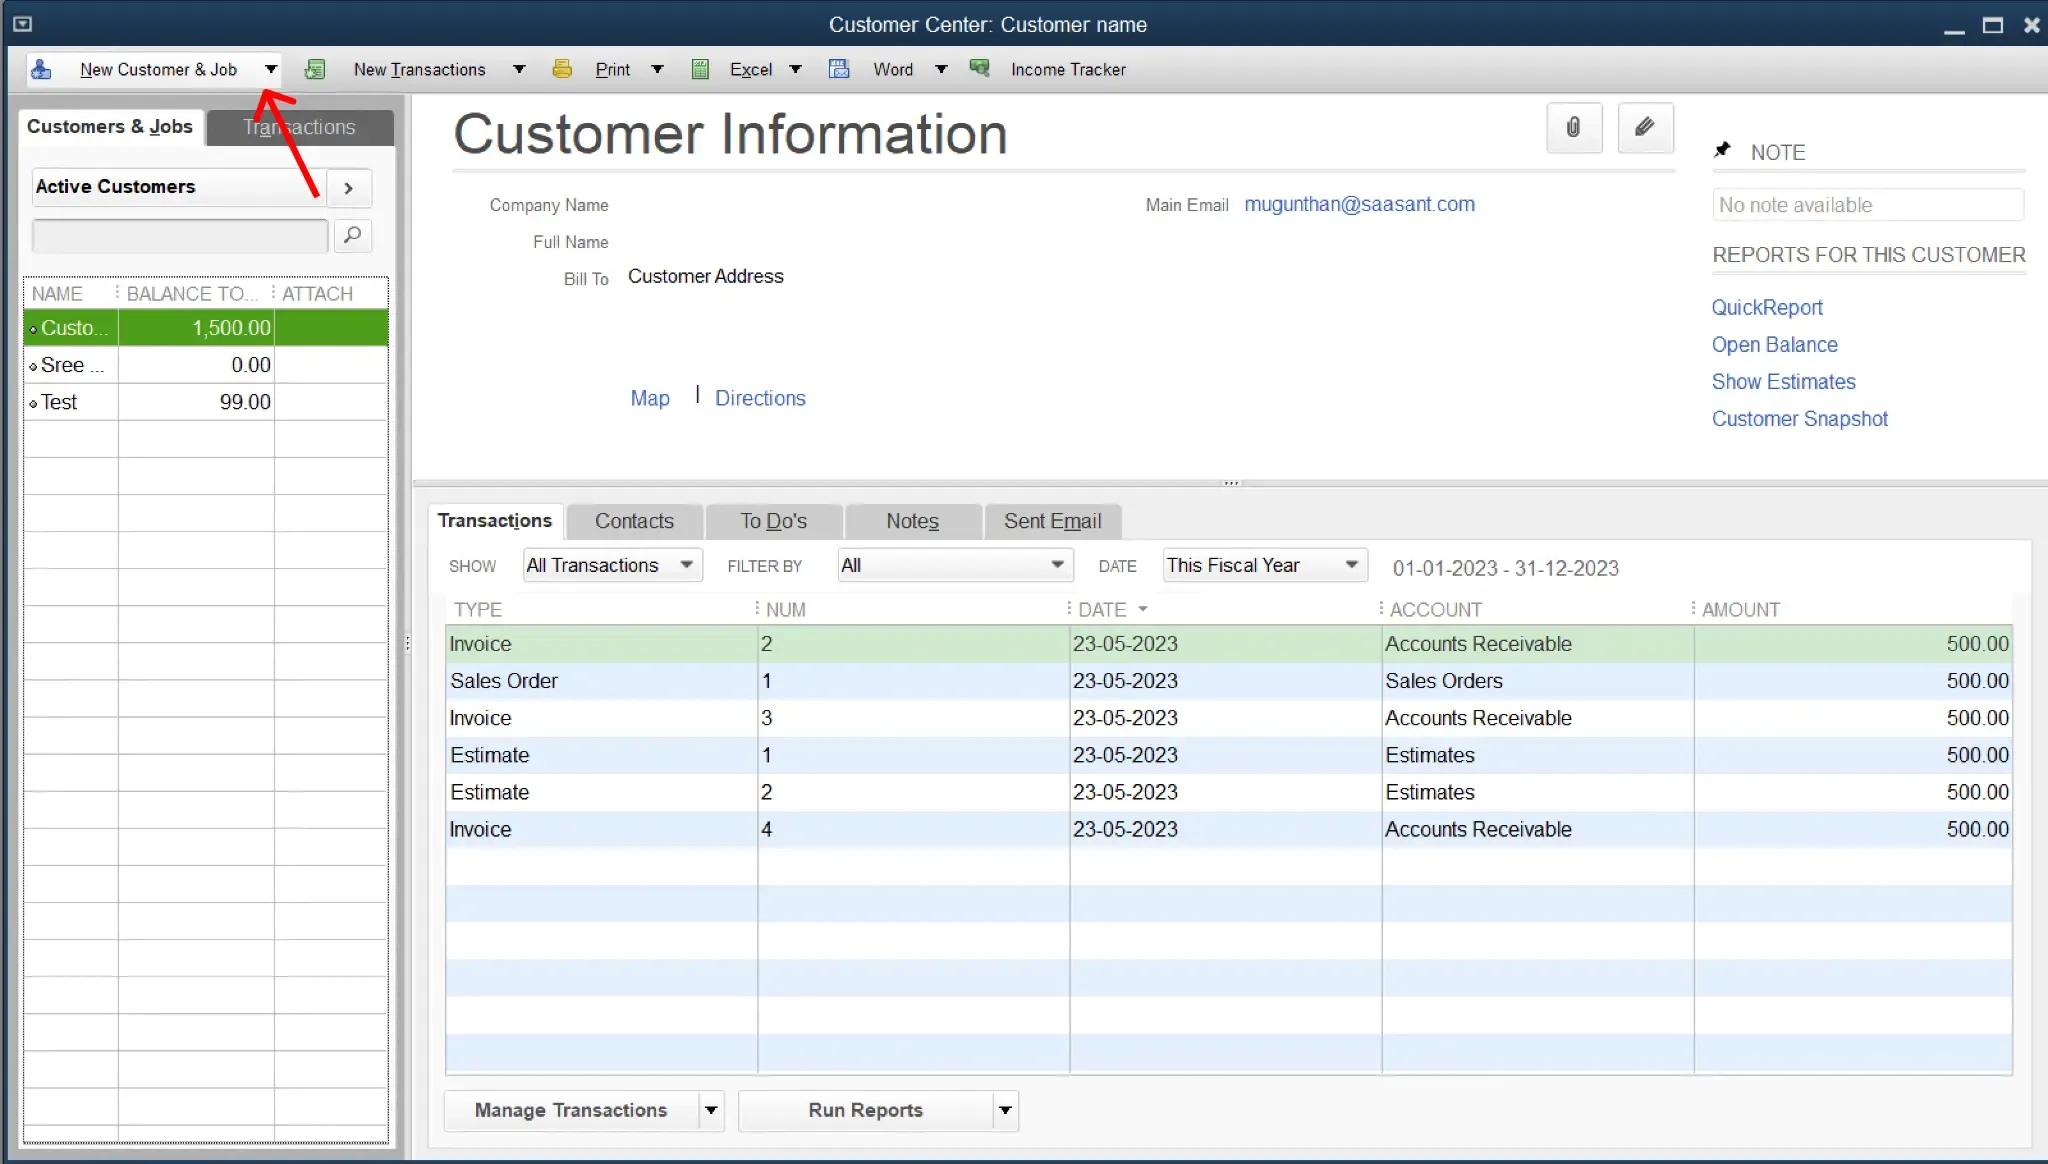
Enter Customer Information - In the "New Customer" window, enter the necessary information for your customer. This includes details such as name, billing address, contact information, and any other details you wish to track.

Save the Customer Information - Click "OK" or "Next" to save the customer information. If you have more customers to add, click "Next," and if you're done, click "OK."
Adding Items (Product/Service)
Open the "Item List" - From the top menu, select "Lists" and then "Item List."

Create a New Item - On the Item List screen, click the "Item" button at the bottom left of the screen, then select "New."
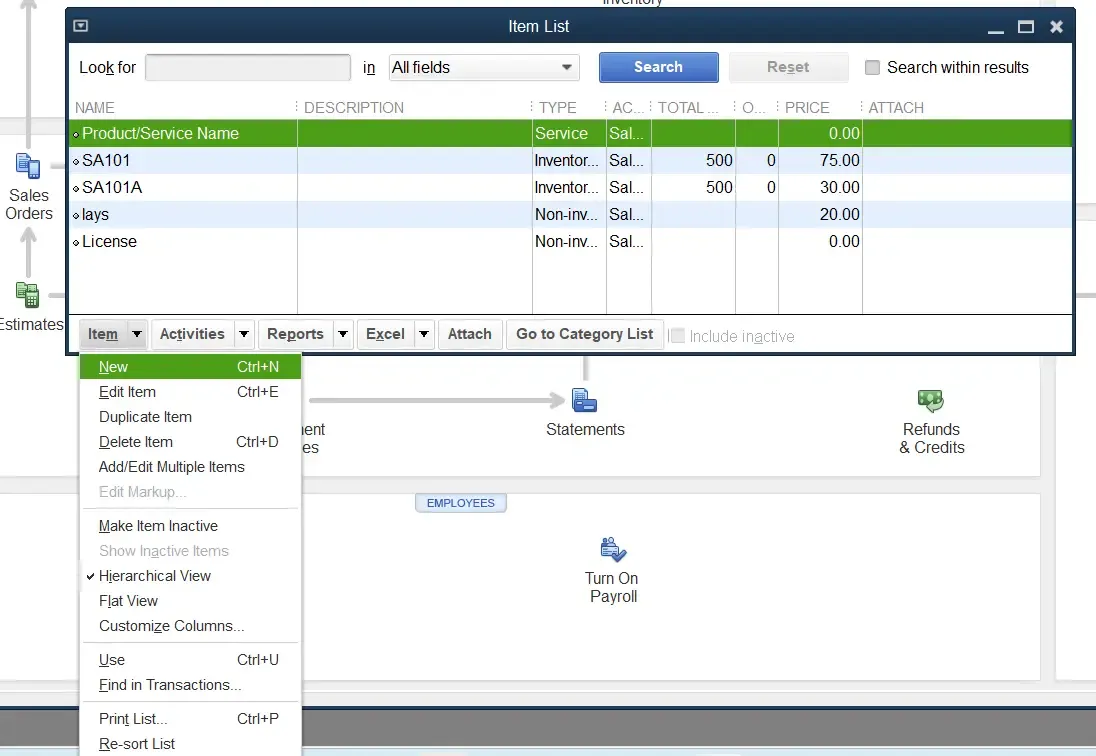
Enter Item Information - In the "New Item" window, select the "Type" of the item from the drop-down menu (this might be "Service" for a service you provide or "Inventory Part" for a product you sell). Enter the item name, description, price/rate, tax code, and other necessary information.
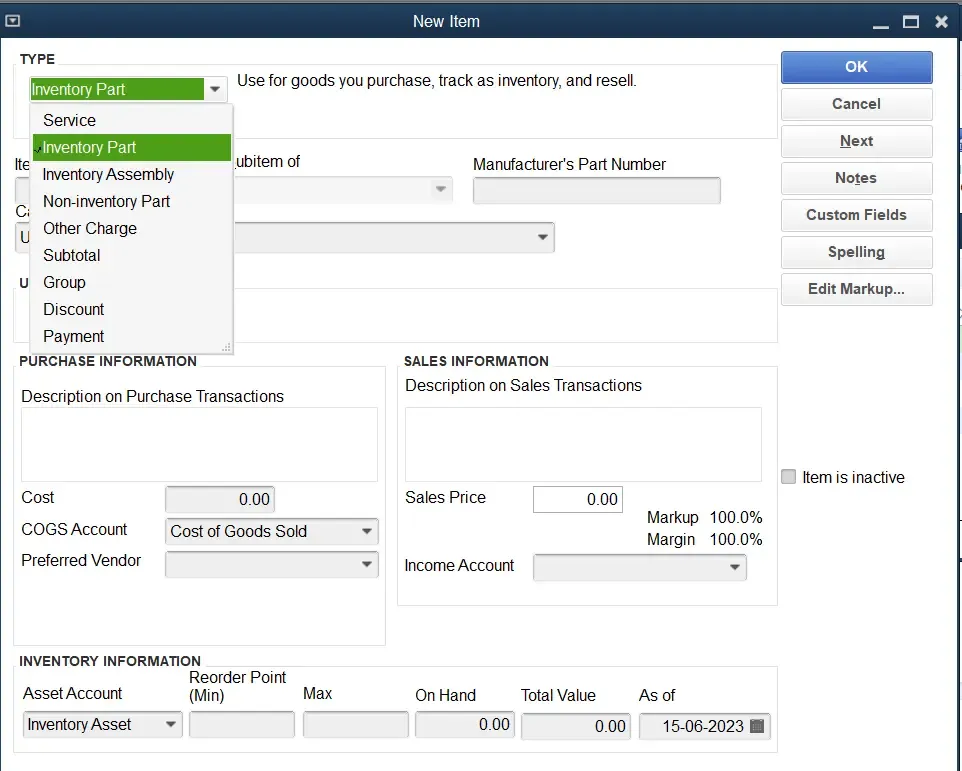
Save the Item Information - Click "OK" to save the item information.
Adding Vendors
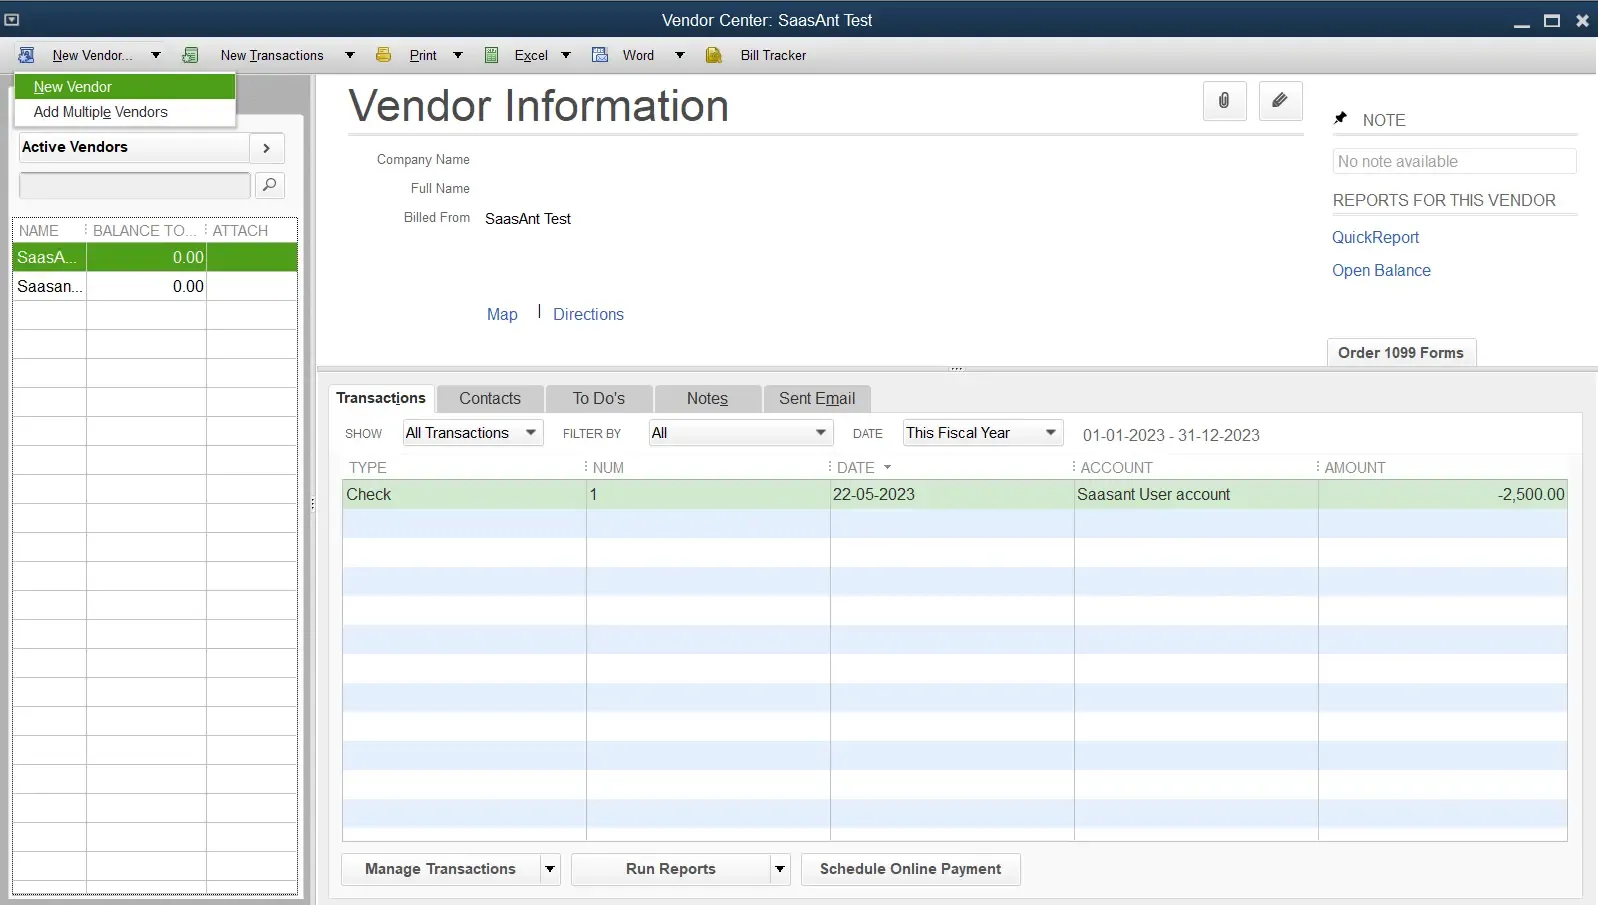
Open the "Vendor Center" - From the top menu, select "Vendors" and then "Vendor Center."

Create a New Vendor - Click " New Vendor " on the Vendor Center screen, and click "New Vendor."
Enter Vendor Information - In the "New Vendor" window, enter the necessary information for your vendor. This includes details such as name, billing address, contact information, and any other details you wish to track.
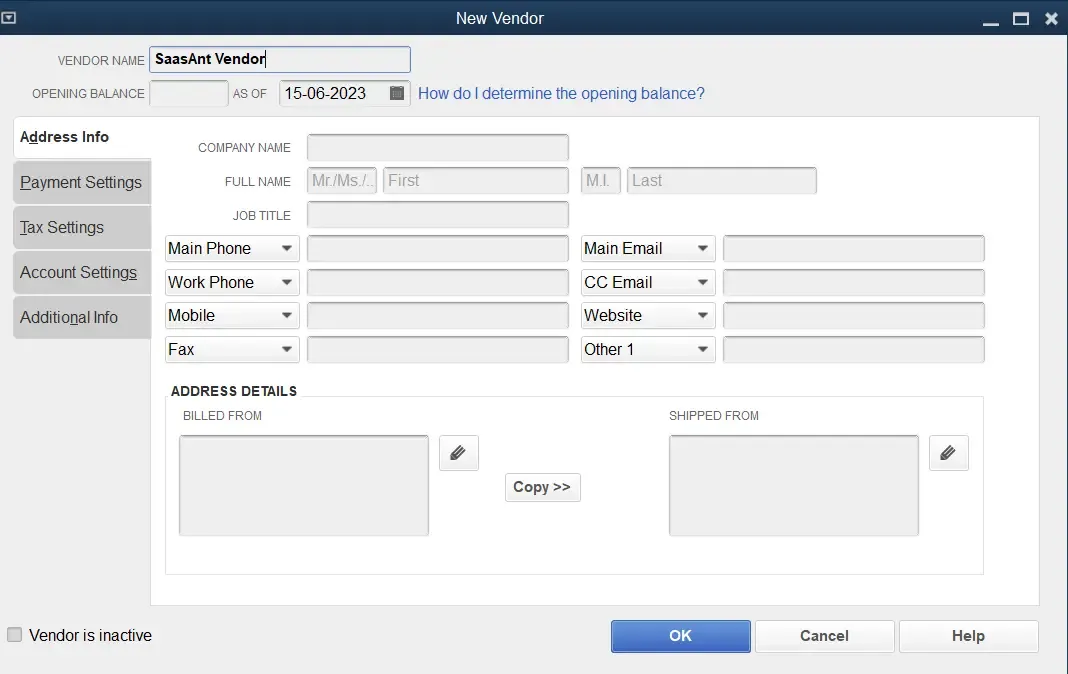
Save the Vendor Information - Click "OK" to save the vendor information.
To learn how to upload vendors into QuickBooks Desktop, refer to this guide.
Setting Up Class Tracking
Turn on Class Tracking - From the top menu, select "Edit" and then "Preferences." Select "Accounting" from the list on the left in the Preferences window, then select the "Company Preferences" tab. Check the "Use class tracking" box and click "OK."
![]()
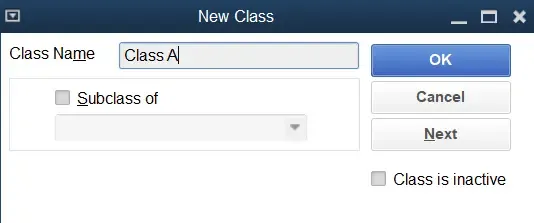
Add New Classes - Select "Lists" and "Class List" from the top menu. In the Class List window, click "Class" at the bottom left of the screen, then select "New." Enter a name for the class, then click "OK."
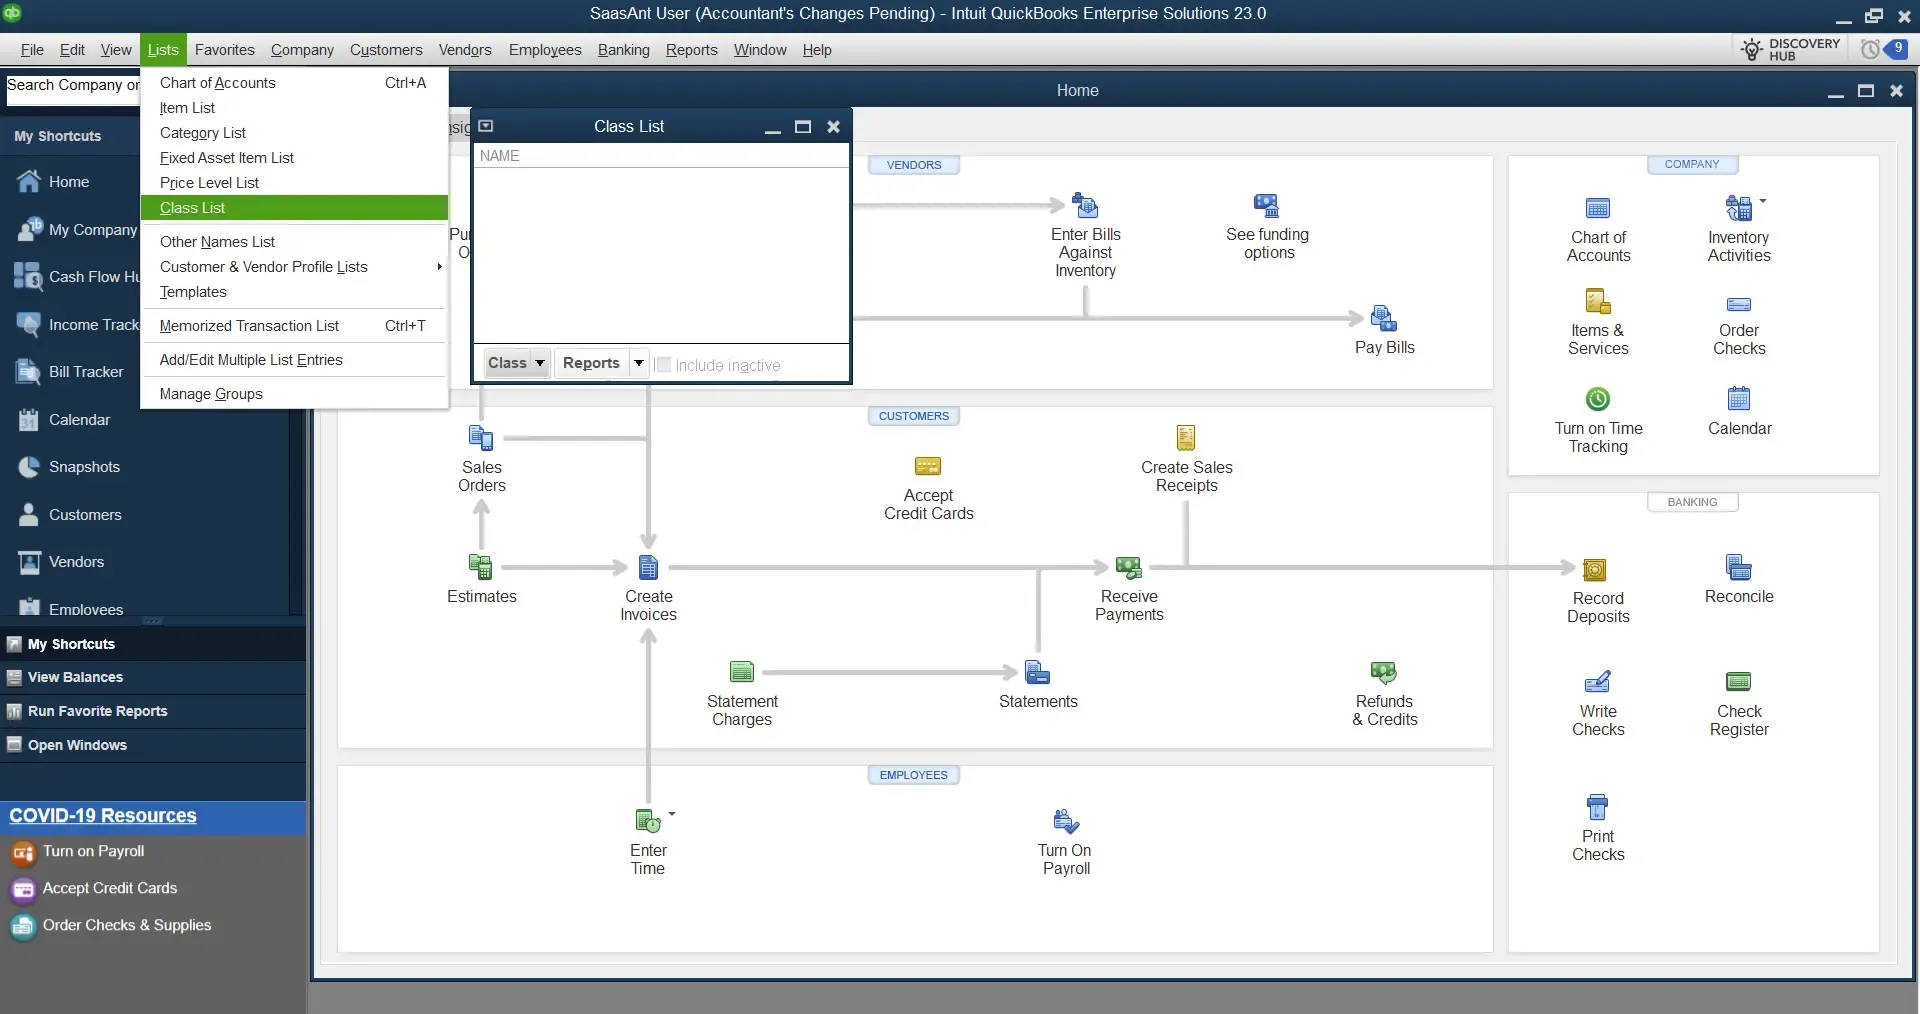
Use Class Tracking in Transactions - When you enter a transaction, you'll see a "Class" column where you can assign the appropriate class. This will help you track income and expenses in different categories (such as restaurant locations or departments).
![]()
Remember to save your work periodically and back up your data regularly to prevent any loss of information.
Frequently Asked Questions
What is QuickBooks, and how can it benefit restaurants?
QuickBooks is an accounting software developed by Intuit. It helps restaurant owners manage cash flow, track income and expenses, process sales tax efficiently, and collect vital data to make informed business decisions. QuickBooks Online, a cloud-based software version, can benefit restaurants, offering powerful reporting capabilities, customizable invoices, inventory management, and over 650 integrations.
What are the unique features of QuickBooks for restaurants?
QuickBooks supports various key operations for restaurants, such as credit payment processing (supports all major credit cards), integration with apps like Stripe, Square, Bill.com, and PayPal, and features that allow tracking income and expenses across different locations or classes. This software also provides live bookkeeping support, automated billing, and invoicing, allowing restaurant owners to generate comprehensive reports.
How can I set up QuickBooks for my restaurant?
Setting up QuickBooks for your restaurant involves several steps. These include creating company lists, adding customers, items (products or services), and vendors, and setting up class tracking. It's important to enter all necessary details accurately and to save your work periodically. Regularly backing up your data is also crucial to prevent any loss of information.
Can QuickBooks integrate with my point-of-sale (POS) system?
Yes, QuickBooks can integrate with various POS systems, which can help streamline your sales process. It can also sync with your bank account to automatically update your financial transactions.