QuickBooks Online Invoice Templates

Managing invoice templates in QuickBooks Online not only streamlines your billing process but also ensures your invoices reflect your brand’s professionalism and attention to detail. Here’s a detailed walk-through on how to create, customize, and manage your invoice templates in QuickBooks Online effectively:
Creating a New Invoice Template in QuickBooks Online
Navigate to Settings: Begin by accessing the Settings menu in QuickBooks, and select Custom form styles.
Initiate a New Template: Click on New style and choose Invoice to start crafting a fresh template. This is particularly useful for creating specialized templates like those needed for progress invoicing.
Naming Your Template: Give your template a distinct name, such as "Progress Invoice Template," making it easily identifiable for future use.
Design Your Template:

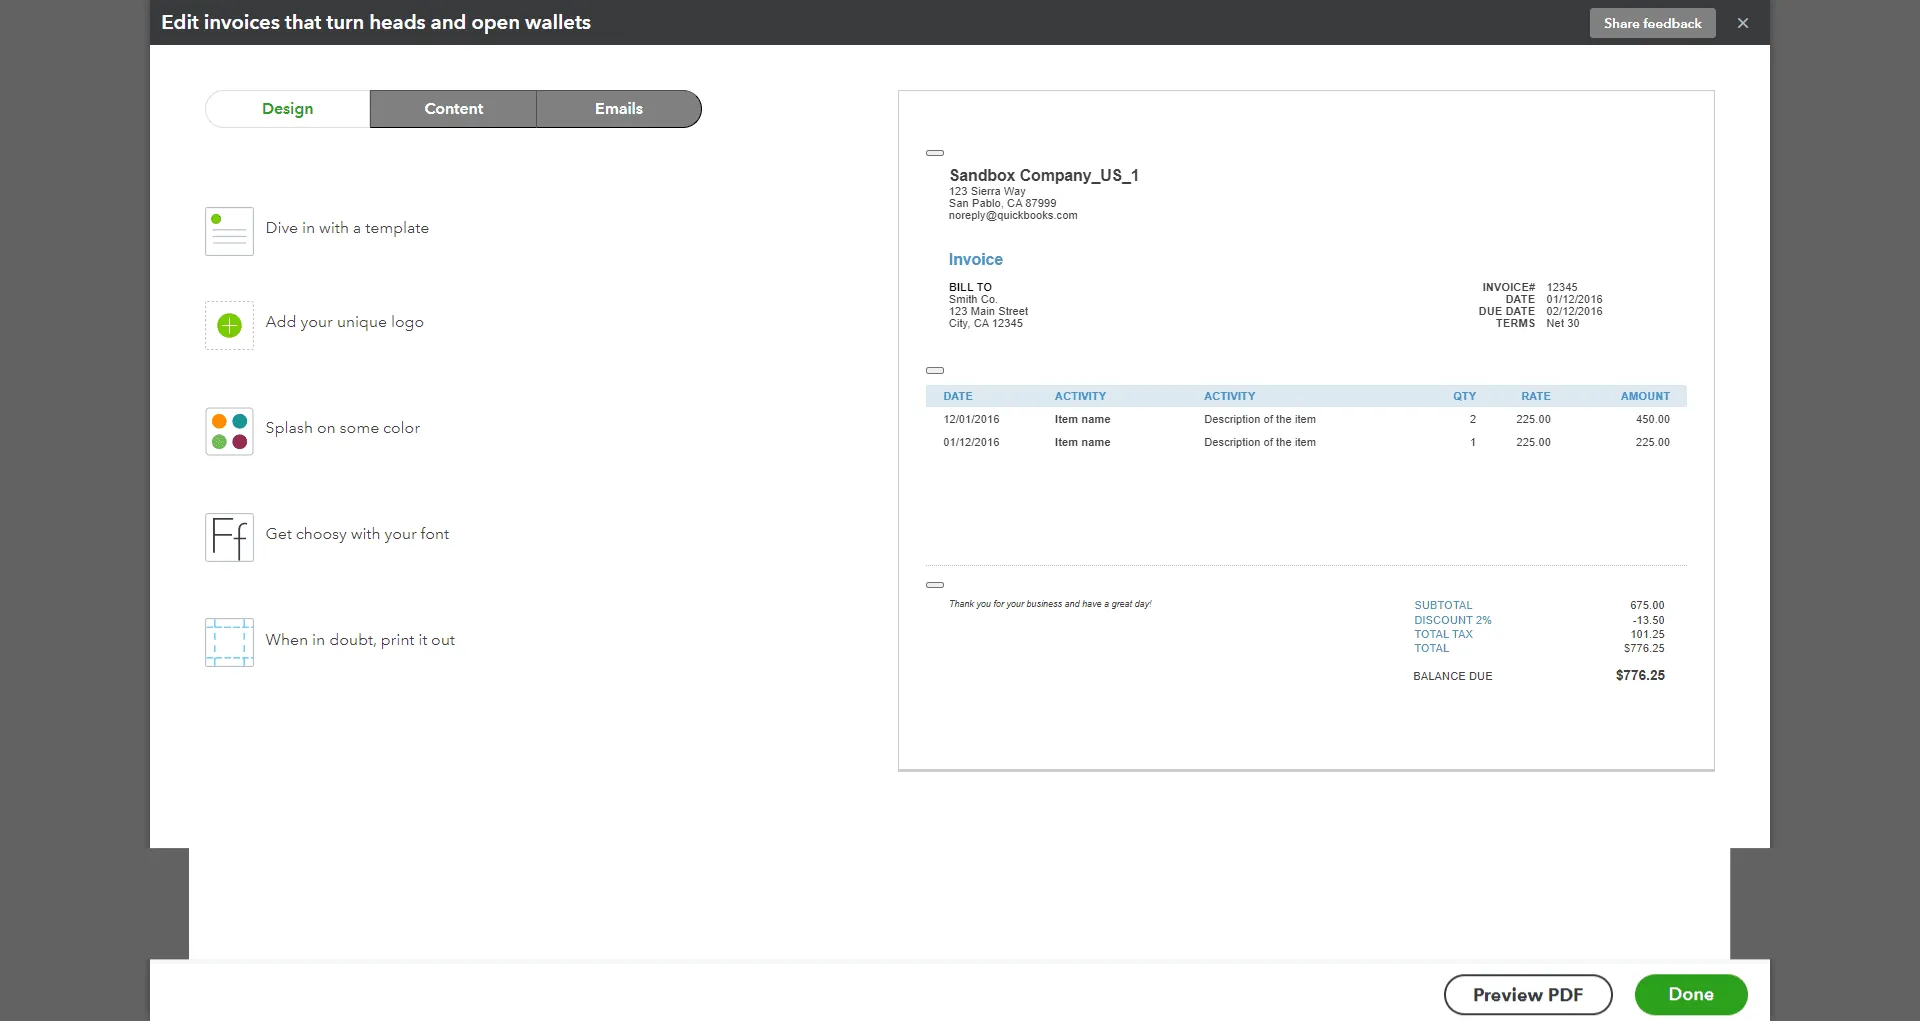
Under the Design tab, opt to Change up the template to customize the visual layout, or Dive in with a template to use a predefined style as your starting point.
Select the Airy new template, which is compatible with progress invoicing, ensuring functionality along with aesthetics.
Adjust Print Settings:
Navigate to Edit print settings. Make sure to deselect options like Fit to window envelope to prevent any print alignment issues.
Configure Content Settings:
Click Edit in the Content tab on the table section, where details like Activity, Rate, and Amount are listed.
Enable Show progress on line items to display detailed descriptions of each item on your progress invoices.
In the footer section, activate the Estimate summary option to include comprehensive details about the estimate and invoiced amounts.
Saving Your Template:
After customizing to your satisfaction, click Done to save your new invoice template.
Editing an Existing Invoice Template
Select a Template:
In Custom form styles, find the template you wish to modify and click Edit.
Implement Changes:
Modify the design, content, and settings as needed to suit your specific billing practices or client requirements.
Apply and Save Changes:
Confirm all adjustments by selecting Done, which will update your template immediately.
Setting a Default Template
For businesses frequently issuing progress invoices, streamline your workflow by setting your newly created template as the default:
Return to Custom form styles, find your template, click the dropdown menu next to it, and choose Make default.
Customizing Invoices and Estimates Directly
Access the Document:
Open an existing document or create a new invoice/estimate.
Activate Customization Options:
Turn on the Manage ⚙️ menu to access a suite of customization options.
Select Preferences:
Adjust fonts, colors, and layout to align the document’s appearance with your brand identity.
Save Your Settings:
Save these preferences to ensure consistency across all future documents.
Integrating Saasant Transactions for Enhanced Functionality
To further enhance your invoicing capabilities, consider integrating Saasant Transactions. This feature allows for the seamless import of invoice data into QuickBooks, facilitating bulk transactions and saving valuable time. It's an excellent tool for businesses looking to automate and optimize their financial operations.
Recommended reading:
Read also
How to Edit Invoice Template in QuickBooks Online
How to Import Invoice Templates to QuickBooks