How to Delete a Vendor in QuickBooks Online?
Managing vendor lists in QuickBooks Online is essential for keeping your accounting records clean and organized. However, as your business grows, you may need to delete outdated or redundant vendor entries. While QuickBooks Online does not allow bulk deletion automatically, applications like SaasAnt Transactions can simplify the process.
This blog will walk you through manually deleting a vendor in QuickBooks Online using SaasAnt Transactions.
Delete Vendor in QuickBooks Online: Quick Instructions
Log in to SaasAnt Transactions with Intuit credentials.
Go to 'Delete' > 'Initiate Cleanup.'
Select 'Ready to clean up' > 'Delete by Searching' > 'Next.'
Choose 'Vendors,' search by name/date, and click 'Search.'
Select vendors, click 'Delete,' and confirm.
How to Delete a Vendor in QuickBooks Online: Step-by-Step Guide
To delete multiple vendors efficiently in QuickBooks Online, ensure you're logged into QuickBooks and have connected SaasAnt Transactions. SaasAnt Transactions provides an intuitive interface to streamline the process.
Step 1: Log Into SaasAnt Transactions
Log into SaasAnt Transactions using your Intuit credentials. Select the company profile from which you want to delete the vendor list.
Step 2: Initiate Cleanup
Navigate to the 'Delete' option and choose 'Initiate Cleanup' to start the process.
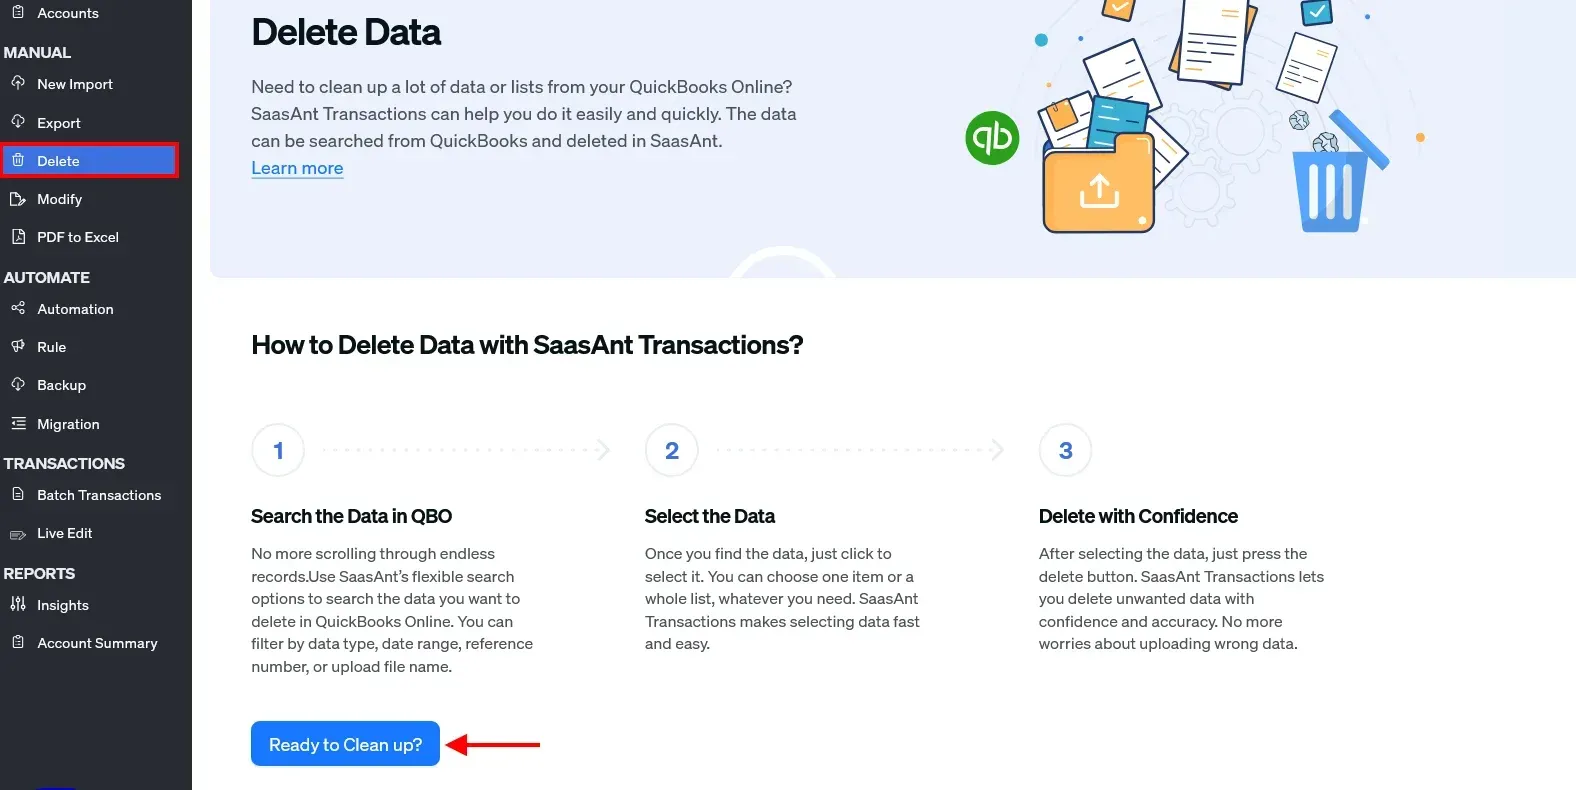
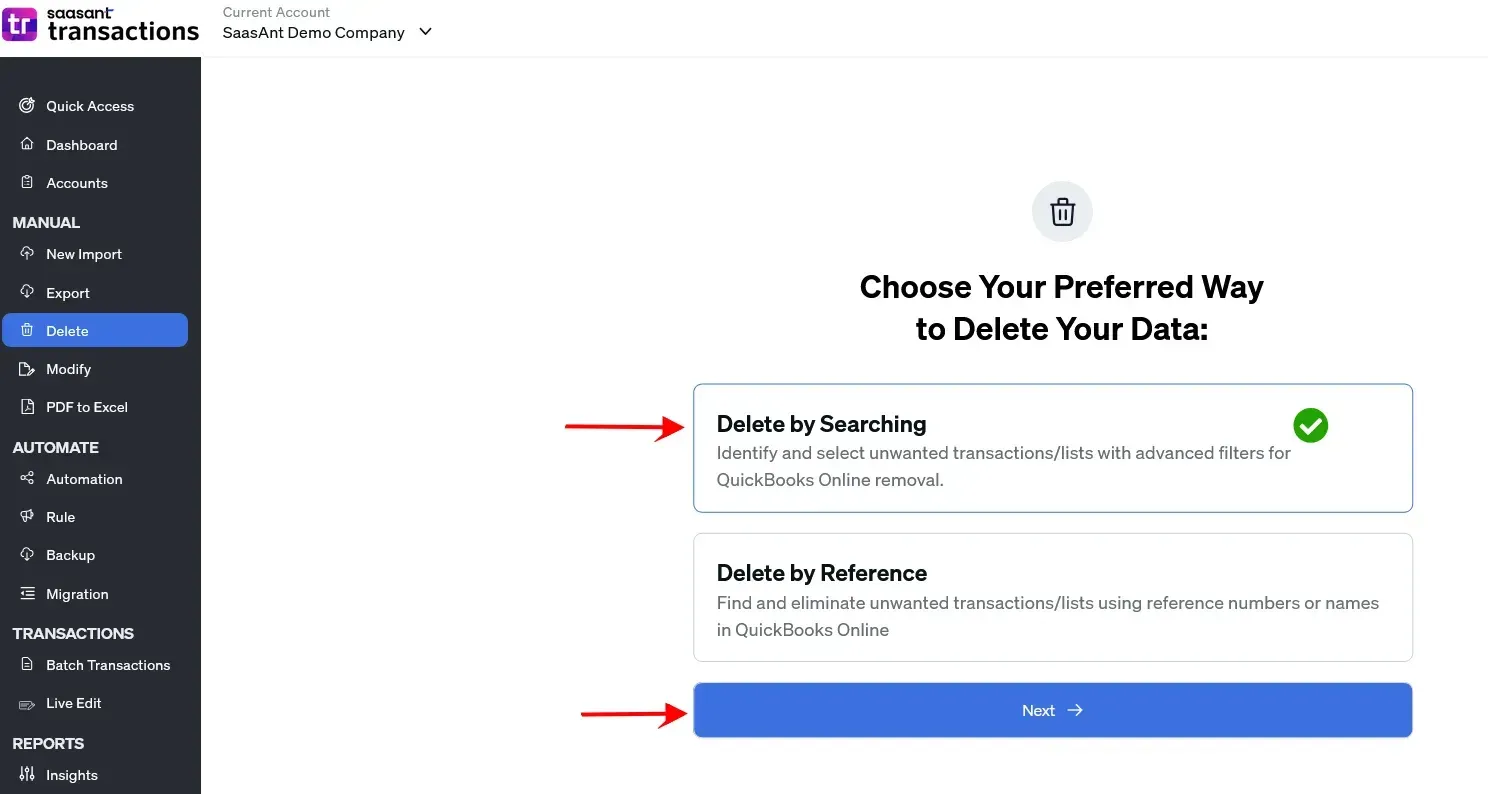
Step 3: Prepare for Deletion
Click on 'Ready to clean up,' then select 'Delete by Searching' and proceed by clicking 'Next.'
Step 4: Select Vendors
Choose 'Vendors' from the list dropdown. Opt for 'Search by Name' or 'Search by Creation Date,' select the appropriate criteria for the vendors you wish to delete, and hit 'Search.'
Step 5: Confirm Deletion
After selecting the vendors, click 'Delete' and then 'Ok' to confirm the deletion of the selected items.
Conclusion
Efficient vendor management is crucial for accurate accounting and smooth business operations. Whether you’re deleting a single vendor or cleaning up a large vendor list, QuickBooks Online and SaasAnt Transactions provide the tools you need. While QuickBooks handles individual vendor deletions, SaasAnt Transactions makes bulk deletion quick and easy.
FAQs
How to Import Vendor Lists into QuickBooks Online?
Access SaasAnt: Log in using your credentials.
Prepare for Import: Select 'Vendors' under the 'Import' section.
Ensure Correct Formatting: Data must be in CSV or Excel format.
Map Fields: Match file columns with QuickBooks fields.
Complete Import: Verify data and finalize the import.
How to Export Vendor List from QuickBooks Online?
Log into SaasAnt: Start your session.
Export Setup: Go to the 'Export' section and select 'Vendors.'
Filter Data: Apply filters like name or creation date.
Select Format: Choose CSV, Excel, or another format.
Download Data: Export and save the file.
How to Delete Vendor List in QuickBooks Online?
Connect SaasAnt: Link your QuickBooks account.
Initiate Cleanup: Select 'Initiate Cleanup' from the 'Delete' menu.
Choose Vendors: Search by name or date to select vendors.
Finalize Deletion: Confirm the action by clicking 'Ok.'
How to Edit Vendor Details in QuickBooks Online?
Access QuickBooks: Open your account.
Search for Vendor: Go to 'Vendors' and select the vendor to edit.
Edit Information: Update name, address, or other details.
Save Changes: Confirm updates are saved properly.
Recommended Reading: