Comprehensive Guide to User Roles and Permissions in Xero

Effectively managing user roles and permissions in Xero is crucial for ensuring your business's financial data is secure and operations run smoothly. This guide covers everything from logging in to managing user roles and troubleshooting common issues.
Contents
User Types and Login Process
Before diving into the specifics of user roles and permissions, it's important to understand how different users can access Xero. Whether you're an employee, a business owner, or an accountant, the process begins with logging into your account.
How Can Employees Log into Xero?
Employees need to access Xero to manage tasks and review financial information relevant to their roles. Here’s how they can log in:
Visit the Xero login page: Go to https://login.xero.com/.
Enter Credentials: Use the email address and password your employer provided.
Access the Dashboard: Click "Login" to view your personalized dashboard, where you can access tasks assigned to you.
For more details, check out Xero’s login page.
How Can I Log into My Xero Account as a Business Owner or Accountant?
Business owners and accountants have broader access to financial data and management tools in Xero. To log in:
Navigate to the Login Page: Visit https://login.xero.com/.
Enter Your Details: Type in your registered email address and password.
Access Your Account: Click “Login” to enter your Xero dashboard where you can manage your business's financial activities.
Detailed instructions are available on Xero’s How to log in page.
Understanding User Roles
User roles in Xero determine the access level to various features and data within the software. Understanding these roles will help you assign the correct permissions to each user.
What Are the Key Responsibilities and Access Levels of an Advisor?
Advisors play a critical role in financial management and decision-making. They have access to a wide range of financial data and client accounts, enabling them to manage and advise on financial matters effectively. They can view financial reports, access client accounts, and utilize advisory tools.
Learn more about the advisor role at Advisor user role on Xero’s website.
What Can Standard and Payroll Admin Users Do?
Standard Users: Standard users handle daily accounting tasks, such as managing invoices, bills, and viewing bank transactions.
Payroll Admins: Specialized in payroll, these users manage processes including setting up employee details and running payroll reports.
Further details can be found at Standard and Payroll Admin access.
Granting and Managing Access in Xero
Ensuring the right people have the right access is fundamental to securing your financial data and streamlining operations.
How Do I Give Staff Access to Xero?
To give staff access to Xero, follow these steps:
Log in as an Admin: Access your Xero account with administrative rights.

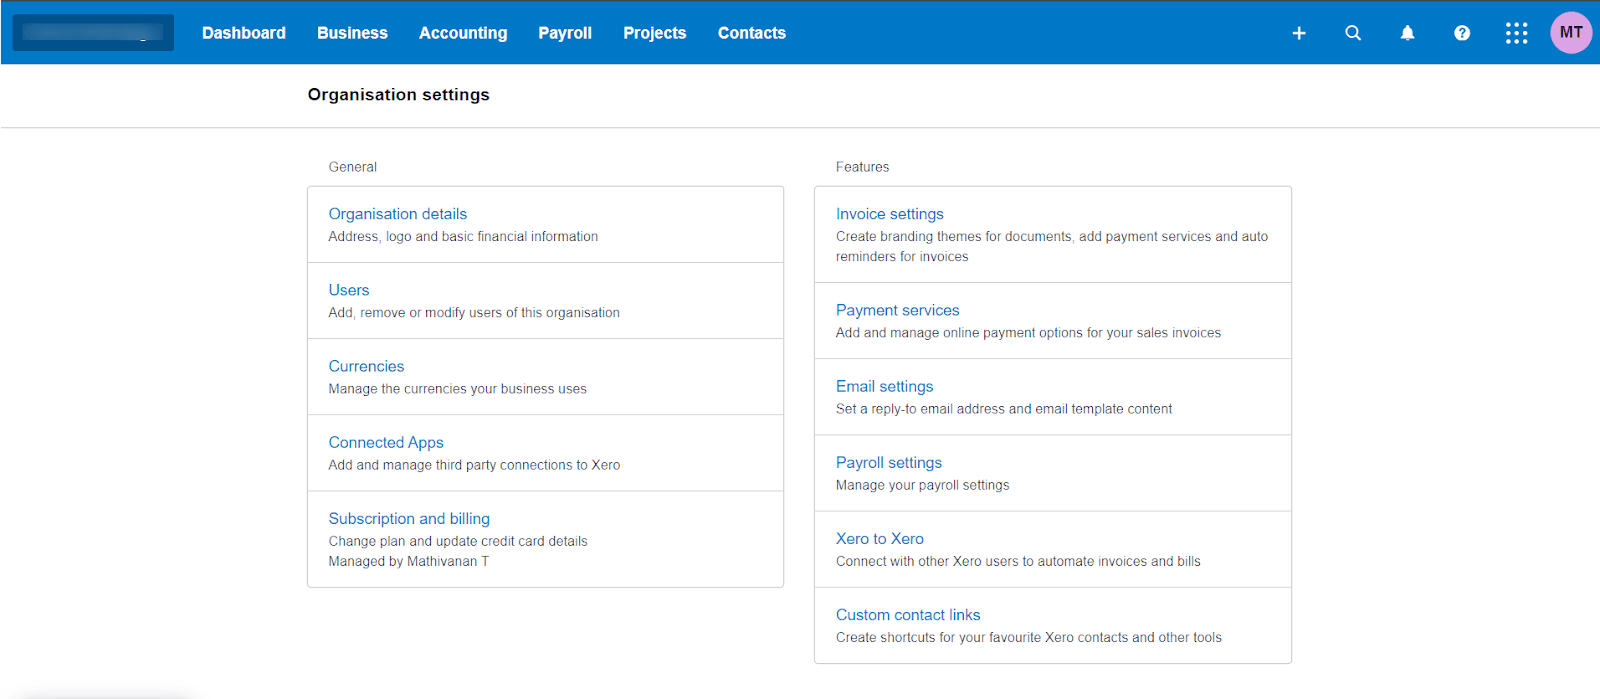
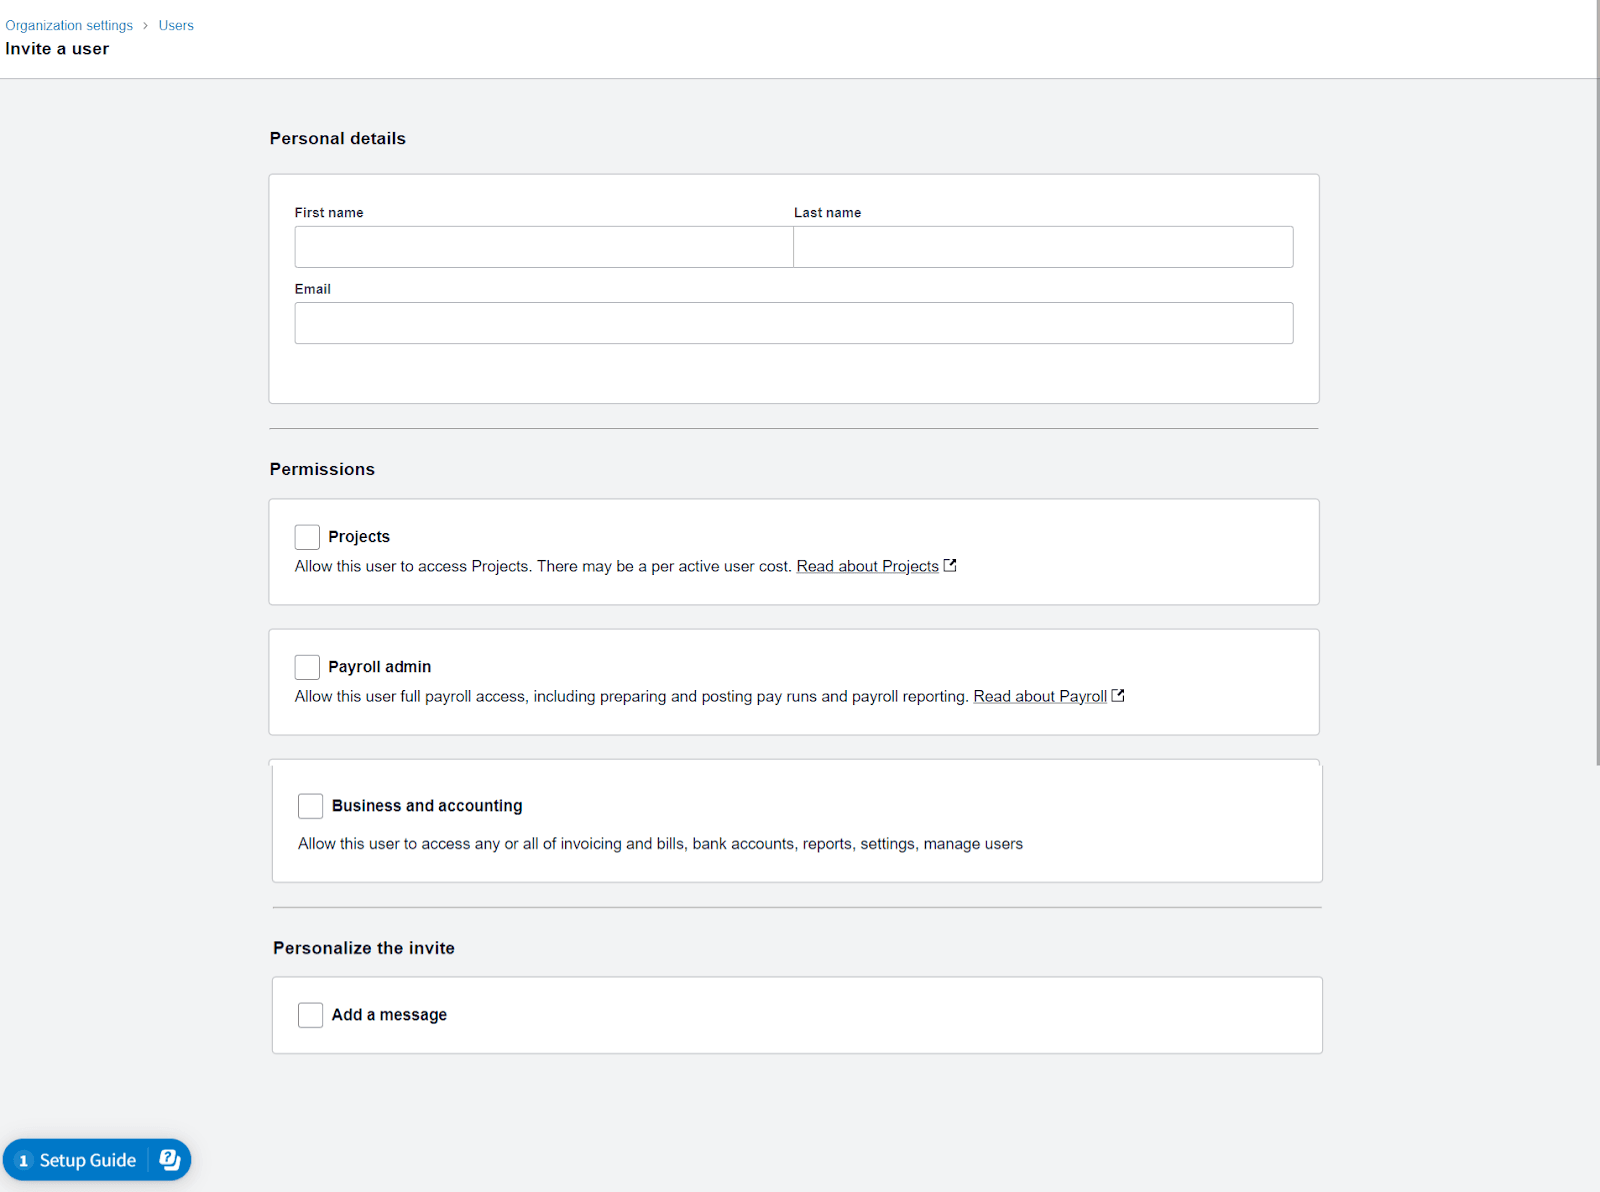
Navigate to Settings: Select “Users” from the settings menu and click on “Invite a User.”

Set Up Access: Enter the new user’s email address, assign their role (e.g., Advisor, Standard User), and send the invitation to join.
For a step-by-step guide, see Add a new user.
How Do I Invite Employees to Xero Timesheets?
Access Payroll Section: In your Xero dashboard, go to the “Payroll” then “Employees” section.
Send Timesheet Invitations: Choose the relevant employee and click “Send Invitation” to grant them access to their timesheets.
Detailed information can be found in Invite employees to My Payroll.
Client Access and Collaboration
Effective collaboration with clients is key to maintaining a successful business relationship. Xero facilitates this through its client portal.
Does Xero Offer a Client Portal for Secure Document Sharing?
Yes, Xero provides a client portal for secure document exchange and collaboration. This feature facilitates seamless and secure sharing of financial reports and documents with clients.
Discover the functionalities at Client collaboration in Xero.
How Do I Set Up a Client in Xero?
Open Contacts: From your Xero dashboard, select “Contacts.”
Add a New Client: Click “Add Contact,” fill in the client’s details, and save. This setup enables invoicing and financial tracking for the client.
For setup details, visit [ Add and manage contacts](https://central.xero.com/s/article/Add-and-manage-contacts).
Troubleshooting and FAQs
Even with a robust system like Xero, users may encounter issues. Having a clear understanding of how to troubleshoot common problems can save time and prevent frustration.
What Should I Do If a User Can't Log In After Being Invited?
Check the user's email address for the invitation and ensure it hasn’t been caught in spam filters.
Verify the invitation hasn't expired; if it has, send a new one.
Guide the user to reset their password if they have forgotten it.
For more troubleshooting tips, visit Troubleshooting login issues.
FAQs for New Xero Users
Q: How do I choose the right user role when setting up new users in Xero? A: Consider the level of access and responsibility required for the user's role in your business. Assign roles accordingly, such as Advisor for financial oversight, Standard User for daily tasks, and Payroll Admin for payroll management.
For detailed guidance, refer to Understanding user roles in Xero.
Q: Can I change a user's role after I have set them up? A: Yes, user roles can be modified to reflect changes in responsibilities or access needs. Update roles through the 'Settings' menu under 'Users.'
More information is available in Change a user’s role.
Q: What should I do if I encounter issues while using Xero? A: Utilize Xero’s Help Center for troubleshooting guides and support. For immediate assistance, contact Xero’s support team or use community forums for advice.
Explore Xero’s support resources at Xero Central.
Conclusion
This comprehensive guide is designed to equip new Xero users, especially business owners and accountants, with the knowledge to effectively manage user roles and permissions. Understanding the login process, responsibilities of different user types, and how to manage and troubleshoot common issues ensures a secure and efficient financial management system within Xero. You can also try out the appstore which has applications that can help you simplify your bookkeeping like SaasAnt Transactions.