How to Delete Chart of Accounts in QuickBooks Online
Suppose you’re looking for how to delete Chart of Accounts from QuickBooks Online. In that case, you may have reasons like duplicate accounts or accounts that serve the same purpose, outdated entries, or the need for simplification or reorganization. But QuickBooks Online doesn’t allow permanently deleting accounts; you can only make them inactive.
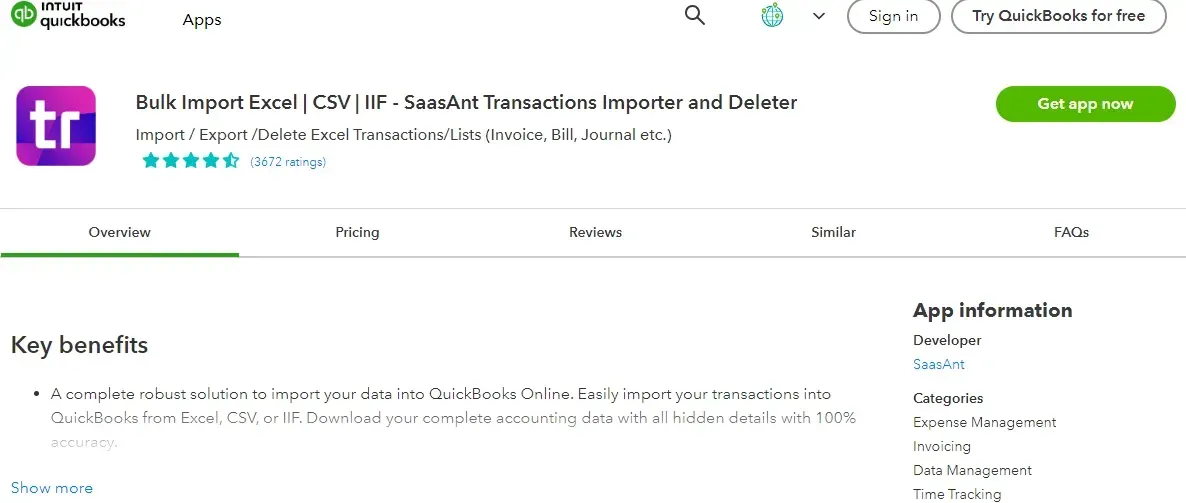
But there is still a way to delete chart of accounts in QuickBooks Online. You have to integrate SaasAnt Transactions. The application has advanced filter and search functionality, and it only lets you delete accounts not linked to any products or service so you can maintain the integrity of your financial data. With a 5-star rating from over 4000 users, SaasAnt Transactions is a trusted application. This blog will guide you on how to delete the Chart of Accounts in QuickBooks Online and make them inactive if needed.
Pro tip: It's best if you export chart of accounts before deleting to ensure you have a backup of your financial data and can easily restore any necessary accounts if needed in the future.
Contents
What is Chart of Accounts in QuickBooks?
Delete Chart of Accounts in QuickBooks Online - Quick Instructions
Delete Chart of Accounts in QuickBooks Online: Step-by-Step Instructions
Conclusion
FAQ
What is Chart of Accounts in QuickBooks?
QuickBooks chart of accounts (COA) lists the account names used to record financial transactions. These accounts are categorized into major groups: Assets, Liabilities, Equity, Expenses, and Income. Assets represent resources owned by the business, while Liabilities are the company's debts. Equity means the owner's investment in the industry, including Retained Earnings (accumulated profits). Expenses are the costs incurred to generate income, such as Bank Charges. Income accounts track revenue earned from business operations. An uncategorized Asset is a placeholder for accounts that don't fit neatly into other asset categories.
Delete Chart of Accounts in QuickBooks Online - Quick Instructions
You can get started with a 30-day free trial immediately.
Connect SaasAnt Transactions with QuickBooks
Select the entity as ‘Accounts.’
Use the advanced filter to search.
Bulk delete.
Delete Chart of Accounts in QuickBooks Online: Step-by-Step Instructions
Here are the easy steps to delete chart of accounts in QuickBooks Online. First, sign up for SaasAnt Transactions, a 30-day free trial with no required credit card details.
Step 1: Connect with SaasAnt Transactions
Find SaasAnt Transactions in the QuickBooks App Store and connect it to your QuickBooks account. This certified, secure app keeps your data safe and well-managed.
Step 2: Filter by Date
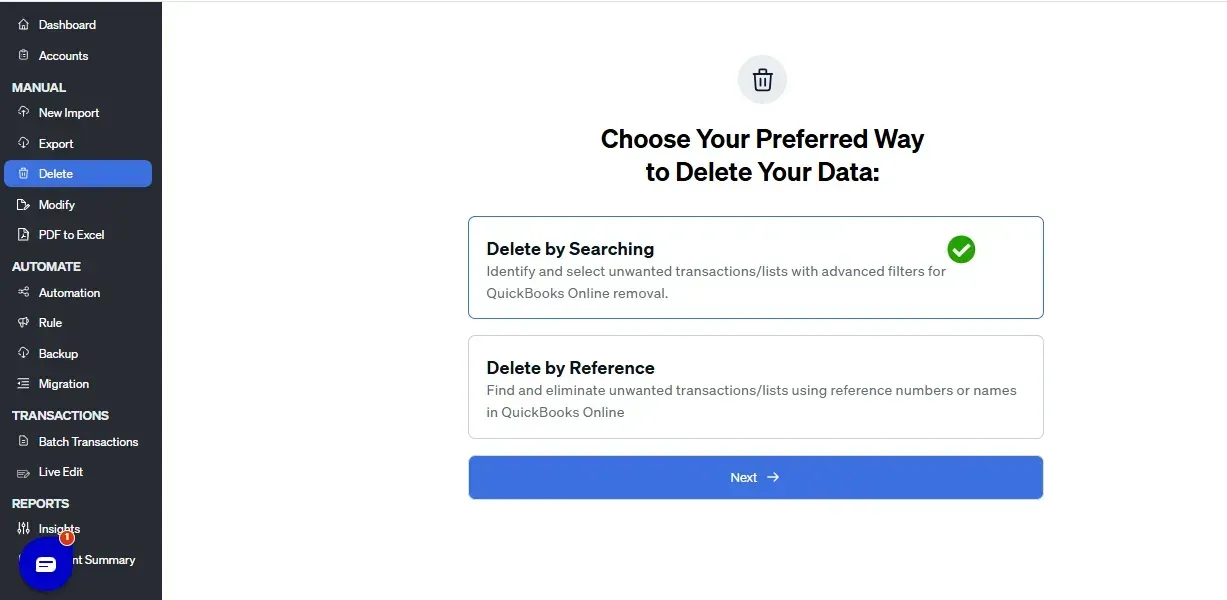
Go to SaasAnt Transactions Dashboard -> Delete.
Select ‘delete by searching’ if you want to delete using date type and date range. Select whether you want to delete based on the created date, transaction date, or last updated date, and select a date range. If you're going to delete chart of accounts in QuickBooks Online based on reference number, select ‘delete by reference.’
Step 3: Initiate the Search
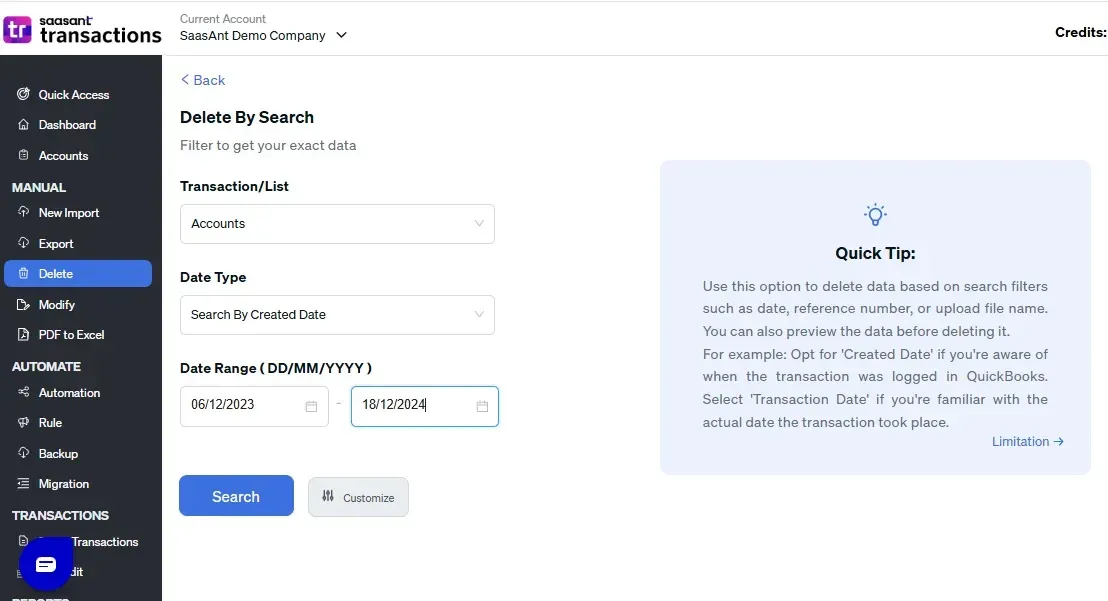
Choose ‘Accounts’ from the transaction/list drop-down and set the date range for the created transaction or the last updated date.
Step 4: Bulk Delete
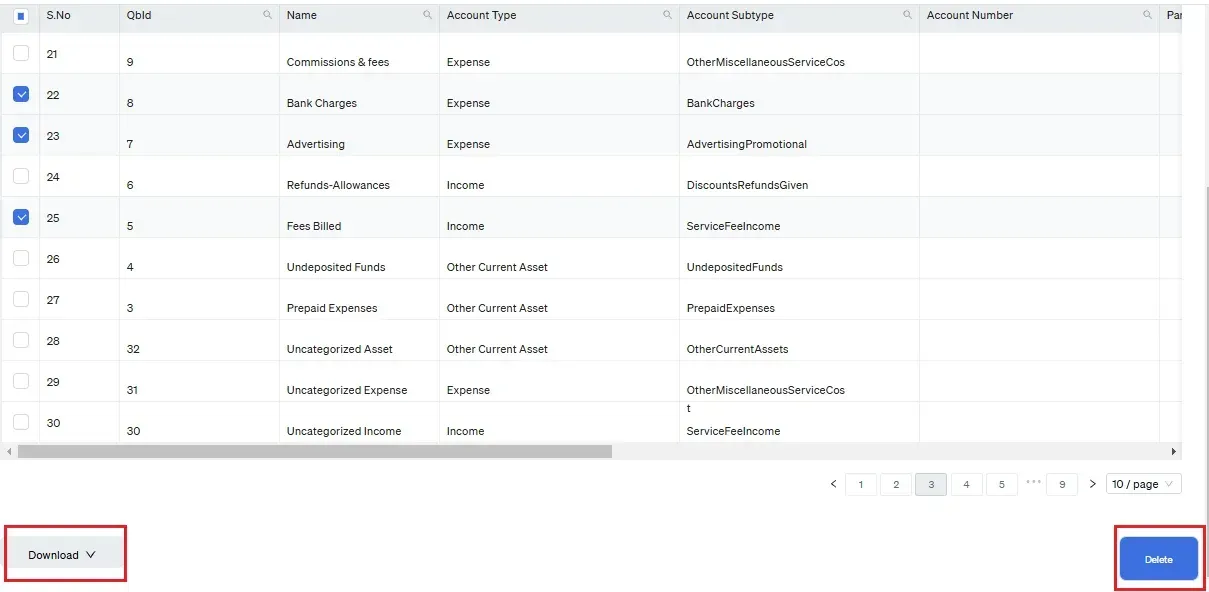
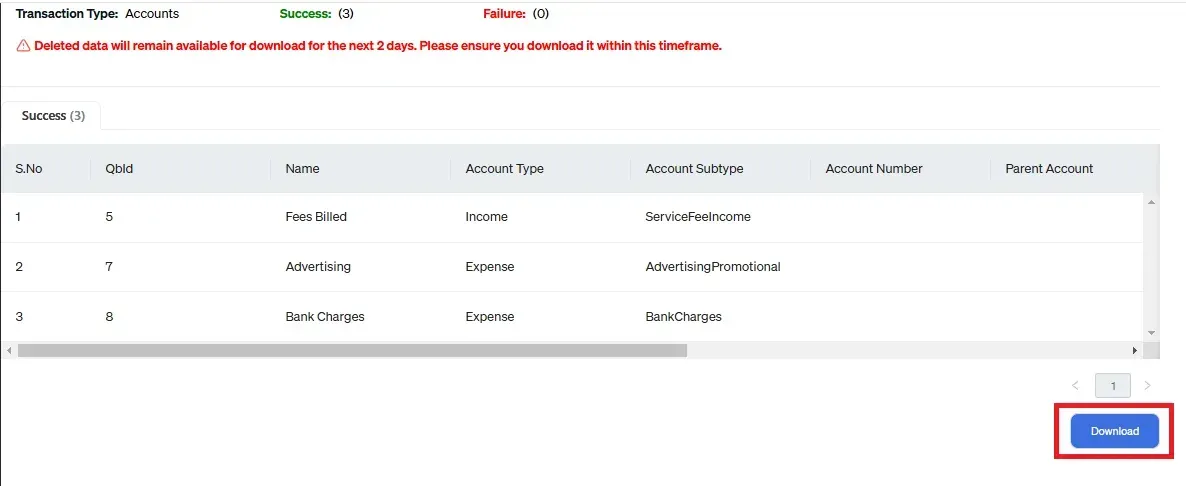
A list of ‘Accounts’ for the chosen date type and range will be displayed. Click on delete. You can also uncheck a particular check box if you wish not to delete it. You can update the filter again if needed using the update filter option at the top right corner of the screen.
Note: Always back up your accounts before deleting them using the download button.
Step 5: Confirm Deletion Eligibility
The selected accounts will be successfully deleted if not linked to products or services.
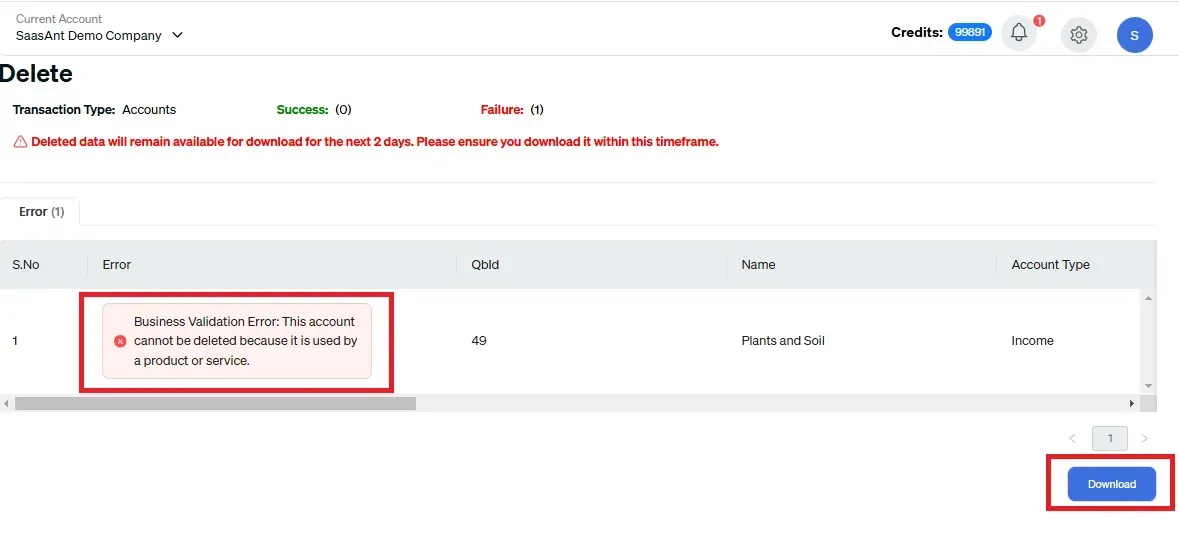
Step 6: Handle Linked Accounts
However, if they are linked, SaasAnt Transactions will display a Business Validation error message stating, “This account cannot be deleted because a product or service uses it.” This ensures that your financial data remains accurate and intact.
How to Make Chart of Accounts Inactive in Quickbooks Online?
If you may need to use an account again or if it is linked to a product or service, you cannot delete the chart of accounts. However, you can make the account inactive, effectively removing it from your active list while preserving its data for future reference.
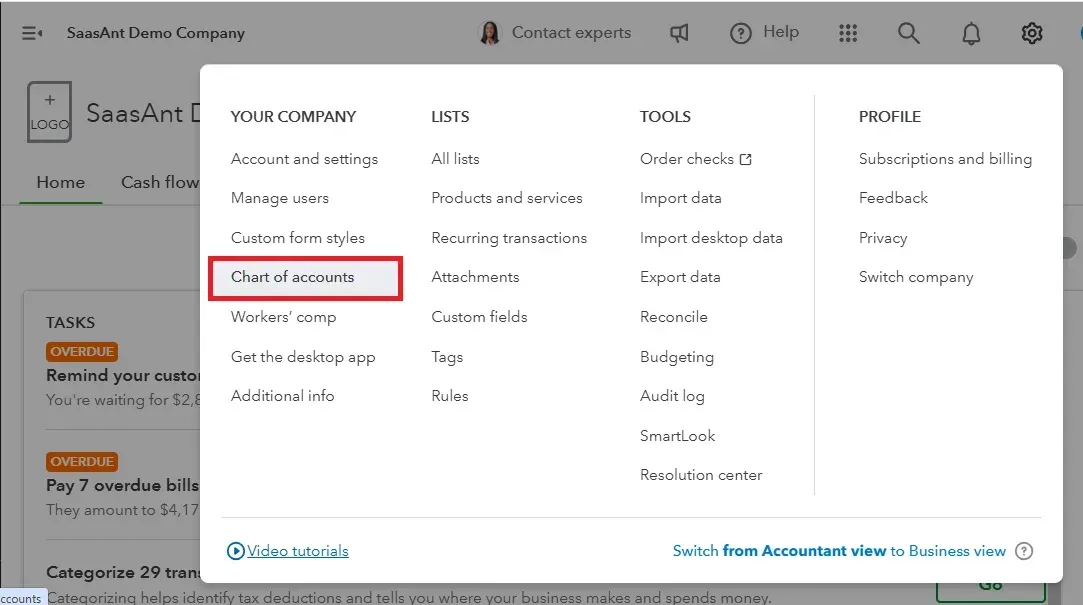
Step 1: Click on the gear icon in the upper right corner of the screen and select ‘Chart of Accounts.’
Step 2: A list of accounts will appear. You can use the search bar to find a specific account. Click the drop-down arrow in the Action column, then select ‘Make Inactive.’ This option is available for accounts not linked to any product or service.
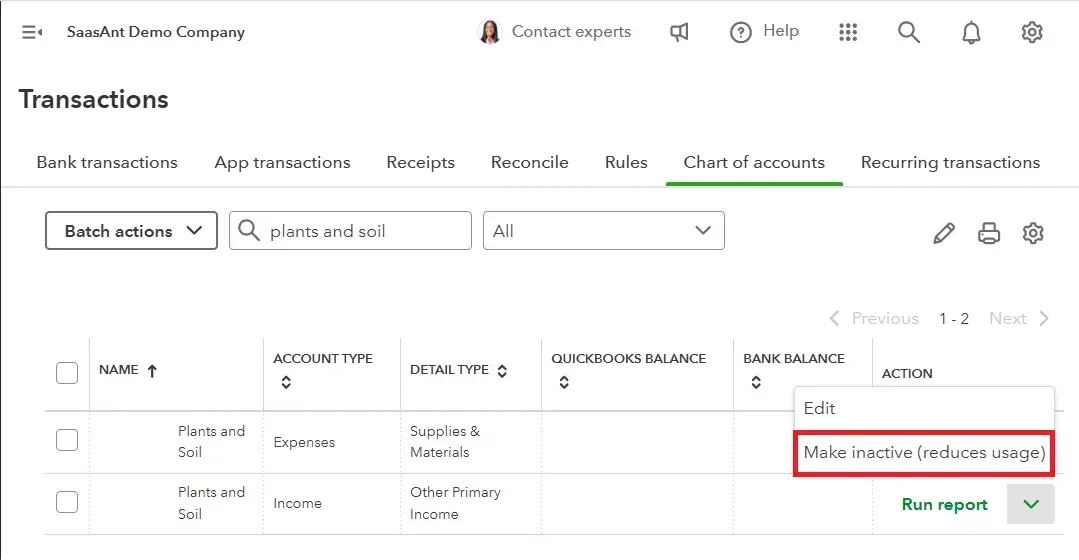
Note: You can quickly reverse this action by searching for the account again and clicking ‘Make Active’ in the Action column.
Conclusion
We’ve explored how to delete chart of accounts in QuickBooks Online using SaasAnt Transactions. This powerful application addresses the limitations of QuickBooks by offering advanced filters that allow you to delete multiple accounts at once, making the process quick, accurate, and efficient. Additionally, for a QuickBooks Online delete account, you can get started immediately with a 30-day free trial, and there’s no requirement to provide credit card information.
Recommended reading:
How to download Chart of Accounts from QuickBooks
FAQ
How do I delete the chart of accounts on QuickBooks Online?
Integrate SaasAnt Transactions by going to the Dashboard and selecting "Delete." Choose "delete by searching" to remove accounts based on date type and range. Select "delete by reference," choose "Accounts," and set the date range for reference number deletion. A list of accounts for the selected filter will be displayed, and you can delete them.
Can you delete chart of accounts in QuickBooks Online?
Yes, you can delete the chart of accounts in QuickBooks Online that are not linked to any products or services using SaasAnt Transactions. Go to the Dashboard and select "Delete." Choose "delete by searching" for accounts based on date type and range. Select "delete by reference," choose "Accounts," and set the date range for reference number deletion. A list of matching accounts will be displayed for deletion.
How to make a chart of accounts inactive in QuickBooks Online?
Click the gear icon in the upper right corner and select "Chart of Accounts." Use the search bar to find a specific account. In the Action column, click the drop-down arrow and select "Make Inactive." This option is available for accounts not linked to any product or service. To reverse, search for the account and click "Make Active."
How do I clean up my chart of accounts?
You can delete the chart of accounts in QuickBooks Online that are not linked to any products or services using SaasAnt Transactions. Go to the Dashboard and select "Delete." Choose "delete by searching" for accounts based on date type and range. Select "delete by reference," choose "Accounts," and set the date range for reference number deletion. A list of matching accounts will be displayed for deletion.
How to delete an account from chart of accounts in QuickBooks Online?
You cannot delete an account from chart of accounts in QuickBooks Online; you can only make it inactive. If you still need to delete an account permanently from QuickBooks you can integrate SaasAnt Transactions and use its advanced filter, such as delete by reference number or delete by choosing a date range.
How to find inactive chart of accounts in QuickBooks Online?
To find inactive chart of accounts in QuickBooks Online, go to gear icon -> Chart of accounts -> Chart of accounts will be displayed -> Click on the gear icon to the right of the printer icon -> check off the box “include inactive.”
How to Import chart of accounts in QuickBooks?
To import chart of accounts in QuickBooks, integrate SaasAnt Transactions with QuickBooks. Go to SaasAnt Transactions dashboard -> New Import -> accounts -> Browse and select the file -> Map the fields in the file to QuickBooks fields -> Upload the file to import accounts into QuickBooks.
How to Export chart of accounts from QuickBooks?
You can export chart of accounts from QuickBooks using SaasAnt Transactions. Integrate SaasAnt Transactions with QuickBooks -> select the entity as accounts to export -> search for accounts based on the created date or transaction date -> enter a date range and choose whether you want to download it in .XLSX or .CSV format.
How to create chart of accounts in QuickBooks?
To create a chart of accounts in QuickBooks Online, navigate to Settings and select Chart of Accounts. Click New, enter the account name, choose the account type and Detail type, and check "Make this a subaccount" if applicable. Enter the Opening Balance and starting date. To make it easier, you can use the automated import feature of SaasAnt Transactions rather than creating one by one.
How to edit chart of accounts in QuickBooks Online?
To bulk edit chart of accounts in QuickBooks, integrate SaasAnt Transactions. Export the chart of accounts, edit the downloaded file, and use the modify feature to update the existing records.