How to Export Vendor Lists in QuickBooks Online?
Exporting the vendor list from QuickBooks is essential for maintaining accurate records, sharing data, or migrating systems. This blog will help you learn how to export vendor lists from QuickBooks Online.
Export Vendor List in QuickBooks Online: Quick Instructions
Follow these steps to export the vendor list from QuickBooks Online quickly:
Log in to your QuickBooks Online account.
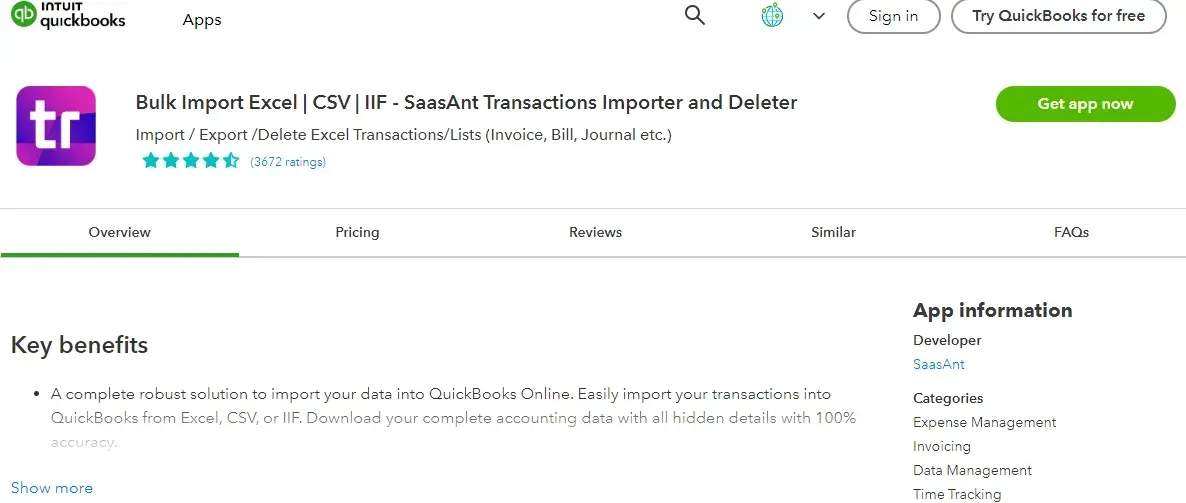
Navigate to the ‘Apps’ tab and find ‘SaasAnt Transactions.’
Connect SaasAnt Transactions with your QuickBooks Online account.
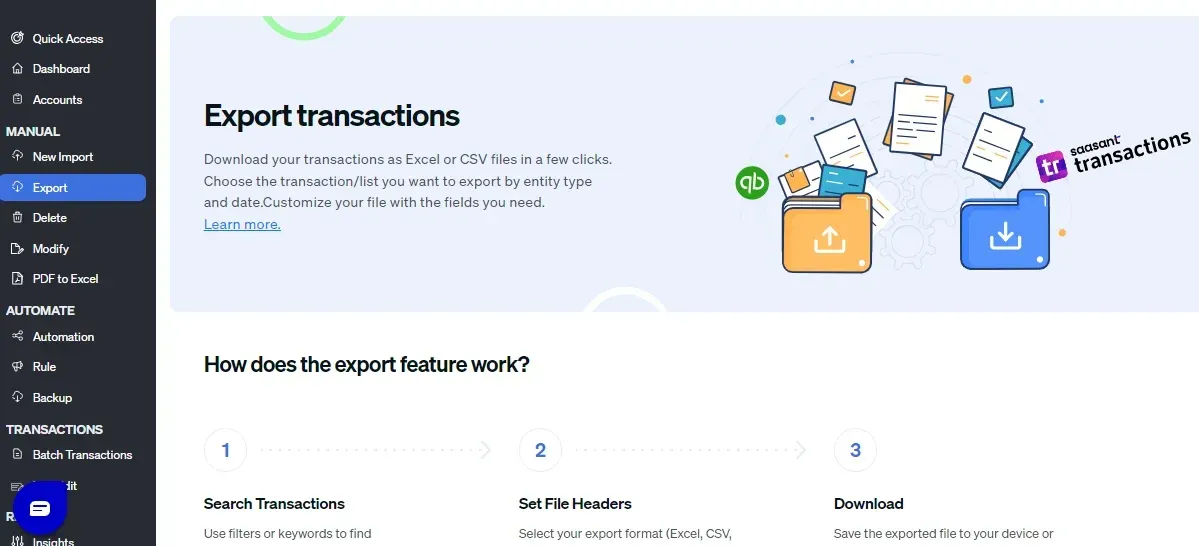
Click ‘Export’ in the left menu to begin the export process.
Select the specific date range as per your requirements.
Choose the entity as ‘Vendors.
Click the ‘Search’ button and download the vendor list in Excel or CSV format.
How to Export Vendor List in QuickBooks Online: Step-by-Step Guide
Follow the below-given steps to export vendor lists in QuickBooks Online:
Step 1: Log in to QuickBooks
Access QuickBooks Online by entering your login credentials.
Step 2: Navigate to the Report Section
Click on the Reports tab in the left menu.
Select ‘Vendors’ to view the complete vendor list.
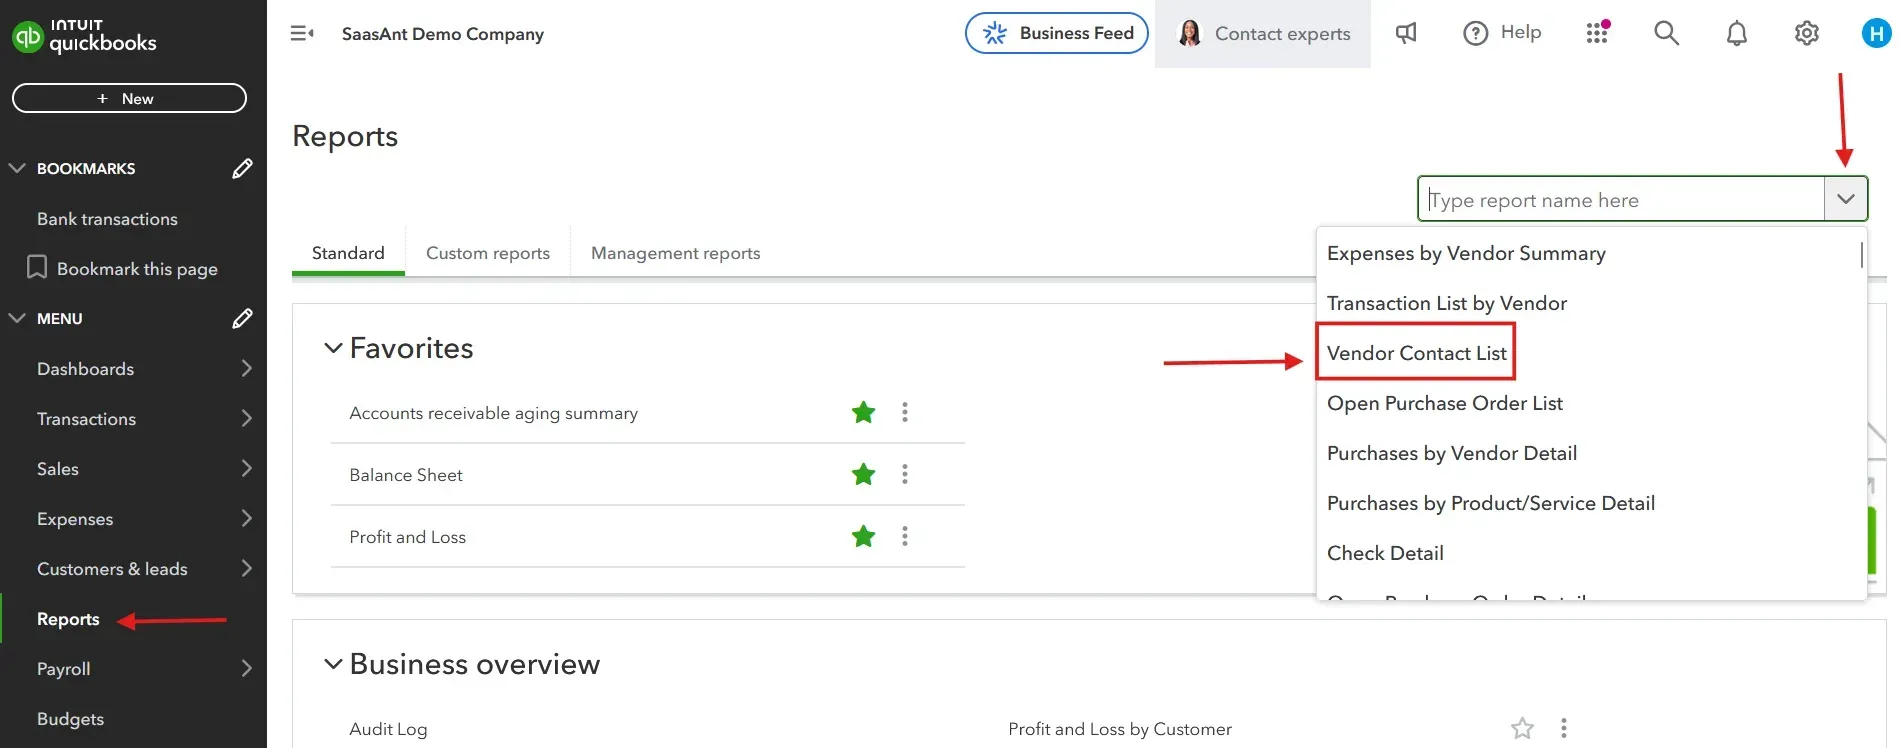
Step 3: Open the Export Option
Look for the Export dropdown menu and click the Export button. Then, export the data in Excel format for easy understanding.
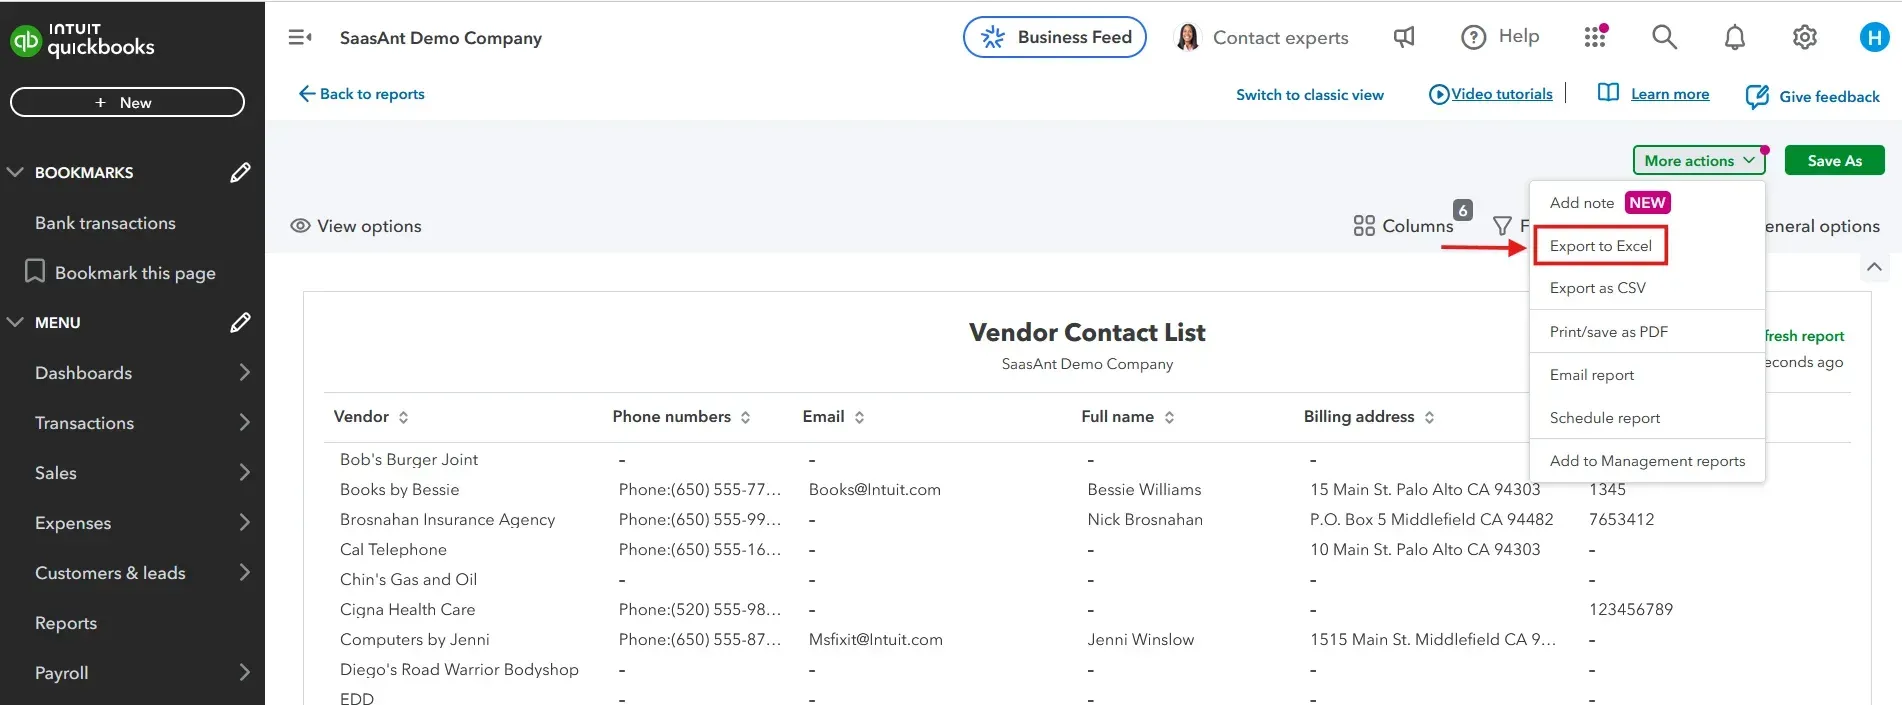
Step 4: Verify the Exported File
Open the downloaded file to ensure all necessary data has been exported correctly.
Export Vendor List from QuickBooks Online
Follow the below-given steps to export the vendor lists using SaasAnt Transactions:
Step 1: Connect SaasAnt Transactions
Visit the QuickBooks App Store and connect SaasAnt Transactions to your QuickBooks account. SaasAnt Transactions is a certified app that ensures secure and organized data handling.
Step 2: Access SaasAnt Transactions Dashboard
Go to the dashboard, click ‘Export,’ and choose ‘Exports’ from the dropdown menu.
Step 3: Apply Filters
Select a date filter such as transaction date, created date, or last updated date. Specify the date range and mapping template.
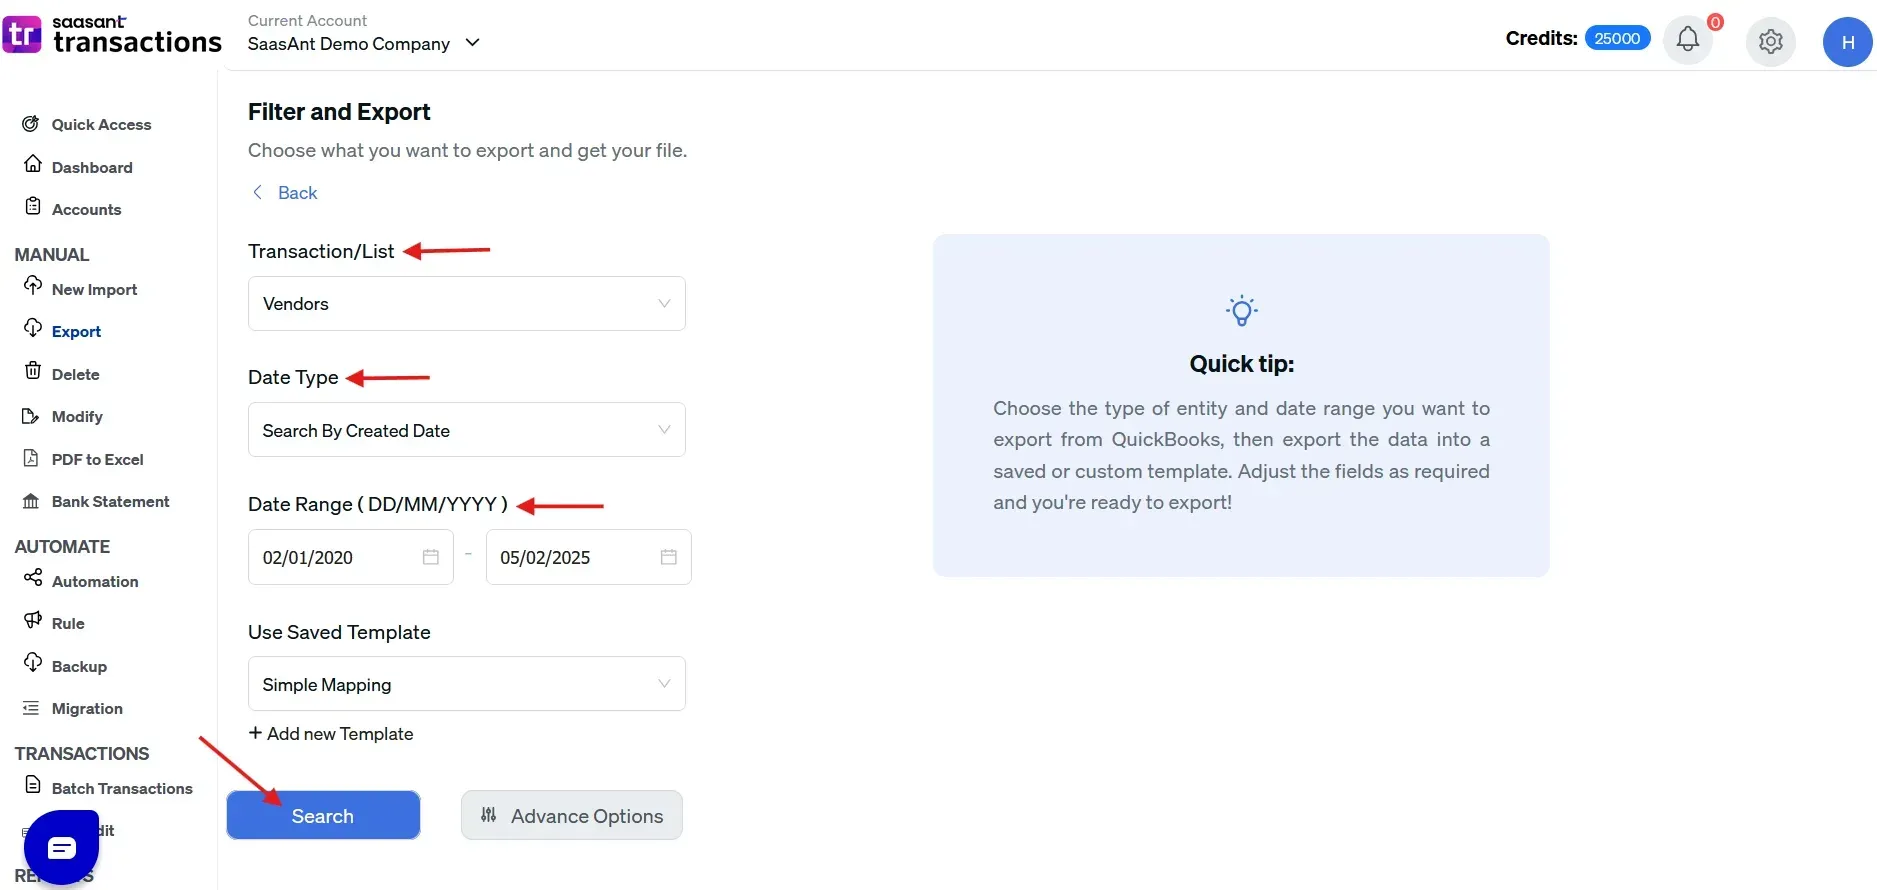
Step 4: Search and Export
A list of vendor entries matching your search criteria will appear. Click ‘Download’ and choose your preferred format, either .xlsx or CSV.
Step 5: Access the Exported File
Check your downloads folder to find the exported vendor list.
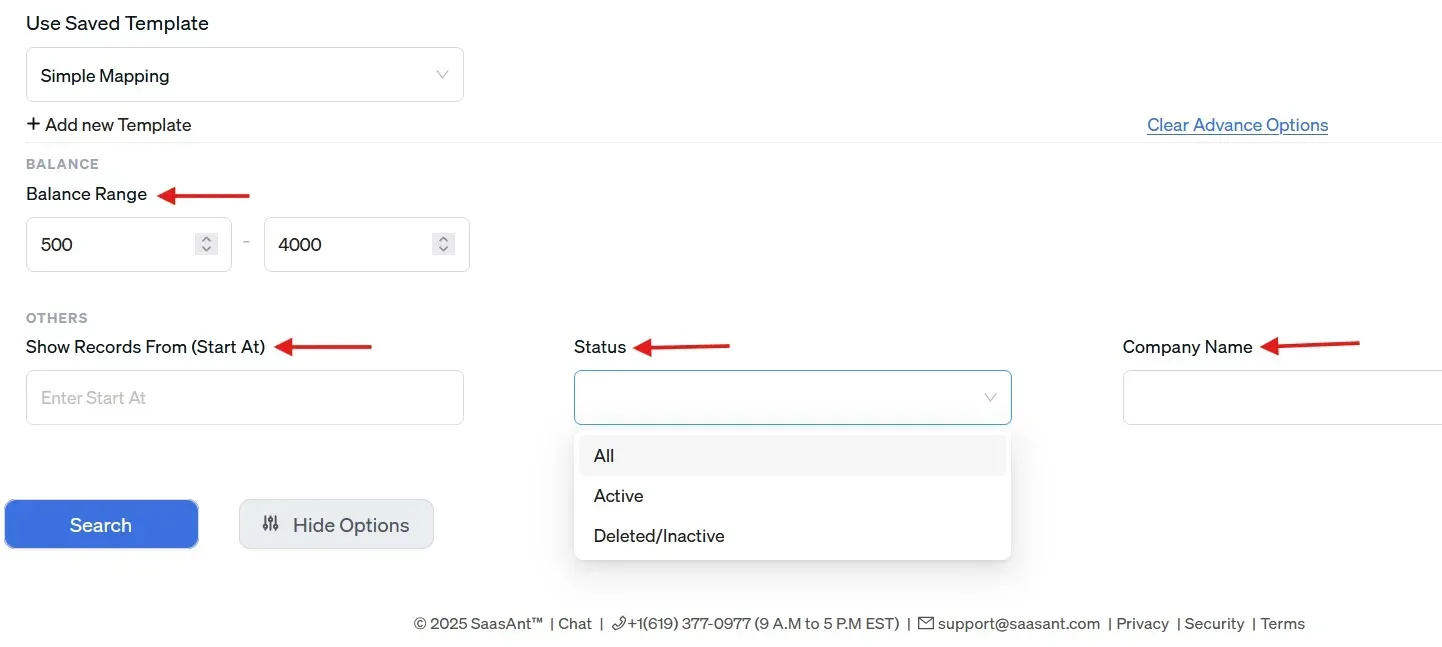
Step 6: Advance Options
In SaasAnt Transactions, you can also use advanced options while exporting ‘vendor list’ data.
For example, you can export vendor lists based on the balance range from $50 to $4500.
You can give the reference ID to export data.
You can choose the data as active, inactive/deleted.
You can also filter it using the company name.
Benefits of Using SaasAnt Transactions for Exporting Vendor Lists
While QuickBooks allows you to download vendor data, SaasAnt Transactions offers additional advantages that enhance data management and flexibility:
Advanced Filtering: Refine your export using balance range, reference ID, and company name filters.
Data Segmentation: Easily segregate active, inactive, or deleted vendors for targeted reporting.
Secure and Reliable: SaasAnt Transactions is a certified solution ensuring your data remains safe.
Time Efficiency: Quickly process large volumes of data and generate reports without manual effort.
Flexible Export Formats: Choose between CSV and Excel formats to suit your requirements.
Using SaasAnt Transactions, businesses can efficiently manage vendor data, gain better insights, and simplify reporting. If you encounter any discrepancies while exporting your vendor lists, you can contact the support team.
Conclusion
Exporting your vendor list from QuickBooks Online is a simple process when using the right steps and tools. With the support of tools like SaasAnt Transactions, you can streamline your data management efforts and maintain better control of your vendor information.
FAQ’s
How to Import Vendor Lists into QuickBooks Online?
Log in to SaasAnt Transactions.
Navigate to ‘Import’ and select ‘Vendors.’
Prepare your file in CSV or Excel format.
Map fields to match QuickBooks’ requirements.
Validate and complete the import process.
How to Export Vendor List from QuickBooks Online?
Sign in to SaasAnt Transactions.
Go to the ‘Export’ section and select ‘Vendors.’
Apply filters and select the desired format (CSV or Excel).
Download and save the file.
How to Delete Vendor Entries in QuickBooks Online?
Log into SaasAnt Transactions.
Access the ‘Delete’ section and choose ‘Vendors.’
Apply filters and select entries.
Confirm deletion.
Recommended reading: