How to Apply a Credit Memo to an Invoice in QuickBooks Online?
If you need to apply a credit memo to an invoice in QuickBooks Online, you’re likely managing customer payments and ensuring accurate financial records. Whether you're a small business owner, bookkeeper, accountant, or part of a finance team, keeping your accounts clean and precise is a top priority.
You may have issued a credit memo due to a product return, billing error, discount, or adjustment, but now you're facing a common challenge—the invoice still shows an outstanding balance. Without applying the credit memo properly, your accounts receivable may be overstated, customers might receive incorrect balance reminders, and financial reports could become inaccurate.
This guide will walk you through the step-by-step process of applying a credit memo to an invoice in QuickBooks Online. By the end, you'll have successfully reduced or cleared the invoice balance, ensuring accurate customer records and seamless financial reporting.
What is a Credit Memo in QuickBooks Online?
A credit memo is a document issued to customers, reducing the amount they owe for a previous invoice. It is typically used to correct billing errors, return products, or provide discounts. The purpose of a credit memo is to adjust the customer's account balance without altering the original invoice, ensuring accurate financial records and customer satisfaction.
Different Ways of Managing Customer Credits in QuickBooks
Automatically Apply Credits: This setting automatically applies credits to the oldest open invoice for the same customer.
If the credit equals the invoice amount, both are marked as Closed.
If the credit is less, the invoice is marked as Partial and the credit memo as Closed.
If the credit is more, the excess is applied to the next oldest invoice or left Unapplied if there are no open invoices.
Manually Apply Credits: Turn off auto-apply to choose when and to which invoices to apply credits.
Credits will not be applied automatically.
You can choose when and to which invoices to apply credits during the payment receipt.
How to Apply a Credit Memo to an Invoice in QuickBooks Online - Step-by-Step Guide
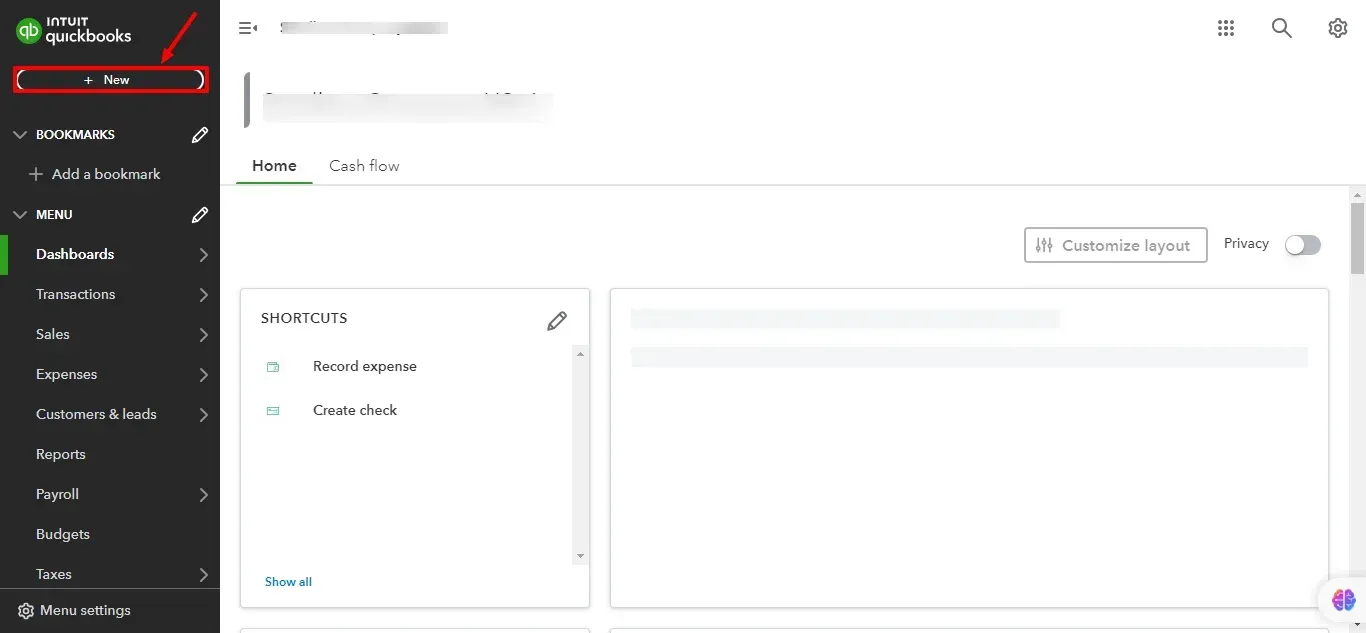
Step 1: QuickBooks Login
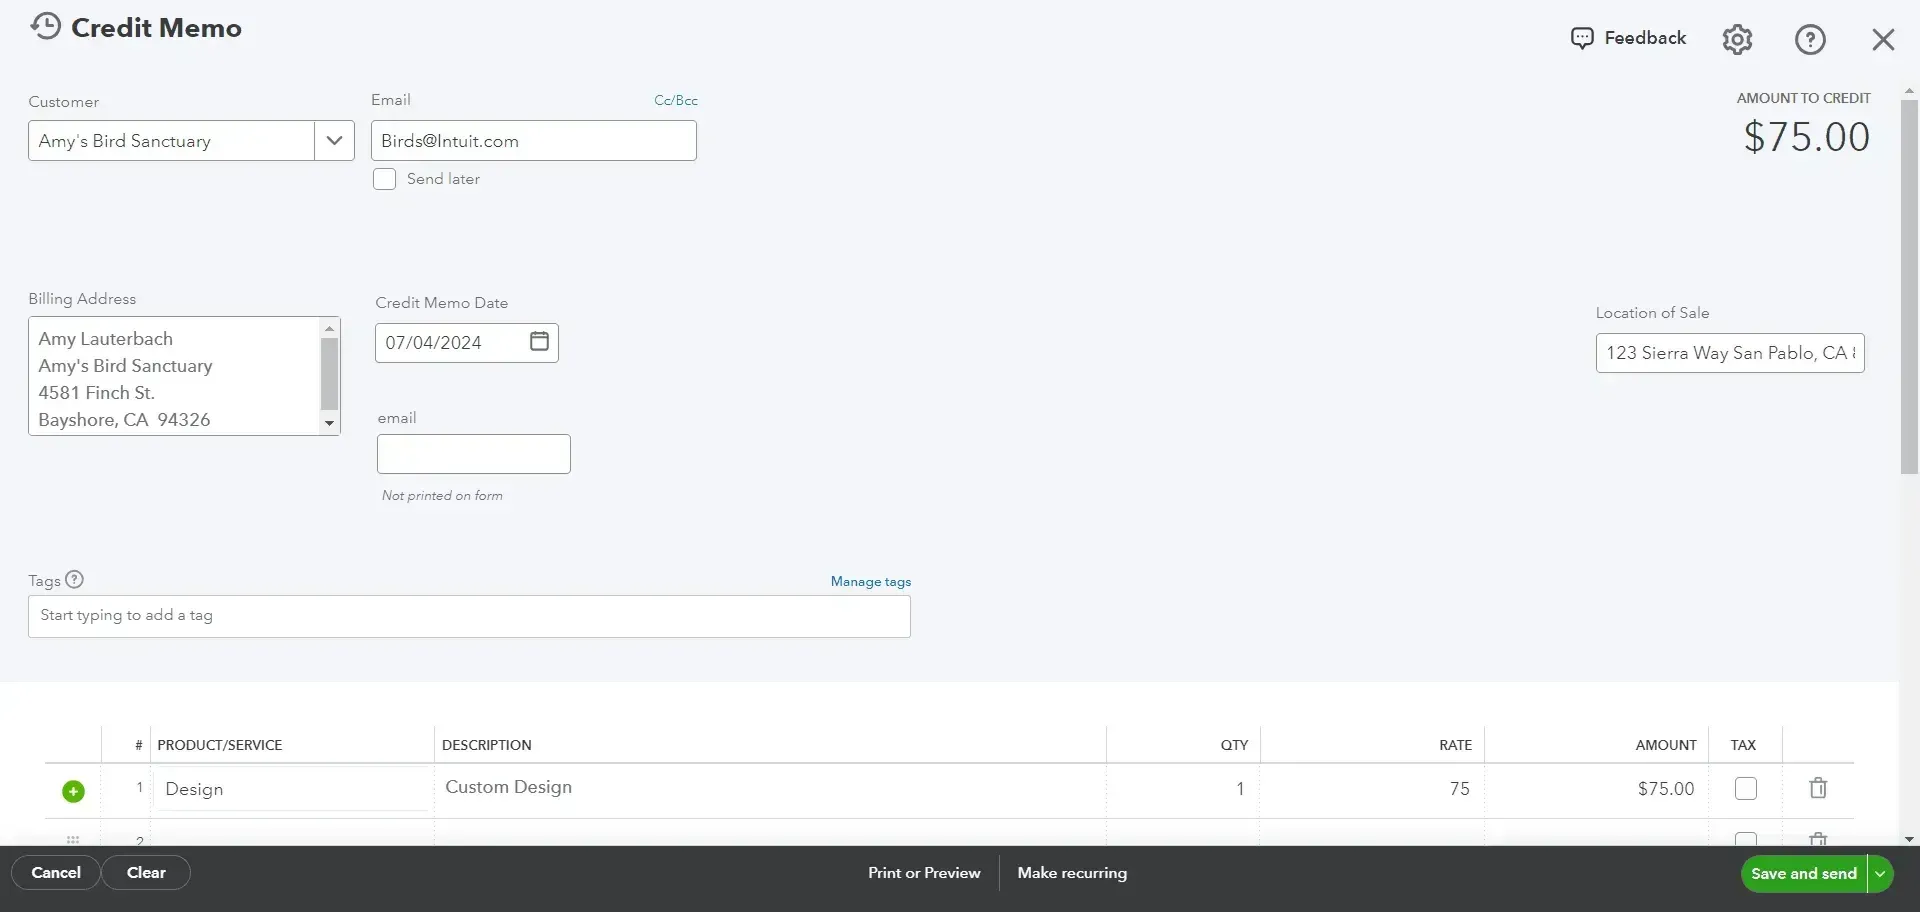
Step 2: Create a Credit Memo
Go to + New and select Credit Memo.
Choose the customer from the dropdown.
Enter details like date and amount.
Save the credit memo.
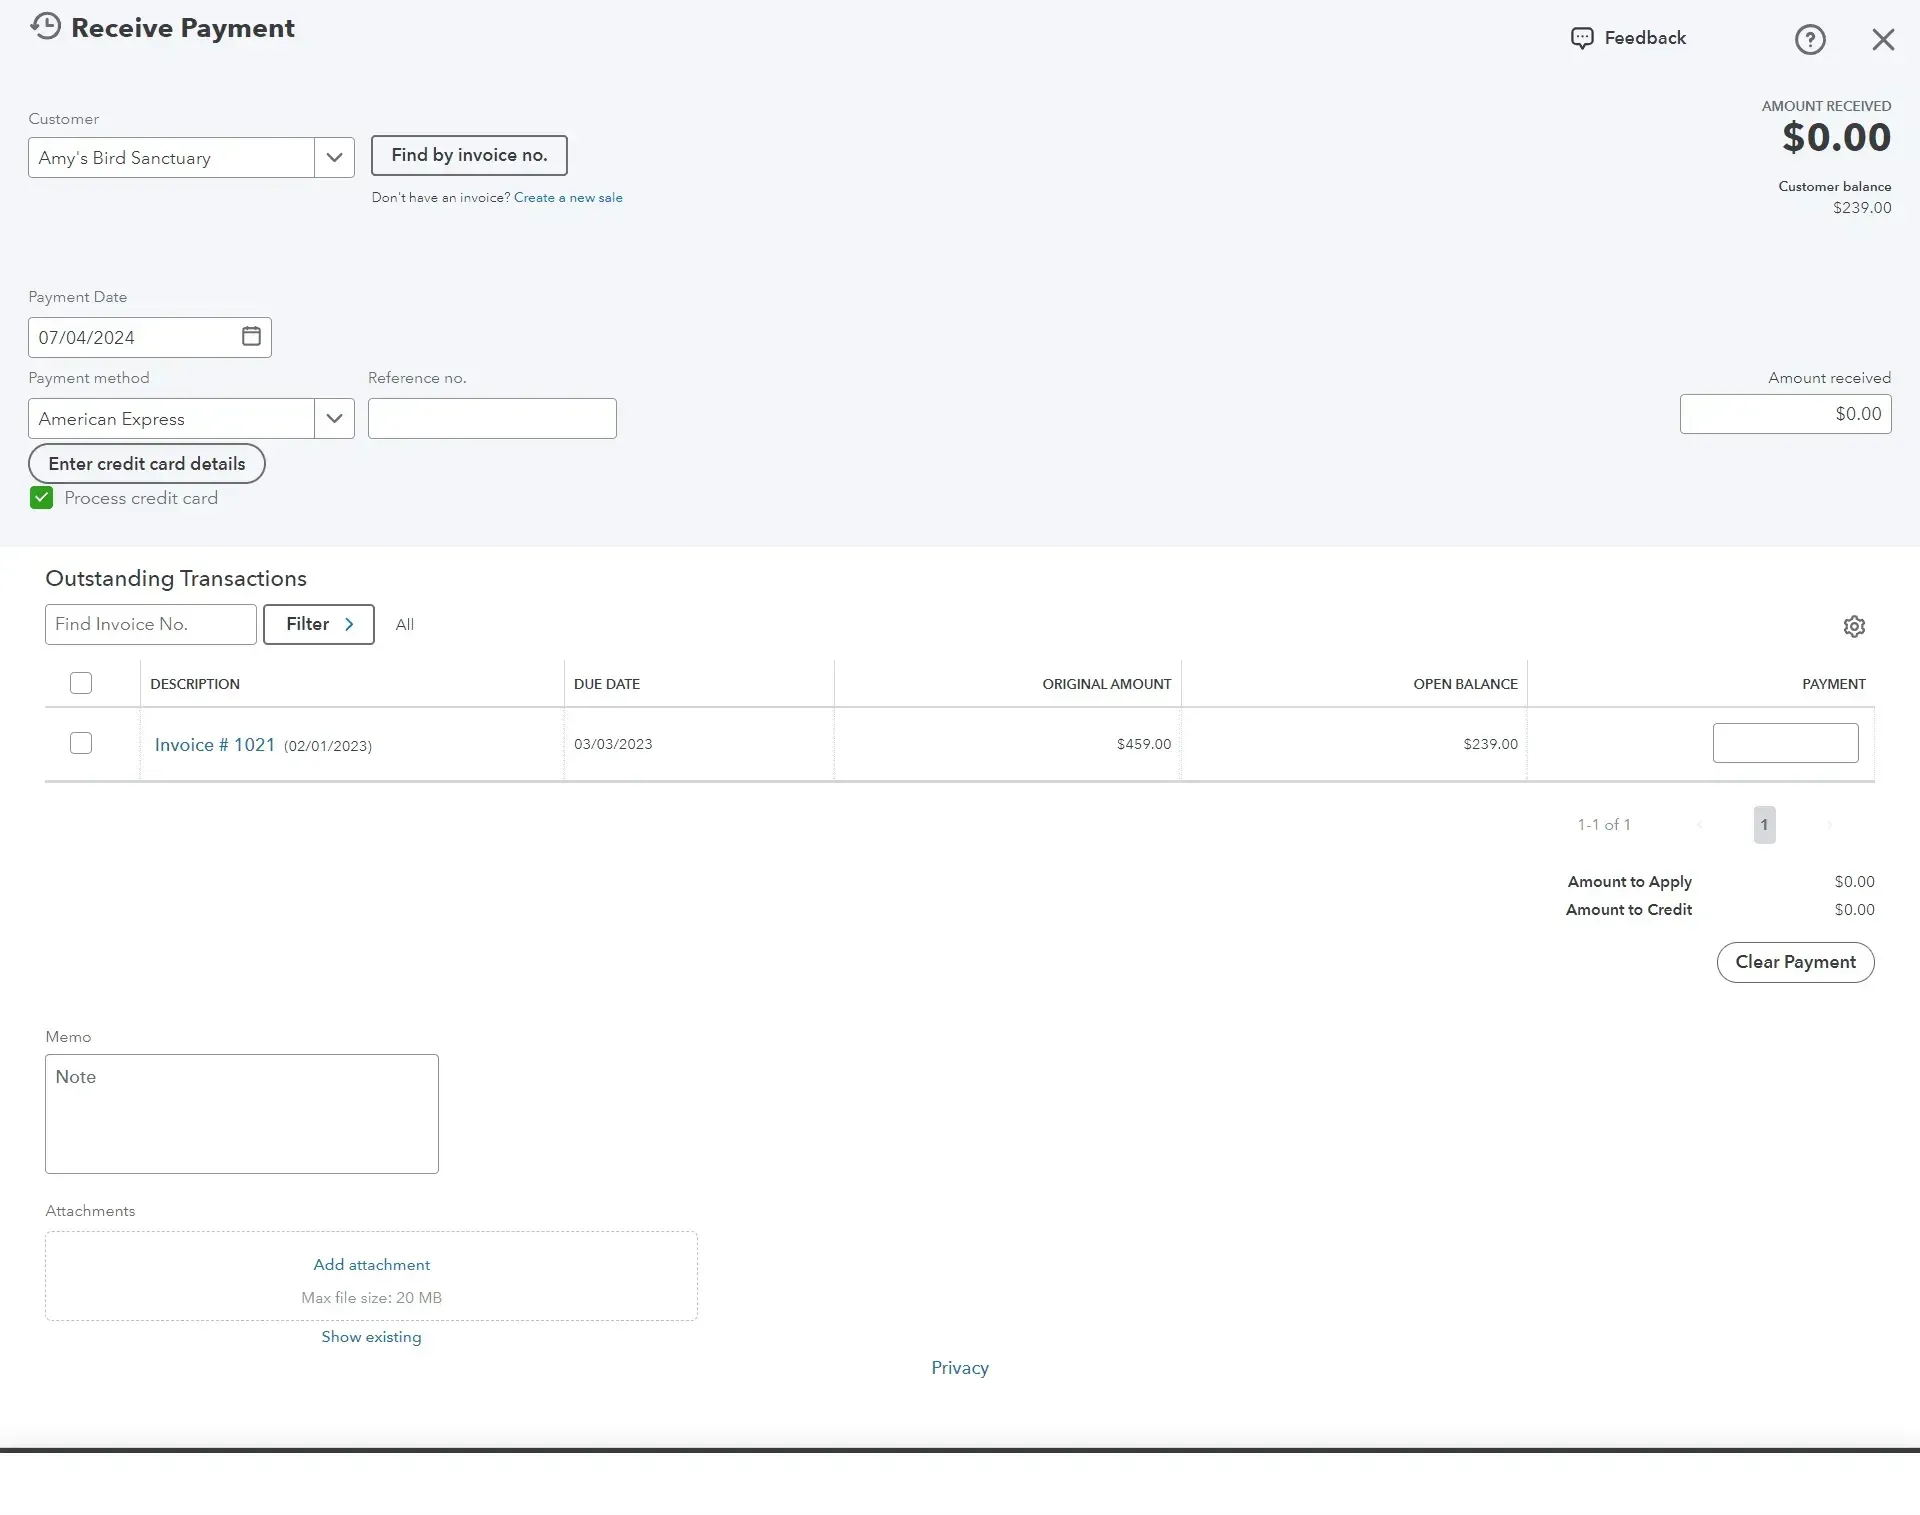
Step 3: Apply the Credit Memo to an Invoice
If auto-apply is off, go to + New and select Receive Payment.
Select the customer.
In the Outstanding Transactions section, choose the invoice to apply the credit.
In the Credits section, select the credit memos to apply.
Enter the amount of credit you want to apply in the Payment column for the invoice.
Fill out the Payment date and ensure the total is correct after applying the credit memo.
Save the transaction.
Note: Read this blog to learn about creating a credit memo in QuickBooks Online.
SaasAnt offers tools that can assist in managing credit memos and invoices within QuickBooks Online. Their platform, SaasAnt Transactions, enables users to import, export, modify, and delete transactions in bulk, streamlining accounting tasks. This is particularly useful for handling credit memos and invoices efficiently.
Key Features Relevant to Credit Memos and Invoices:
Bulk Import and Export: SaasAnt Transactions allows for the bulk import and export of credit memos and invoices using Excel, CSV, or IIF files. This feature is beneficial for businesses looking to migrate or update large volumes of data without manual entry.
Transaction Modification: The platform provides a "Live Edit" feature, enabling users to edit existing transactions directly in QuickBooks Online without the need to delete and re-import them. This is useful for making corrections to credit memos or invoices as needed.
Automation with Custom Rules: Users can set up custom rules to automate transaction handling, reducing manual effort and minimizing errors. For example, you can create rules to automatically categorize or modify transactions during the import process.
Data Deletion: If necessary, SaasAnt Transactions allows for the bulk deletion of transactions, which can help in cleaning up data or correcting large-scale errors.
By leveraging these features, businesses can manage their credit memos and invoices more effectively, ensuring accurate financial records and efficient accounting workflows.
Why You Need to Apply for a Credit Memo?
Product Returns
When customers return products, the original invoice must be adjusted to reflect the return. Applying a credit memo reduces the customer's outstanding balance and ensures that your financial records accurately represent the transaction.
Billing Errors
Mistakes such as overcharges or incorrect amounts can happen during the billing process. Issuing a credit memo allows you to correct these errors, ensuring that your customer pays the correct amount and that your accounts are accurate.
Discounts and Adjustments
Sometimes, you may offer discounts or need to make adjustments after an invoice has been issued. A credit memo allows you to apply these changes without altering the original invoice, maintaining a clear and accurate record of all transactions.
Conclusion
Applying credit memos correctly is crucial for accurate accounting and customer satisfaction. By following the steps outlined in this guide, you can efficiently manage credits in QuickBooks Online and ensure the precision of your financial records.
FAQs
What is a credit memo in QuickBooks?
A credit memo in QuickBooks is a document issued to customers, reducing the amount they owe due to returns, discounts, or billing errors.
How do I create a credit memo in QuickBooks Online?
Navigate to the + New button, select Credit Memo under the Customers section, fill in the details, and save the credit memo.
Can I delete a credit memo in QuickBooks Online?
You can delete a credit memo by locating it in the customer's transaction history and selecting the delete option.
How do I edit a credit memo in QuickBooks Online?
Find the credit memo in the customer's transaction list, open it, make the necessary changes, and save the updated memo.
How long does it take for a credit memo to apply to an invoice?
The application is instant once you save the changes in the Receive Payment section.
What if my credit memo doesn't apply to the correct invoice?
You can manually adjust the amounts in the Receive Payment section or contact QuickBooks support for assistance.
How do I apply a vendor credit memo to a bill in QuickBooks Online?
Navigate to the + New button, select Pay Bills, choose the vendor and the bill, and then apply the vendor credit.
What are two ways to start a credit memo in QuickBooks Online?
In QuickBooks Online, you can start a credit memo in two main ways:
From the + New Button:
Click the + New button in the left-hand navigation menu.
Under the Customers section, select Credit Memo.
Fill out the required information, such as the customer name, product/service, and amount.
From the Customer Page:
Go to the Sales menu, then select Customers.
Choose the specific customer from the list.
Click on New transaction, then select Credit Memo.
Enter the necessary details and save the credit memo.
Both methods allow you to create and apply credit to a customer account effectively.
Read Also
How to Delete Credit Memo in QuickBooks Online
How to Export Credit Memo in QuickBooks Online : A Complete Guide
Import Credit Memo in QuickBooks Online: A Complete Guide
How to Edit Credit Memo in QuickBooks Online: A Complete Guide