How to Apply Vendor Credit in QuickBooks Online: A Complete Guide
Welcome to our guide on applying vendor credit in QuickBooks Online. If you're a small business owner, bookkeeper, or accountant, you know how important it is to keep your financial records accurate and up-to-date. You might have already received a vendor credit—perhaps from a returned item, an overpayment, or a discount—and recorded it in QuickBooks Online. Now, you're looking to apply that credit to an outstanding bill to reduce what you owe.
This guide is here to help if you’re unsure of the next steps. We understand that your main focus is to correctly match the credit with the right bill, ensuring your vendor balances are accurate. By following our step-by-step instructions, you can avoid mistakes like overpaying and keep your records in perfect order. Success in this task means that your vendor credit is correctly applied, your vendor balance is updated, and your books truly reflect your current financial situation.
Let's get started and make sure you have all the tools you need to handle vendor credits smoothly in QuickBooks Online.
Apply Vendor Credit in QuickBooks Online: Quick Instructions
Go to + New, select Vendor Credit, and choose the vendor.
Enter credit details (Account, Amount), then Save and close.
Open Expenses > Vendors, and find the bill to apply the credit.
Open the bill, click Make Payment, and select the vendor credit.
Confirm the payment amount, then Save and close.
How to Apply Vendor Credit in QuickBooks Online: Step by Step Guide
To apply vendor credit in QuickBooks Online, the first step is to create a new vendor credit.
Step 1: Open the + New menu in QuickBooks Online.
Log into QuickBooks Online and click the + New menu on the left side of the screen. This menu lets you create various transactions, including vendor credits.
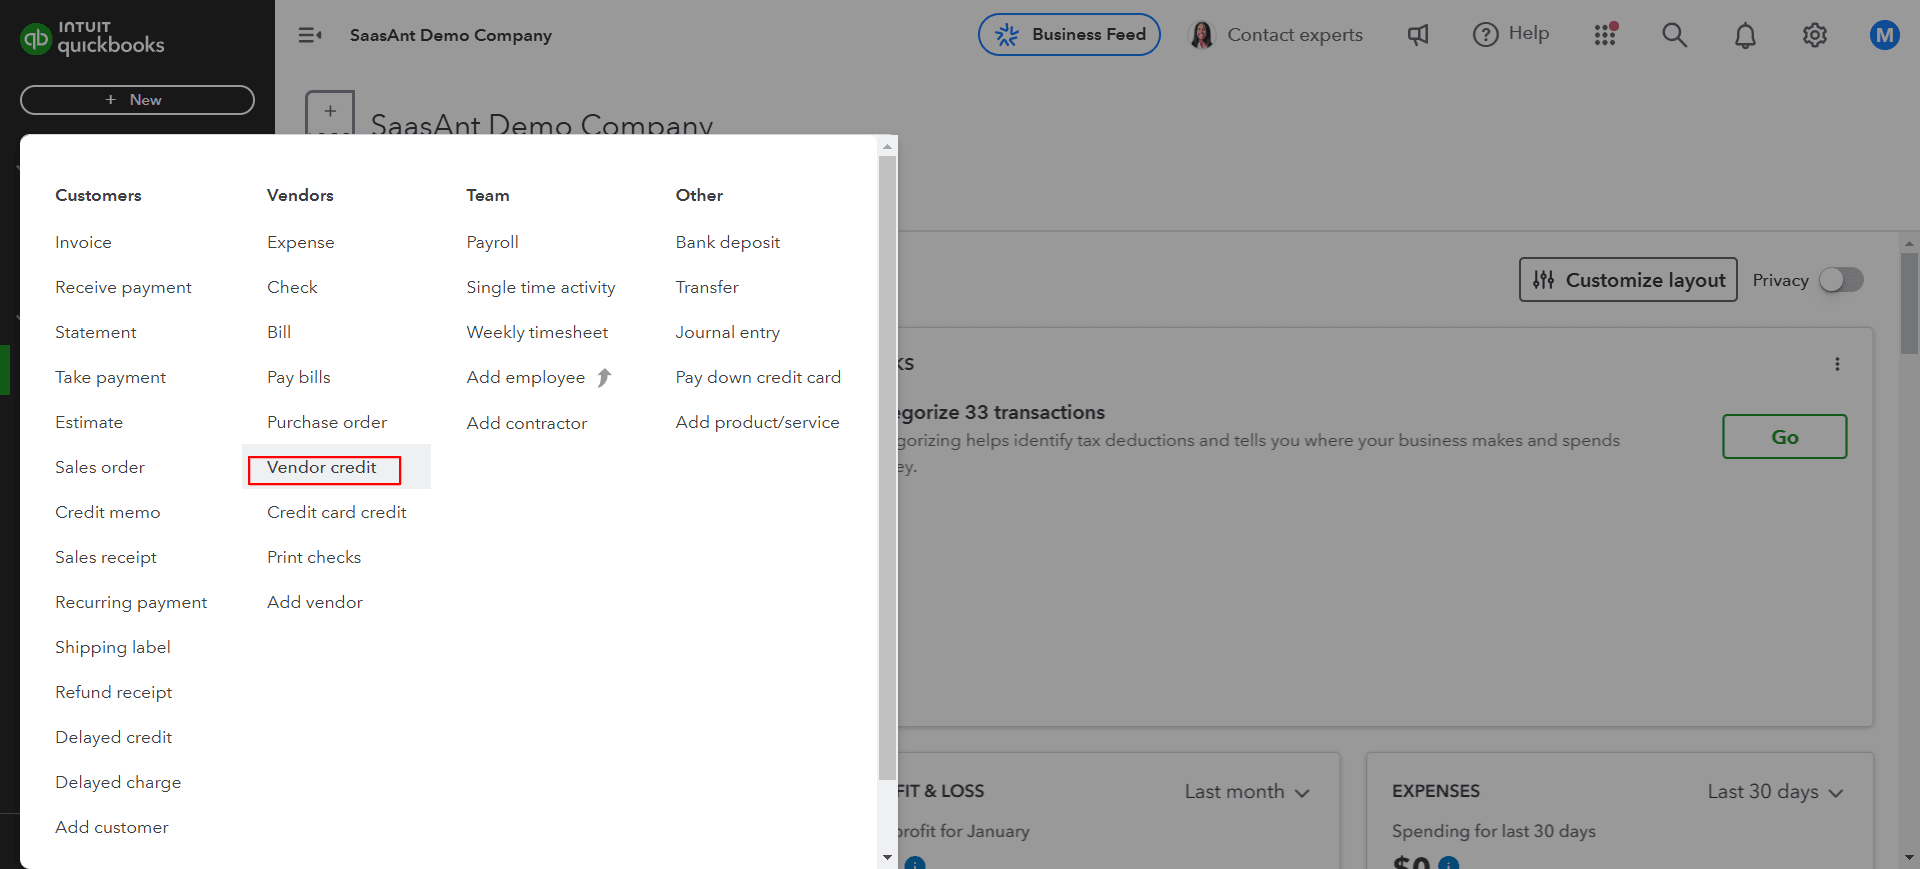
Step 2: Select Vendor Credit.
From the dropdown list, select Vendor Credit. This option lets you create a record of the credit from a vendor, which could be due to a return, a refund, or an overpayment.
Step 3: Choose the correct vendor.
In the Vendor dropdown menu, select the vendor who issued the credit. Ensure you select the correct vendor, and the credit will be applied accurately to their account.
Step 4: Enter the credit details.
Fill in the Account field with the appropriate expense or liability account to which this credit applies. Next, enter the amount of the credit as shown on the vendor’s statement or invoice. You can also add details like a Memo or Description to keep clear records.
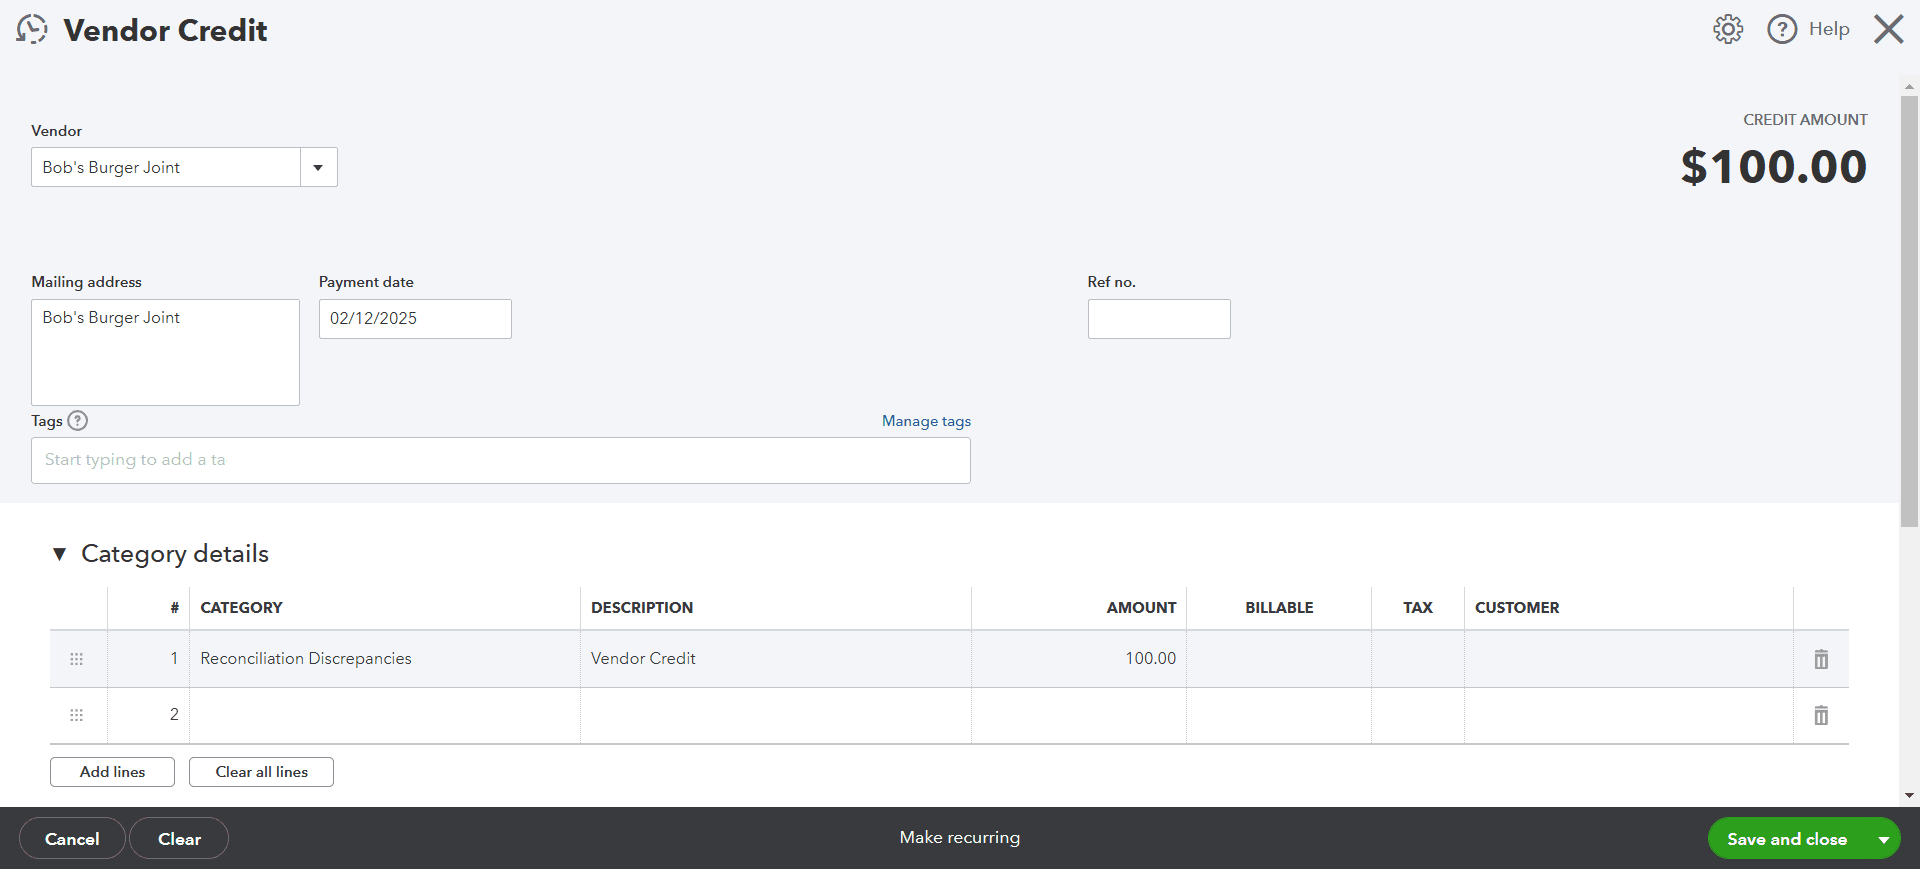
Step 5: Save the vendor credit.
Once you’ve entered all the details, click Save and close to save the credit. QuickBooks will store the vendor credit, making it available for future transactions or bills from that vendor.
Step 6: Navigate to the Expenses menu and select Vendors.
Now, you’ll apply the saved vendor credit to an existing bill. Go to the Expenses menu on the left panel, then choose Vendors. This will open a list of all your vendors and their related transactions.
Step 7: Locate and open the specific bill to which you want to apply the credit.
Search for the vendor you just created a credit for. To apply vendor credit, open the outstanding bill by clicking on it to view its details.
Step 8: Initiate the payment process by clicking Make Payment.
With the bill open, click Make Payment at the top of the screen. This action opens a new window to apply vendor credit to the selected bill.
Step 9: Select the bill and apply the credit.
In the payment window, locate the Outstanding Transactions section and ensure the bill you want to pay is selected. Next, scroll down to the Credits section. Here, you’ll see the vendor credit you created earlier. Check the box next to the credit to apply it to the bill, reducing the amount owed by the credit amount.
Step 10: Review and save the transaction.
Before saving, double-check the Payment amount field to ensure it reflects the correct balance after the credit has been applied. Once everything looks accurate, click Save and close to finalize the transaction.
Conclusion
Applying vendor credits in QuickBooks Online is straightforward yet essential to managing vendor relationships and ensuring accurate financial records. Following the steps mentioned in the blog can effectively offset bills, track vendor credits, and maintain clean, up-to-date books.
Regularly applying vendor credits improves expense management and enhances accounting accuracy. This process will equip you to handle vendor refunds, returns, and adjustments, keeping your business finances balanced and organized.
Incorporating automation tools can significantly enhance the efficiency and accuracy of managing vendor credits in QuickBooks Online. One such trusted application is SaasAnt Transactions, utilized by thousands of QuickBooks users to streamline their accounting processes.
SaasAnt Transactions is a powerful tool designed to simplify the import and management of various transaction types, including vendor credits, into QuickBooks Online. By leveraging its advanced features, users can automate data entry, apply custom rules, and ensure seamless integration with their accounting system.
Bulk Import of Vendor Credits: Instead of manually entering each vendor credit, SaasAnt allows for the bulk import of vendor credits from Excel spreadsheets or text files directly into QuickBooks Online. This feature saves time and reduces the risk of data entry errors.
Customizable Import Settings: SaasAnt offers flexible import settings, enabling users to map spreadsheet columns to corresponding QuickBooks fields accurately. This customization ensures that all data is correctly aligned during the import process.
Automation Through Scheduling: With SaasAnt, users can schedule regular imports of vendor credits, ensuring that their QuickBooks Online data remains up-to-date without manual intervention. This automation is particularly beneficial for businesses handling a high volume of transactions.
Error Reduction and Data Validation: The application includes robust data validation features that check for inconsistencies or errors before importing. This proactive approach helps maintain the integrity of your financial records.
Comprehensive Support and Resources: SaasAnt provides extensive support through detailed guides, tutorials, and a responsive customer service team, ensuring users can maximize the application's potential.
Read also:
FAQ’s
What is a Vendor Credit in QuickBooks Online?
A vendor credit in QuickBooks Online is a transaction that records refunds or returns from a vendor. It helps you offset outstanding bills and keep accurate expense records.
How do I create a vendor credit in QuickBooks Online?
Go to + New > Vendor Credit, select the vendor, enter the Account and Amount, and click Save and Close.
Can I apply multiple vendor credits to a single bill in QuickBooks Online?
Yes, when paying a bill, you can select multiple vendor credits in the Credits section to apply them all at once to reduce the bill amount.
Why doesn’t my vendor credit appear when I apply it to a bill?
Ensure the vendor credit is assigned to the same vendor as the bill. If the vendor doesn’t match, QuickBooks won’t display the credit for that bill.
How do I know if a vendor credit was successfully applied to a bill?
After applying the credit, review the Payment amount on the bill. The amount should reflect the total owed after subtracting the applied credit.
How do I apply a credit to a vendor in QuickBooks?
You can apply a credit by first entering a vendor credit transaction. Then, when you record the vendor’s bill, open the bill and click the Apply Credit button. This lets you select the credit you entered, which will reduce the amount you owe.
How do I use supplier credit in QuickBooks Online?
To use supplier credit in QuickBooks Online, start by creating a vendor credit. Click the + New button and select Vendor Credit to record the credit. Later, when you enter a bill for that vendor, open the bill and use the Apply Credit option to lower the bill’s total.
How do you apply for a credit in QuickBooks Online?
In QuickBooks Online, “applying for a credit” usually means using an existing vendor credit to pay down a bill. First, record the vendor credit, then open the related bill and click Apply Credit. QuickBooks will automatically apply the credit amount, reducing the bill you need to pay.
What are two ways to use vendor credit?
There are two common ways to use vendor credit in QuickBooks:
Apply to a Bill: Use the credit to reduce the amount on an outstanding vendor bill.
Request a Refund: If you have more credit than needed, you can ask the vendor for a refund of the unused amount.
These steps help keep your accounts accurate and make sure you get the most out of any credits available.
Read also
How to Enter Vendor Credit in QuickBooks Online
Workflow Automation for Bookkeeping and Accounting Professionals
Import Journal Entries into QuickBooks Online: Step by Step Guide
How to Delete Vendor Credits in QuickBooks Online?