How to Create an Invoice in QuickBooks Online
 Creating an invoice in QuickBooks Online is crucial for managing your business transactions efficiently. This guide will provide detailed instructions on how to create an invoice in QuickBooks Online.
How to Create an Invoice in QuickBooks Online - Step by Step Guide
Step 1: Create and Send an Invoice in QuickBooks Online
Using the New Layout
Start a New Invoice:
Select the + New button and then choose Invoice.
Select Add customer and pick a customer from the dropdown menu. Verify all their information, especially their email address.
Review and Set Dates:
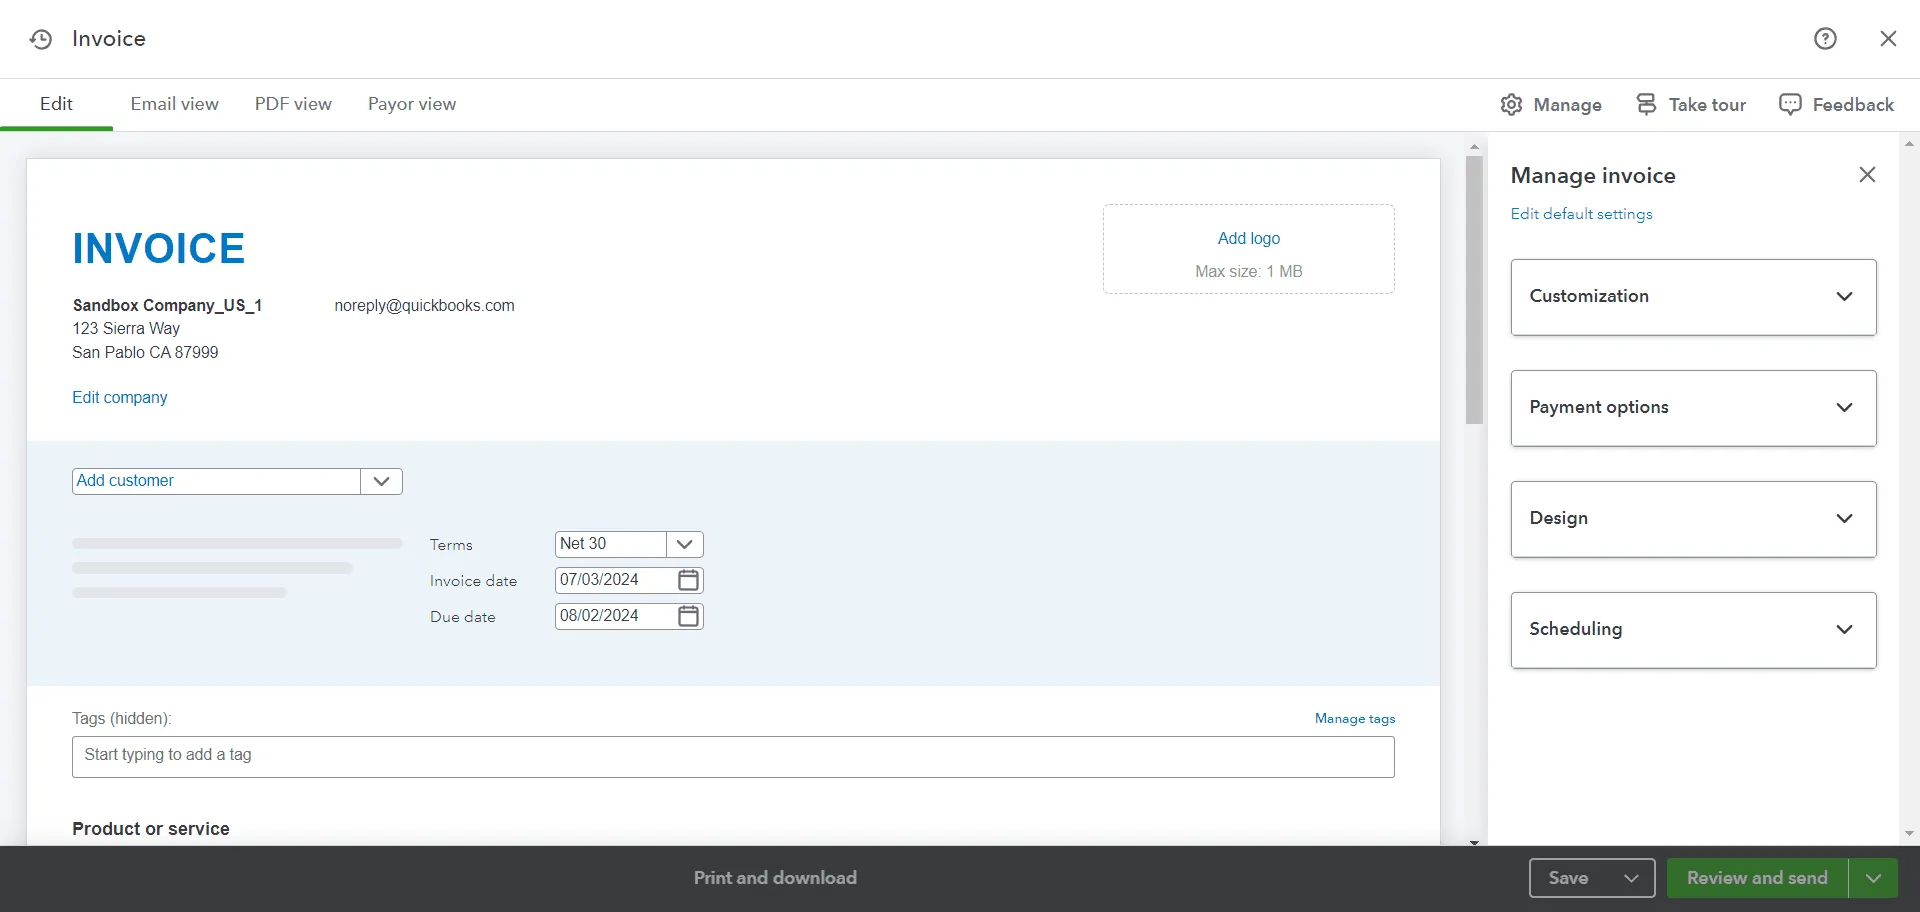
Check the Invoice date, Due date, and Terms. Update them if necessary. Note that "Net" refers to the number of days until payment is due.
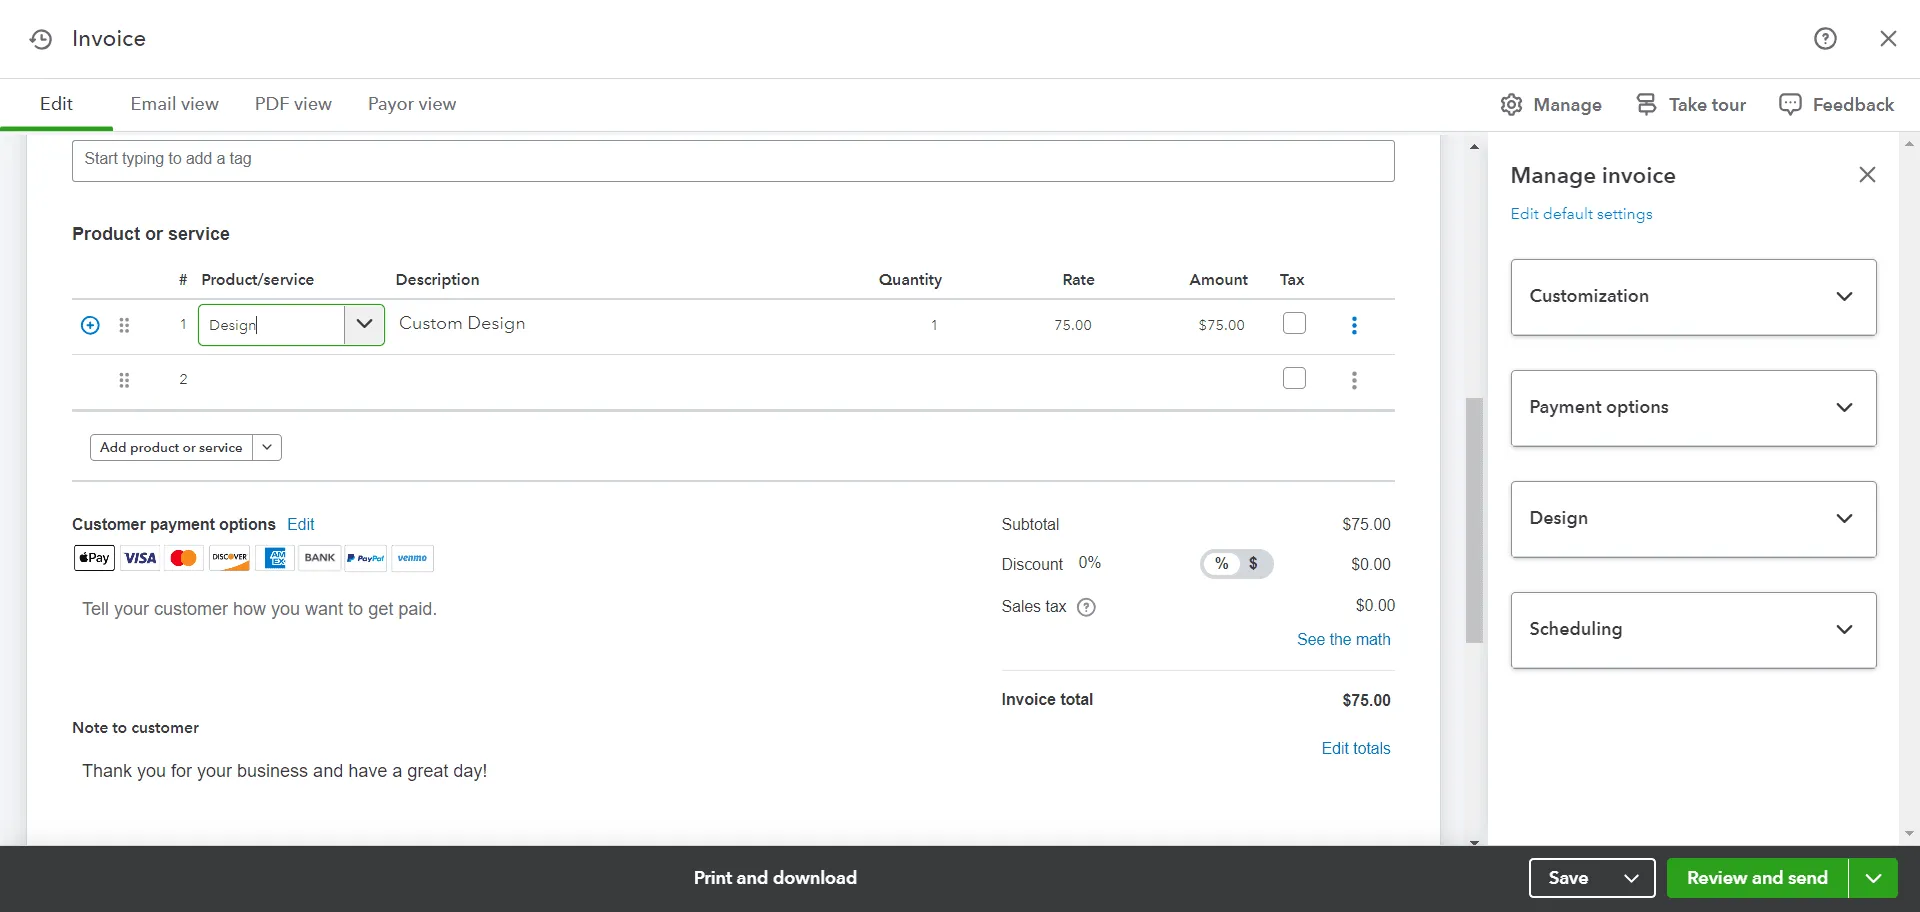
Add Products or Services:
Click Add product or service and select items from the dropdown menu.
Choose how to calculate the charge amount - flat rate, by hour, or by item. Enter the quantity and rate as needed.
Customize Invoice Info and Design:
To adjust the invoice details or design, select ⚙ Manage and choose options from the side panel. QuickBooks will apply these choices to all current and future invoices.
You can change fields your customer sees by using the toggles to turn any fields on or off.
Payment Options:
Select Payment options to choose how your customers can pay you online. Toggle these options on or off. Note that you need to sign up for QuickBooks Payments to receive online payments, which can be done here.
Additional Fields:
Include fields for shipping fees or discounts by toggling them on and entering the amounts. Sales tax will display automatically if your setup includes taxable products.
Add Notes and Attachments:
Write a personalized note or add attachments in the designated fields.
Design Adjustments:
Go to Design to change the color and font to match your company’s branding. If you have templates from the previous invoicing experience, you can choose them here, though some functions may be unavailable.
Saving and Sharing the Invoice:
To send the invoice, select Review and send to email it to your customer. You can adjust the email content before sending.
To send invoices via text message, select Text and follow the steps (available for payments-enabled customers only). Ensure you have the customer's permission before opting in for text notifications.
To print a paper invoice, select Print and download.
If you’ve received a payment from the customer, select Receive Payment.
To send a link to the invoice via text, select Share link.
Using the Old Layout
Start a New Invoice:
Select the + New button and then choose Invoice.
From the Customer dropdown, select a customer. Ensure all their info is correct, especially their email address.
Review and Set Dates:
Check the Invoice date and change the due date in the Terms dropdown if necessary. "Net" refers to the number of days until payment is due.
Add Products or Services:
From the Product/Service column, select an item.
Enter the quantity, rate, and change the amount if needed.
Select the Tax checkbox if sales tax applies.
Saving and Sharing the Invoice:
To send the invoice, select Save and send to email it to your customer. Adjust the email content before sending.
To send the invoice later, select Save and close.
To print a paper invoice, select Save and then Print or preview.
To send a link to the invoice via text, select Save and share link.
Step 2: Review Unpaid Invoices
QuickBooks categorizes unpaid invoices into your accounts receivable account, visible on your Balance Sheet and other financial reports. To review your invoices:
Go to Sales and select Invoices.
Check the Status column to see where your invoices are in the sales process. Common statuses include:
Due in [days]: Invoice not emailed yet.
Due in [days] Sent: Invoice emailed to the customer.
Due in [days] Viewed: Customer opened the invoice.
Deposited: Invoice paid.
Overdue [days]: Invoice past due and unpaid.
Overdue [days] Viewed: Customer opened but didn’t pay the overdue invoice.
Delivery issue: Invoice undelivered. Check email address and resend.
Voided: Invoice voided in QuickBooks.
To notify customers about upcoming invoice due dates, you can send them a reminder message.
Step 3: Receive Payments for Invoices
Using QuickBooks Payments
Customers can pay invoices directly via credit card, PayPal, Venmo, or ACH transfer. QuickBooks processes these payments and allocates them to the correct accounts automatically.
Using an External Payment Platform
If you use an external platform to process payments, keep track of those payments in QuickBooks. Learn more about recording invoice payments manually.
FAQs
How do I create a new invoice in QuickBooks?
To create a new invoice, click the + New button, select Invoice, add customer details, list products or services, and customize the invoice as needed. Send it via email, text, or print.
How do I generate an invoice?
Generating an invoice involves selecting the + New button, choosing Invoice, entering customer and product/service information, customizing the invoice, and then sending it to the customer.
How do I create a new invoice template in QuickBooks Desktop?
To create a new invoice template in QuickBooks Desktop, go to the Lists menu, select Templates, and click New. Customize the template according to your business needs.
How does QuickBooks invoicing work?
QuickBooks invoicing allows you to create and send invoices, customize fields, add products or services, set up payment options, and monitor invoice status. It integrates with QuickBooks Payments for seamless online payments.
Can I import invoices into QuickBooks Online?
Yes, you can import invoices into QuickBooks Online using tools like SaasAnt Transactions. This tool allows you to import multiple invoices efficiently by uploading a file with all the necessary invoice details.
How do I customize my invoices in QuickBooks Online?
To customize your invoices, go to the ⚙ Manage option during invoice creation. You can adjust the design, add or remove fields, and save these customizations for all future invoices.
How can I track the status of my invoices in QuickBooks Online?
You can track the status of your invoices by going to Sales and selecting Invoices. The Status column will show various stages like Sent, Viewed, Deposited, Overdue, and more.
By following these steps and utilizing QuickBooks Online’s features, you can efficiently create, customize, and manage invoices, ensuring smooth financial transactions for your business.
Related Articles: