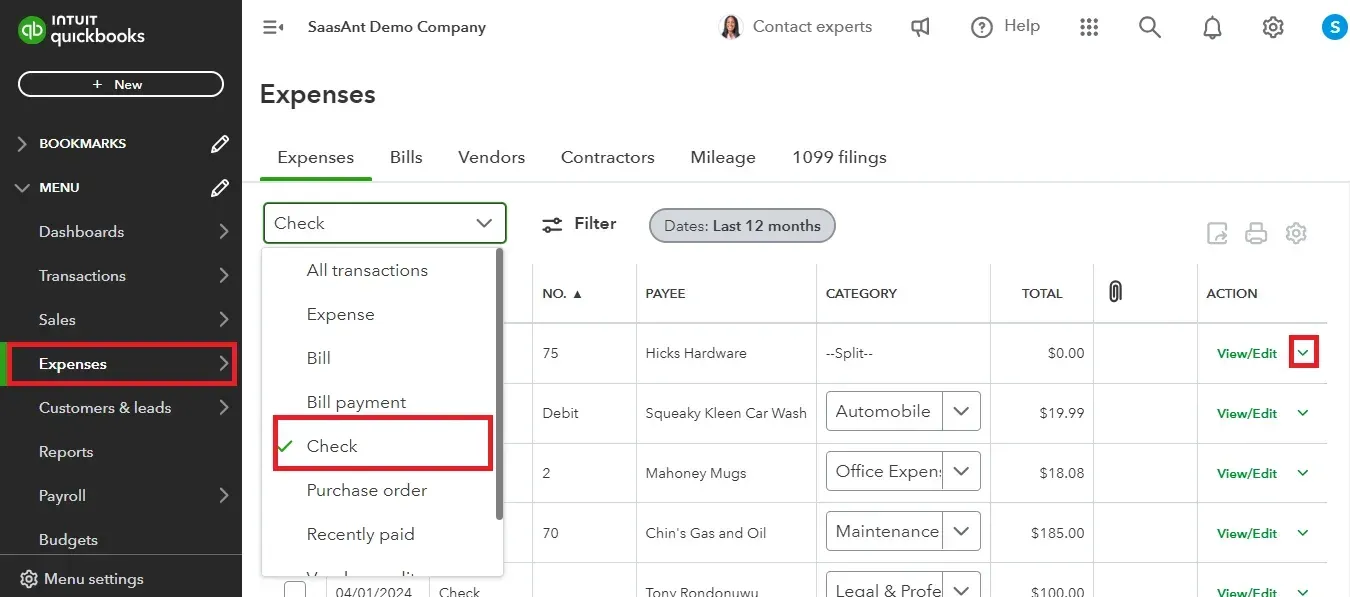
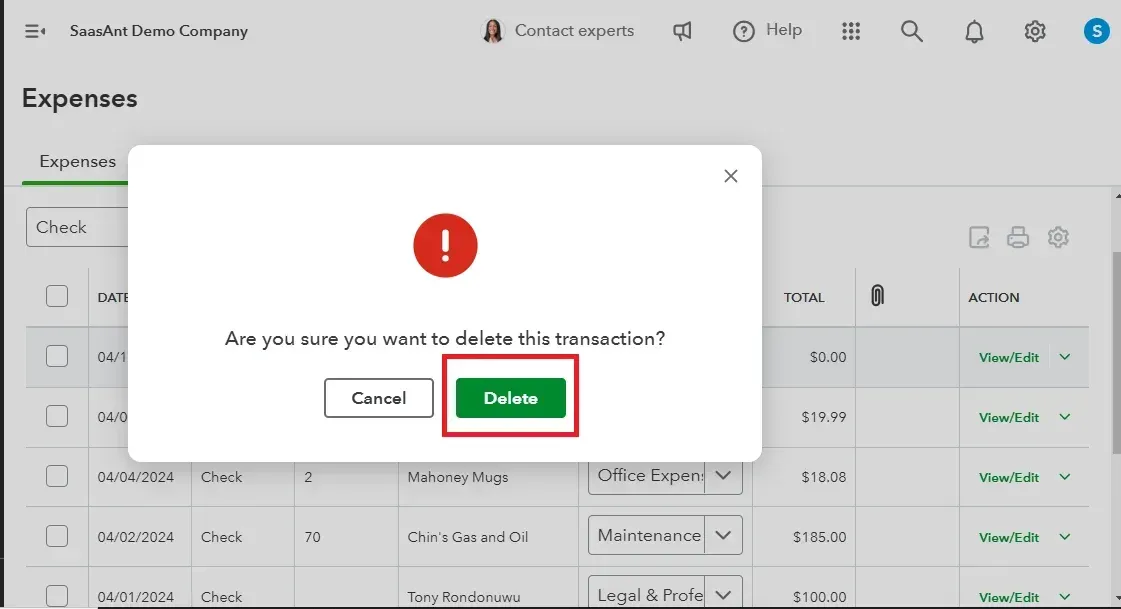
Managing financial transactions in QuickBooks requires precision and vigilance, particularly when deleting checks. This blog explores the appropriate circumstances for deleting a check, provides a step-by-step guide, and emphasizes the importance of verifying deletions to ensure accurate financial records.
Managing checks in QuickBooks Online can sometimes require bulk deletions, especially when dealing with large volumes of data. SaasAnt Transactions offers a seamless way to delete checks with a single click.
Begin by logging on to SaasAnt Transactions.
Ensure it is connected to your QuickBooks Online account.
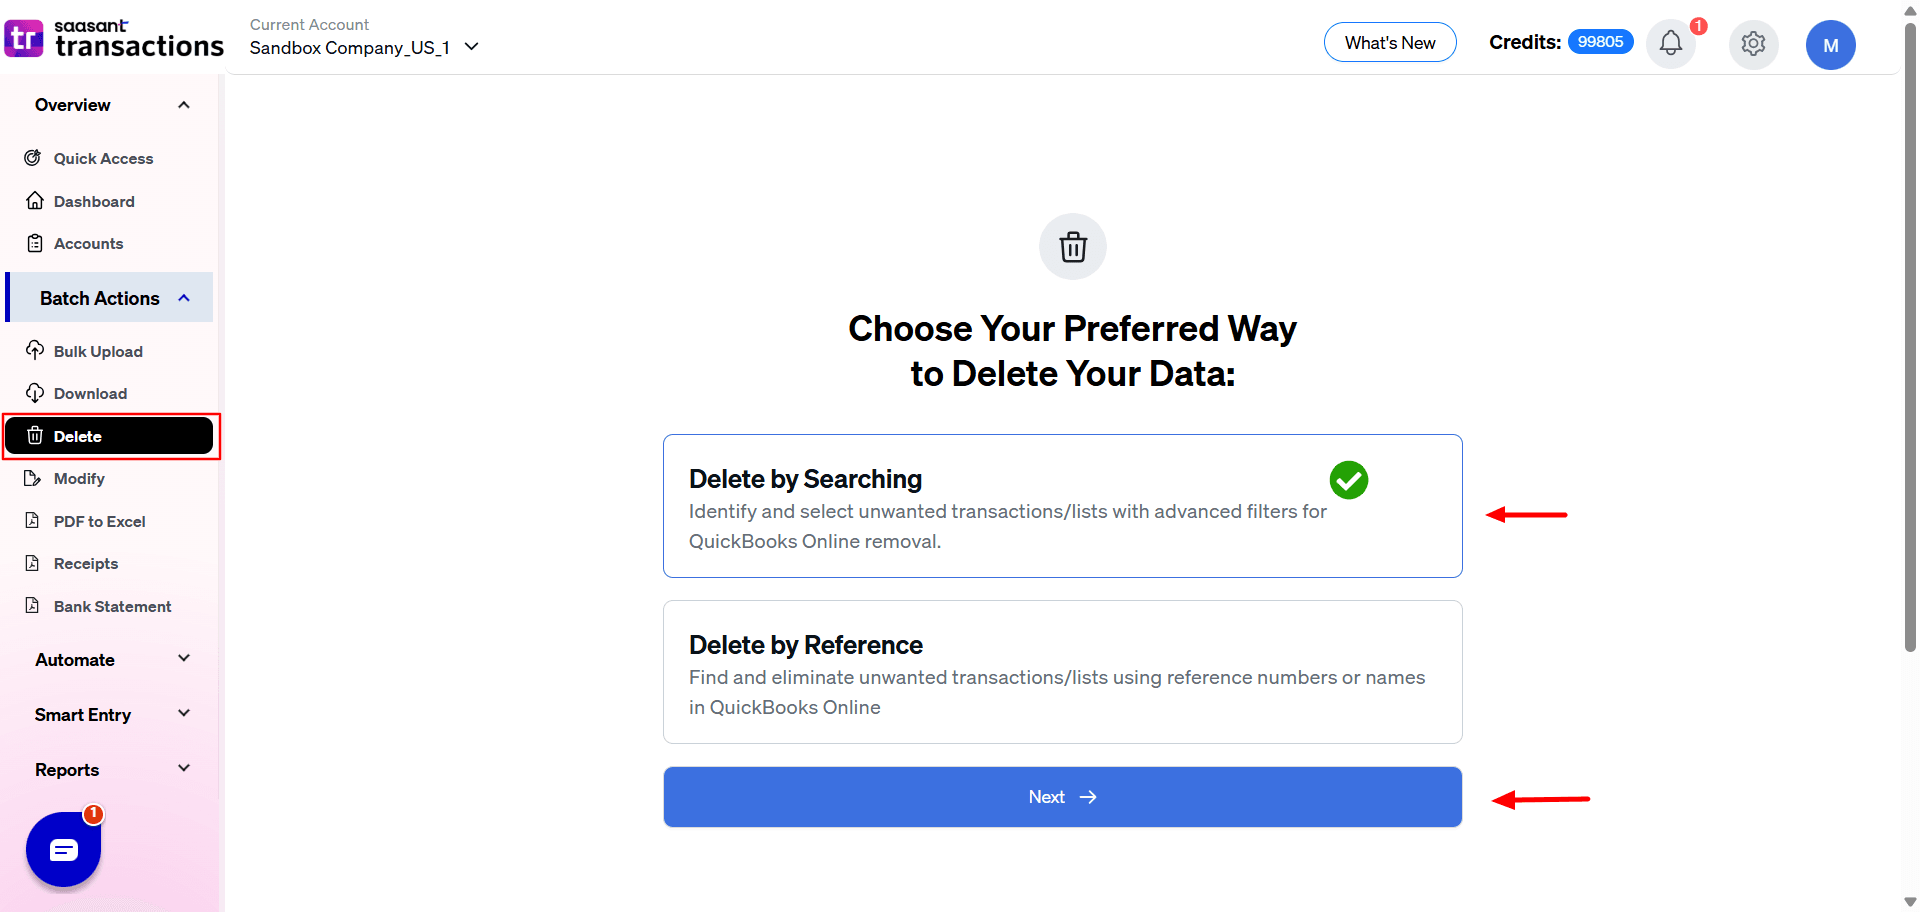
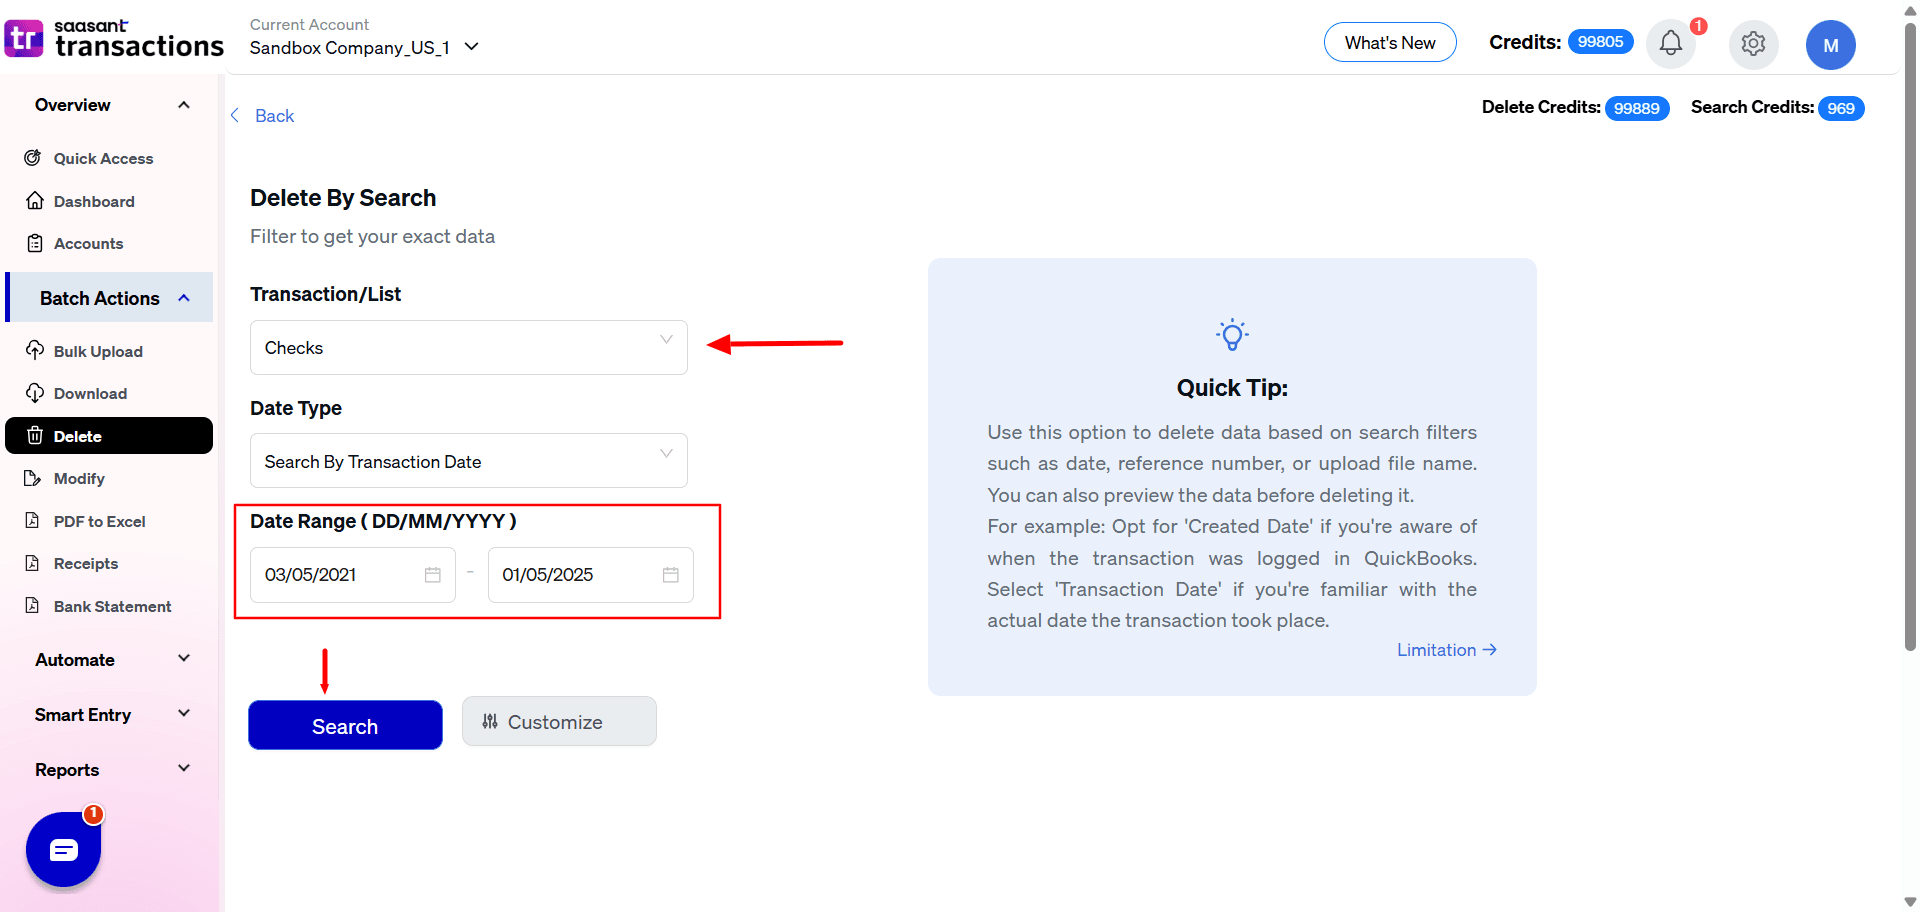
Then, navigate to the ‘Delete’ option to delete your checks.
Click the ‘Ready to Clean up?’ button to commence the delete procedure.
You can choose the most convenient method to delete your data:
Delete by Searching: Use advanced filtering options to identify and select unwanted transactions or lists for removal from QuickBooks Online.
Delete by Reference: Within QuickBooks Online, you can locate and eliminate specific transactions or lists using reference numbers or names.
From the available options, select ‘Checks’ as the transaction type you wish to delete.
If you’ve chosen ‘Delete by Searching’ as your preferred method, select your preferred date type from the dropdown menu. You can choose from:
‘Search by Created Date’
‘Search by Transaction Type’
‘Search by Last Updated Date’
Use the calendar box to set your desired date range. Choose the start and end dates for the checks you wish to delete.
Click the Search button to retrieve the transactions that match the selected criteria. The results will be displayed based on the date range and type you specified.
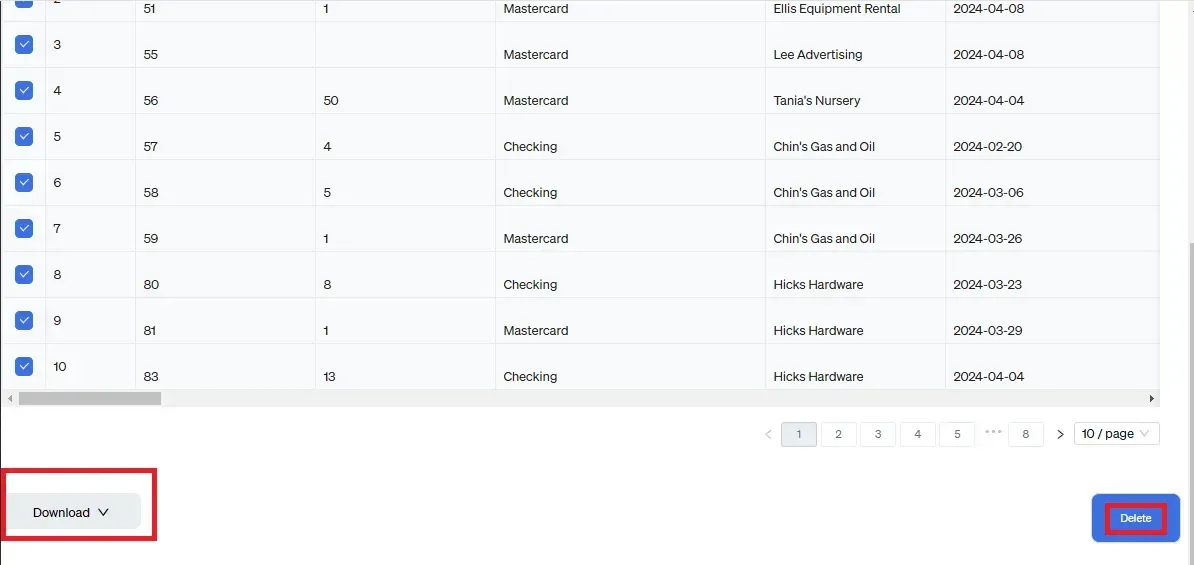
Carefully review the search results. Select the checks that you wish to delete by checking the appropriate boxes.
Once you’ve selected, click the Delete button to remove the chosen checks from QuickBooks Online permanently. SaasAnt Transactions will process the deletion.
Note: It is highly recommended that you create a data backup before proceeding with deletion. Click the ‘Download’ button next to the ‘Delete’ button to save a copy for future reference or potential re-import.
After the deletion process is complete, the deleted checks will be displayed. Ensure that all intended checks have been successfully removed.
In QuickBooks, deleting a check is a significant action that should be carefully considered. There are specific scenarios where deleting a check becomes necessary to maintain the integrity of financial records. Here’s an in-depth look at when and why you might need to delete a check:
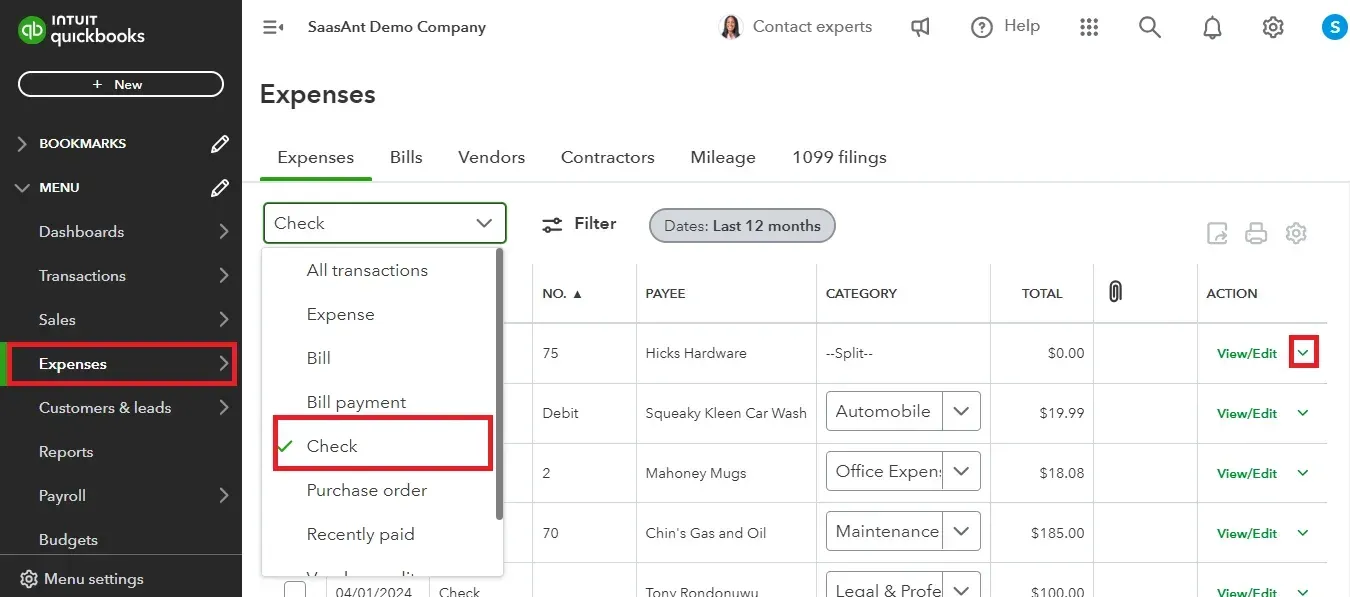
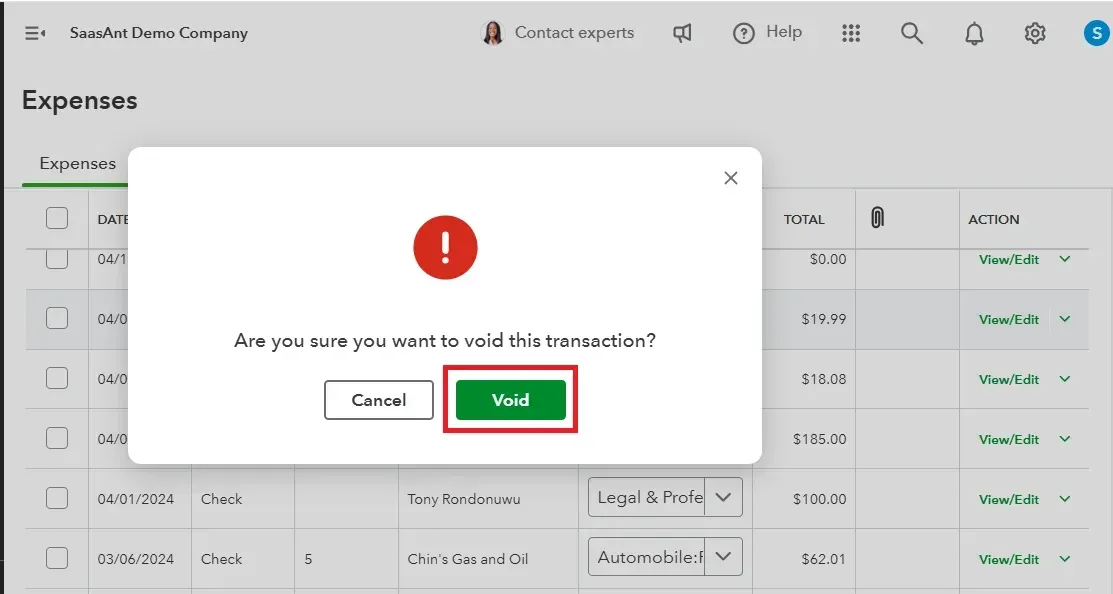
When a check is voided, it indicates it is no longer valid. This might occur because the check was canceled before being cashed or deposited. Common reasons for voiding a check include:
Errors in the Check Amount: The amount written on the check must be corrected.
Incorrect Payee Information: The check was issued to the wrong individual or organization.
Clerical Mistakes: Any other errors that rendered the check unusable.
If a voided check was incorrectly processed or entered into QuickBooks erroneously, it’s important to delete it. This ensures that the voided check does not appear in financial reports or during bank reconciliations, which could otherwise lead to inaccuracies in your financial statements.
Duplicates can occur due to manual entry errors or system glitches. When two or more identical checks are recorded in QuickBooks, it can cause significant issues:
Distorted Financial Records: Duplicate entries can inflate expenses or payments, resulting in misleading financial reports.
Incorrect Reporting: The presence of duplicates can skew your financial data, affecting decision-making and financial analysis.
Identifying and removing duplicate checks is essential for maintaining accurate and clean financial data. This ensures that each transaction is recorded only once, providing a true reflection of your financial activity.
There are instances where a check might be entered into QuickBooks with significant errors, such as:
Posting to the Wrong Account: The check was recorded in an incorrect account.
Significant Data Errors: Errors too substantial to be fixed through simple editing.
In cases where the check entry cannot be corrected through editing, it may be necessary to delete the erroneous check. By doing so and re-entering the transaction with accurate details, you ensure that your financial records accurately reflect the intended transaction.
Sometimes, a check may be categorized under an incorrect account or expense category. If reclassification options are not available or sufficient, deletion might be required:
Incorrect Expense Category: The check was recorded under the wrong expense category.
Wrong Account: The check was assigned to an incorrect account.
Deleting a misclassified check and re-entering it under the correct category is crucial for maintaining the accuracy of your financial statements. This practice helps ensure that your financial reports provide a true and accurate representation of your financial situation.
Deleting a check in QuickBooks is a significant action that can impact your financial records and reporting. It is crucial to verify the details and understand the implications thoroughly to ensure that the deletion is executed correctly and does not lead to unintended consequences. Below are key factors to consider before confirming the deletion of a check:
Ensure Correct Check Selection: Before proceeding with the deletion, confirming that the check you are about to delete is vital. Mistakes can happen, and deleting the wrong check can lead to discrepancies in your financial records. To avoid this:
Verify Check Information: Double-check essential details such as the check number, payee, date, and amount to ensure they align with your intended action.
Review Transaction History: Look at the transaction history associated with the check to ensure that it matches your records and that no other transactions that could be affected by the deletion are linked.
Assess Financial Reports: Deleting a check can significantly affect your financial reports. It is essential to assess how this action will affect your financial statements and reports:
Impact on Account Balances: Understand how the deletion will alter your account balances. Deleting a check can affect your cash flow, balance sheets, and profit and loss statements.
Reconciliation Impact: If the check has been previously reconciled or included in your bank reconciliation process, its deletion could create discrepancies. Review your reconciliation reports to assess how the deletion might affect your reconciliations.
Check for Linked Transactions: Some checks might be linked to other transactions, such as invoices or payments. Before deletion:
Identify Linked Transactions: Determine if the check is associated with any other transactions in QuickBooks. Deleting the check could impact these related transactions..
Update Related Records: If linked transactions are affected, update them accordingly to maintain consistency in your financial records.
Follow Best Practices: Adhere to accounting best practices to maintain accurate records:
Document the Reason for Deletion: Record why the check is being deleted. This documentation can be helpful for future reference and auditing purposes.
Consult with Your Accountant: If in doubt, consult with your accountant or a financial advisor to ensure that the deletion is appropriate and that all implications are considered.
Create a Backup: Before making any significant changes to your QuickBooks records, including deleting checks.
Backup Your QuickBooks Data: Ensure you have a current backup of your QuickBooks data. This precaution allows you to restore your records and prevent data loss.
Deleting a check in QuickBooks can have far-reaching effects on your financial records and reporting. Understanding these impacts is crucial to ensure your financial data remains accurate and reliable. Here’s a detailed look at how deleting a check can affect various aspects of your financial management:
Immediate Changes in Account Balances: When a check is deleted, the amount associated with that check is removed from the account balance. This alteration can have several implications:
Bank Account Balance: Your bank account balance in QuickBooks will reflect the deletion, potentially leading to discrepancies if the check has been reconciled.
Cash Flow: Deleting a check can impact your cash flow statements, as it removes the associated outflow of cash.
Balance Sheets and Profit & Loss Statements: The deletion of a check affects key financial statements:
Balance Sheet: The removal of the check alters the accounts payable or expense accounts, affecting the overall balance of your financial position.
Profit & Loss Statement: If the check was recorded as an expense, its deletion impacts the reported expenses and net income, potentially skewing profitability analysis.
Bank Reconciliation Discrepancies: Deleting a check that has been previously reconciled or included in your reconciliation process can cause discrepancies:
Reconciliation Reports: Deleting might lead to mismatches between your QuickBooks records and bank statements, requiring you to adjust your reconciliation reports.
Future Reconciliations: Ensure that subsequent reconciliations are adjusted to reflect the deletion, maintaining consistency in your financial reporting.
Linked Transactions and Dependencies: Checks might be related to other transactions, such as invoices or payments. Deleting a check can:
Affect Related Records: Remove or alter related transactions, which can lead to potential inconsistencies in your accounts receivable or payable.
Require Updates: You may need to update or adjust related records to reflect the change and maintain accurate financial data.
Regulatory and Auditing Implications: Deleting financial records can have compliance and auditing consequences:
Audit Trail: Document deletions and maintain an audit trail. Regulatory compliance may require that you keep accurate records of all transactions, including deletions.
Legal Implications: Depending on local regulations, maintaining accurate records is crucial for legal and compliance reasons.
Business Operations and Financial Analysis: The deletion of a check can influence various aspects of business operations:
Budgeting and Forecasting: Changes in financial records can impact budgeting and forecasting accuracy, affecting financial planning and decision-making.
Operational Reporting: Regular reports may need adjustments to reflect the deletion, ensuring that management reports remain accurate.
Deleting a check in QuickBooks is a crucial process that must be handled precisely to maintain your financial records' integrity. Understanding the appropriate scenarios for deletion, following a meticulous step-by-step guide, and verifying the details are all essential steps in ensuring your financial data remains accurate and reliable.
To further streamline your accounting processes and enhance your financial accuracy, consider integrating tools that simplify and optimize your QuickBooks experience. SaasAnt Transactions offers powerful features for importing and managing financial transactions efficiently. With its user-friendly interface and seamless integration, SaasAnt Transactions can help you maintain accurate records and avoid common pitfalls associated with manual data entry.
Start your free 30-day trial of SaasAnt Transactions today, no credit card required, and experience firsthand how this application can revolutionize your QuickBooks workflow and keep your financial data in top shape.
To delete a check in QuickBooks:
Start by logging in to SaasAnt Transactions, ensuring the app is connected to QuickBooks.
Navigate to the ‘Delete’ option.
Click ‘Ready to Clean up?’ to initiate the process.
You can delete checks by either using advanced filters (Delete by Searching) or by reference numbers or names (Delete by Reference).
Select ‘Checks’ as the transaction type, specify the date and range, and then click ‘Search’ to retrieve the relevant checks.
Review the results, select the checks to delete, and click the ‘Delete’ button to remove them.
Before proceeding, it’s advisable to back up your data by clicking the ‘Download’ button next to ‘Delete.’
Finally, confirm that the deletion was successful by reviewing the displayed results.
To import a check in QuickBooks,
Open SaasAnt Transactions on your computer and ensure it's connected to QuickBooks Online.
Click the ‘Let’s Import’ button to start exporting your checks.
Select ‘Checks’ from the transaction type options.
Choose your date type from ‘Created Date,’ ‘Transaction Type,’ or ‘Last Updated Date.’
Set your desired date range using the calendar box.
Choose the ‘Simple Mapping’ template or upload your custom template.
Click ‘Search’ to begin the import process.
Download the exported checks in CSV format by clicking the ‘Download’ button.
To export a check in QuickBooks,
Open SaasAnt Transactions on your computer and ensure it's connected to QuickBooks Online.
Click the ‘Let’s Export’ button to start exporting your checks.
Select ‘Checks’ from the transaction type options.
Choose your date type from ‘Created Date,’ ‘Transaction Type,’ or ‘Last Updated Date.’
Set your desired date range using the calendar box.
Choose the ‘Simple Mapping’ template or upload your custom template.
Click ‘Search’ to begin the export process.
Download the exported checks in CSV format by clicking the ‘Download’ button.
Method 1: Using Your File
Upload your file containing the checks to SaasAnt Transactions.
Map the fields, including the reference number, to match QuickBooks Online data.
Review and upload the file to apply modifications to the checks.
If needed, use the 'Undo' feature to roll back any changes made.
Method 2: Export and Modify
Export the checks from QuickBooks Online using SaasAnt Transactions.
Modify the exported file with necessary updates.
Re-upload the modified file to SaasAnt Transactions.
If required, utilize the 'Undo' feature to reverse the changes.
Log in to QuickBooks and go to the 'Banking' menu.
Select 'Write Checks' or 'New Check' depending on your version.
Enter the payee’s name in the 'Pay to the Order of' field.
Choose the bank account from which the check will be issued.
Input the check date, amount, and memo details.
Categorize the payment by selecting the appropriate account or expense category.
Review the details and click 'Save and Close' or 'Save and New' to finalize.