How to Edit Journal Entries in QuickBooks Online

Editing journal entries in QuickBooks is an essential skill for maintaining accurate financial records. Whether you need to correct an error, update an entry, or adjust your financial data, knowing how to properly edit journal entries ensures your accounting remains precise and up-to-date.
You can easily edit multiple journal entries in QuickBooks using SaasAnt Transactions. It’s a QuickBooks add-on with a 5-star rating from over 4000 QuickBooks users. Let’s dive in to see how to edit Journal entries in QuickBooks Online.
How to Edit Journal Entries in QuickBooks Online: Step-by-Step Guide
Editing journal entries in QuickBooks Online using Saasant Transactions is a straightforward process. Here’s a step-by-step guide:
Step 1: Access Saasant Transactions
Log in to QuickBooks Online: Ensure you're logged in with the necessary permissions to edit journal entries.
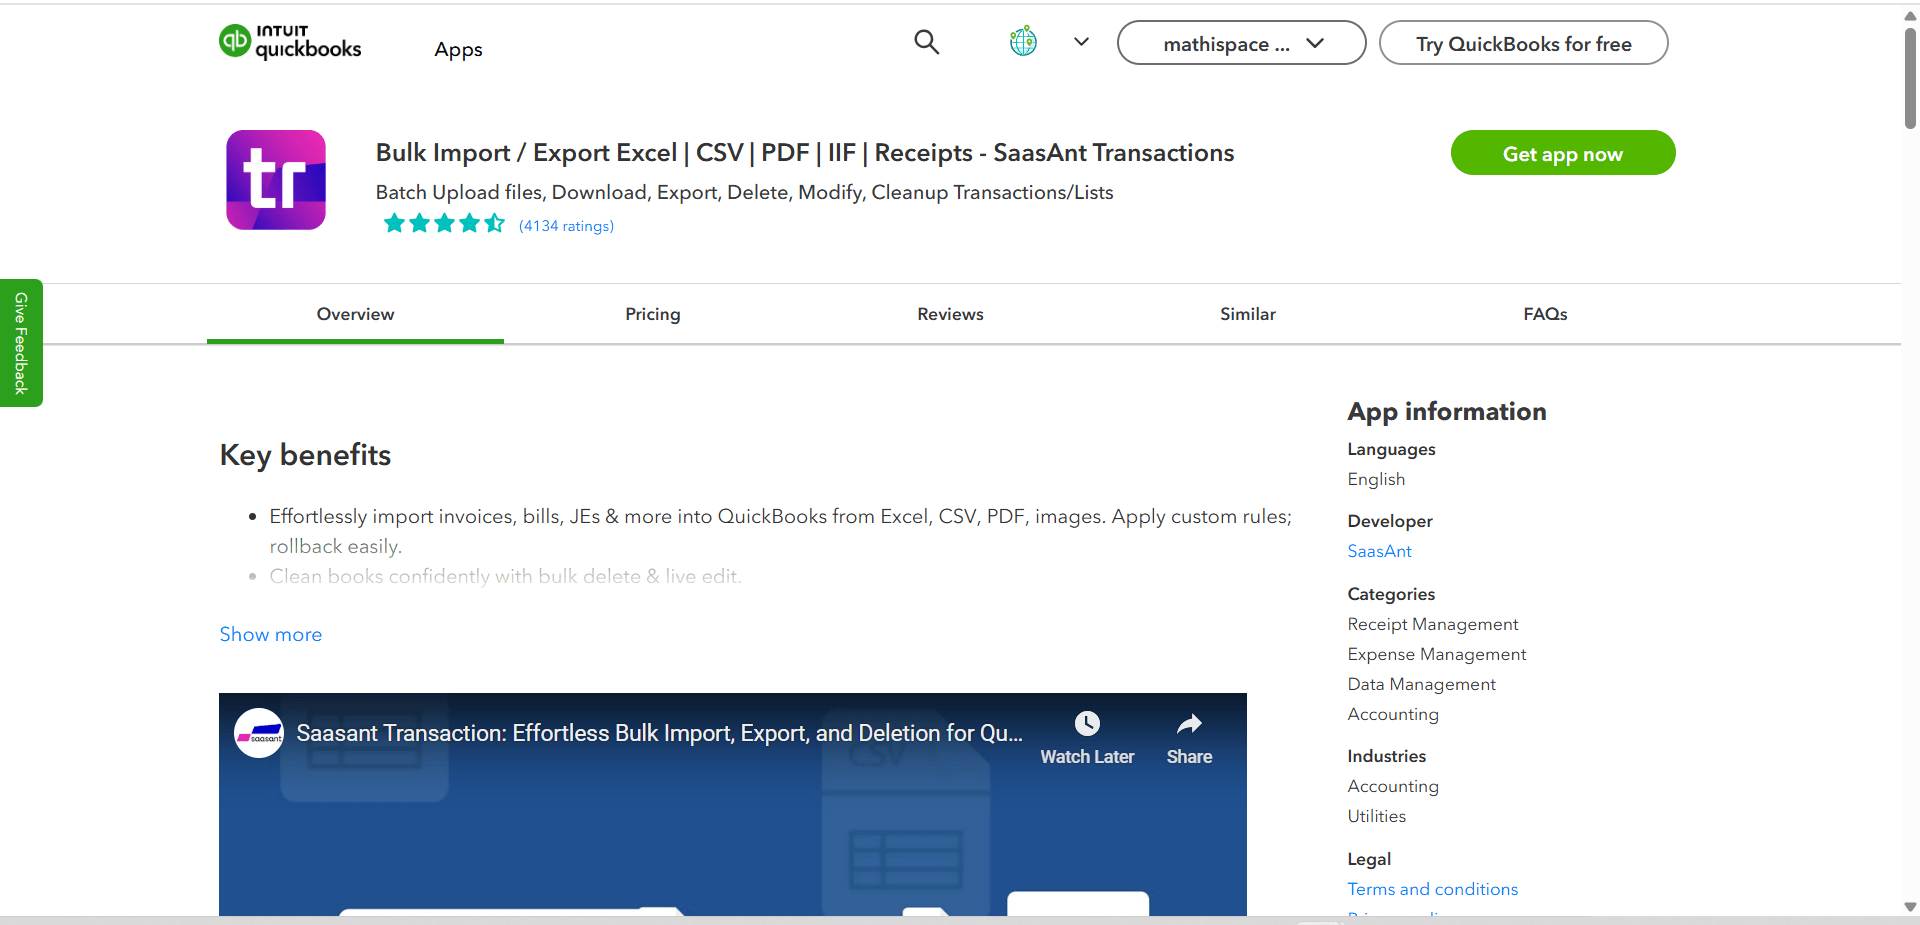
Open Saasant Transactions: From the QuickBooks Online dashboard, navigate to the Apps section. Find and open Saasant Transactions.
If you haven't added SaasAnt to your QuickBooks account, search for it via Find Apps. It's the most trusted and highly rated one in the QuickBooks appstore.
Step 2: Download Existing Journal Entries
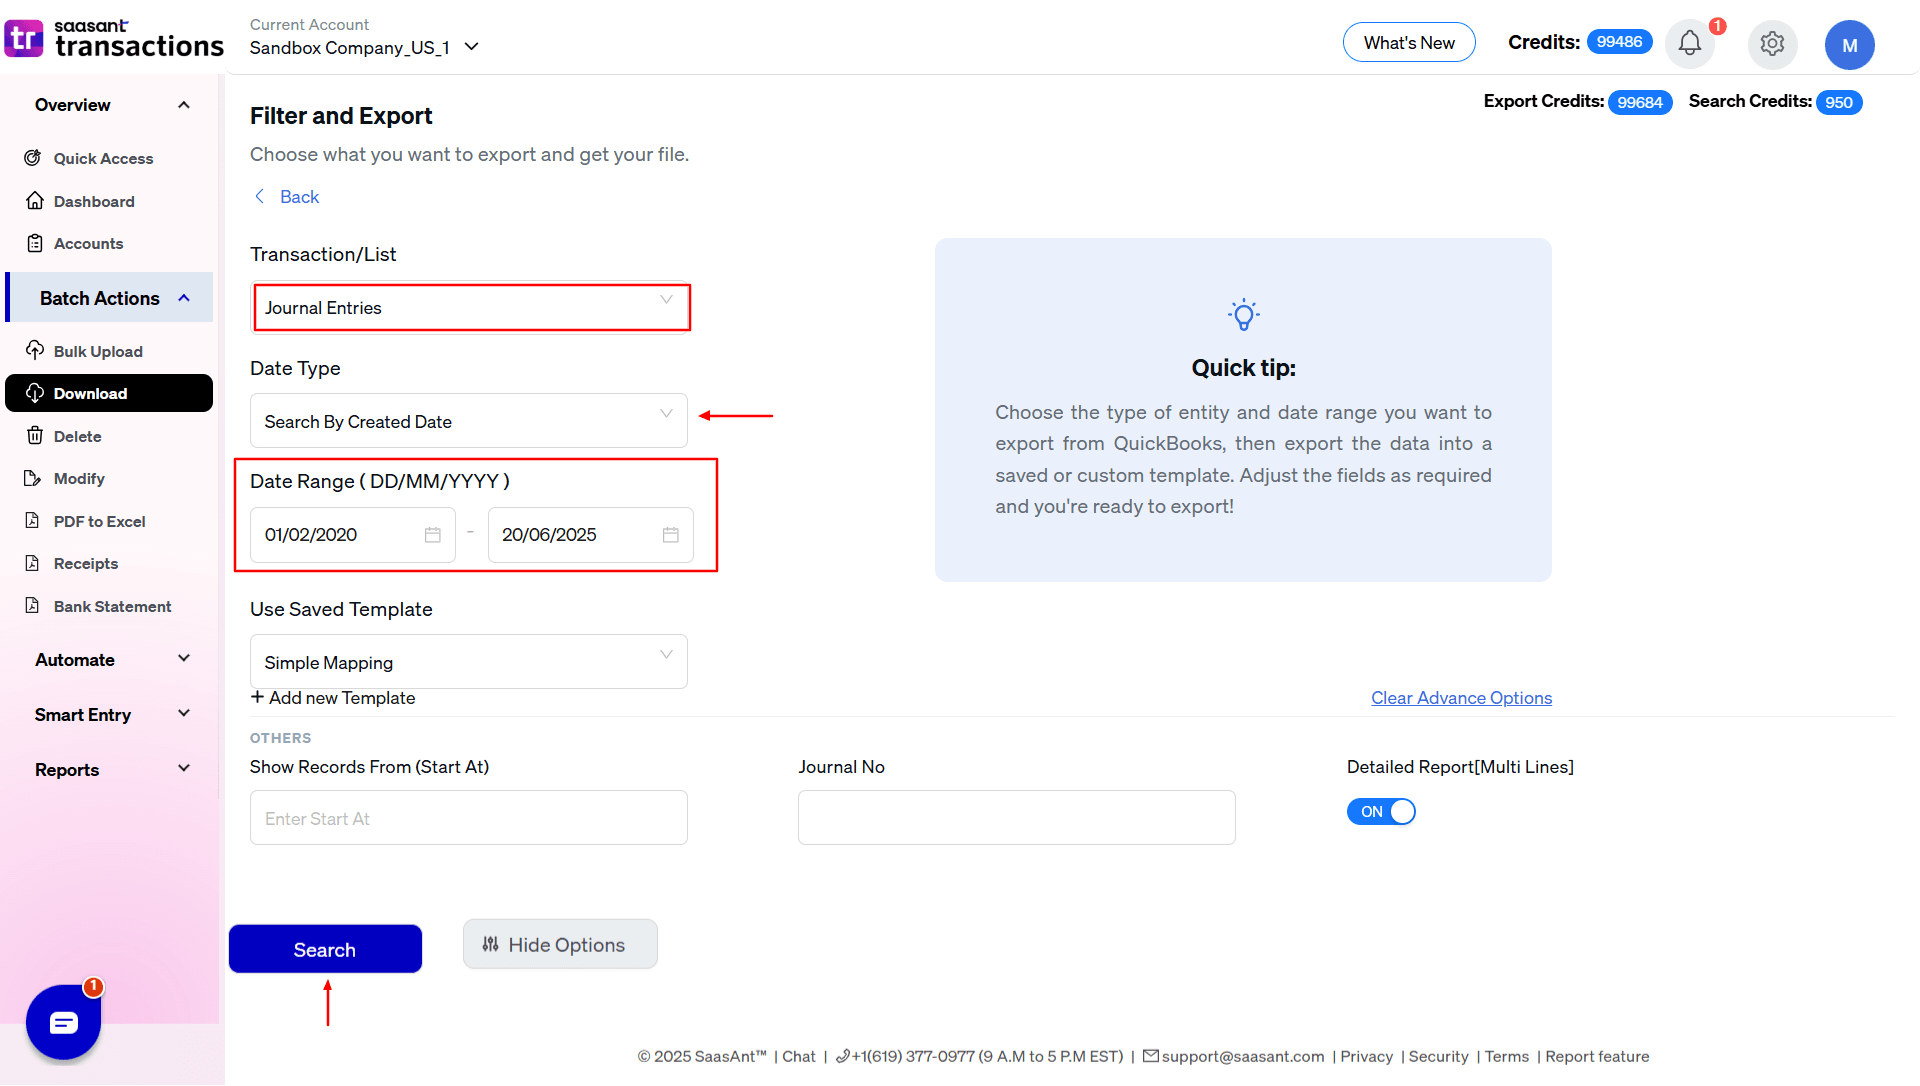
Select the Type of Data: In Saasant Transactions, choose the option for "Journal Entries."
Export Journal Entries: Download the journal entries you want to edit. This is typically done by selecting the appropriate date range or specific entry IDs.
Filter and Export: Here, select “Journal Entries” in Transaction/List, select the preferred search style inside “Data Type” and give the data range, next you give the template. Refine your search further by using Show Records From (Start At) and Journal no.
Step 3: Edit Journal Entries
Open the Exported File: The exported data will usually be in an Excel or CSV format. Open this file using a spreadsheet application like Excel or Google Sheets.
Locate the Entry to Edit: Find the specific journal entry you want to modify. You can search by date, entry ID, or description.
Make the Necessary Changes: Edit the details of the journal entry as required. You can change the amounts, accounts, or any other relevant fields.
Step 4: Re-import the Edited Entries
Prepare for Import: Save the edited file in CSV format, as this is the format Saasant Transactions typically accepts for import.
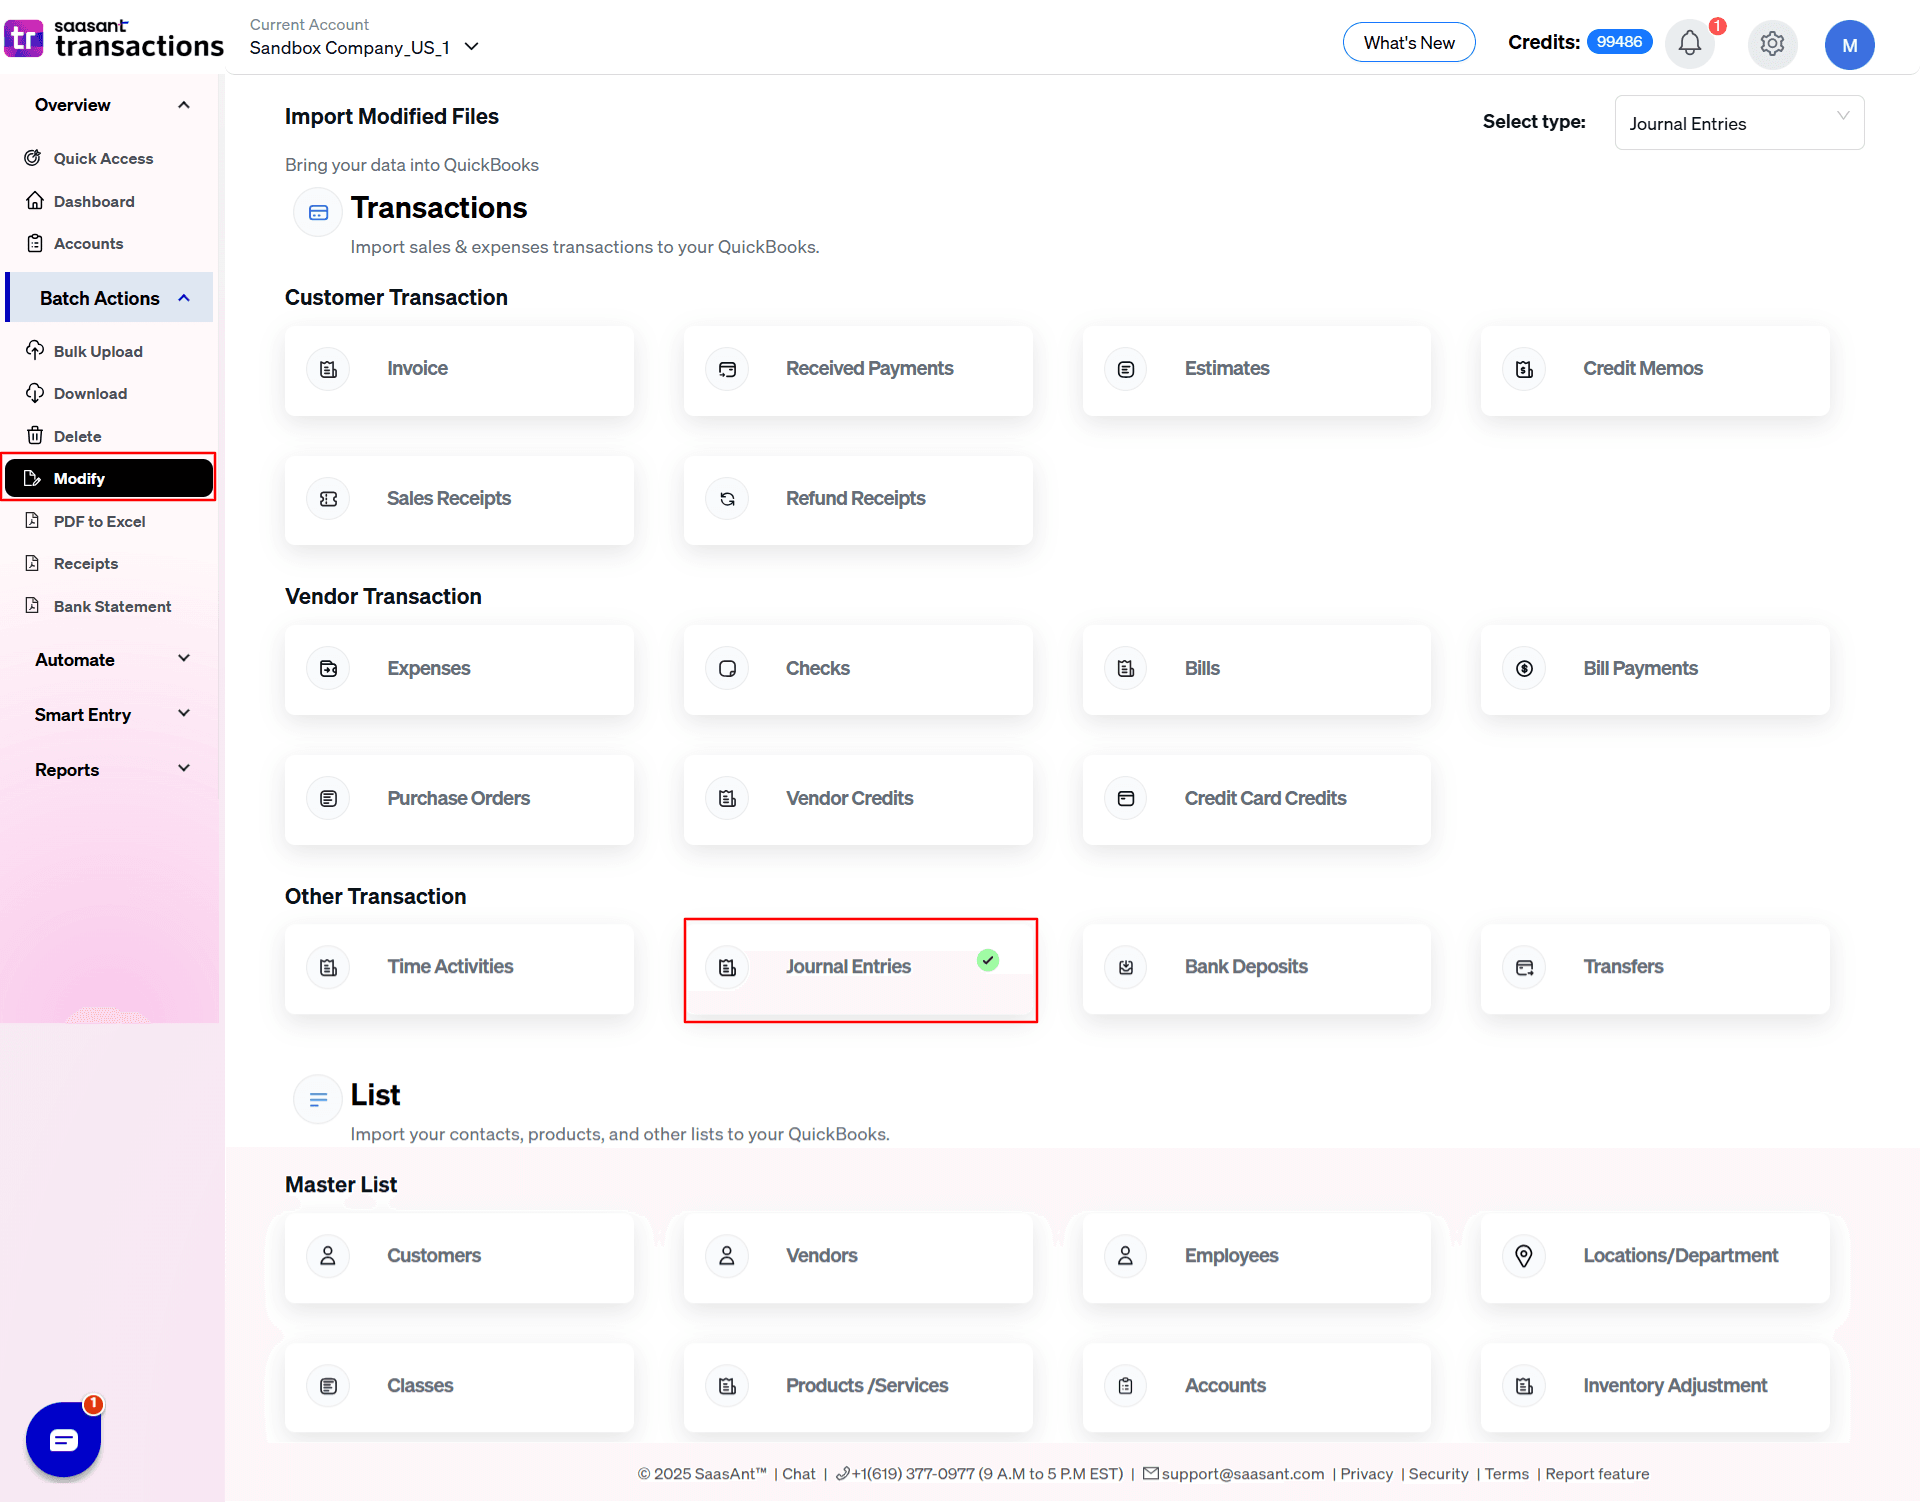
Upload the File: Go back to Saasant Transactions and choose the “Modify” option. Select "Journal Entries" as the data type.
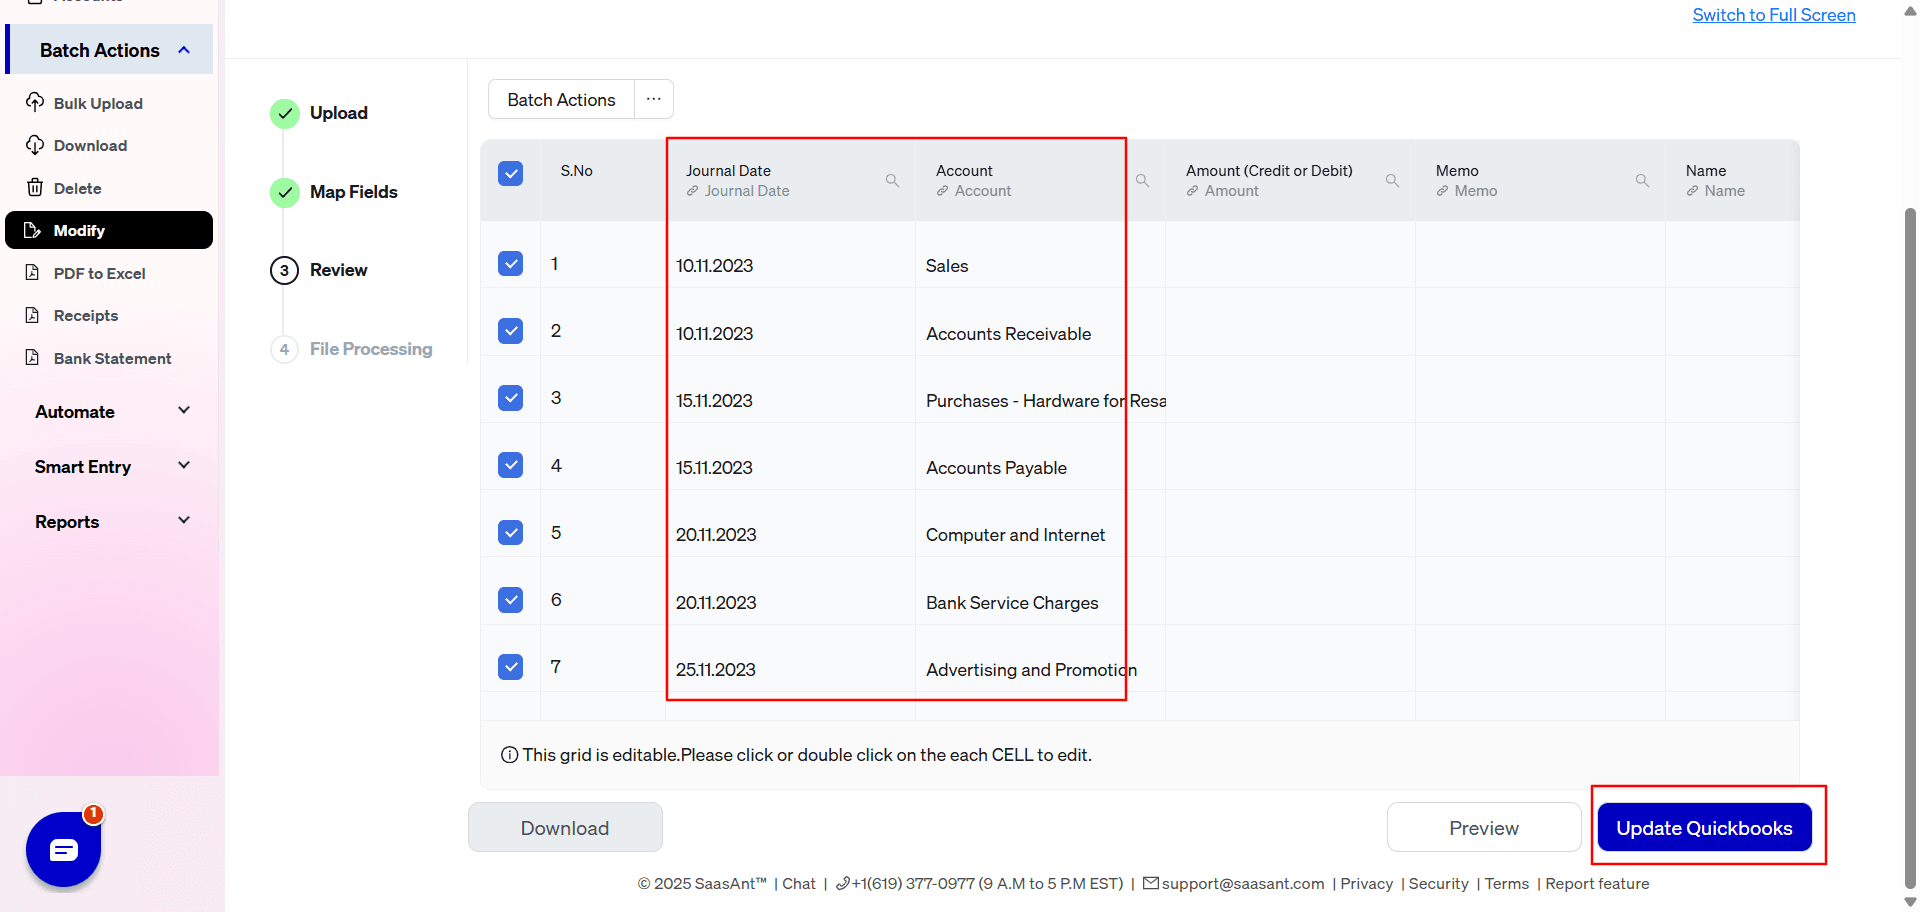
Map the Fields: Saasant will automatically map the fields from your CSV file to the corresponding QuickBooks fields. Ensure everything is correctly mapped to avoid errors by going back to the mapping if necessary.
Review and Import: After mapping, review the data for accuracy. Once confirmed, proceed with the import.
Step 5: Verify the Changes in QuickBooks Online
Check the Entries: Go back to QuickBooks Online and navigate to the journal entries section. Verify that the edits have been successfully updated.
Run Reports: If necessary, run relevant reports to ensure that the changes are reflected correctly in your financial statements.
Alternate method:
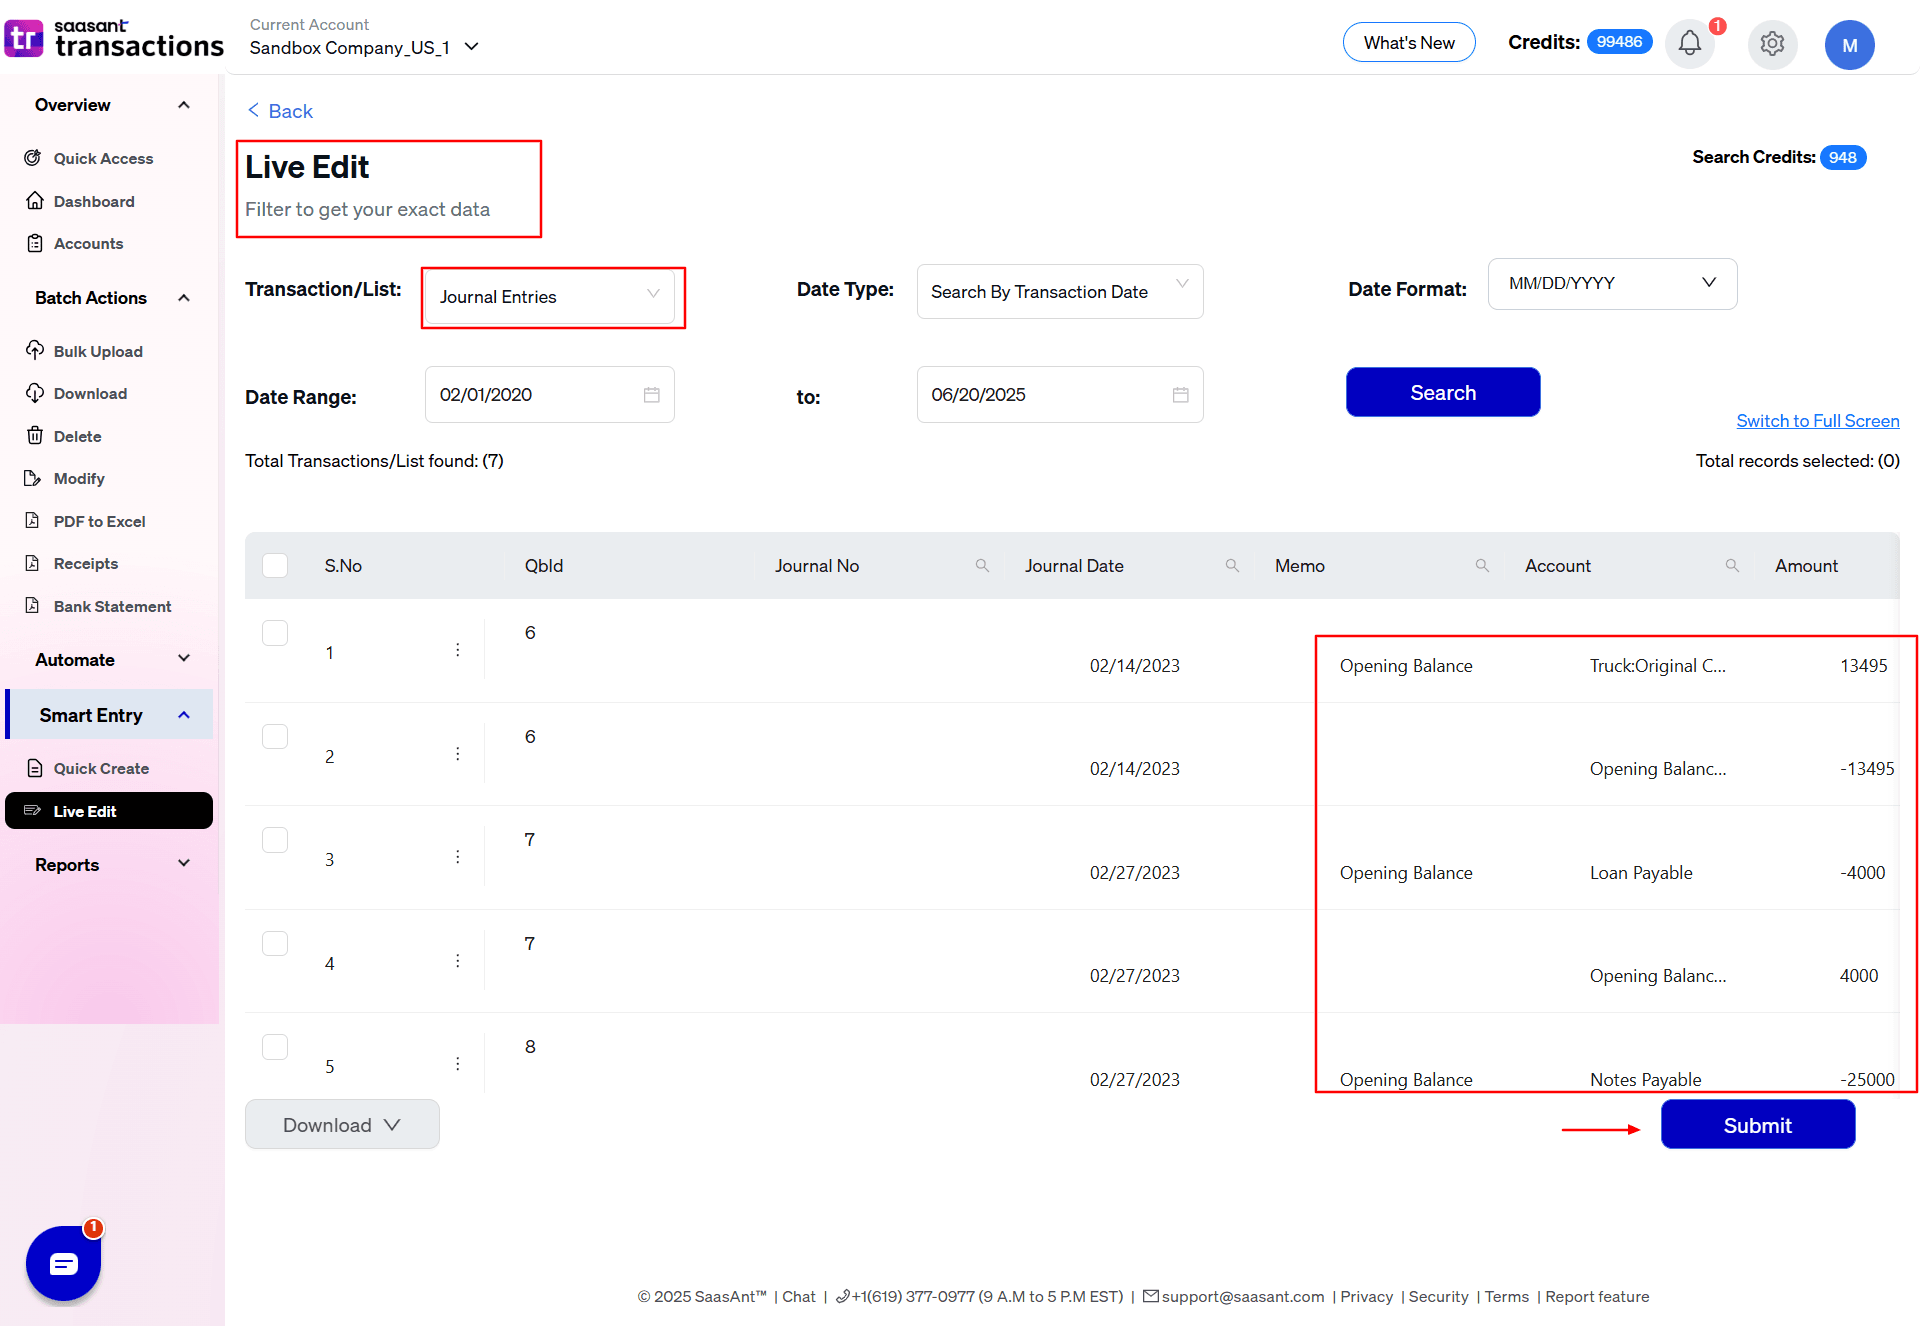
If you are making quick fixes to specific entries, you can also use Live Edit. In Smart Entry > Live Edit, you can search the particular entries you want to edit with filters and make changes directly in the results grid.

What are the Reasons for Editing Journal Entries in QuickBooks Online?
Common reasons for editing journal entries include:
Correcting Errors: Fixing mistakes such as incorrect amounts, dates, or accounts.
Updating Information: Making changes to reflect new or updated financial information.
Adjusting Financial Data: Modifying entries to ensure accurate financial reporting after new developments.
Best Practices for Editing Journal Entries
Document Changes: Keep a record of all edits made to journal entries, including the reasons for the changes.
Reconcile Regularly: After editing, reconcile your accounts to ensure that your financial data remains accurate.
Consult with Your Accountant: For complex edits, consider consulting with your accountant to ensure that changes are handled correctly.
Conclusion
Editing journal entries in QuickBooks Online is crucial for accurate financial records, and using tools like SaasAnt Transactions can simplify this task. SaasAnt integrates seamlessly with QuickBooks, enabling you to efficiently import, export, and edit various transactions, including bulk edits of journal entries. This helps save time and reduces errors.
For those new to SaasAnt, there's a 30-day free trial that offers full access to all features, allowing you to explore its capabilities risk-free. This trial is a great opportunity to see how SaasAnt can enhance your QuickBooks Online experience and improve your financial management.
FAQs
1. How to Edit Journal Entries in QuickBooks Online?
To edit a journal entry in QuickBooks Online, navigate to the 'Accounting' tab, select 'Chart of Accounts,' and locate the account containing the journal entry. Find the specific entry, click to open it, make your changes, and then save the updates. For bulk edits, you can use tools like SaasAnt Transactions to streamline the process.
2. How to Create a Journal Entry in QuickBooks Online?
To create a journal entry in QuickBooks, go to the 'New' button on the left-hand menu, select 'Journal Entry' under the 'Other' category, and fill in the required details, such as accounts, debits, credits, and memos. Once completed, click 'Save and Close' to record the entry.
3. Can I Delete a Journal Entry in QuickBooks Online?
Yes, you can delete a journal entry in QuickBooks. Navigate to the 'Accounting' tab, find the journal entry in the relevant account, click to open it, and then select 'More' at the bottom of the screen. Choose 'Delete' and confirm your action. Be cautious, as deleting a journal entry cannot be undone and may impact your financial reports.
4. Can I Import Journal Entries into QuickBooks Online?
Yes, you can import journal entries into QuickBooks Online using tools like SaasAnt Transactions or QuickBooks’ built-in import feature. Prepare your journal entries in a CSV or Excel format, then follow the import steps to upload and map the data to the appropriate fields in QuickBooks.
Recommended reading: