How to Enter Bills in QuickBooks Online: Step-by-Step Guide
 Entering bills in QuickBooks Online can feel overwhelming, especially for small business owners and new users. You might struggle to find the "Enter Bills" option or face frustration with bugs like autofill issues and keyboard shortcuts such as “save and new” that suddenly stop working. It’s understandable to feel stressed when the cursor doesn’t start in the vendor box, forcing you to click or tab multiple times. Sometimes, when you are trying to use the ‘upload multiple bills’ throws you an error saying ‘something went wrong.’
Manually entering bills one by one is also tedious and time-consuming, making it hard to keep your records organized. Fortunately, using SaasAnt Transactions can simplify this process. With a 4.9-star rating from 4000 users, SaasAnt Transactions offers a user-friendly solution that keeps your data secure while saving you time. In this blog, we’ll walk you through the default method of how to enter and manage bills in QuickBooks online and the easy bulk uploading using SaasAnt Transactions. This blog also covers how to create recurring bills to help you manage your expenses more efficiently.
Feel free to skip to the section you need the most using the table of contents below.
Contents
How to Enter Bills in QuickBooks Online: Step-by-Step Guide
Easy Bulk Upload of Bills Using SaasAnt Transactions
Conclusion
FAQ
How to Enter Bills in QuickBooks Online: Step-by-Step Guide
Default method: upload multiple bills
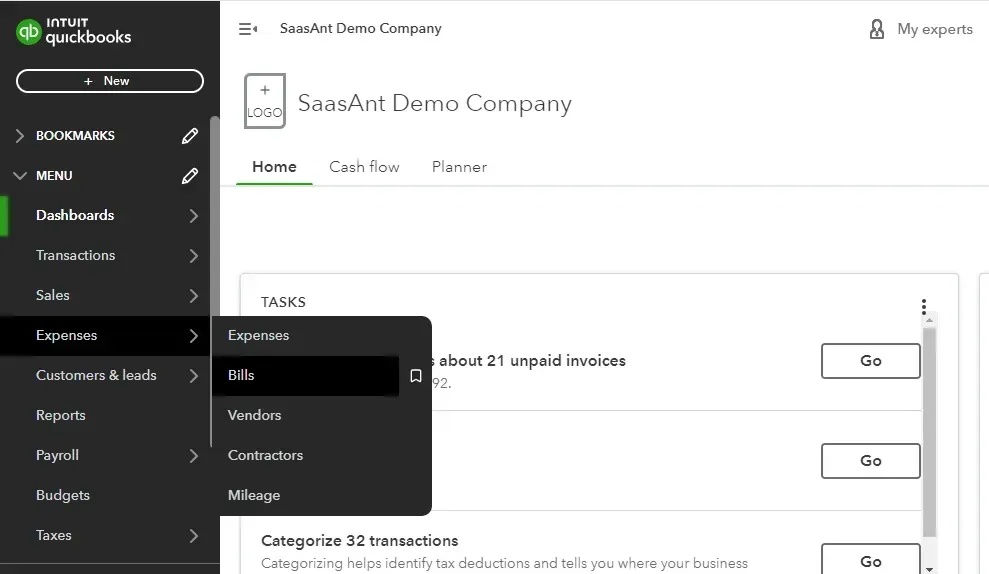
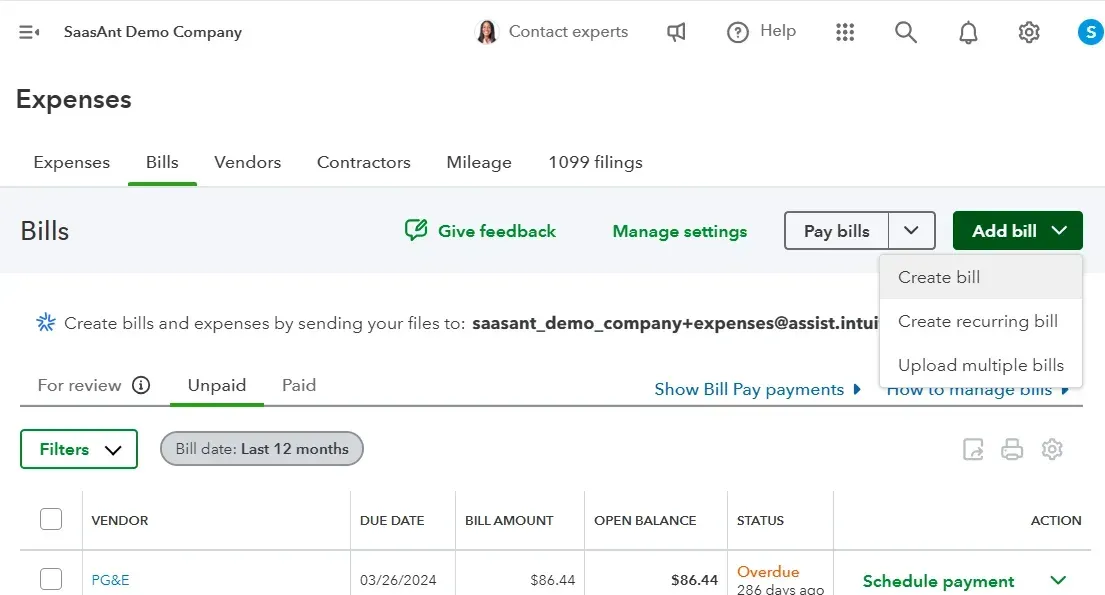
Step 1: To upload bills from your computer, navigate to Expenses -> Bills
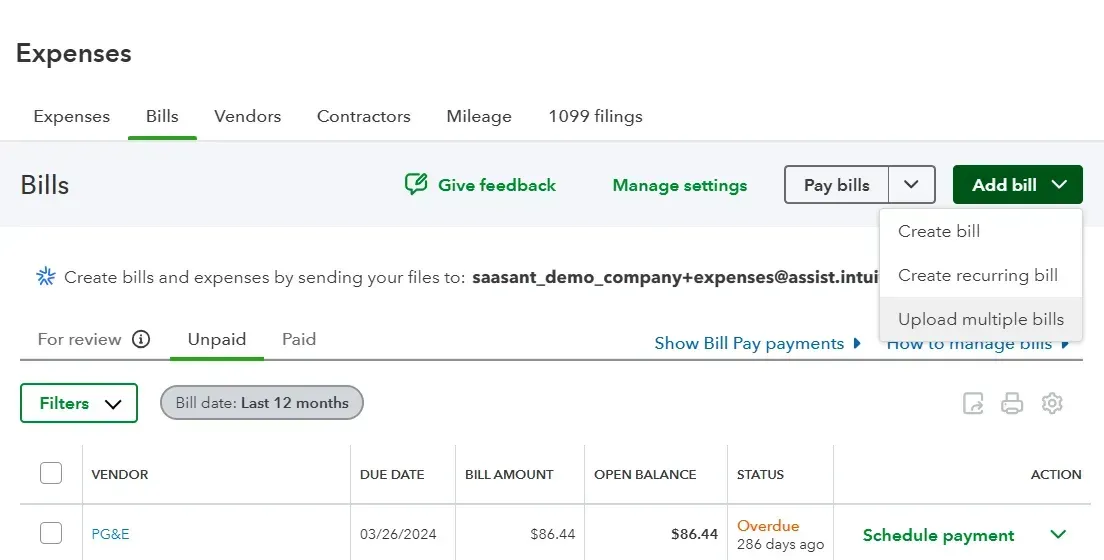
Step 2: Click “Add Bill” and select the “Upload Multiple Bills” option from the dropdown.
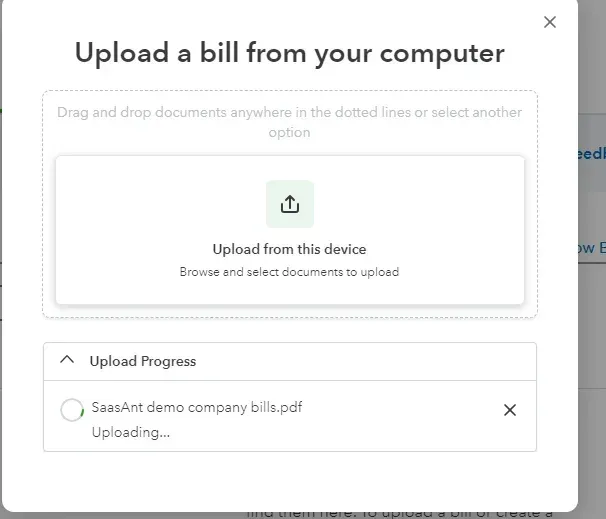
Step 3: Once you receive a bill or invoice from your vendor, save it on your computer and choose the file to upload. Note that you can only import a PDF file. Sometimes, you might get an error message saying ‘Something went wrong’ or ‘Upload failed.’
Whereas when you use SaasAnt Transactions, you can upload bills as XLS, XLSX, CSV, IIF or PDF.
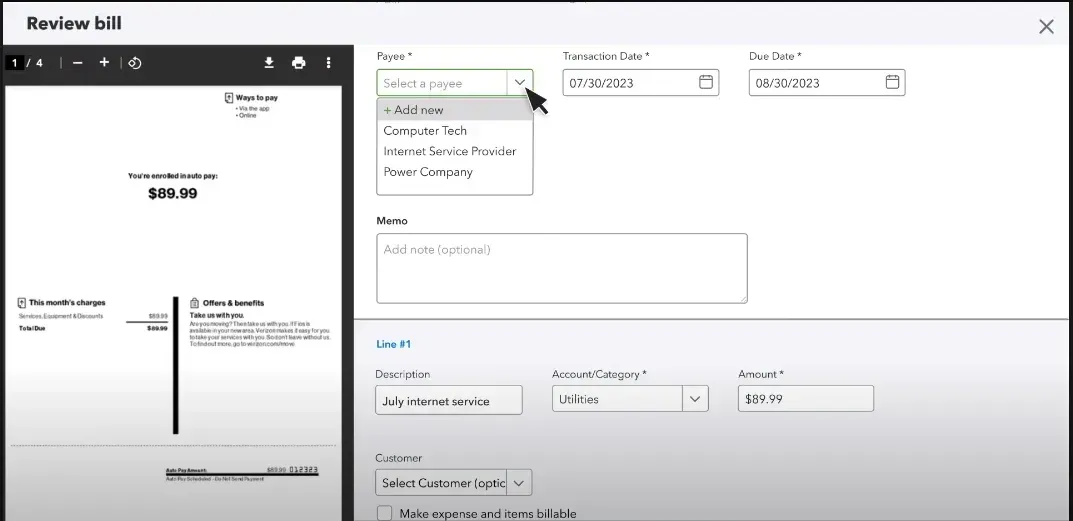
Step 4: The uploaded bills will appear under “For Review,” QuickBooks will automatically detect essential information.
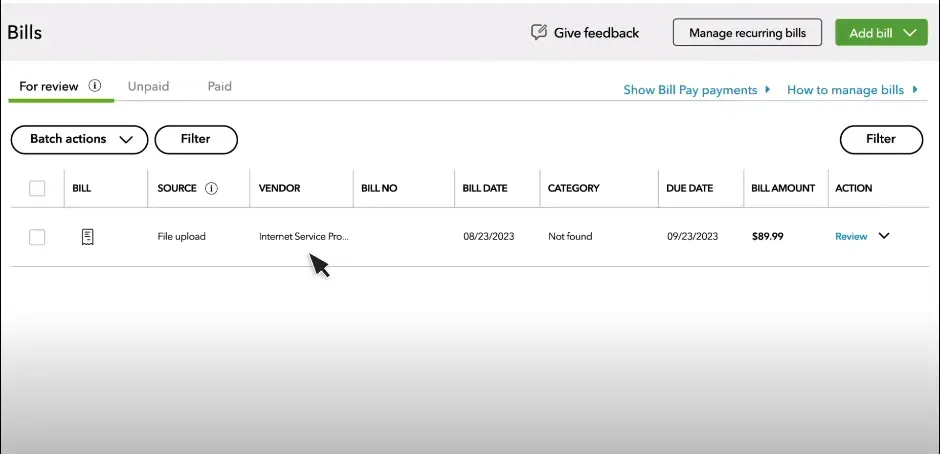
Step 5: Review the details captured by QuickBooks, filling in any missing or incorrect information. Select the account type, typically an expense account for bills, and choose a payee. If the vendor is not listed, you can add a new one. Select Save and Close.
Easy Bulk Upload of Bills Using SaasAnt Transactions
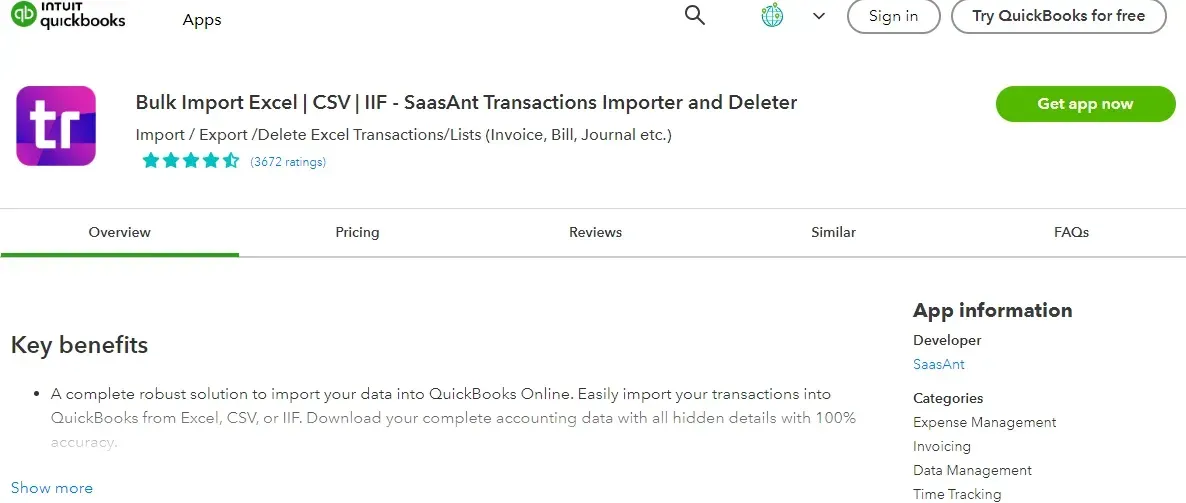
Step 1: Find SaasAnt Transactions in the QuickBooks App Store and connect it to your QuickBooks account. SaasAnt Transactions is a certified, secure app designed to keep your data safe and well-managed. You can get started with the 30-day free trial instantly.
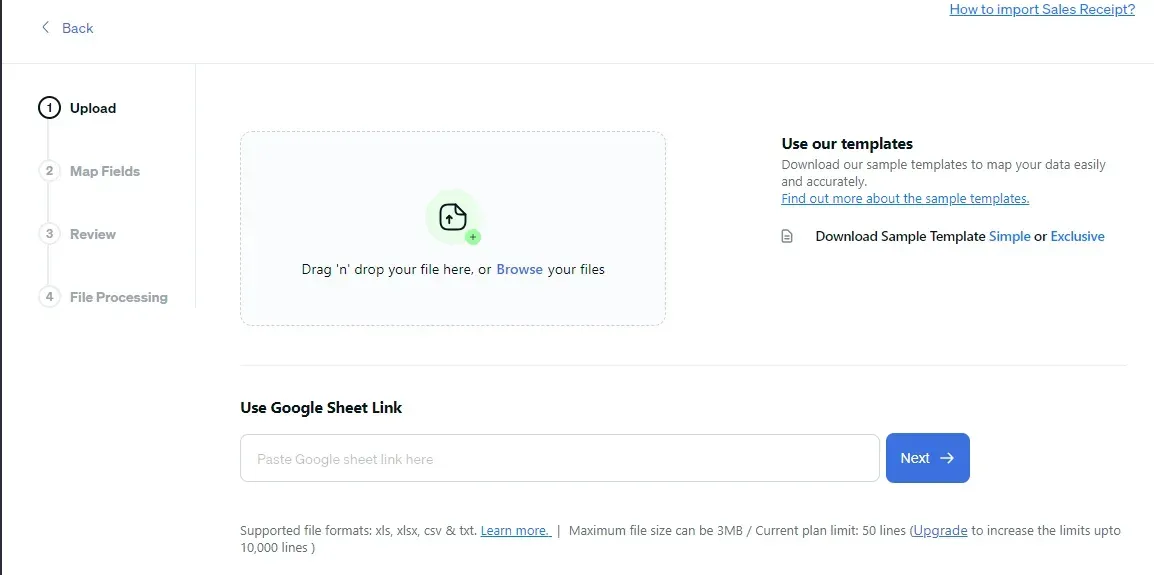
Step 2: Now, navigate to the SaasAnt Transactions dashboard and select New Import. Under Vendor Transactions, select Bills.
Browse and select the file you want to import. You can upload any type of file format, such as XlS, XLSX, CSV, or IIF. Additionally, SaasAnt Transactions lets convert a PDF file to a supported format.
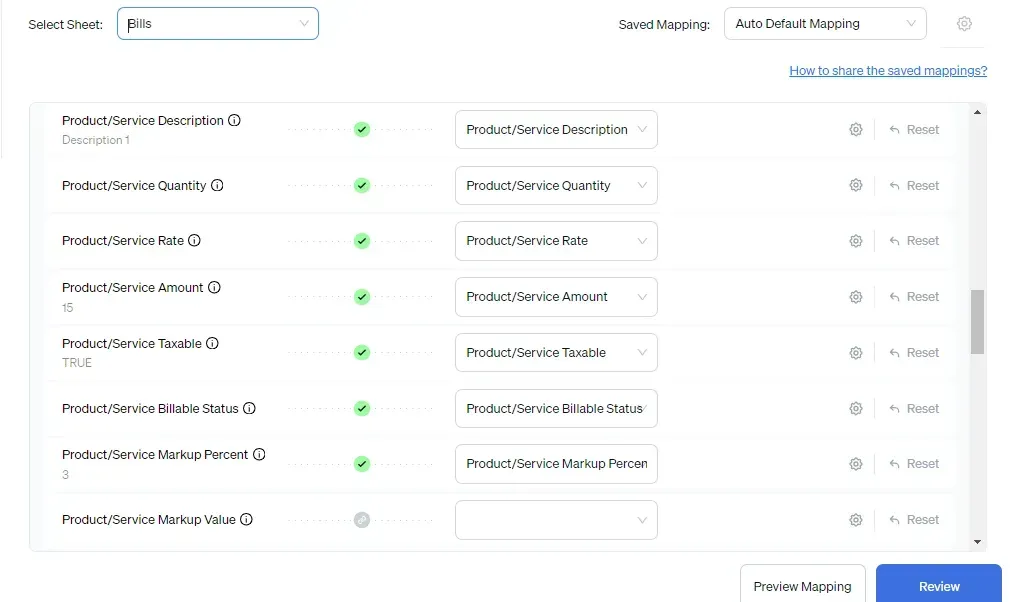
Step 3: Mapping matches the fields in QuickBooks to those in the imported file. Select a sheet in case you have multiple sheets in the same file.
For example, when you select QuickBooks entity as Bills, QuickBooks attributes for Bills will appear on the left, such as the Bill Number. If your file lists the Bill Number under S.No, you'll need to map it correctly.
Preview Mapping shows you how the fields would be mapped in QuickBooks.
Using the SaasAnt Transactions import template can make mapping even simpler.
 Step 4: Review the data mapped to avoid mistakes and ensure the accurate alignment of all details. SaasAnt Transactions facilitates data review and corrections, helping you identify errors and resolve them.
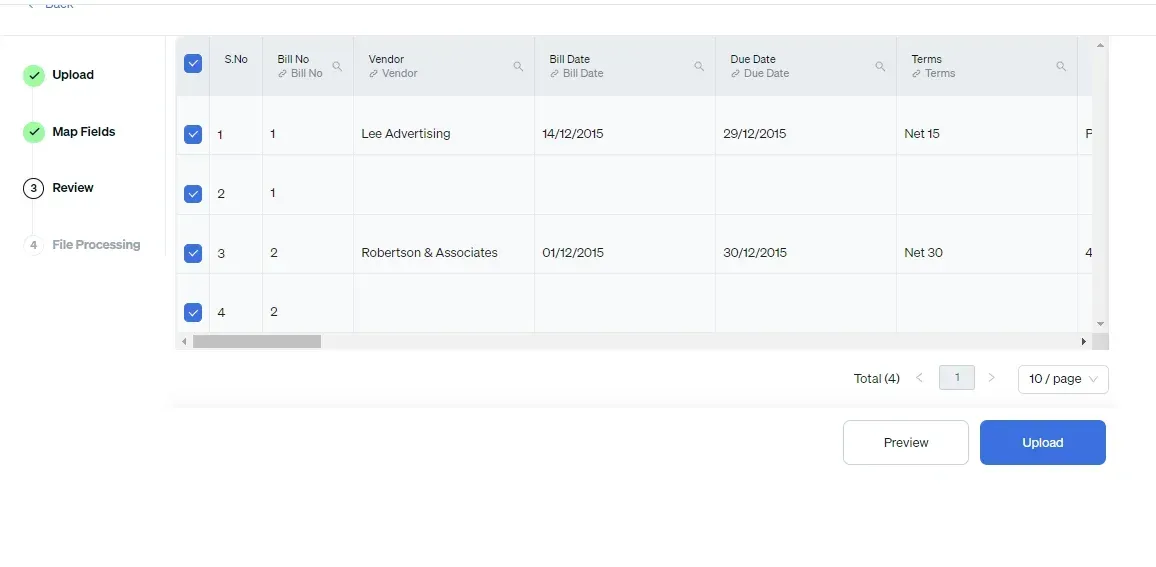
Step 5: Upon confirming the data accuracy, click ‘Upload’ to import your bills into QuickBooks Online.
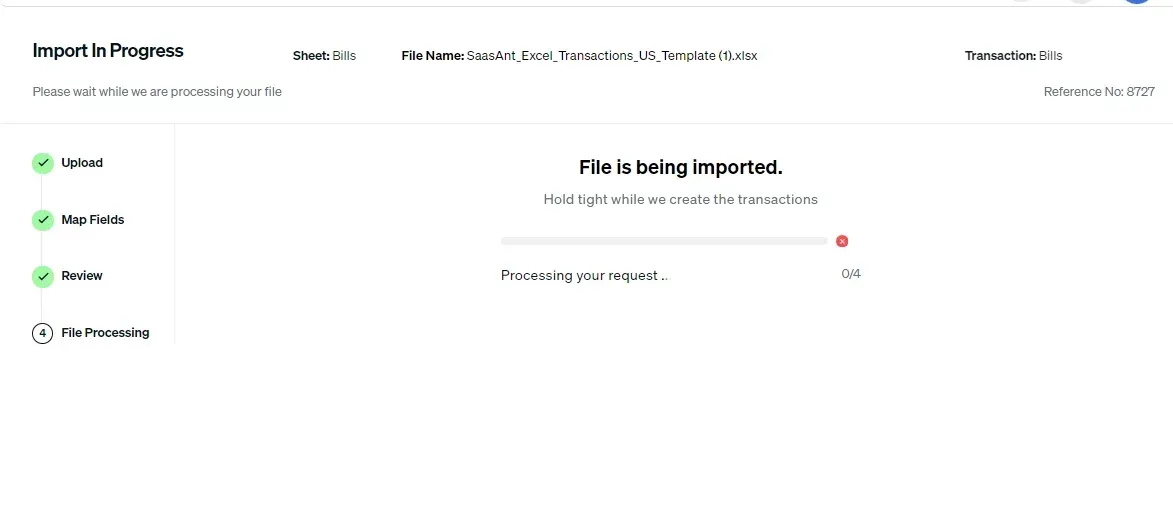
Step 6: Once the data is uploaded, click on Show Results. Upon successful import, the list of bills uploaded will appear with their reference number. Click on the reference number to verify if that particular bill has been uploaded into QuickBooks.
If there is an issue with import, you will receive an error report, and SaasAnt Transactions will offer suggestions on how to resolve the issue.
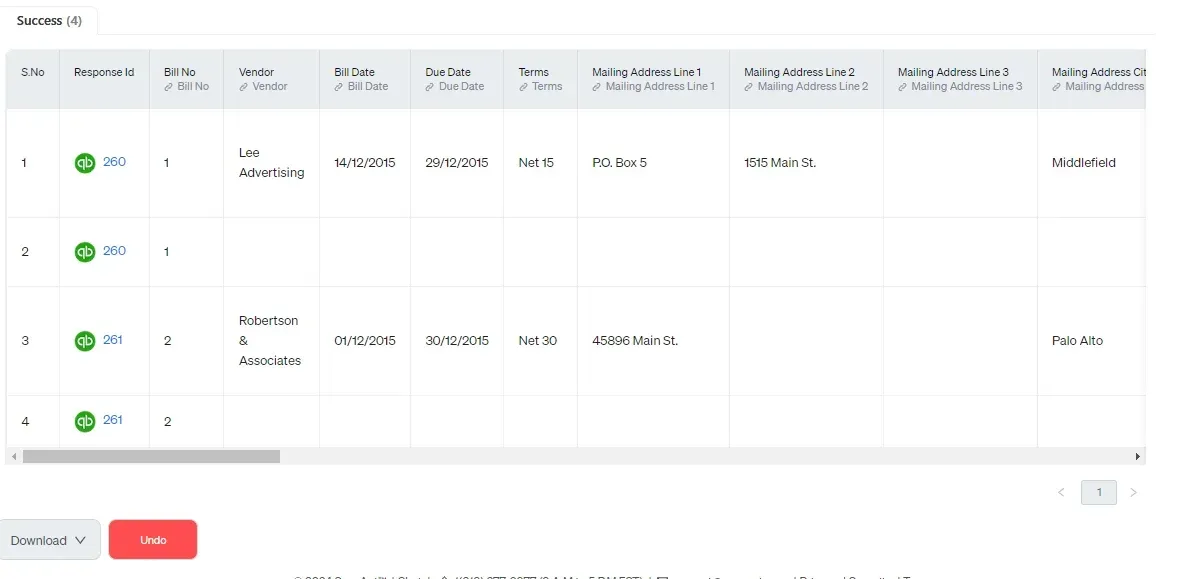
You can also roll back (undo) the imported data if needed.
A quick note: You can also automate bulk upload of financial statements using email, FTP/SFTP, or Zapier using SaasAnt Transactions.
To Create Bills Individually
Sometimes, you only have a bill or two to enter. In such cases, you may try the following method.
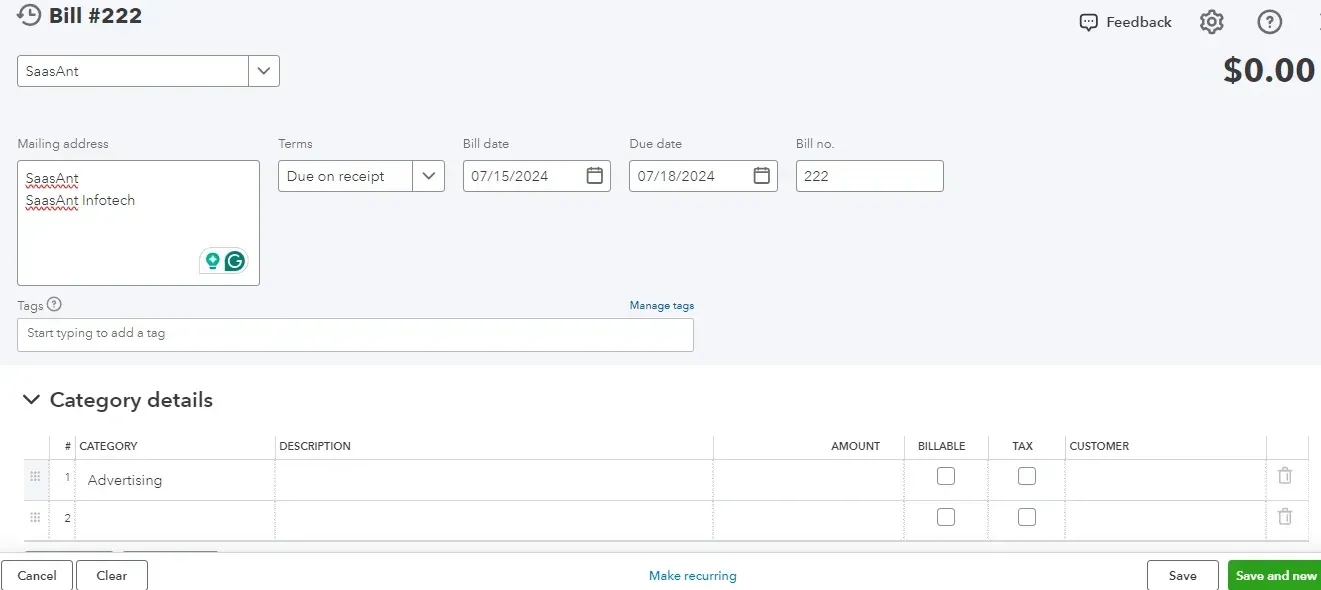
Step 1: Go to Expenses -> Bills -> Add Bills -> Create a Bill.
Step 2: Choose a vendor, select the category you are being billed for, enter the description and amount, and select Save. You can view the new bill in the Unpaid tab.
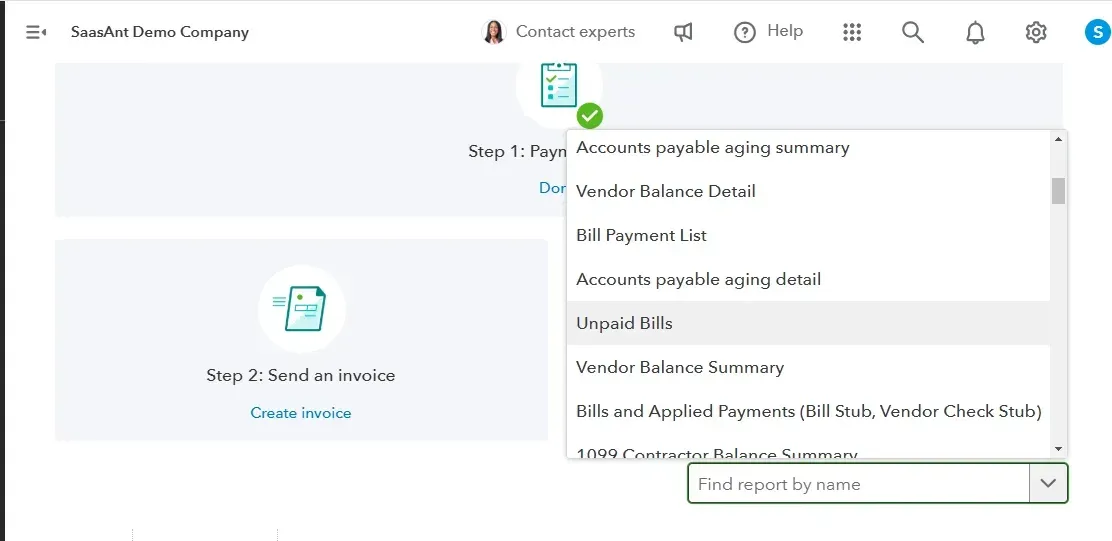
Note: You can also check your unpaid bills by going to ‘Reports’ in the dashboard and then selecting the unpaid bills in the ‘Find report by name’ drop-down menu.
How to Mark Bill as Paid
Click on + New located in the upper left corner.
Under the Vendors section, select Pay Bills.
Enter the Payment Account and Payment Date.
Select all the bills that you are paying with this payment.
If necessary, adjust the payment amounts.
Finally, click Save and Close.
How to Create a Recurring Bill in QuickBooks Online
Step 1: To set up a recurring bill, go to Expenses -> Bills -> Add Bills -> Create a Recurring Bill.
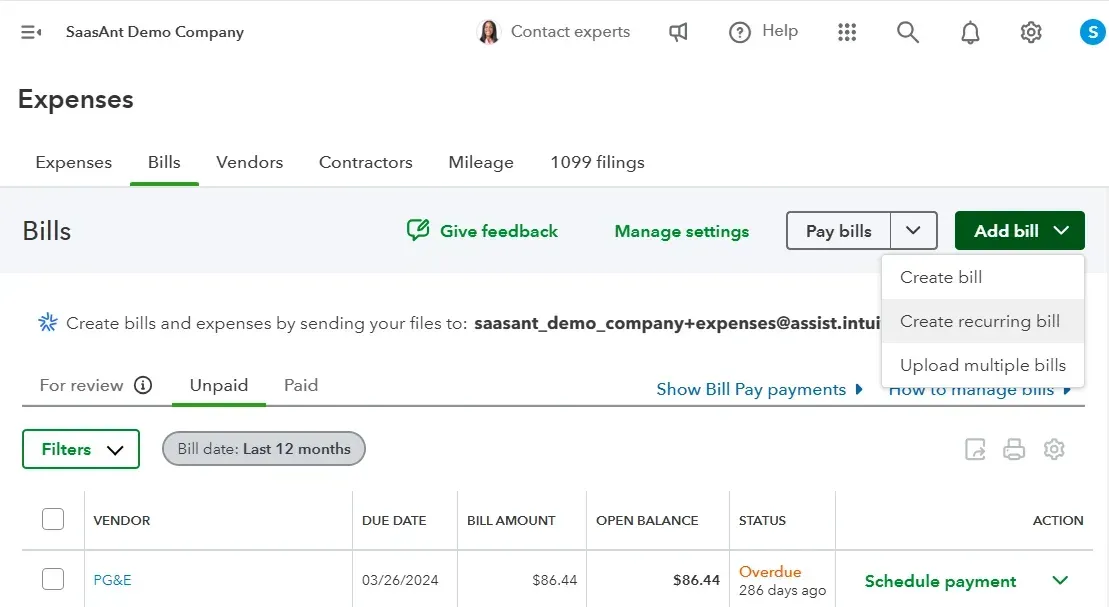
Step 2: Name the template and select the type (Scheduled, Reminder, or Unscheduled) from the dropdown. Choose a vendor; if not listed, click Add New to include their details.
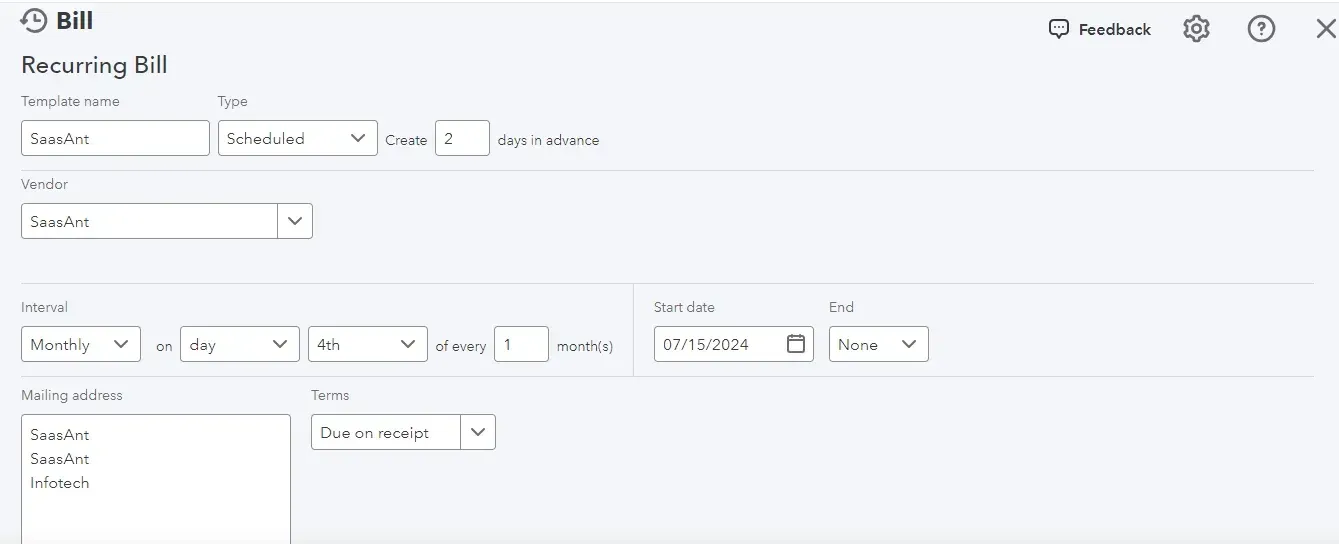
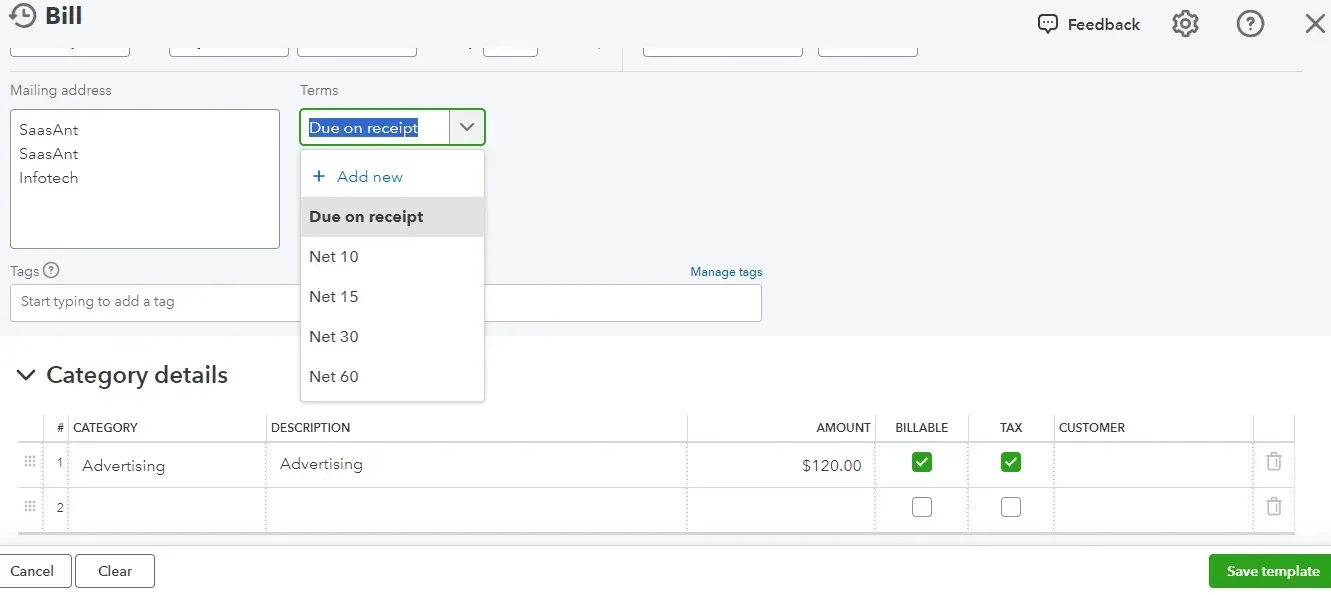
Step 3: Select the payment interval and specify the start and end dates. Choose the terms (e.g., Due on Receipt, Net 10, Net 60), or create your own by clicking Add New. Enter the category, description, and amount, then click Save Template.
Setting up recurring payments will make it convenient for you to keep track of upcoming payments and will show up when you run reports.
Read also:
How to Delete a Bill in QuickBooks Online
Conclusion
In conclusion, precise bill records are essential for transparent financial management and simplifying audit preparation. It doesn’t have to be such a tedious or time-consuming task. You can always get started with SaasAnt Transactions using the 30-day free trial immediately.
FAQ
What is the purpose of enter bills in QuickBooks?
The purpose of entering bills in QuickBooks is to track and manage your business's accounts payable. By recording bills, you can monitor expenses, ensure timely payments, and maintain accurate financial records. This process helps you manage cash flow effectively and provides insights into your business's financial health.
How do I record a bill on QuickBooks?
To record just a bill or two, go to QuickBooks Dashboard -> Expenses -> Bills -> Add Bills -> Create a Bill. Enter the vendor details, description, and amount, and click Save. If you need to create multiple bills, integrate SaasAnt Transactions and bulk upload from XLS, XLSX, CSV, IIF, or PDF file.
How do I enter multiple bills in QuickBooks?
To enter multiple bills in QuickBooks, integrate SaasAnt Transactions with QuickBooks and import effortlessly from XLS, XLSX, CSV, IIF, or PDF files. You can also get started with the 30-day free trial immediately.
How to manage bills in QuickBooks?
To manage bills easily, integrate SaasAnt Transactions with QuickBooks and import effortlessly from XLS, XLSX, CSV, IIF, or PDF files. You can also create recurring bills in QuickBooks online and use the reports to check the ‘unpaid bills’ to manage bills effectively.