How to Import Estimates into QuickBooks Online

Importing estimates into QuickBooks Online can be challenging due to the formatting complexity and potential errors arising from manual entry. These difficulties can disrupt your financial workflow and lead to inaccuracies in project cost projections.
SaasAnt Transactions addresses these issues by offering a streamlined solution for bulk imports, ensuring precision and efficiency. With a commendable 4.9-star rating from over 4000 users, SaasAnt Transactions is recognized for its reliability in simplifying the import process and enhancing data accuracy.
This guide will show you how to import estimates into QuickBooks Online, improving your financial management and planning.
How to Import Estimates into QuickBooks Online: Quick Instructions
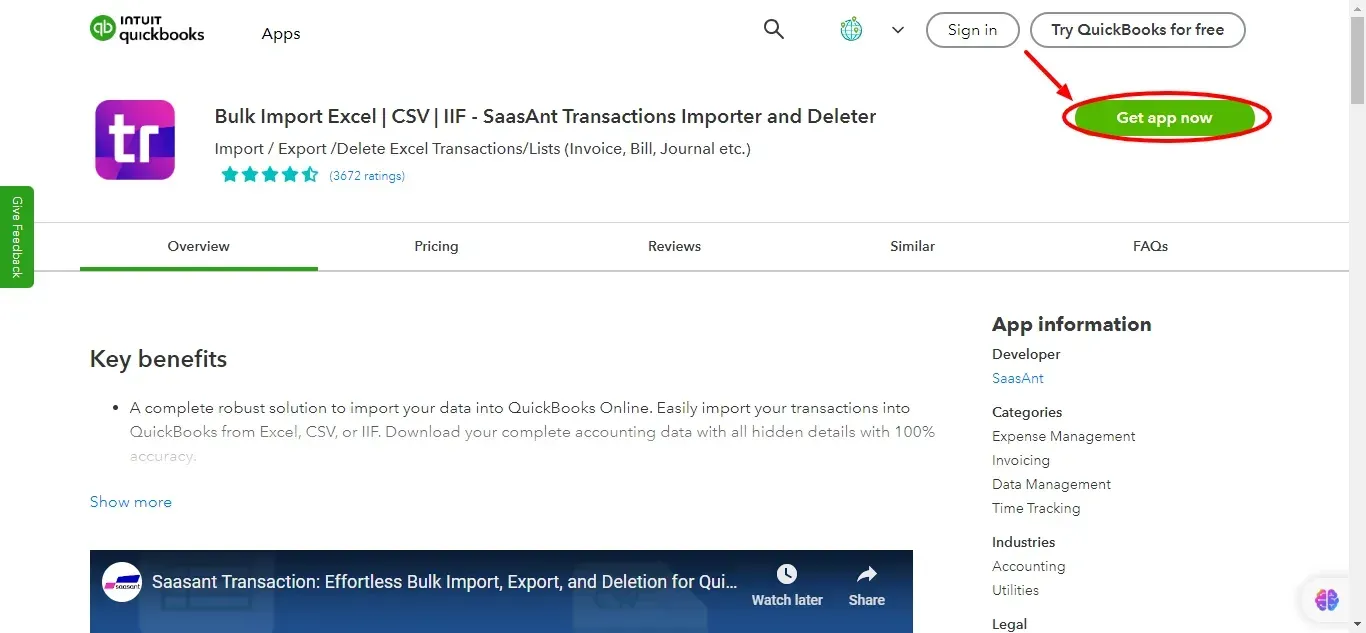
Log In and Connect: Access your QuickBooks Online account, navigate to the 'Apps' tab, find 'SaasAnt Transactions,' and click ‘Get App Now’ to connect it.
Prepare and Upload: Choose 'New Import,' ensure your estimates file (Excel, CSV, PDF or IIF) is ready, and upload it.
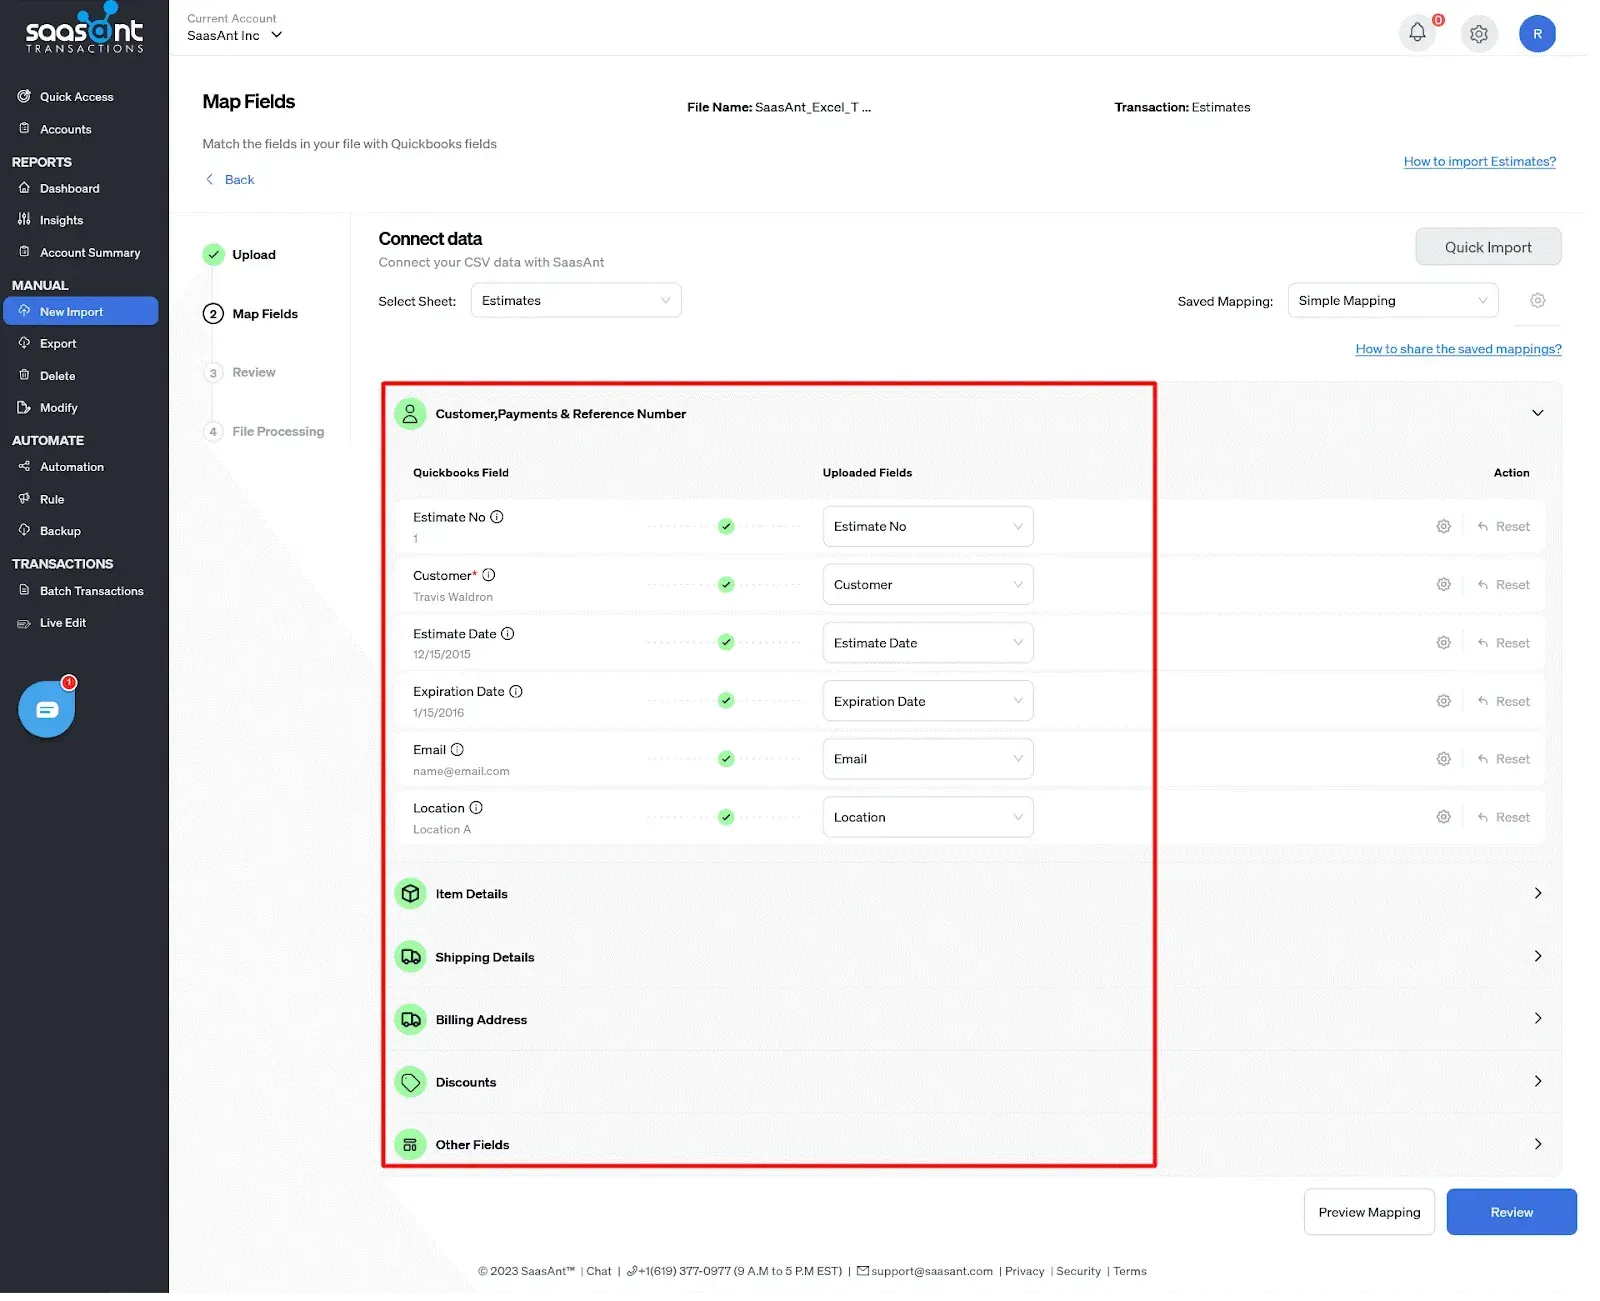
Map Fields: Align your file fields with QuickBooks fields on the mapping screen and review the setup.
Review and Import: Verify the mapped fields, start the import, and check the data in QuickBooks for accuracy.
How to Import Estimates into QuickBooks Online: Step-by-Step Guide
Step 1: Prepare Your Estimates Data for Import
Organize Data: Ensure your estimates data is in a format supported by SaasAnt Transactions—Excel (XLS, XLSX), CSV, PDF or IIF.
Sample Template: Utilize the SaasAnt Transactions Sample Template to ensure your data fields are correctly mapped.
Note: Convert PDF files if your estimates are in PDF format; use SaasAnt Transactions to convert the PDF to a supported format.
Step 2: Set Up SaasAnt Transactions via QuickBooks App Store
Access the App: Open QuickBooks Online, go to the Apps tab and search for SaasAnt Transactions.
Connect the App: Click ‘Get App Now’ to link SaasAnt Transactions with your QuickBooks account. SaasAnt Transactions is a SOC2-certified app that handles your data according to General Data Protection Regulation (GDPR) norms.

Note: Saasant Transactions offers its customers a 30-day free trial. You don’t have to give your credit card details, either. Make the most of this offering and save tons of time.
Step 3: Upload Your Estimates File

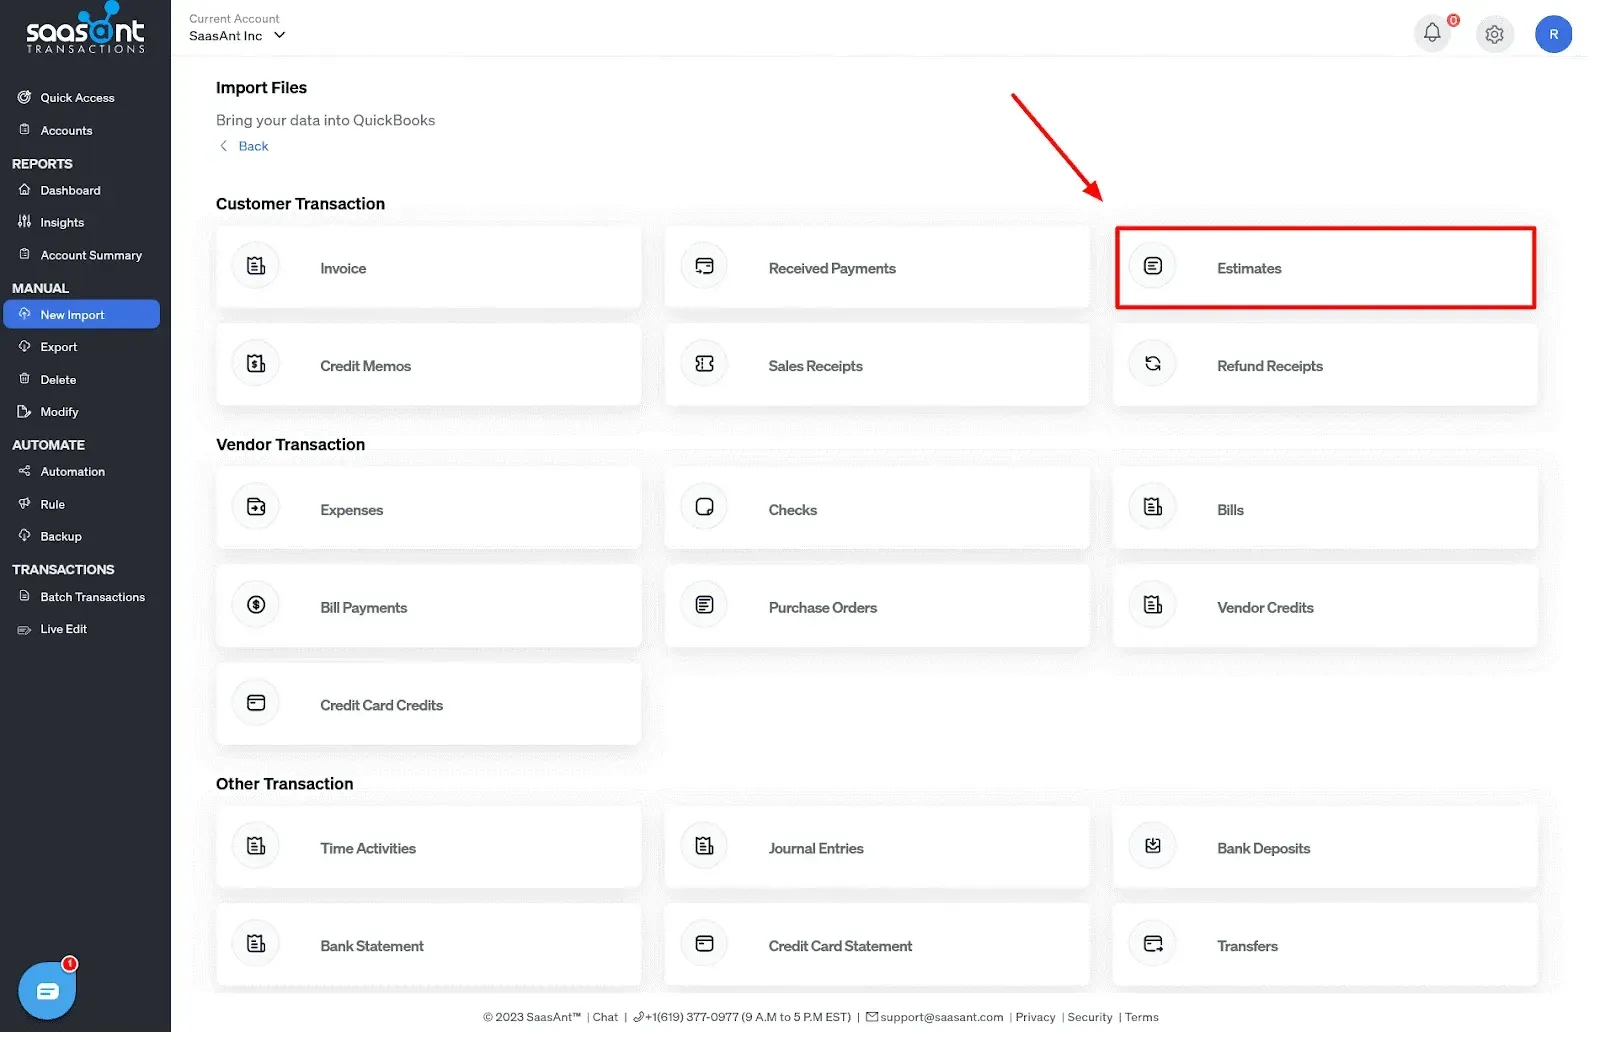
New Import: Select ‘New Import’ to start the process.
Choose Transaction Type: Select 'Estimates' as the transaction type.
Upload the File: Click ‘Browse’ to upload your file in Excel (XLS, XLSX), CSV, PDF or IIF format.
Step 4: Map Your Estimates Data Fields

Correct Mapping: Ensure appropriate alignment of the details from your file with the corresponding fields in QuickBooks.
Preview Mapping: Leverage SaasAnt’s 'Preview Mapping' feature to avoid potential errors during the import.
Support Portal: Utilize the SaasAnt support portal to map the fields accurately.
Step 5: Review Your Data Before Final Import
Review the Data: Review the data for inconsistencies before initiating the import.
Make Corrections: SaasAnt allows you to correct errors at this stage, helping to facilitate a smooth import process.
Step 6: Complete the Import Process
Import: Click the ‘Import’ button in SaasAnt Transactions to import your estimates data into QuickBooks Online.
Confirmation: Receive confirmation of the successful import of your data.
Step 7: Verify the Imported Estimates
Verification: Review the import of your estimates data into QuickBooks.
Final Check: Undertake a final check to ensure the accuracy of the imported data, with an option to 'undo' the import if necessary. This action will roll back the complete imported data and bring QuickBooks to the pre-import state.
Conclusion
Efficiently managing estimates is crucial in maintaining a professional relationship with your clients. Utilizing SaasAnt Transactions facilitates easy estimates into QuickBooks Online and supports automation, scheduling your imports via email, Zapier, or FTP.
Enhance your efficiency by starting with SaasAnt Transactions today, backed by the support team’s white-glove onboarding process, guiding you in getting started promptly.
FAQs
Can you import an estimates into QuickBooks Online?
Yes, you can import estimates into QuickBooks Online using QuickBooks apps like SaasAnt Transactions, which streamline the process and ensure accuracy.
How do I enter an estimate in QuickBooks Online?
To enter an estimate, go to the Sales tab, select Estimates, click ‘New Estimate,’ fill in the required details, and save.
How do I import estimates into QuickBooks Online?
Use SaasAnt Transactions to import estimates. Connect the app, upload your file, map the fields, review the data, and initiate the import.
Does QuickBooks support multi-currency estimates imports?
Yes, QuickBooks Online supports multi-currency estimates imports, allowing businesses to manage international transactions effectively.
Can I import estimate data from other accounting software into QuickBooks Online?
Yes, you can import estimate data from other accounting software into QuickBooks Online using compatible file formats such as Excel, CSV, PDF or IIF using SaasAnt.
How do I transfer estimates data when changing the company set up in QuickBooks?
Export your estimates data to a supported format, then use SaasAnt Transactions to import it into your new QuickBooks company setup.
Recommended Reading: