Import Invoices into QuickBooks Online: Step-by-Step Guide
Effortlessly Import Invoices into QuickBooks Online
Easily import a large volume of invoices into QuickBooks Online without the hassle of manual data entry. This guide will help you streamline the process and avoid errors.
Import Invoices into Quickbooks Online - Quick Instructions
For users seeking a quick start, follow these straightforward steps to import your invoices into QuickBooks Online:
Log in to your QuickBooks Online account.
Navigate to the 'Apps' tab and find 'SaasAnt Transactions.'
Connect SaasAnt Transactions with your QuickBooks Online account.
Click 'New Import' to start the invoice import process.
Upload your invoice file (supports various formats, including Excel, CSV, and IIF).
Map the fields in your file correctly with QuickBooks fields in the mapping screen.
Review the mapping and initiate the import.
Validate the imported data in QuickBooks Online to ensure accuracy.
Importing invoices into QuickBooks Online can streamline your business operations, saving time and reducing errors. Follow these detailed steps to ensure a smooth process.
How to Import Invoices into QuickBooks Online - Step by Step Guide
Step 1: Preparing Your Invoice Data for Import
Organize your invoice data in a supported format (Excel, CSV, PDF or IIF). Using a sample template can help ensure correct data mapping.
Step 2: Setting Up the Import Tool
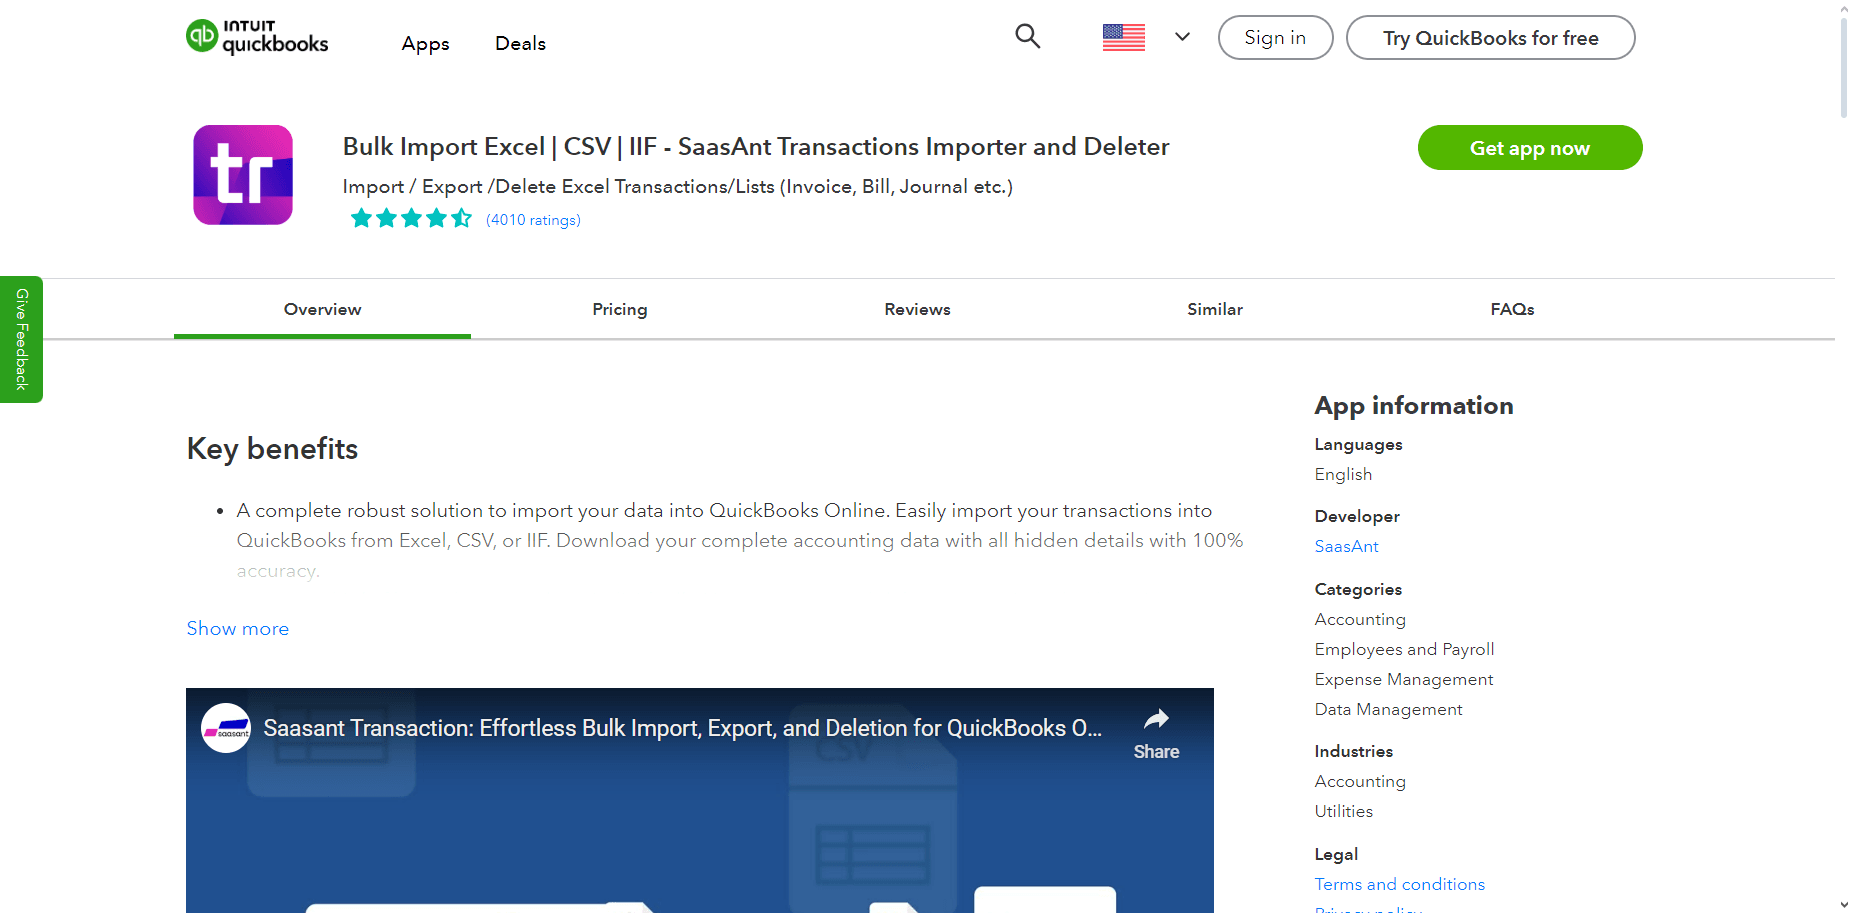
Access the import tool via the QuickBooks Online Appcenter. Log in, navigate to the 'Apps' tab, and connect the import application.
Step 3: Uploading Your Invoice File
Initiate a new import, select 'Invoice' as the transaction type, and upload your file in the supported format.
Step 4: Mapping Your Invoice Data Fields
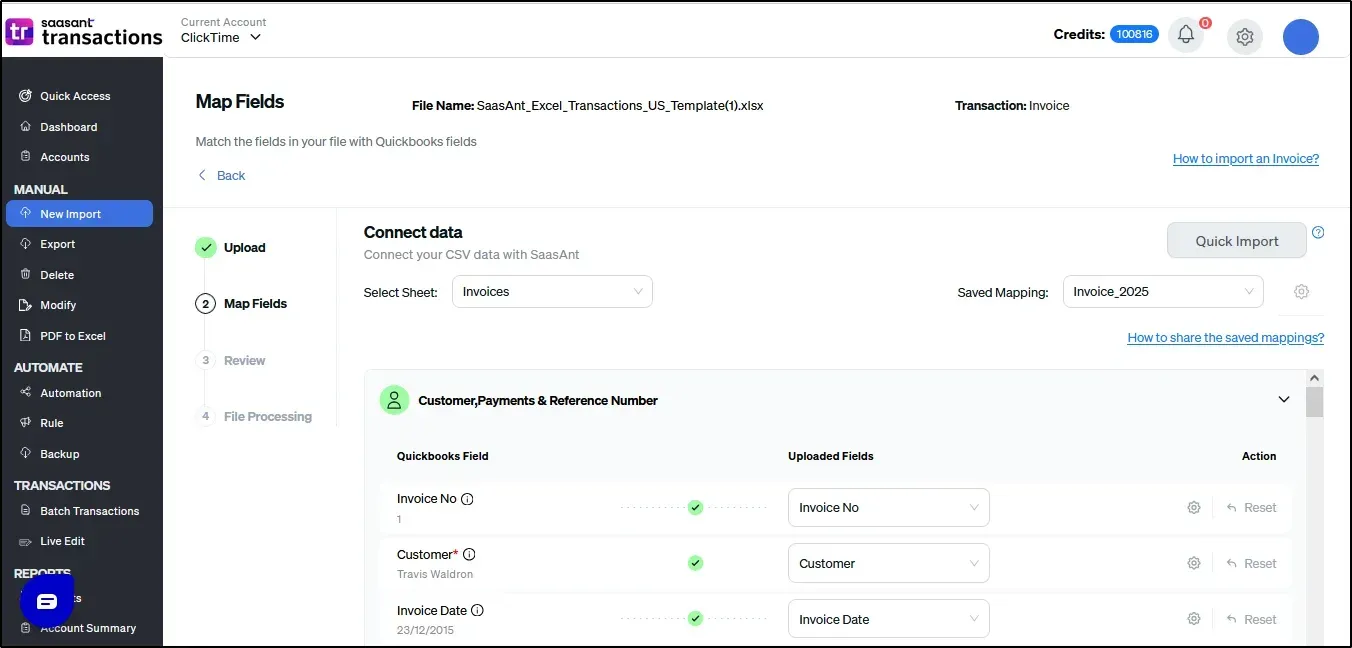 Map your file headers to the corresponding fields in QuickBooks. Use the "Preview Mapping" feature to ensure accuracy before importing.
Step 5: Reviewing Your Data Before Import
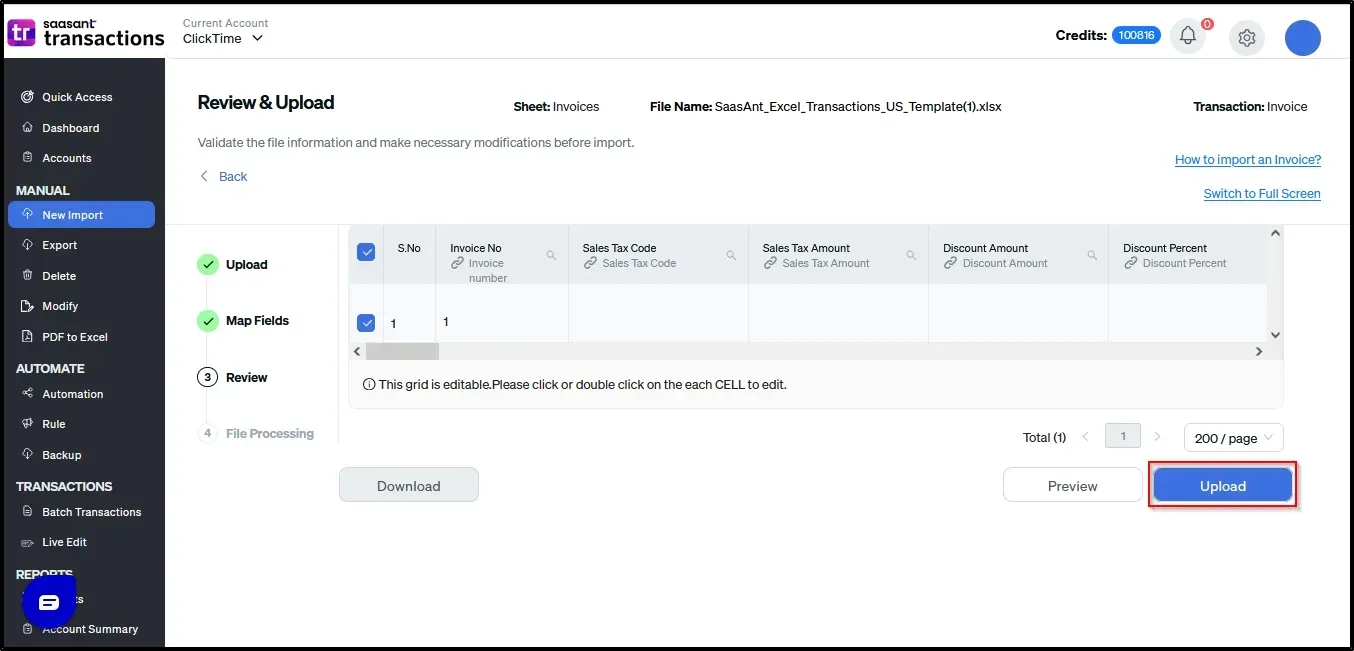
Double-check your mapped data to catch any mistakes. This step ensures everything lines up perfectly.
Step 6: Completing the Import Process
Click the ‘Import’ button to finalize the process. The application will import your invoice data seamlessly into QuickBooks Online.
Step 7: Verifying the Imported Invoices
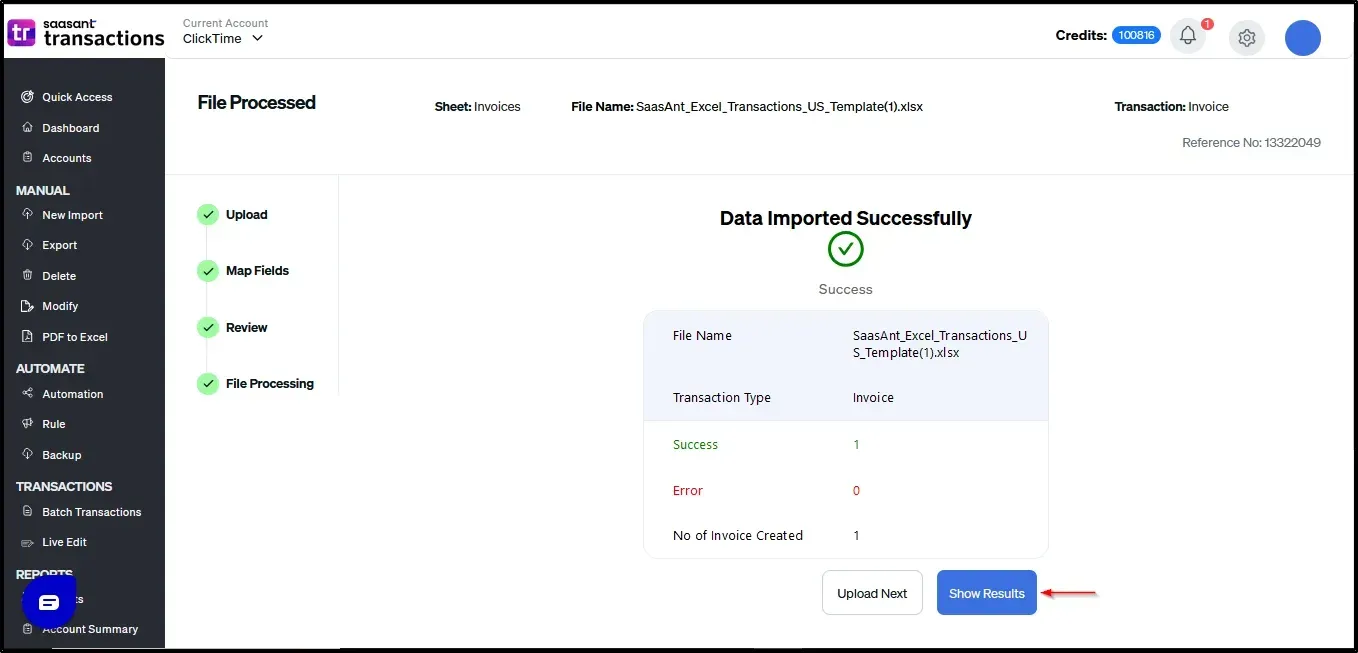
Verify that all invoices have been imported correctly. Use the verification feature to ensure data accuracy. If needed, you can undo the import using the rollback feature.
Simplify Your Invoicing: Upload Invoices into QuickBooks Online
Uploading invoices into QuickBooks Online can be straightforward and efficient with the right tools. Automate the process to save time and reduce errors by scheduling imports via email, Zapier, or FTP.
Additionally, expert onboarding support is available to help you get started quickly and efficiently. Don’t wait—enhance your invoicing process today for a more organized and hassle-free experience.
To learn more, check out this article on importing PDF invoices into QuickBooks Online.
FAQs
How to Import Invoices into QuickBooks Online?
To import invoices into QuickBooks Online using SaasAnt, follow these steps:
Connect your QuickBooks Online account to SaasAnt Transactions.
Upload your invoice file (Excel, CSV, PDF or IIF formats).
Map the columns in your file to the corresponding QuickBooks fields.
Review the mapping and import the invoices.
Can I import invoices into QuickBooks Online?
Yes, you can import invoices into QuickBooks Online using SaasAnt Transactions. This tool supports various file formats like Excel, CSV, PDF and IIF, making the process efficient and customizable to your needs.
How can I migrate invoice data when switching to a new company setup in QuickBooks?
To migrate invoice data to a new QuickBooks company setup:
Export your invoices from the current setup in XLS, XLSX, CSV, PDF or IIF format.
Import the exported files into your new QuickBooks Online account using SaasAnt Transactions.
Follow the import steps to ensure all data is correctly transferred.
Is it possible to import data from other software into QuickBooks Online?
Yes, you can import data from other software into QuickBooks Online. SaasAnt Transactions facilitates this by allowing you to gather and map data from your existing software accurately during the import process, ensuring a smooth transition.
Can I import invoices from Excel to QuickBooks?
Yes, you can import invoices from an Excel file into QuickBooks using SaasAnt Transactions. Format your Excel file to match QuickBooks headers, and use SaasAnt templates for guidance. This ensures accurate and efficient data import.
Does QuickBooks support multi-currency invoice imports?
Yes, QuickBooks supports multi-currency invoice imports. Enable the multi-currency feature in QuickBooks, then use SaasAnt Transactions to import invoices. Specify the currency for each transaction, and SaasAnt will handle the exchange rates.
Can I import invoices into QuickBooks Desktop?
Yes, you can import invoices into QuickBooks Desktop using SaasAnt Transactions Desktop. Prepare your invoice data in a compatible format (Excel or CSV), map the fields correctly, and initiate the import to ensure accurate data transfer.
How do I import sales invoices into QuickBooks Online (QBO)?
To import sales invoices into QBO:
Prepare your data in a supported format.
Use SaasAnt Transactions to map and upload your data.
Follow the steps to ensure your sales invoices are accurately imported into QuickBooks Online.
How do I send multiple invoices in QuickBooks Online?
To send multiple invoices in QuickBooks Online:
Go to the 'Sales' tab and select 'Invoices.'
Check the boxes next to the invoices you want to send.
Click the 'Batch actions' drop-down and select 'Send.'
Review the email details and send the invoices.
What is batch invoicing in QuickBooks?
Batch invoicing in QuickBooks allows you to create and send multiple invoices at once. This feature saves time by enabling you to invoice multiple customers simultaneously, ensuring efficient and streamlined billing processes.
Recommended reading:
Import Invoices into QuickBooks Desktop