How to Make a Journal Entry in QuickBooks Online
 Journal entries are the cornerstone of any accounting system. QuickBooks Online is a versatile tool for recording transactions that don’t fit into other entries. Whether you’re making adjustments, correcting errors, or recording complex financial transactions like depreciation, understanding how to create a journal entry is essential. This article provides a detailed, step-by-step guide on how to make, create, or record a journal entry in QuickBooks Online.
How to Make a Journal Entry in QuickBooks Online: Step-by-Step Guide
Step 1: Understanding When to Make a Journal Entry
Before diving into the technical process, knowing when a journal entry is necessary is essential. Here are some scenarios where you would need to create one:
Adjusting Entries: To record accrued incomes, accrued expenses, prepaid expenses, and deferred incomes.
Correcting Errors: When a transaction has been recorded incorrectly.
Recording Depreciation: To allocate the cost of tangible assets over their useful lives.
Year-End Adjustments: To ensure that the financial statements reflect the actual financial position of the business.
Step 2: Preparing to Record a Journal Entry
Identify the Accounts Involved: Determine which accounts will be debited and credited in your transaction.
Gather Supporting Documents: Collect any invoices, receipts, or contracts that support the transaction you’re recording.
Step 3: Accessing the Journal Entry Feature
Log In to QuickBooks Online: Enter your credentials to access your QuickBooks Online account.
Navigate to the Dashboard: You’ll be taken to the main dashboard once logged in.
Step 4: Creating the Journal Entry
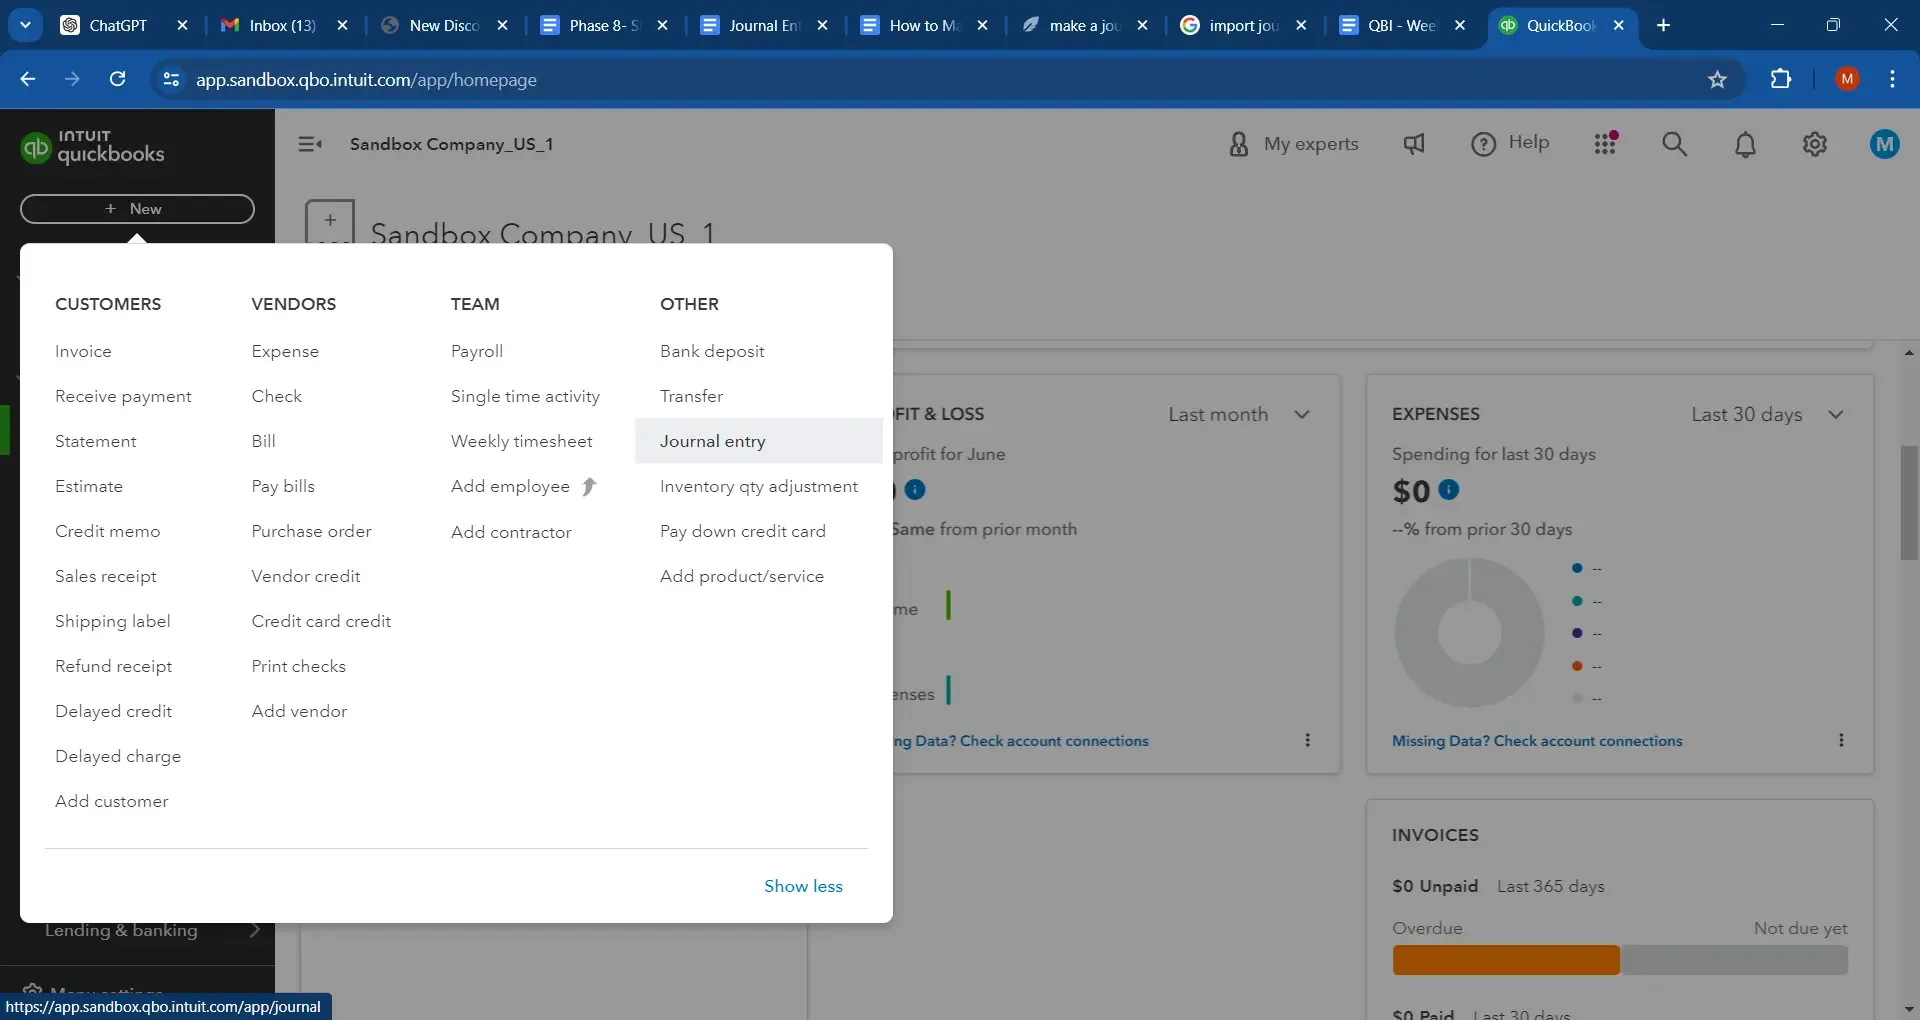
Locate the ‘+ New’ Button: Find and click the ‘+ New’ button, usually located at the top of the left-hand menu.
Select ‘Jour
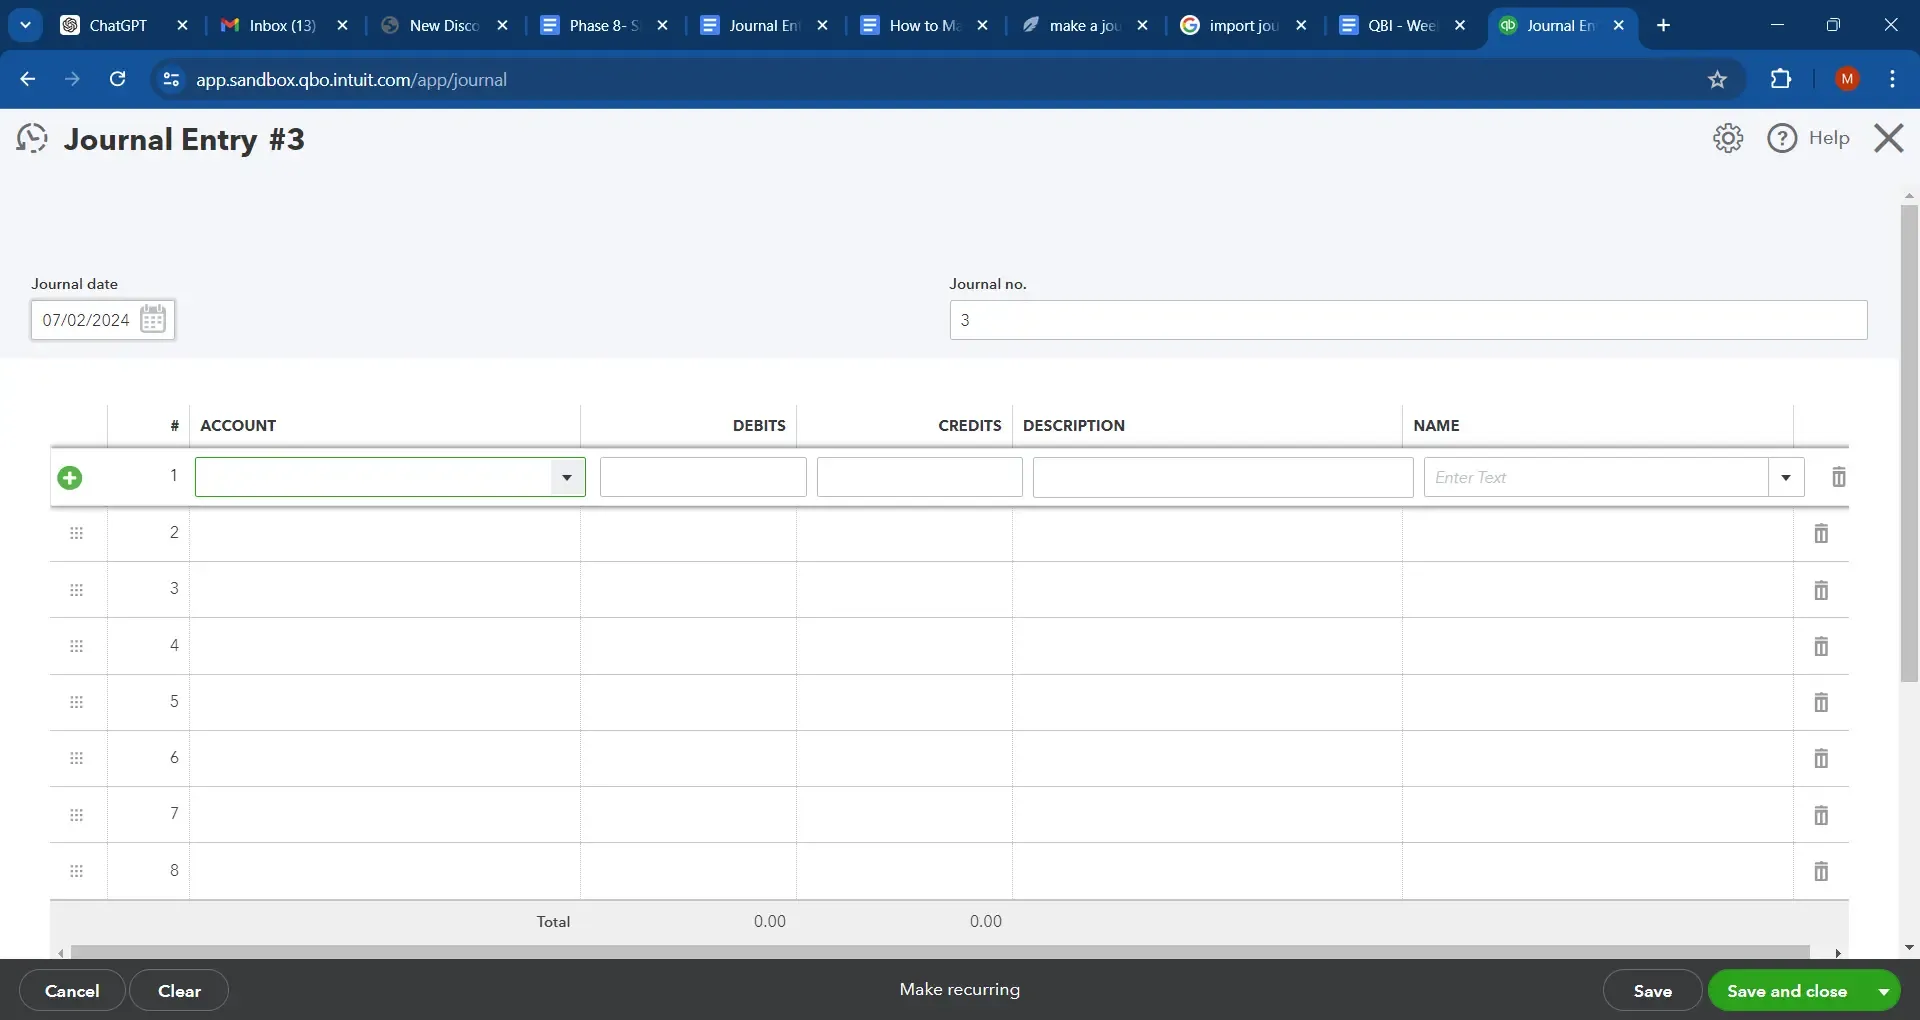 nal Entry’: From the dropdown options, choose ‘Journal Entry.’
Step 5: Filling Out the Journal Entry Form
Enter the Transaction Date: Specify when the transaction occurred or should be recorded.
Input the Accounts: In the ‘Account’ column, select the first account that will be debited.
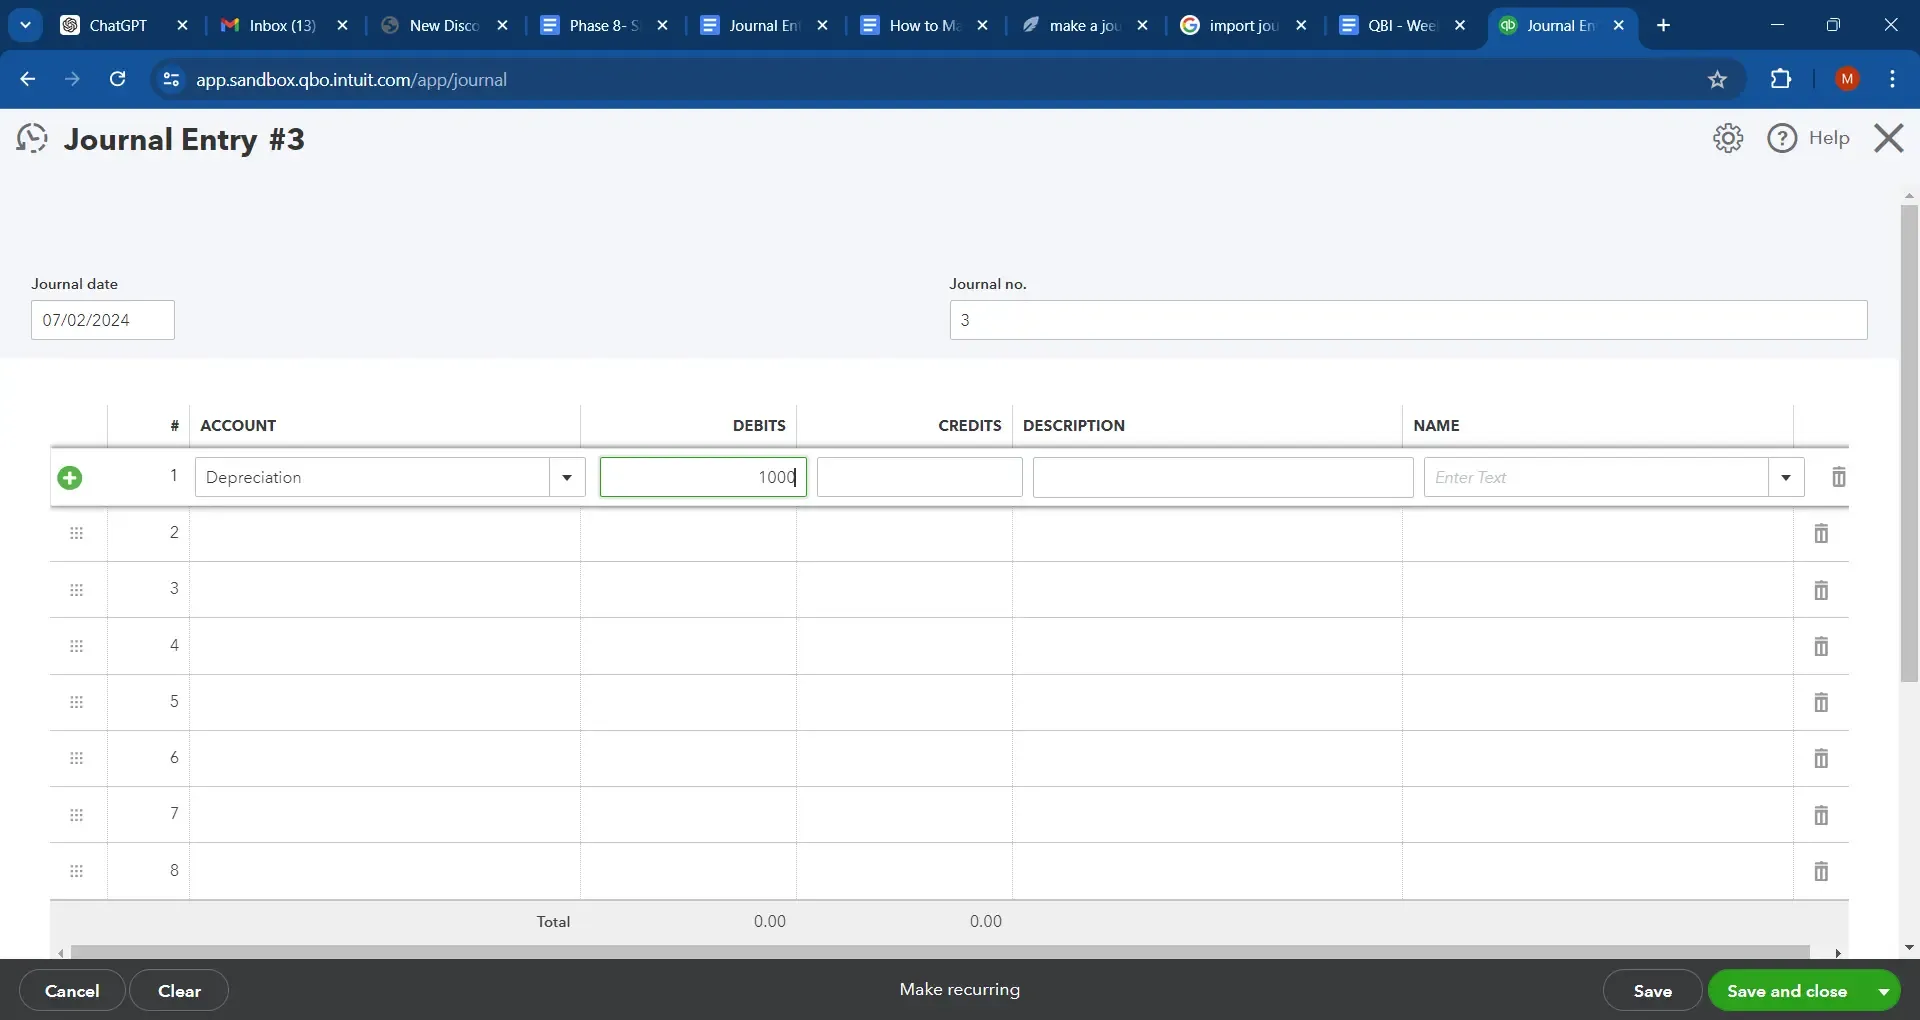
Specify Debit and Credit Amounts: Enter the transaction amount in the debit column for the first account and in the credit column for the corresponding account.
Add a Description: Provide a clear transaction description for future reference.
Step 6: Reviewing and Saving the Journal Entry
Double-check the Entry: Review all the details you’ve entered to ensure accuracy.
Save the Journal Entry: If everything looks correct, click ‘Save and close’ to record the journal entry.
Step 7: Creating an Accumulated Depreciation Account (If Necessary)
If you’re recording depreciation and don’t have an ‘Accumulated Depreciation—Equipment’ account:
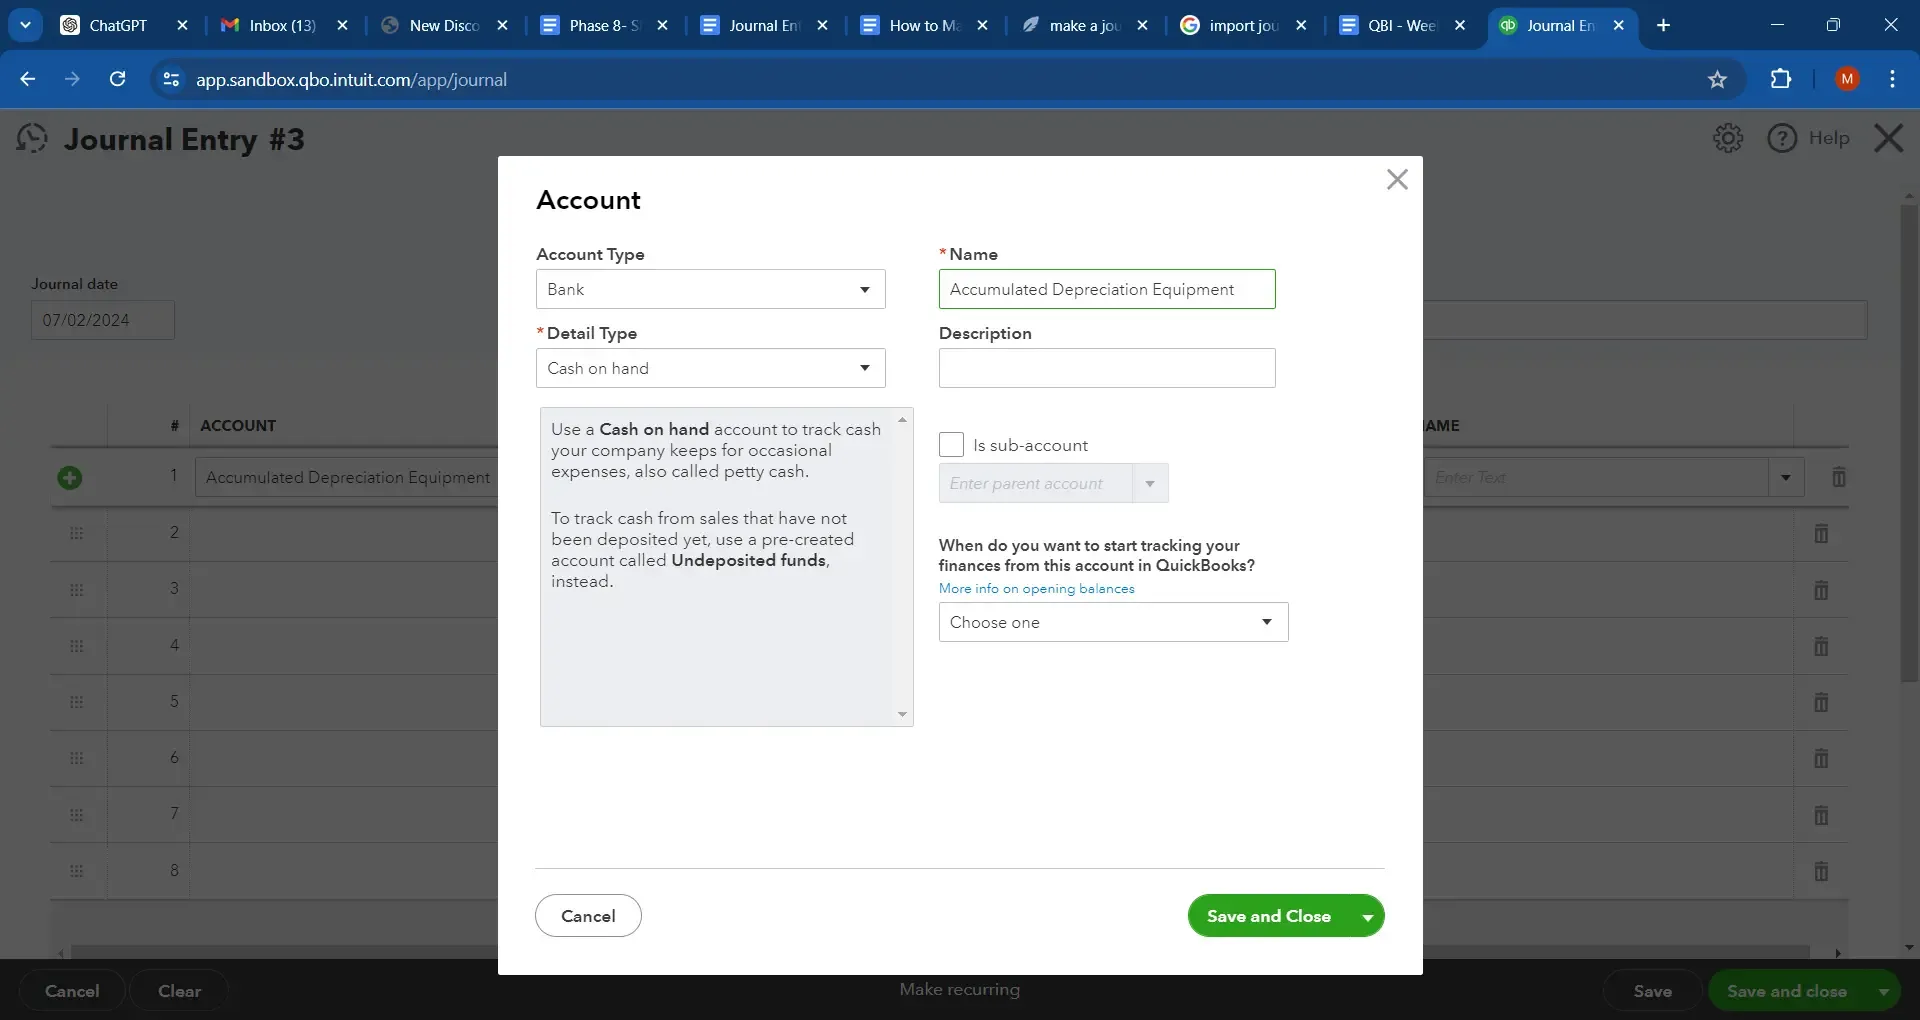
Go to the Chart of Accounts: Navigate to Settings ⚙️ and select ‘Chart of Accounts.’
Create a New Account: Click ‘New,’ and fill out the form with the appropriate details for the newly accumulated depreciation account.
Save the New Account: After entering the details, save the new account to use it for your depreciation entry.
Step 8: Recording Depreciation
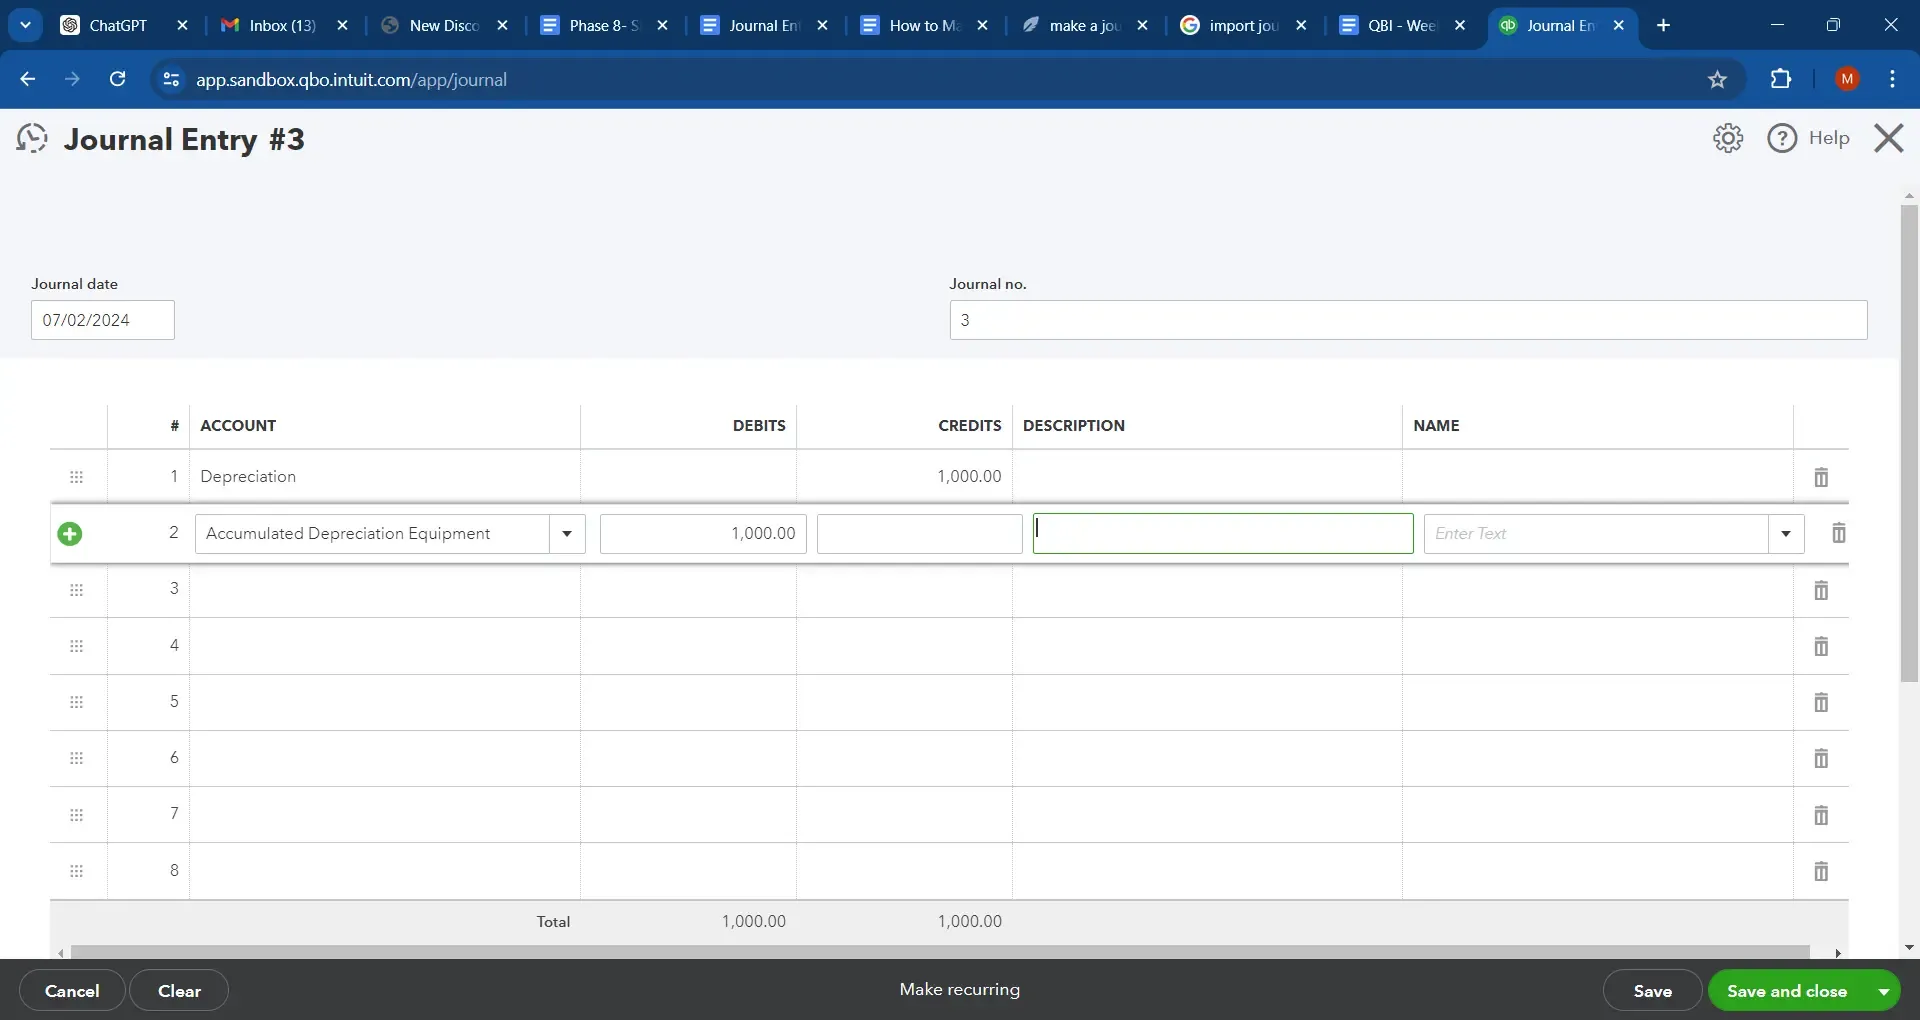
Debit the Depreciation Expense Account: Enter the amount of depreciation in the debit column next to the ‘Depreciation Expense’ account.
Credit the Accumulated Depreciation Account: Enter the same amount in the credit column next to the ‘Accumulated Depreciation—Equipment’ account.
Common Mistakes to Avoid
Mismatched Debit and Credit: Ensure the total amounts in the debit and credit columns are equal.
Incorrect Account Selection: Double-check that you’ve selected the correct accounts for the transaction.
Forgetting to Save: Remember to save your journal entry after reviewing it.
To know more about how to find or view journal entries in QuickBooks Online refer to this guide.
Recommended reading:
Conclusion
Recording a journal entry in QuickBooks Online is straightforward once you understand the steps involved. By following this guide, you can ensure that your financial records are accurate and up-to-date. Remember, if you’re ever uncertain about a transaction, it’s wise to consult with an accountant or financial advisor.
FAQs
How do I print a journal entry in QuickBooks Online?
To print a single journal entry:
Select the journal entry you wish to print.
Click on the "More" option.
Select "Transaction journal."
Use the dropdown menu to choose "Print/Save as PDF."
Can I download a journal entry in QuickBooks Online?
Yes, you can download journal entries:
Go to the Reports tab under Billing.
Select "Journal Entry Export – Accrual Basis" or "Journal Entry Export – Cash Basis."
Choose the Accrual Basis to display all possible transactions matching your filter options.
Is it possible to import journal entries into QuickBooks Online?
Yes, you can use Saasant Transactions to import journal entries into QuickBooks Online.
How do I create a journal entry in QuickBooks Online?
Log in to your QuickBooks Online account.
Navigate to the Dashboard.
Click on the ‘+ New’ button.
Select ‘Journal Entry’ from the dropdown options.
Fill out the form with the transaction date, accounts involved, debit and credit amounts, and a description.
Review and save the journal entry.
When should I create a journal entry in QuickBooks Online?
Create a journal entry in the following scenarios:
Adjusting entries for accrued incomes, expenses, prepaid expenses, and deferred incomes.
Correcting errors in previous transactions.
Recording depreciation.
Year-end adjustments to reflect the accurate financial position of the business.
What are common mistakes to avoid when creating journal entries?
Ensure debit and credit amounts match.
Double-check account selections to avoid errors.
Permanently save the journal entry after reviewing it.
How do I record depreciation in QuickBooks Online?
To record depreciation:
Create an accumulated depreciation account if necessary:
Go to Settings ⚙️ and select ‘Chart of Accounts.’
Click ‘New,’ fill out the form, and save the new account.
Debit the Depreciation Expense account and credit the Accumulated Depreciation account with the depreciation amount.
What should I do if I’m unsure about a transaction?
If uncertain about a transaction, consult with an accountant or financial advisor to ensure accuracy.
Read also
Batch Transactions in QuickBooks Online - Detailed Guide
How to Edit Multiple Transactions in QuickBooks
How to Export Transactions from QuickBooks Online
Accounting Automation with SaasAnt Transactions: Streamline Your Financial Processes