How to Map Files to QuickBooks Fields in SaasAnt Transactions Online
When uploading data into QuickBooks Online, the most critical step is ensuring your file matches what QuickBooks expects. That’s where field mapping comes in.
With SaasAnt Transactions Online, you can bulk import invoices, bills, receipts, or other data, but before posting, you’ll need to tell the software which column in your file corresponds to which QuickBooks field. This ensures that everything is placed correctly without errors or manual corrections.
What Is Field Mapping in QuickBooks?
Field mapping is simply the process of linking the headers in your file with the fields in QuickBooks.
For example:
Your file might say Cust Name → QuickBooks expects Customer
Your file might say Txn Date → QuickBooks expects Transaction Date.
By mapping these once, SaasAnt knows how to interpret your data and push it into QuickBooks correctly.
How to Do Field Mapping in SaasAnt Transactions
When you upload a file into SaasAnt Transactions Online, you’ll see the mapping screen:
On the left, you’ll see QuickBooks fields (grouped by category).
On the right, you’ll see the headers from your file.
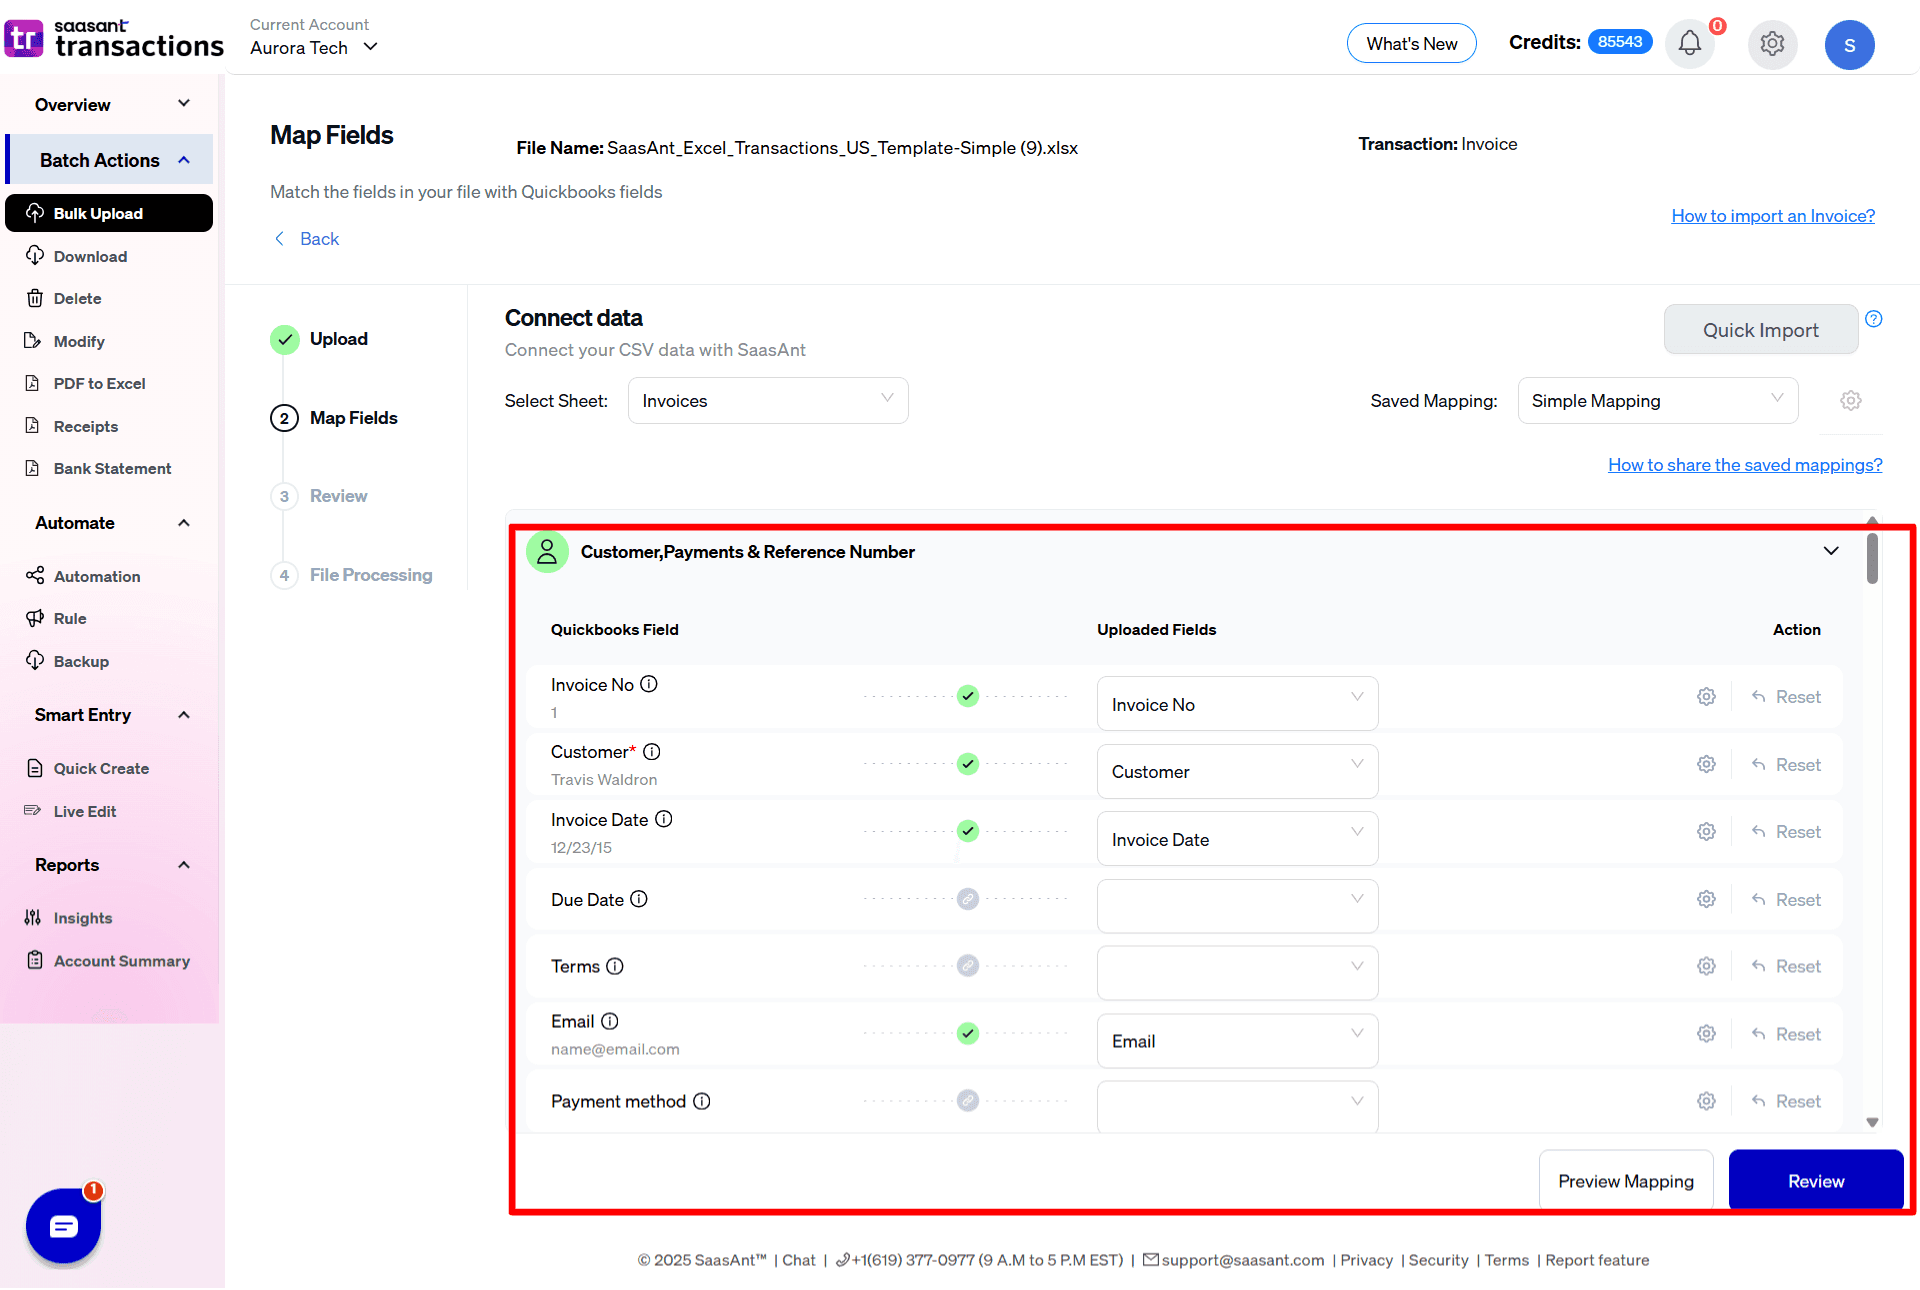
All you need to do is select the correct header for each QuickBooks field you want to fill. If you’re unsure about what a field means, hover over it. SaasAnt provides a quick explanation.
Preview Before You Import
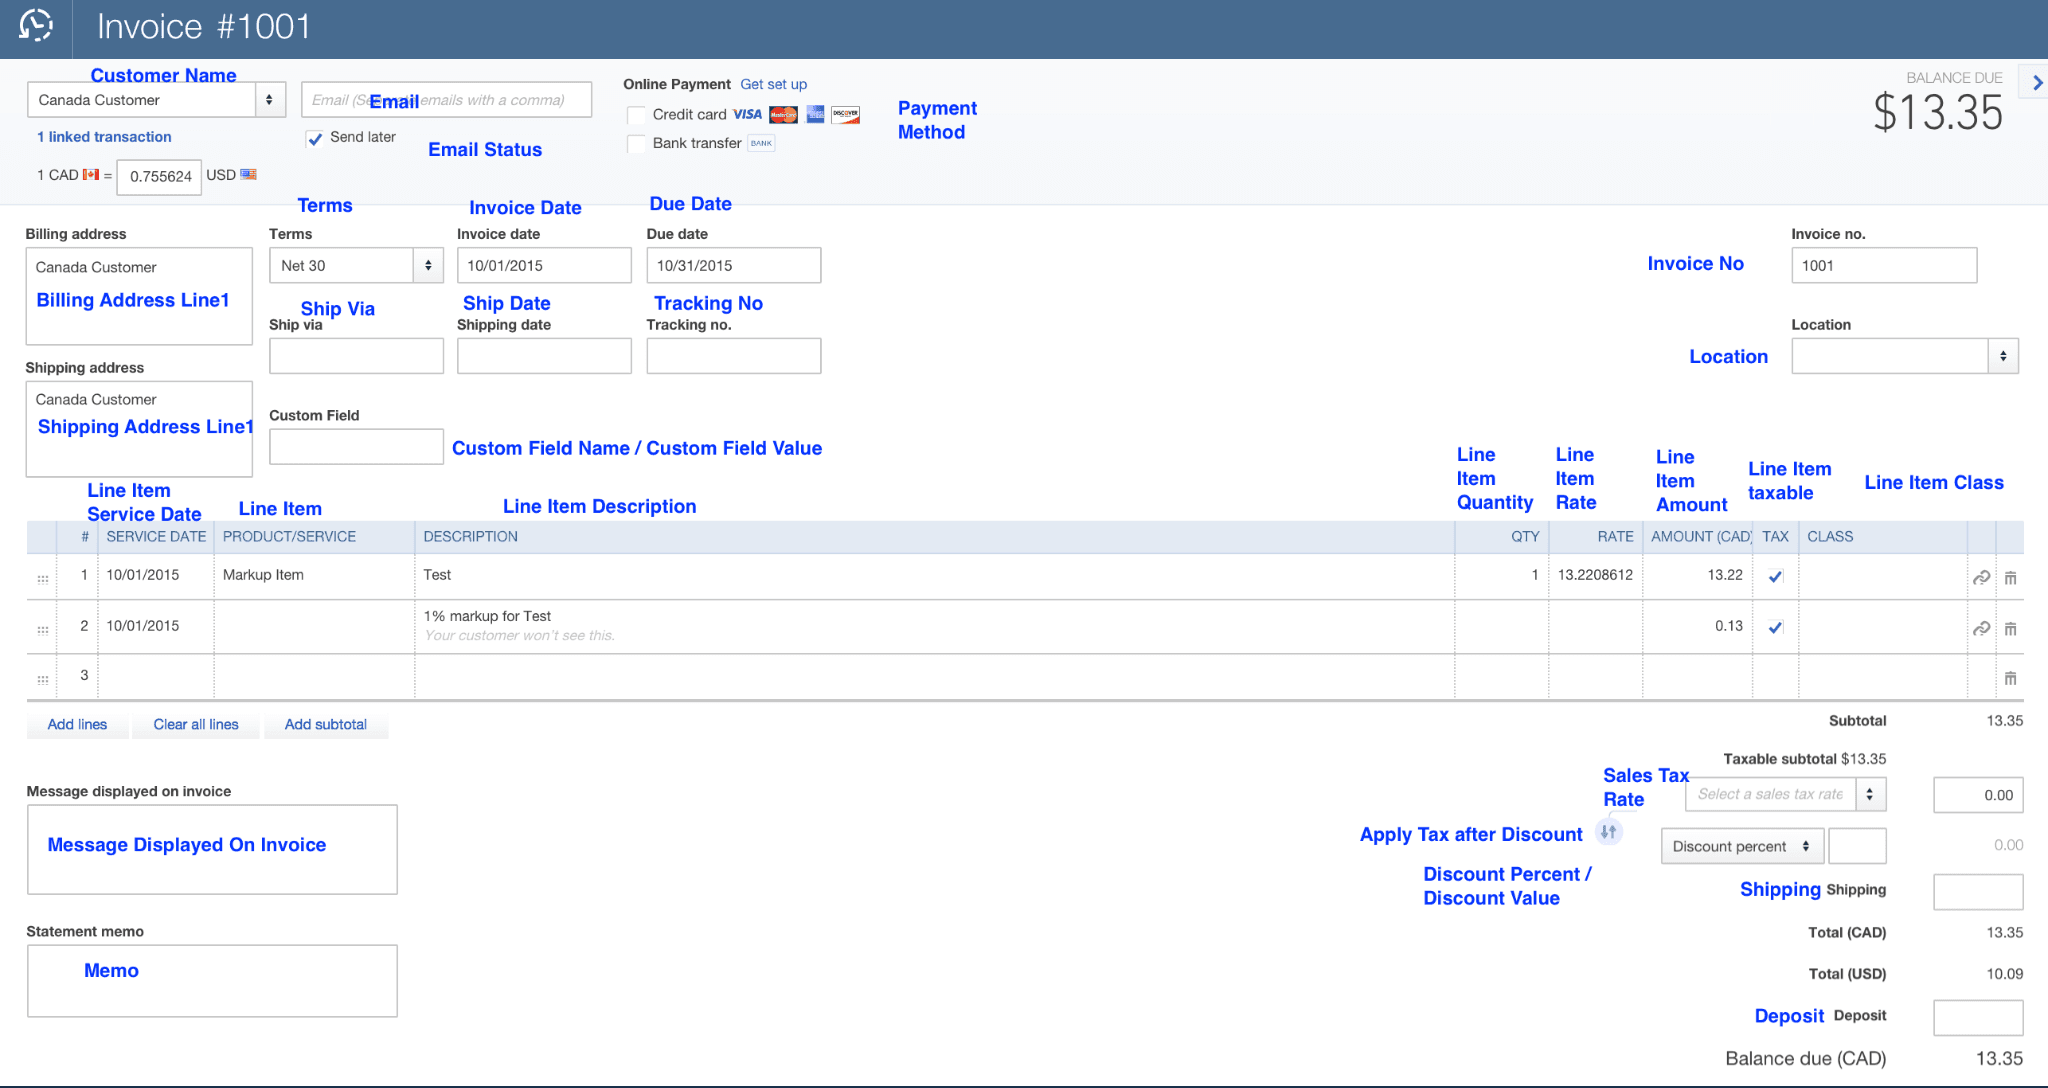
Are you unsure if your mapping is correct? Click Preview Mapping.
This displays a QuickBooks-style preview of your data, allowing you to confirm that every column is mapped correctly before posting. It’s a simple way to avoid errors when working with large imports.
For example, the image below depicts QuickBooks Fields for Invoice.
Save Your Mapping for Future Imports
If you regularly work with similar files, you don’t have to redo the mapping every time.
Click "Save Mapping" to save your setup.
Use different saved mappings for different file types (e.g., invoices from one system, bills from another).
Even if you forget to save, SaasAnt remembers your last mapping automatically.
This is a significant time-saver for bookkeepers and accountants who handle recurring imports.
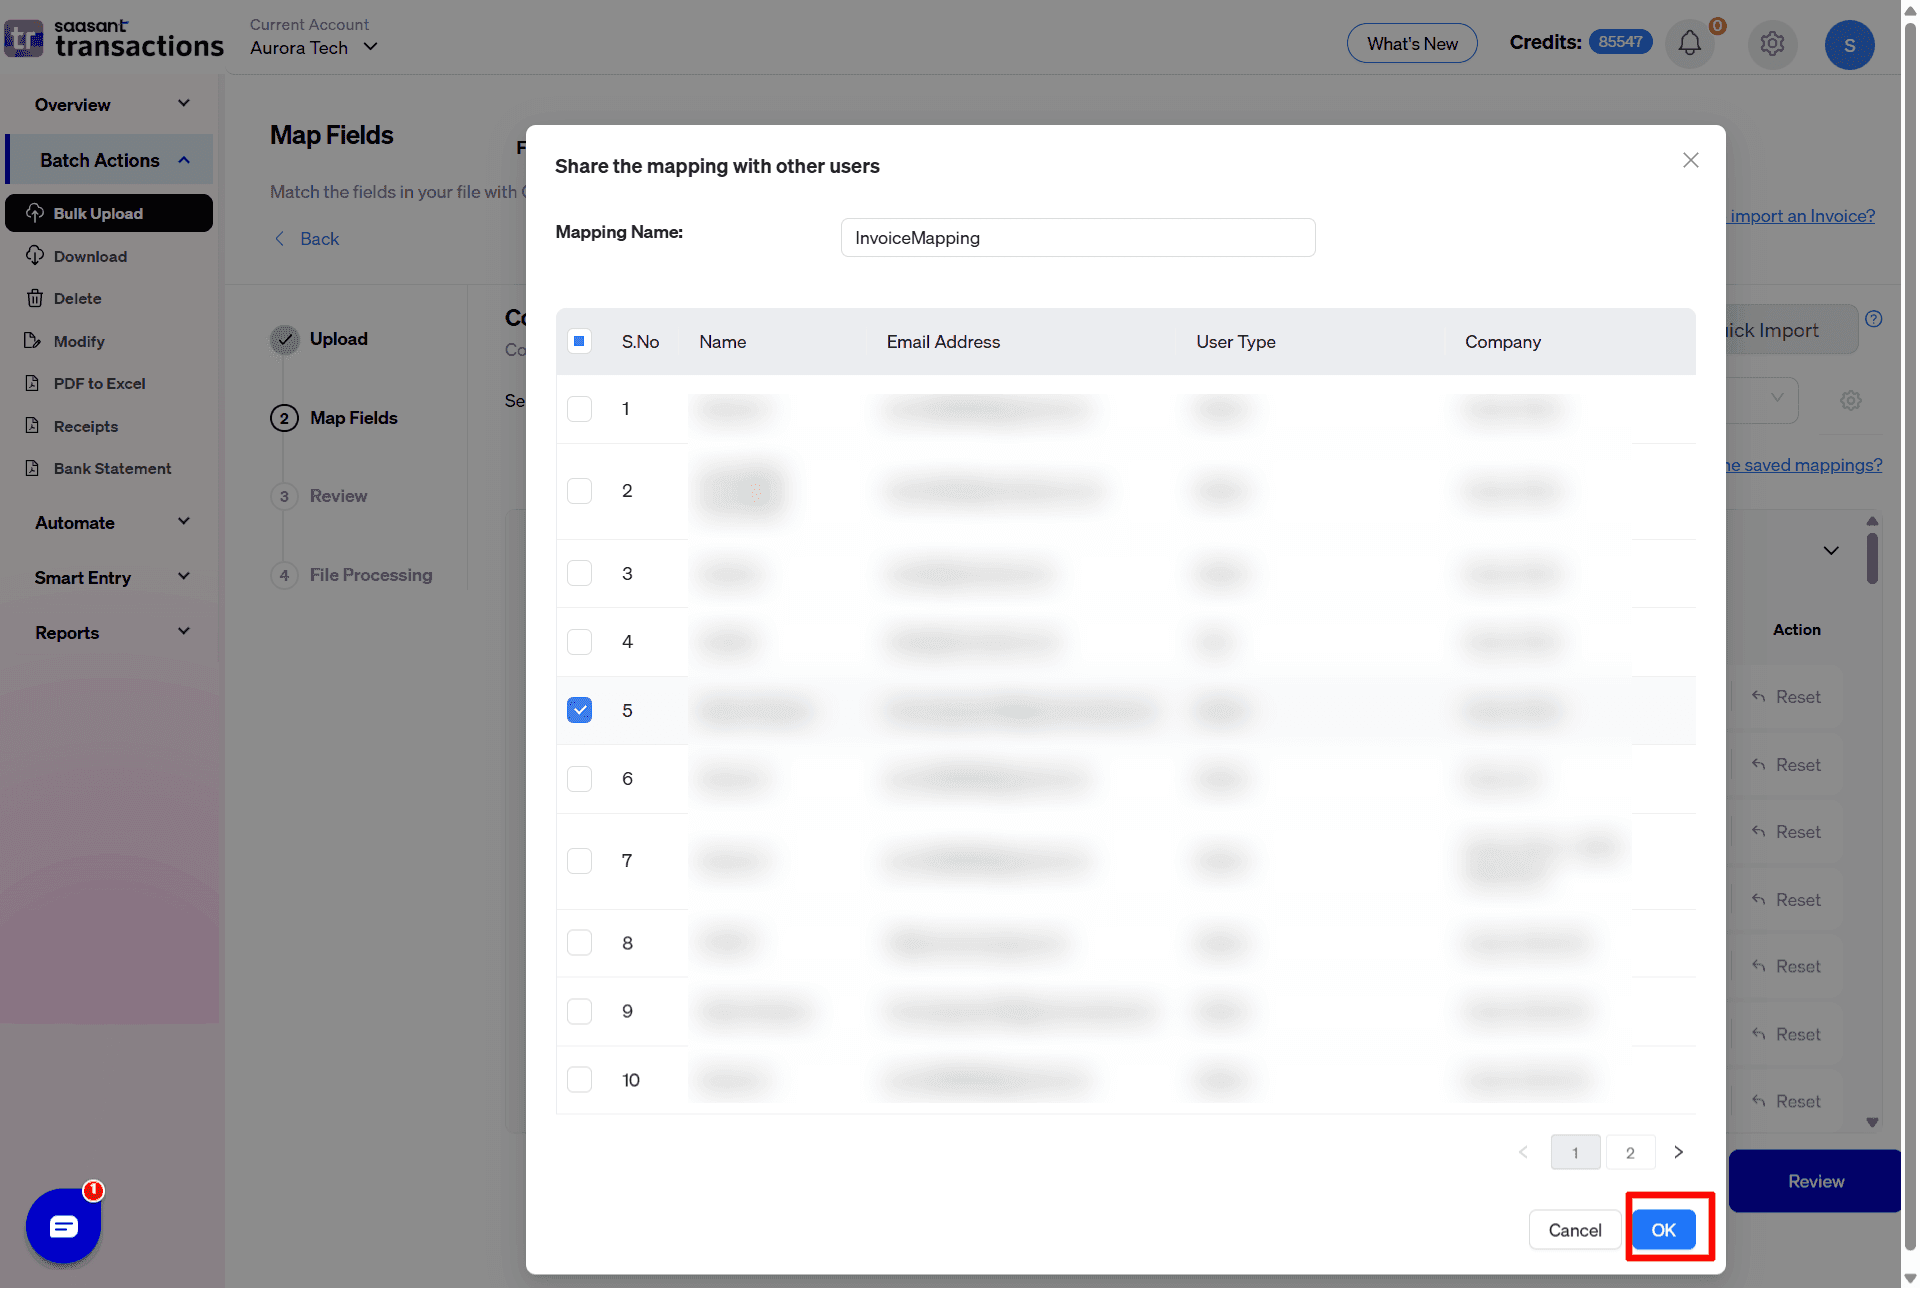
How to Share Saved Mappings With Other QuickBooks Users
If your team works on the same QuickBooks company, you don’t need each person to recreate mappings from scratch. You can share your saved mappings with other users.
Here’s how:
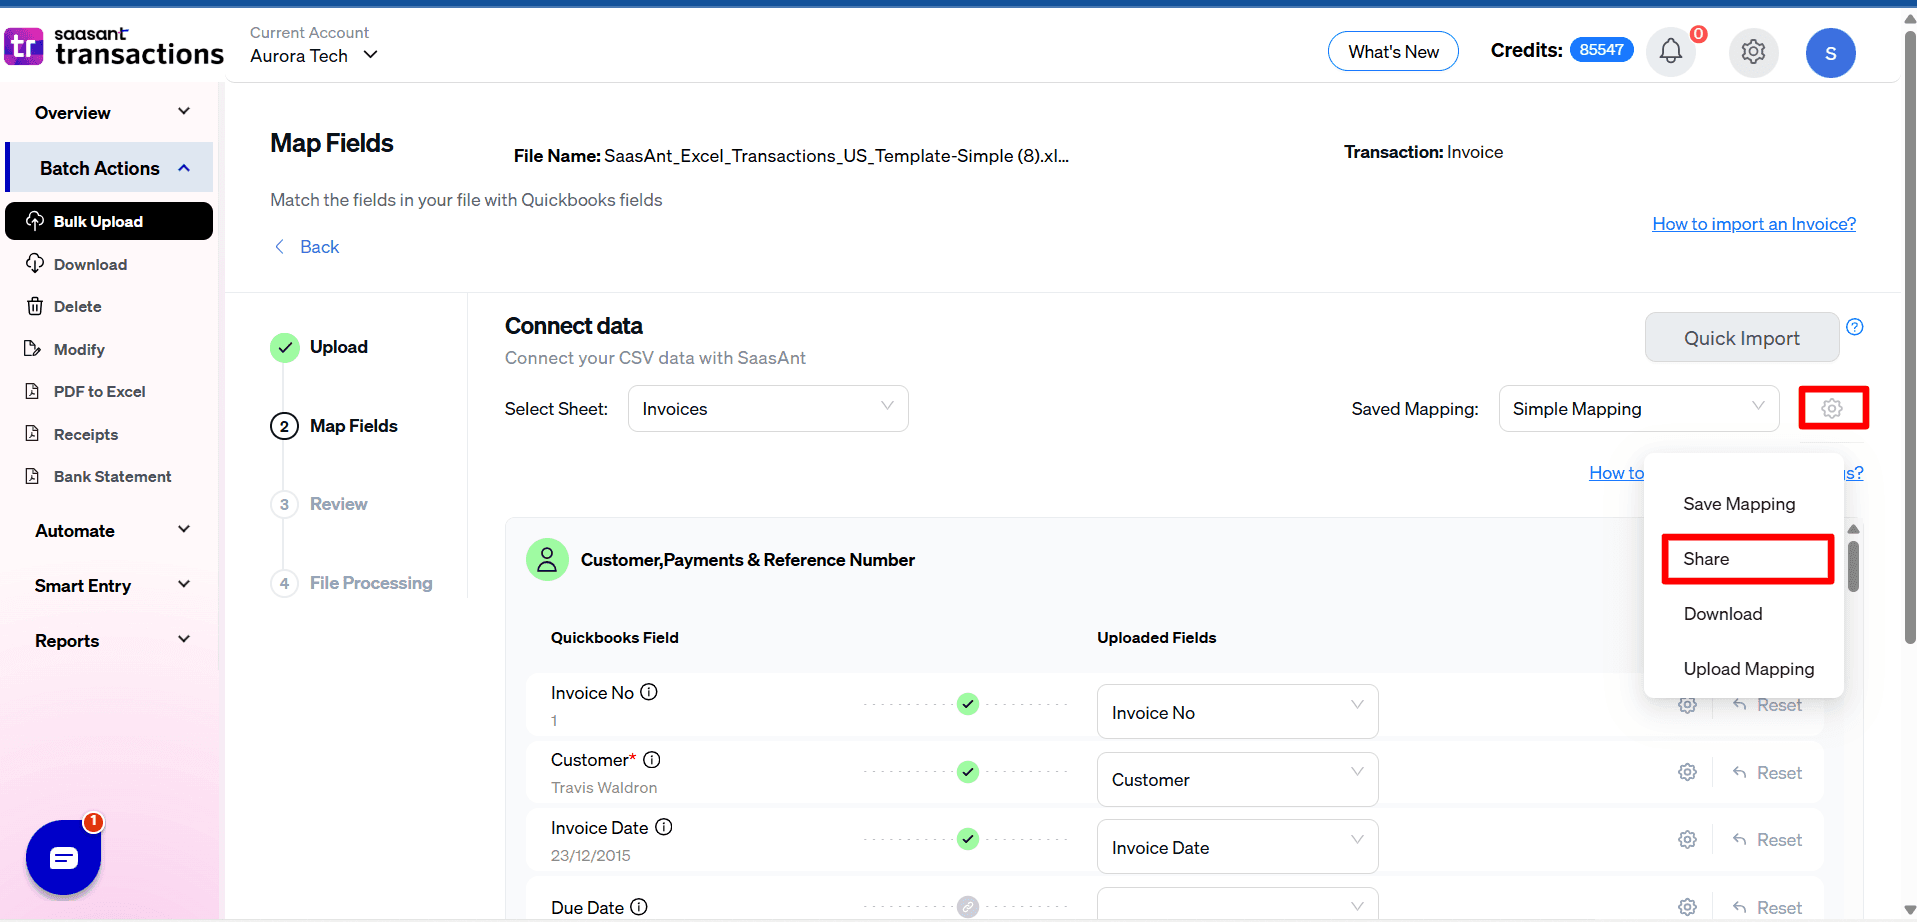
Step 1: On the Field Mapping screen, click the More button.
Step 2: Select Share from the list.
Step 3: Enter a new mapping name for the shared version.
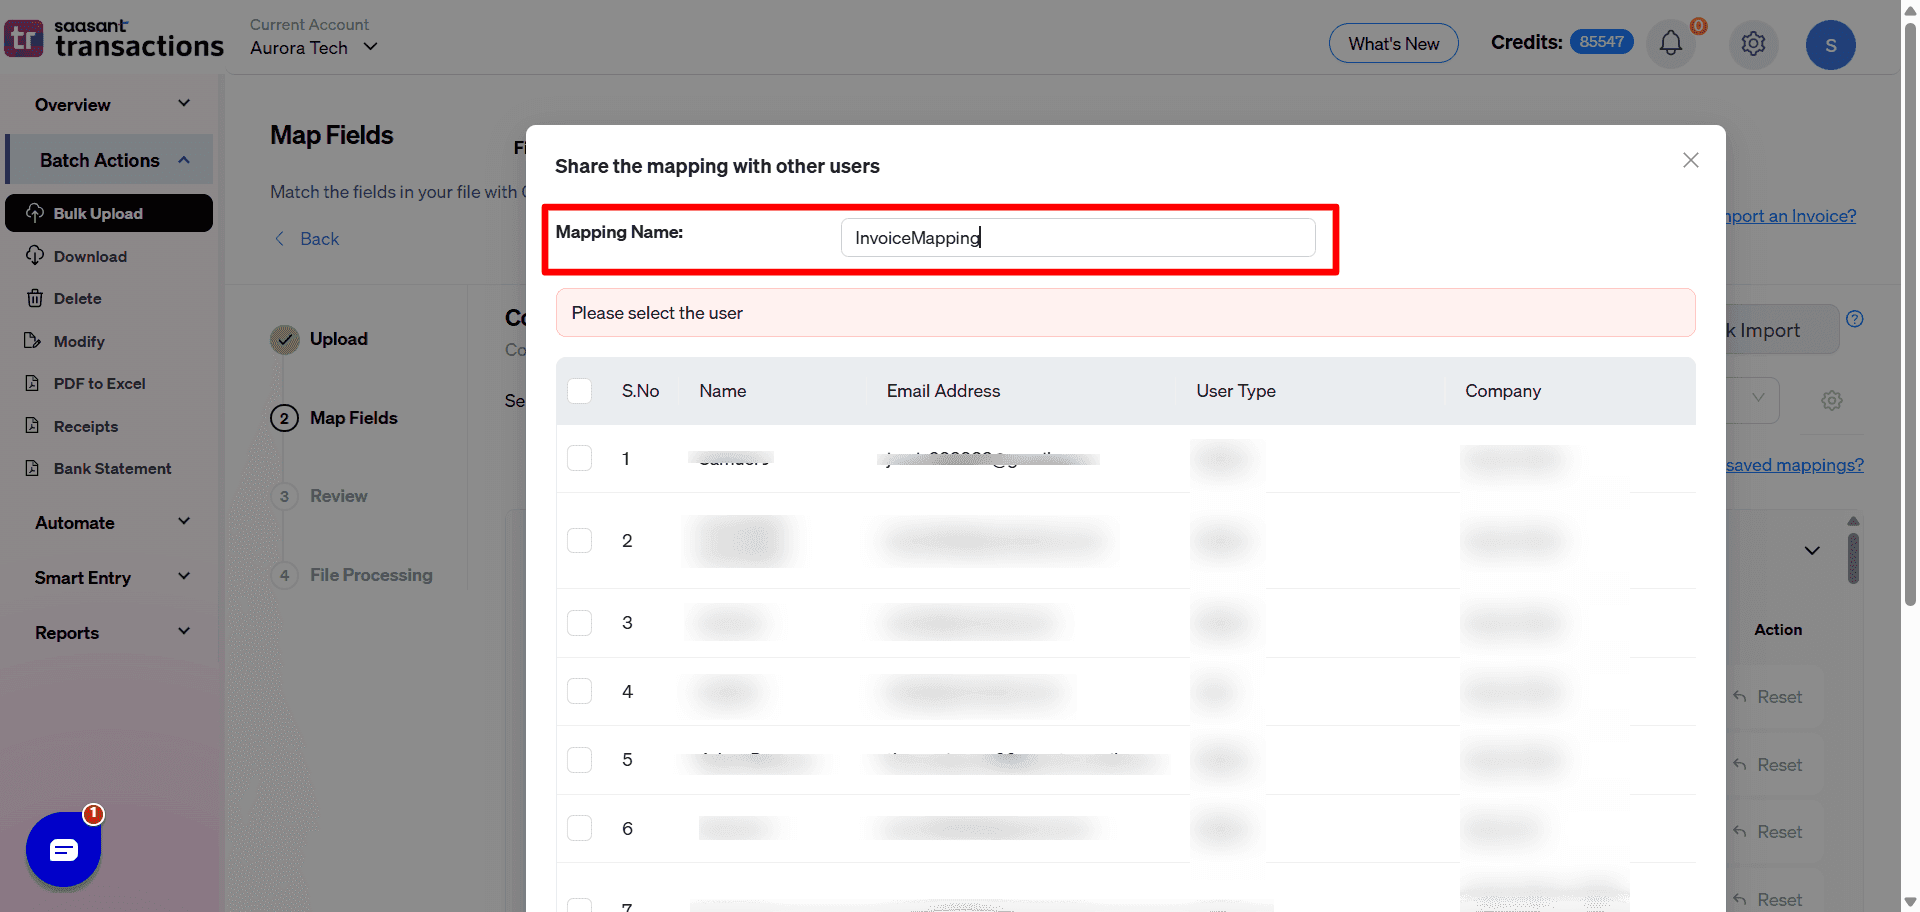
Step 4: Choose the QuickBooks users from the table.
Step 5: Click OK to finish.
Why Field Mapping Matters
Correct field mapping is the key to smooth QuickBooks bulk imports and avoiding frustrating errors. By taking a minute to map headers properly, you:
Reduce manual data entry
Avoid mismatches and duplicate records.
Speed up cleanup and catch-up projects.
Ensure accurate financial reporting.
Final Thoughts
Field mapping in SaasAnt Transactions Online is designed to make QuickBooks imports easier, not harder. With previews, saved mappings, and default options, you can confidently move data in bulk without worrying about errors.
If you’re ready to cut down on manual entry and speed up your accounting workflows, give SaasAnt Transactions Online a try.
Frequently Asked Questions
1. What is field mapping in SaasAnt Transactions Online?
Field mapping is the process of linking the column headers in your file (such as "Cust Name" or "Txn Date") with the corresponding fields in QuickBooks Online (such as "Customer" or "Transaction Date"). This ensures that your imported data is correctly placed in the designated fields without errors.
2. Why is field mapping important when importing data into QuickBooks?
Correct field mapping helps you avoid mismatched data, duplicate records, and the need for manual corrections. It ensures invoices, bills, receipts, and other transactions are imported accurately, leading to faster bookkeeping and reliable financial reports.
3. Can I preview my field mapping before importing data?
Yes. SaasAnt Transactions Online provides a Preview Mapping option. This provides a QuickBooks-style preview of your data, allowing you to confirm the mapping before posting and reducing errors during bulk imports.
4. Do I need to set up field mapping every time I import files?
No. You can save your mappings for future use. SaasAnt Transactions also remembers your last mapping automatically, and you can create multiple saved mappings for different file types, saving significant time for recurring imports.
5. Can I share my saved field mappings with other QuickBooks users?
Yes. SaasAnt Transactions allows you to share saved mappings with other users in the same QuickBooks company. This way, your team doesn’t need to recreate mappings from scratch, ensuring consistency and efficiency across users.
Import Excel into QuickBooks Online:
How to connect SaasAnt to QuickBooks Online:
Tags
Read Also
Importing Excel into QuickBooks : Detailed Guide
How to Delete Multiple Transactions in QuickBooks Online
Export Data from QuickBooks Online : Detailed Guide
How to Edit Multiple Transactions in QuickBooks