How to Refund a Customer in QuickBooks Online?
Recording customer refunds in QuickBooks Online helps maintain accurate records. This ensures that refund issues are handled promptly and correctly, ultimately increasing customer trust and satisfaction. This step-by-step guide will walk you through the process, ensuring you can record refunds confidently and keep your QuickBooks Online account in perfect order. Follow along to quickly learn how to refund a customer in QuickBooks Online.
How to Refund Payment in Quickbooks Online: Quick Instructions
Refund Receipt (all payment types): + New > Refund receipt > Select Customer > Enter sale details (Credit card/Direct Debit payment method) > Choose Refund Account > Save (adjust for partial).
QuickBooks Payments Refund (if applicable): Login to Merchant Service Center > Processing Tools > Reverse a Transaction > Enter details/Search > Select transaction > Submit (adjust for partial).
Note: Void before batch closes to avoid fees. Refunds after may incur fees.
How to Refund a Customer in QuickBooks Online: Step-by-Step Guide
In QuickBooks Online, you can either record the credit memo issued to the customer or the refund amount provided. For detailed instructions on creating a credit memo, please click here.
The following steps will guide you through how to record a customer refund in QuickBooks Online.
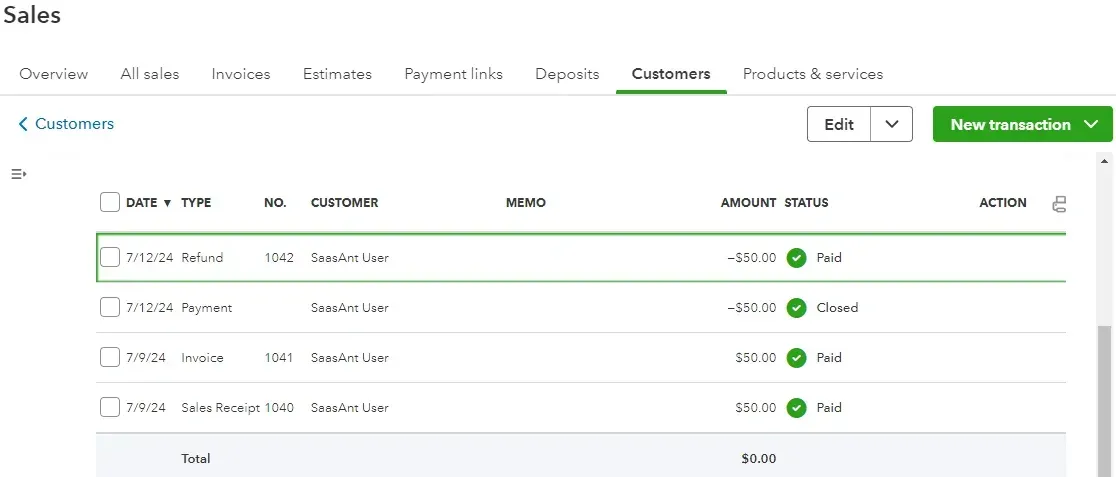
Step 1: Before creating the refund receipt, check the customer information and then navigate to the refunds section through Sales -> Customers and searching for the customer to be refunded.
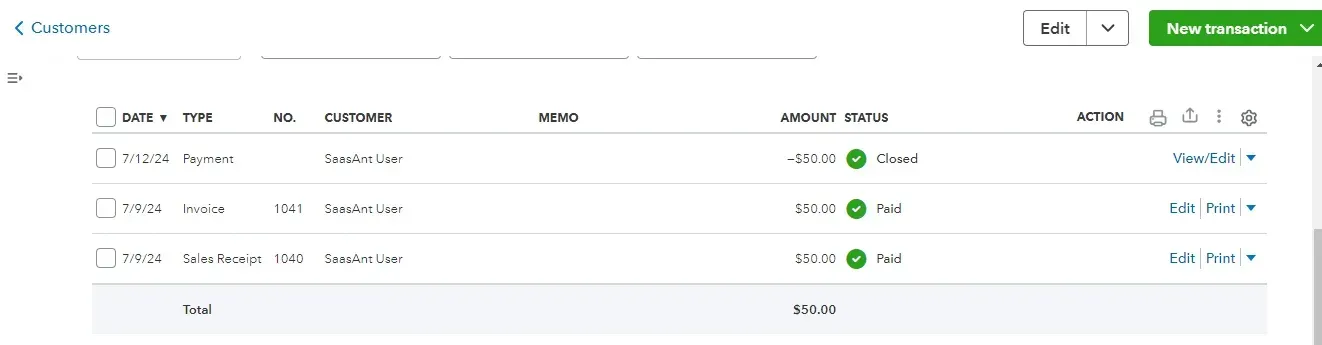
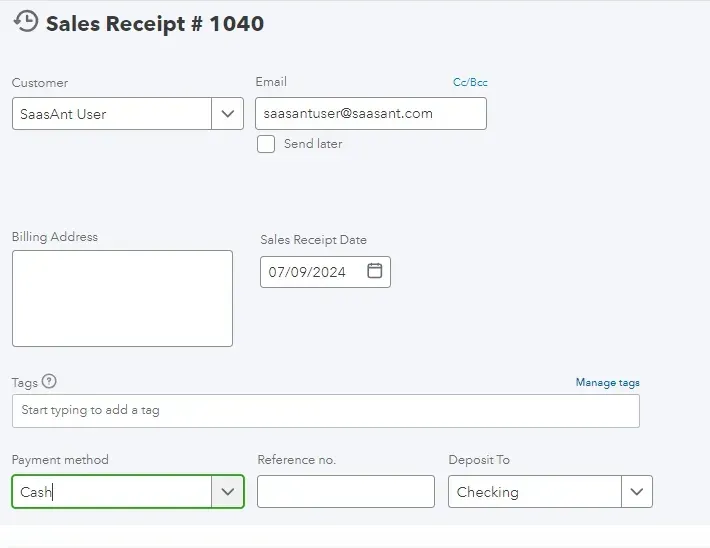
Step 2: Review their sales receipt to identify the account into which the money was deposited and details such as the product and quantity.
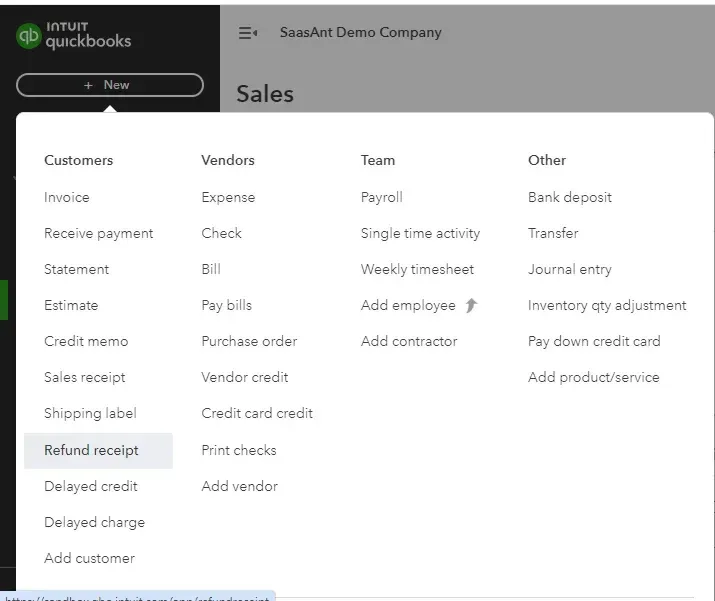
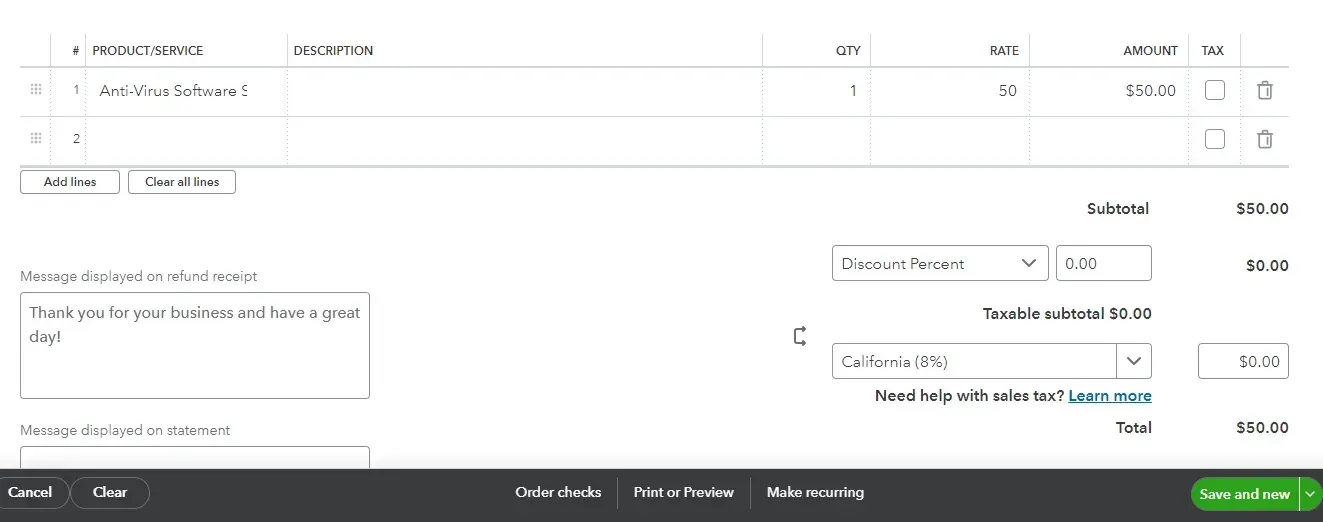
Step 3: Go to New -> Refund Receipt.
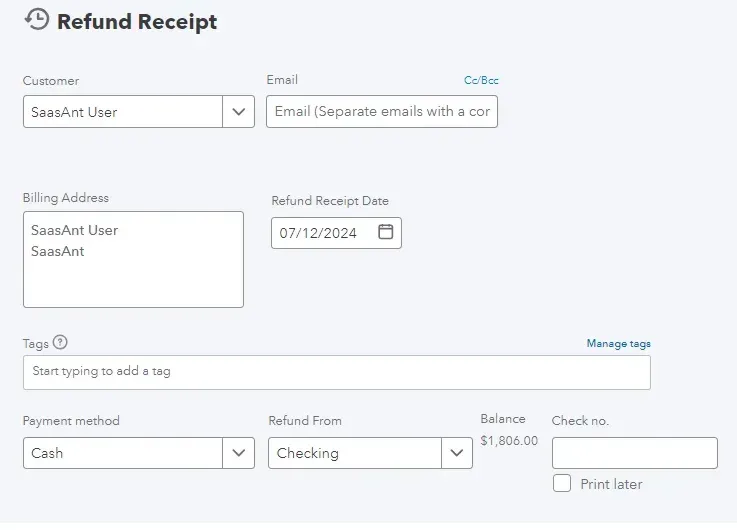
Step 4: Enter the customer name, the date of the refund, the payment method, and the refund account (as identified in the sales receipt). If paying from the bank, you don't need to include a check number. Then, enter the product or service, description, quantity, and rate.
Step 5: Click Save and Close.
Step 6: Check the customer's list and search for the customer to see the refund receipt.
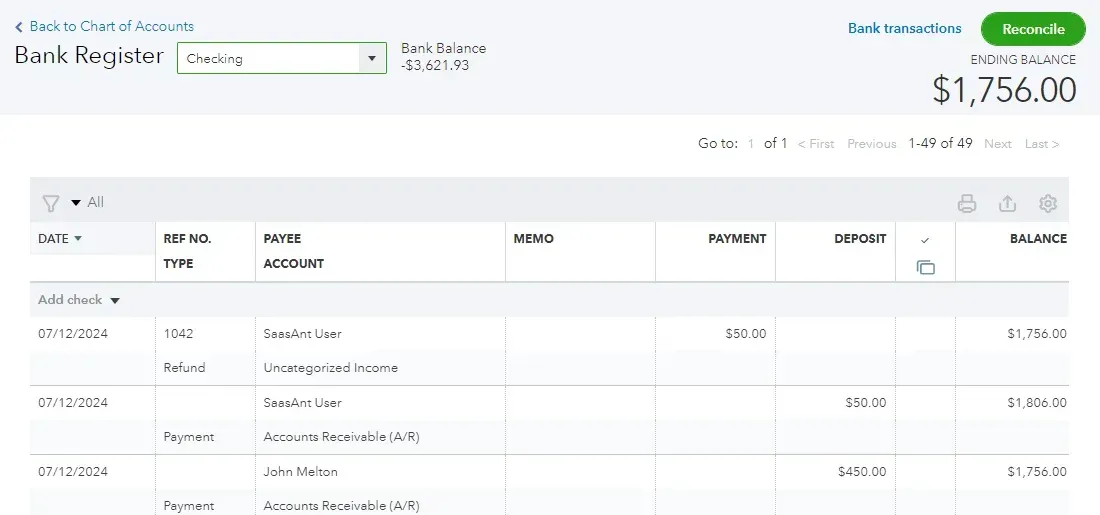
Step 7: Alternatively, go to Transactions -> Chart of Accounts -> the bank account you chose to refund from -> View Register to see the recorded refund receipt.
Consider the Following Scenario
Suppose you already have refund data in an Excel spreadsheet. Manually entering each refund can be time-consuming and prone to errors. SaasAnt Transactions can automate this process by allowing you to import refund details in bulk and ensure that all refund details are accurately recorded and synced with QuickBooks Online, saving time and reducing the risk of mistakes.
Recommended reading:
Enhance Refund Management with the Right Add-Ons
Add-ons like SaasAnt Transactions are invaluable when managing refund receipts in QuickBooks Online. SaasAnt Transactions simplifies the bulk import and automation of financial data, ensuring refund details are accurately recorded without manual entry errors. Utilizing this application enhances efficiency and accuracy, making the refund process smoother and more reliable.
FAQ
How to refund a customer in QuickBooks online?
Integrate SaasAnt Transactions with QuickBooks and automate the bulk import of refund data. Go to New -> Refund Receipt. Enter the customer's name, refund date, and payment method.
Enter product details and amount. Select Save and Close.
How do I reverse a customer payment in QuickBooks Online?
Go to sales -> customer and enter the customer’s name. A list of transactions under the customer’s name will appear. Click on the transaction you want to reverse. Select more and choose to delete.
How do I categorize a refund in QuickBooks Online?
Go to +New -> Credit card credit. Enter the supplier’s name in the payee field. Select the credit card details in the bank/credit card ▼ dropdown. Enter the Payment date, refund Amount, Tax, and category and save and close.
How do I record a returned customer payment in QuickBooks online?
Go to Transactions -> Bank transactions, find the bounced check, and expand the details. Select the customer from the Vendor/Customer ▼ dropdown, choose Accounts Receivable in the Account ▼ dropdown, then click Add. Next, go to Sales -> Customers, select the customer, find and edit the payment, uncheck the invoice box, select the new expense created, and click Save and Close.
How do I refund a duplicate payment in QuickBooks?
New -> Vendor -> check. Enter the customer’s name. In the payment category, select accounts receivable. Enter the duplicate or an overpayment to refund, save, and close.
When to Issue Customer Refunds in QuickBooks Online?
Issue refunds to customers when products are returned due to defects or cancellations. Refunds are also necessary for service dissatisfaction, overpayments, and billing errors. This demonstrates your commitment to customer satisfaction and maintains trust.
Why Refund Receipts Are Important?
Refund receipts are important because they ensure accuracy, transparency, and communication with customers. They also create an audit trail, aid in legal compliance, and contribute to accurate financial reporting. These receipts help maintain records for future reference and can be used to resolve disputes.
What three methods can one use to refund a customer when filling out a refund receipt?
When completing a refund receipt in QuickBooks Online, you can refund a customer using three payment methods: Credit Card, Direct Debit, or Cash. Select the appropriate payment method from the Payment method dropdown to ensure the refund is processed correctly.