How to View Journal Entries in QuickBooks Online
Whether you’re reconciling accounts, reviewing transactions, or preparing for tax season, accessing your journal entries is essential. Journal entries record your financial transactions and ensure your accounts are balanced and accurate.
In this detailed guide, we'll walk you through how to view journal entries in QuickBooks Online, including insights on the new Modern View reporting experience that QuickBooks Online has started rolling out.
How to View Journal Entries in QuickBooks Online: Step-by-Step Guide
Follow these steps to view your journal entries in QuickBooks Online:
Log into Your QuickBooks Online Account
Begin by logging into your QuickBooks Online account.
Navigate to Reports
Once on the dashboard, navigate to the left panel and click 'Reports.’
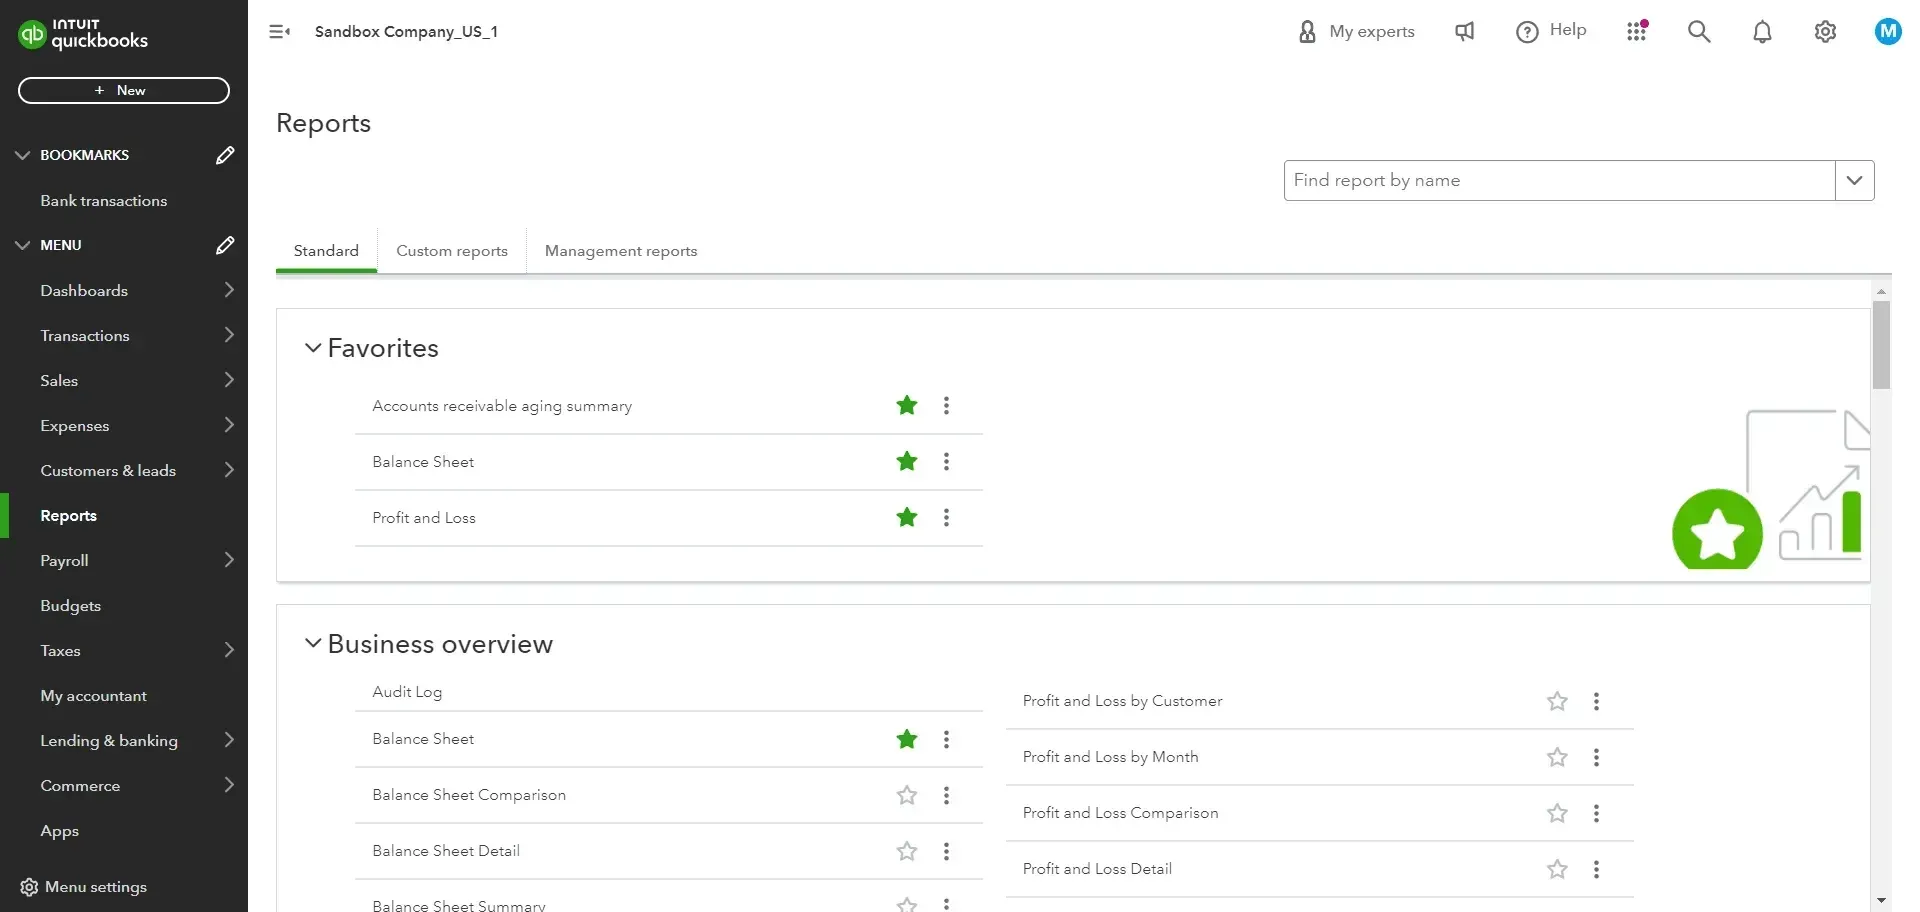
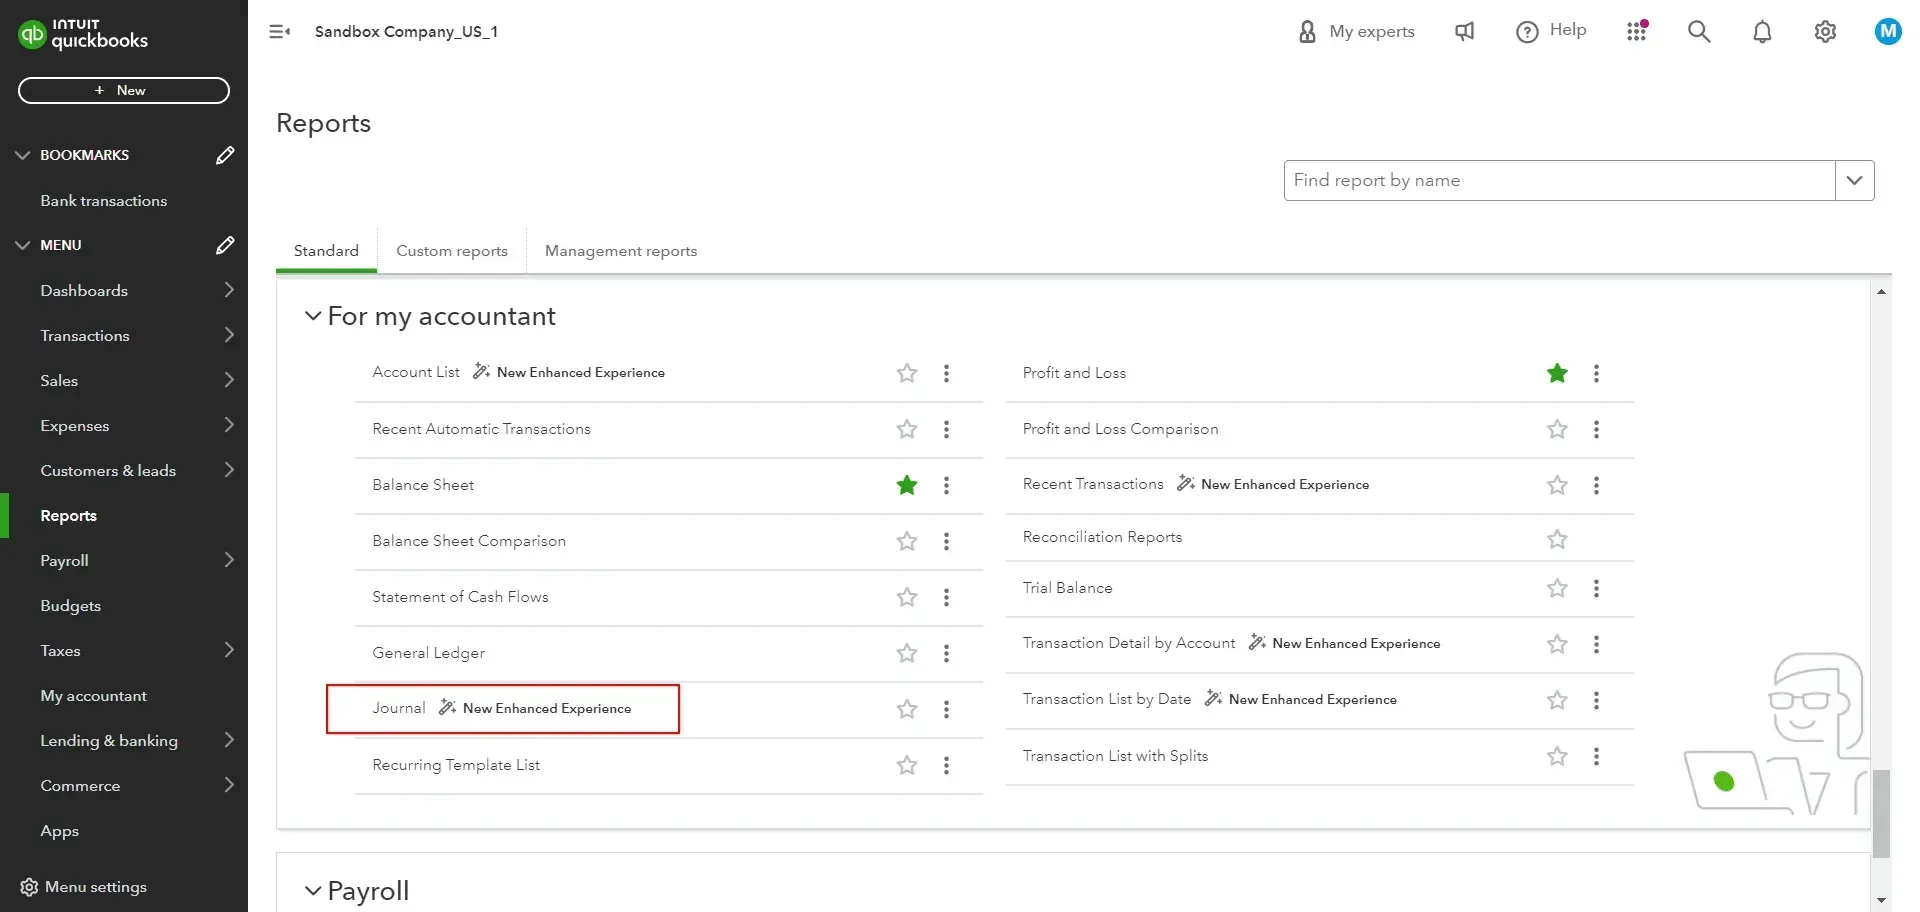
Access the Journal Report
In the 'Standard' tab, scroll down to the 'For my accountant' section and click 'Journal.'
Note: If the report is using the new Modern View, you'll notice a magic wand icon on the title. Starting July 2024, this new view will gradually replace the Classic View for all standard reports.
Set the Date Range
Here, you can set the date range for the journal entries you wish to view.
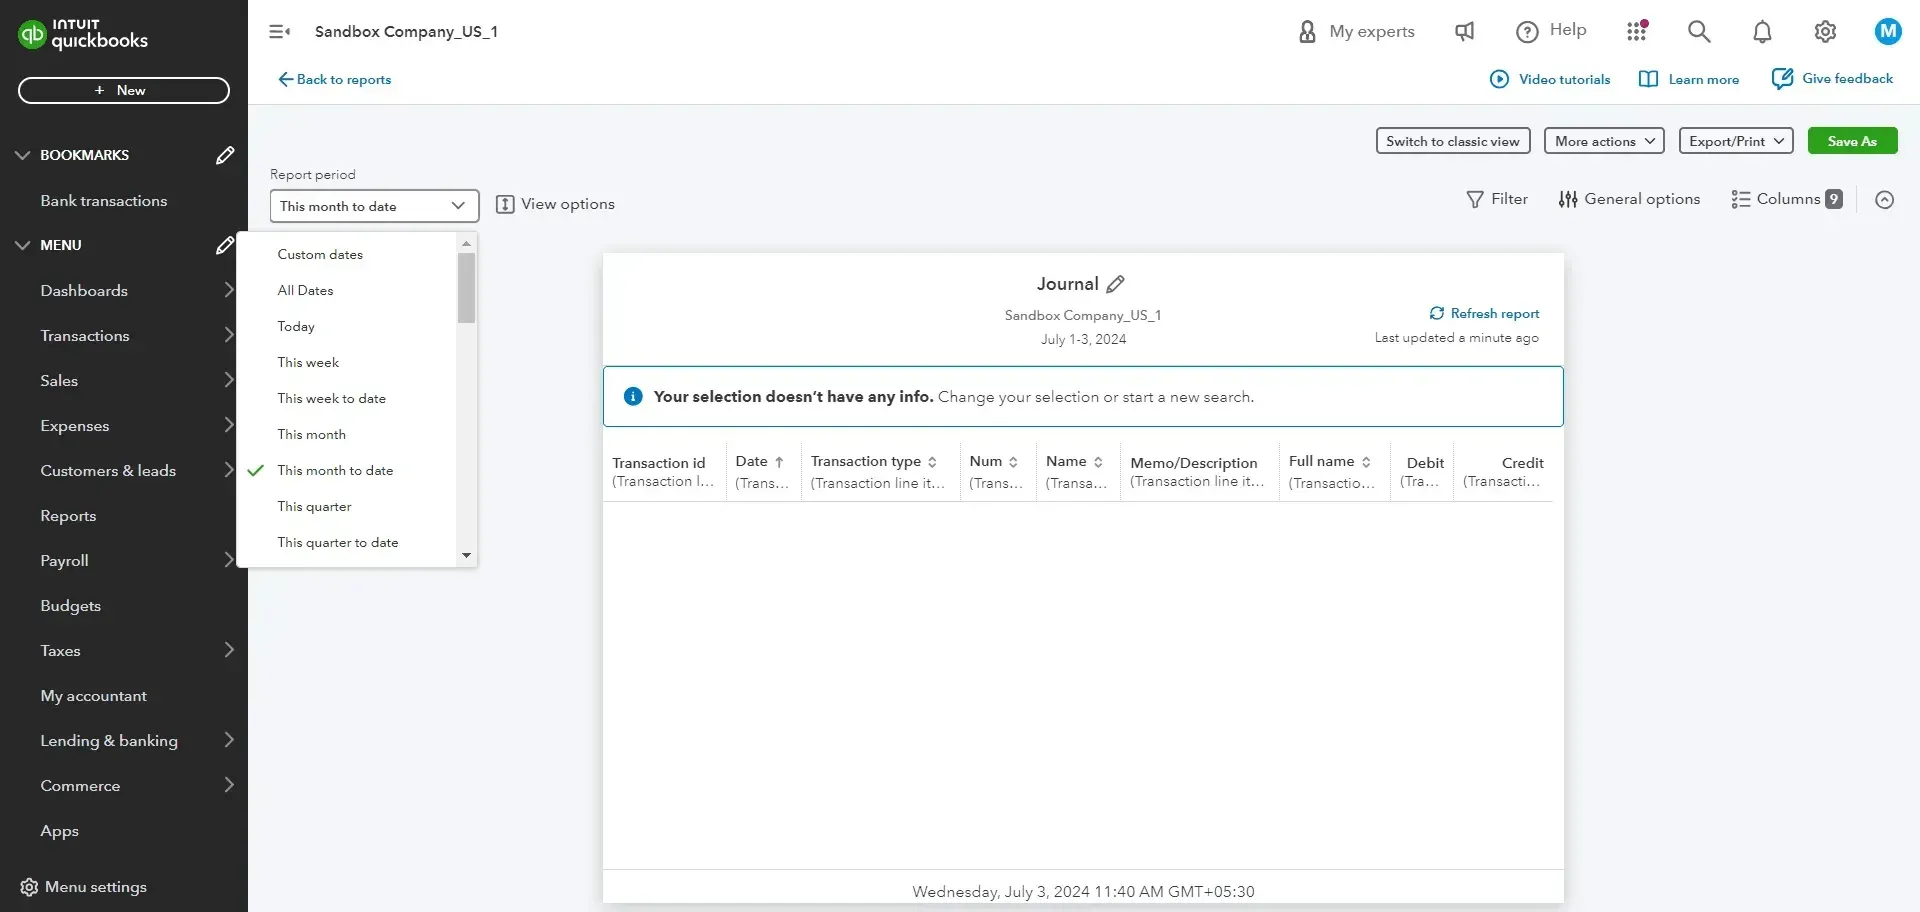
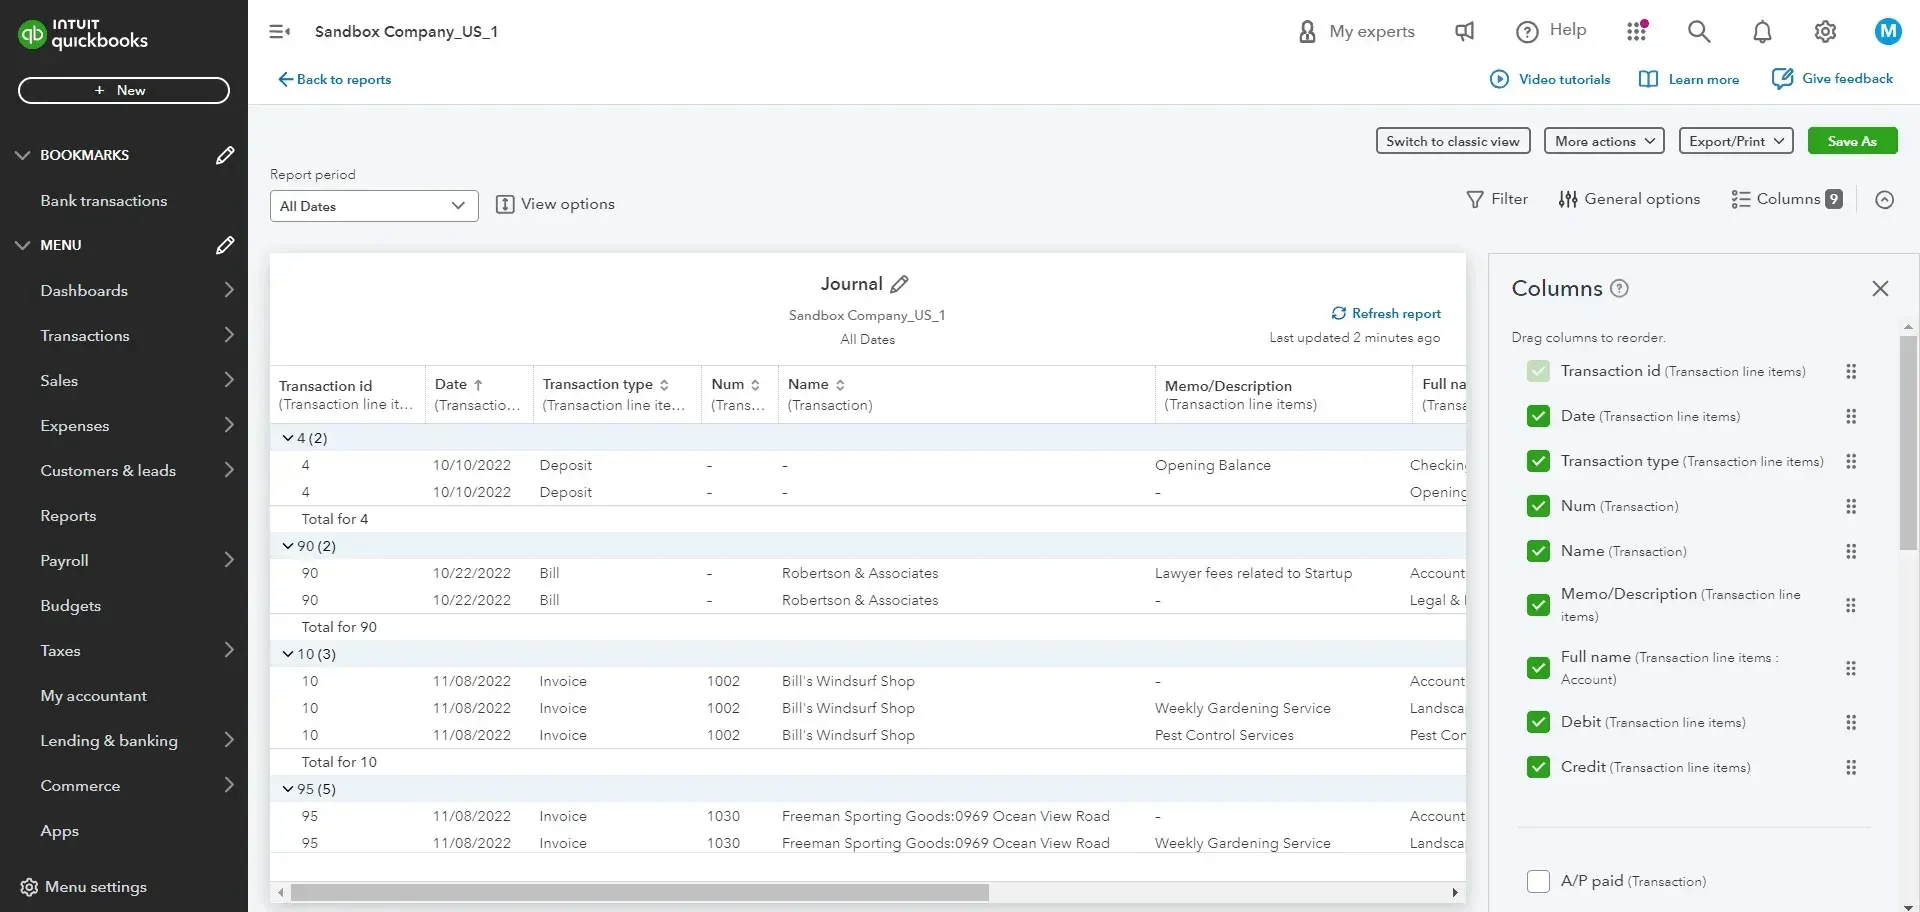
Customize the Report
To customize the report further, click on the ‘Customize’ button.
After setting your filters, click ‘Refresh report’ to view all the journal entries.
View and Edit Entries
You’ll now see a list of all journal entries within your specified date range. Click on any entry to view more details or to make edits.
Print or Export the Report
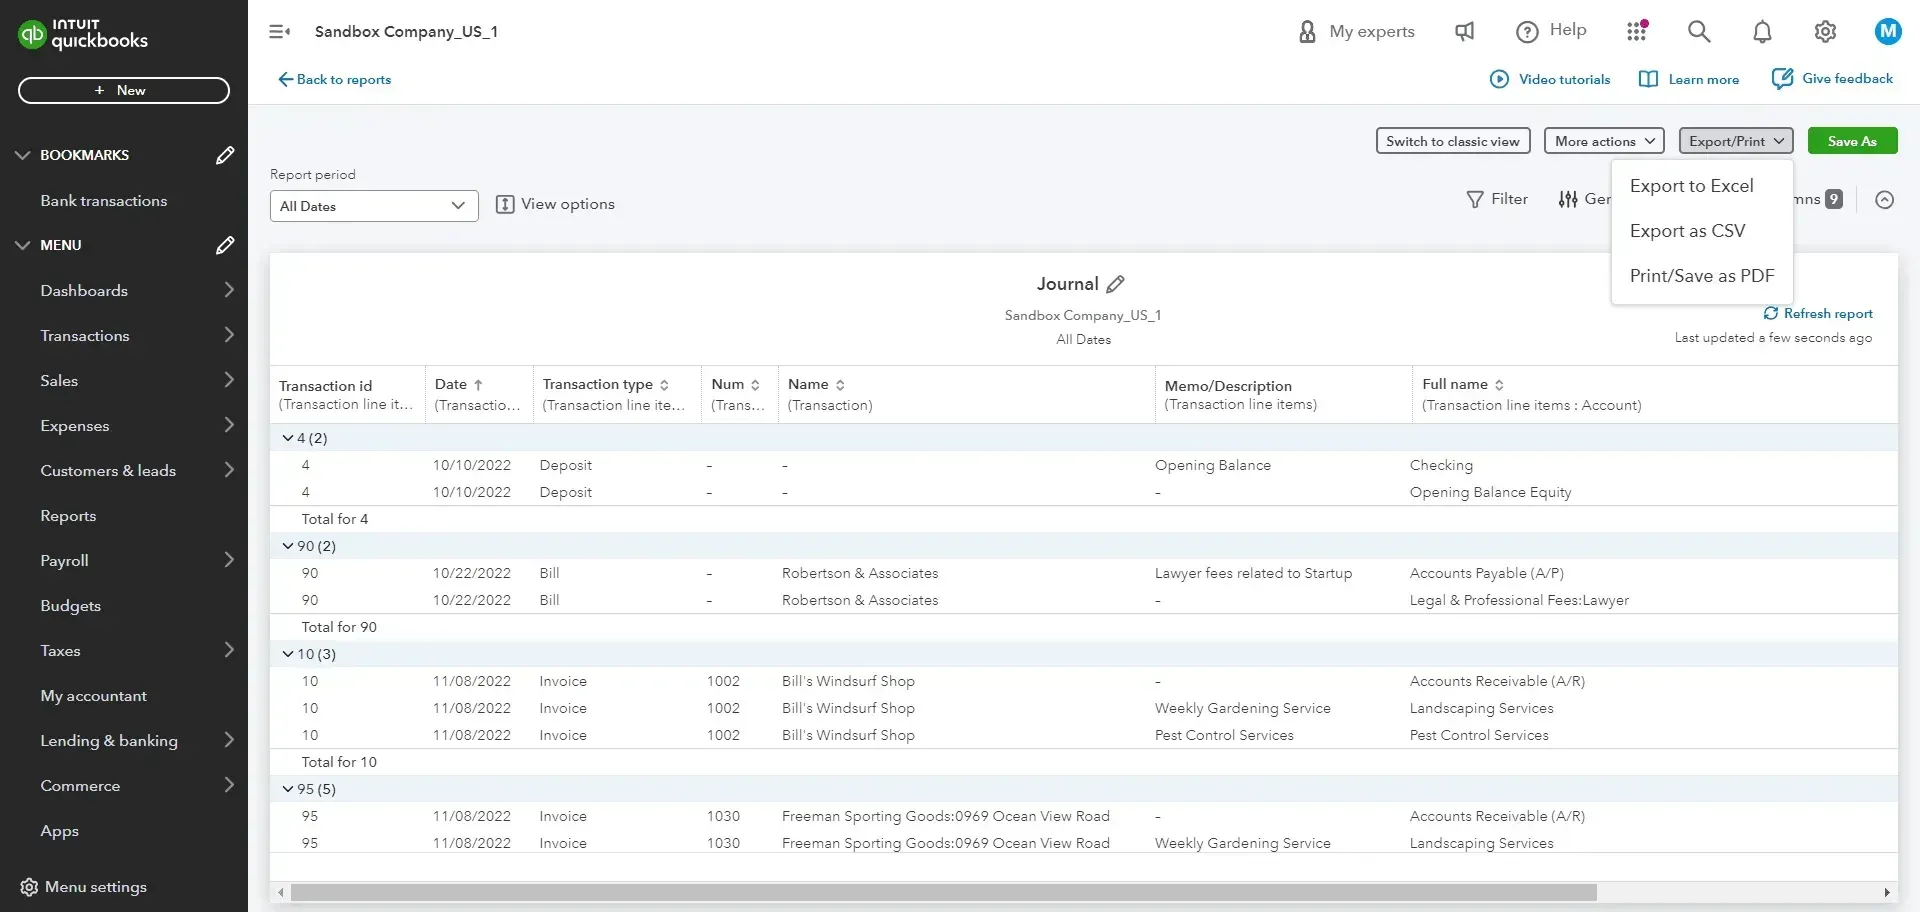
To print or export the report, use the options at the top of the report page.
Insights on Modern View Reporting Experience
In July 2024, QuickBooks Online started rolling out a new reporting experience for Standard Reports called Modern View. This update is significant because it introduces several enhancements and changes to how reports are generated and viewed:
Improved User Experience: Modern View offers faster loading times and fewer crashes for reports with many lines. It also includes improved user permissions for reporting to ensure your data is secure.
Enhanced Customization Options: With Modern View, you can immediately preview customizations before saving your report. It offers more customization options, including advanced filters, data pivots, and charting of your data.
New Reports and Features: The update includes new reports for Fixed Assets, Revenue Recognition, and Projects. It also allows you to run any report directly from Microsoft Excel and add it to Management Reports.
Customizing Reports in Modern View
Here’s how you can create custom reports using the new Modern View:
Create a Custom Report
Go to Reports and select + Create new report.
Choose the report type, then click Create. You might see options for using the report creation wizard or manually adding data columns.
Use the pencil icon to enter or edit the name of your report.
Customization Options
Date Range: Select the date coverage for your data.
Pivot: Summarize and total your report data. Select fields to categorize in the rows and columns, then choose which value field you want to summarize.
Group: Categorize line items by any column and calculate totals, averages, or percentages for numeric groups.
Filter: View only specific entries by selecting what you want to filter by.
General Options: Change the accounting method, number format, or header/footer fields.
Columns: Select and reorder columns, and choose to include or exclude them from your report.
Saving and Viewing Custom Reports
Select Save As to save your report. You can edit it at any time.
To view your custom reports, go to Reports and select the Custom reports tab. Click on the report name to open it.
Exporting and Printing
Use the Export/Print dropdown to export your data to Excel or print the report.
Visualizing and Scheduling Reports
Visualize Your Report
Open your custom report and select Chart View. Choose a chart type and adjust the fields for the Horizontal (X) and Vertical (Y) axes.
Add Chart Reports to Management Reports
While viewing your report in Chart View, go to More actions and select Add to Management reports. You can create a new management report or add to an existing one.
Schedule an Emailed Report
From the Standard or Custom reports tab, select more options next to any report available in the New Enhanced Experience, then select Create a schedule.
Enter the workflow name, start date, and how often you want the report sent. Fill out the email details and select Save and Enable.
Recommended reading:
Conclusion
By following these steps and leveraging the new Modern View, you can efficiently view and manage your journal entries in QuickBooks Online. This update enhances the reporting capabilities and ensures a more streamlined and user-friendly experience.
Bonus Tip: If you need to add multiple journal entries into QuickBooks, consider using integrations like SaasAnt Transactions. These integrations allow you to import journal entries from Excel into QuickBooks, simplifying the process.
How SaasAnt Transactions Can Help with Journal Entry Management Tasks
SaasAnt Transactions streamlines the entire process by automating the bulk management of journal entries in QuickBooks Online. It minimizes manual data entry and error-prone tasks, making it easier for you to manage and review your financial records. Here’s how it supports your workflow:
Bulk Import/Export: Quickly import and export journal entries from Excel, CSV, or IIF files, saving time and reducing mistakes.
Advanced Filtering & Mapping: Easily sort and filter transactions, so you can locate specific journal entries without hassle.
Streamlined Reconciliation: Automatically update and reconcile transactions, ensuring your records match your bank and ledger data.
Error Reduction & Troubleshooting: Maintain an audit trail with detailed logs that help identify and fix discrepancies faster.
Efficient Reporting: Export organized data for generating accurate financial reports, making audits and tax preparation simpler.
By using SaasAnt Transactions, you focus less on manual processes and more on accurate, real-time financial management.
FAQs
How Do I View Old Journal Entries in QuickBooks Online?
To view old journal entries in QuickBooks Online, follow these steps:
Go to the Reports menu.
Search for ‘Journal Report.’
Use the date filter to choose the desired time range.
Click Run Report to see a list of journal entries.
How Do I See a List of All Journal Entries in QuickBooks Desktop?
To see a list of journal entries in QuickBooks Desktop:
Click on Advanced Search from the top-right menu.
Choose Journal Entry as the transaction type.
Filter results using date, amount, or accounts to view specific entries.
How Do I Run a Journal Entry Report in QuickBooks Online?
To run a Journal Entry Report:
Navigate to the ‘Reports’ section.
Search for ‘Journal Report.’
Customize the date range and transaction type.
Click ‘Run Report’ to view the data.
How Do I Create Multiple Journal Entries in QuickBooks Online?
To create multiple journal entries:
Click ‘+ New’ and select ‘Journal Entry.’
Enter details for the first transaction.
Add more lines for additional entries.
Ensure the debit and credit amounts are equal for each transaction.
Repeat the process for each entry.
How Do I Find Specific Journal Entries in QuickBooks Online?
You can find specific journal entries in QuickBooks Online by:
Using the Advanced Search option.
Selecting Journal Entry as the transaction type.
Applying filters like date, account, or transaction amount.
How Do I Import Journal Entries into QuickBooks Online?
To import journal entries into QuickBooks:
Ensure your file is in CSV or Excel format.
Use QuickBooks’ import feature by navigating to Settings > Import Data.
Select Journal Entries and upload your file.
Map the fields, review the data, and click Import.
If you want to delete a journal entry in QuickBooks refer this guide.
How Do I Access Adjusting Journal Entries in QuickBooks Online?
To access adjusting journal entries:
Use the Advanced Search option.
Select Journal Entry as the transaction type.
Filter by Adjusting Entries to view only adjusting journal entries.
What Is an Adjusting Journal Entry in QuickBooks?
An adjusting journal entry is used to correct account balances before financial statements are finalized. These entries ensure accuracy in financial reporting and align with accounting principles.
How Do I Reconcile Journal Entries in QuickBooks Online?
To reconcile journal entries:
Navigate to the Accounting tab and select Reconcile.
Choose the relevant account.
Review and compare journal entries with your bank statement.
Adjust or add journal entries if needed.
Can I Edit a Journal Entry in QuickBooks Online?
Yes, you can edit a journal entry in QuickBooks Online:
Use Advanced Search to find the journal entry.
Open the entry and click Edit.
Make necessary changes, ensuring that the debit and credit amounts remain balanced.
How Do I Run a Profit & Loss or Balance Sheet Report in QuickBooks Online?
To run a Profit & Loss or Balance Sheet report:
Navigate to the Reports section.
Search for Profit & Loss or Balance Sheet.
Set the date range and other filters.
Click Run Report to generate the financial report.
How Do I Troubleshoot Issues with Journal Entries in QuickBooks?
If you’re facing issues with journal entries:
Ensure debit and credit values are equal.
Clear your browser cache or use Incognito Mode.
Contact customer support if the problem persists.
How Do I Create a Journal Entry in QuickBooks Desktop?
To create a journal entry in QuickBooks Desktop:
Navigate to Company and select ‘Make General Journal Entries.’
Enter the date, debit/credit amounts, and choose the appropriate accounts.
Ensure the entry is balanced before saving.
How Do I Run a General Ledger Report in QuickBooks Online?
To run a general ledger report:
Navigate to the ‘Reports’ tab.
Search for ‘General Ledger.’
Adjust the date filter and select accounts as needed.
Click ‘Run Report’ to generate a detailed view of all transactions.
Can I Make Multiple Journal Entries in QuickBooks Desktop?
Yes, you can make multiple journal entries in QuickBooks Desktop:
Open the General Journal Entry window.
Add each transaction with its corresponding debit and credit.
Use the Add Line button to enter additional entries.
How Do I Export Journal Entries from QuickBooks?
To export journal entries from QuickBooks:
Go to Reports and run the Journal Report.
Click the Export button and choose between Excel or PDF formats.
Save the file to your computer.
How Can I Run the Journal Report to See Financial Transactions in QuickBooks?
To run the Journal Report:
Go to the Reports tab.
Search for Journal and select Journal Report.
Adjust the date range to view specific financial transactions.
How Do I Manage Journal Entries for Small Businesses Using QuickBooks?
QuickBooks helps manage journal entries for small businesses by allowing you to:
Create, edit, and import journal entries for accurate record-keeping.
Run detailed reports like Journal and General Ledger for reviewing transactions.
Make adjusting entries to correct any discrepancies.
What Is the Accounting Equation, and How Does It Relate to Journal Entries?
The accounting equation is Assets = Liabilities + Equity. Journal entries are used to ensure that this equation is always balanced when recording financial transactions in QuickBooks.
How Do I Reconcile Accounts Using Journal Entries in QuickBooks?
To reconcile accounts using journal entries:
Go to Reconcile under the Accounting tab.
Choose the appropriate account.
Match the journal entries to your bank statements.
Resolve any discrepancies by adjusting the entries.
Read also
Batch Transactions in QuickBooks Online - Detailed Guide
How to Edit Multiple Transactions in QuickBooks
How to Export Transactions from QuickBooks Online
Accounting Automation with SaasAnt Transactions: Streamline Your Financial Processes