Import Chart of Accounts in QuickBooks Online: How to
You could either create chart of accounts manually or import chart of accounts into QuickBooks Online. Creating them one by one is time-consuming and increases the risk of errors, leading to potential financial issues, whereas importing chart of accounts into QuickBooks Online is much easier and keeps your data error-free. Yes, there is a default method to import chart of accounts into QuickBooks Online, but it has limitations. Sometimes, it is the unclear error messages and other times, it's the false indication that you've reached the maximum number of accounts.
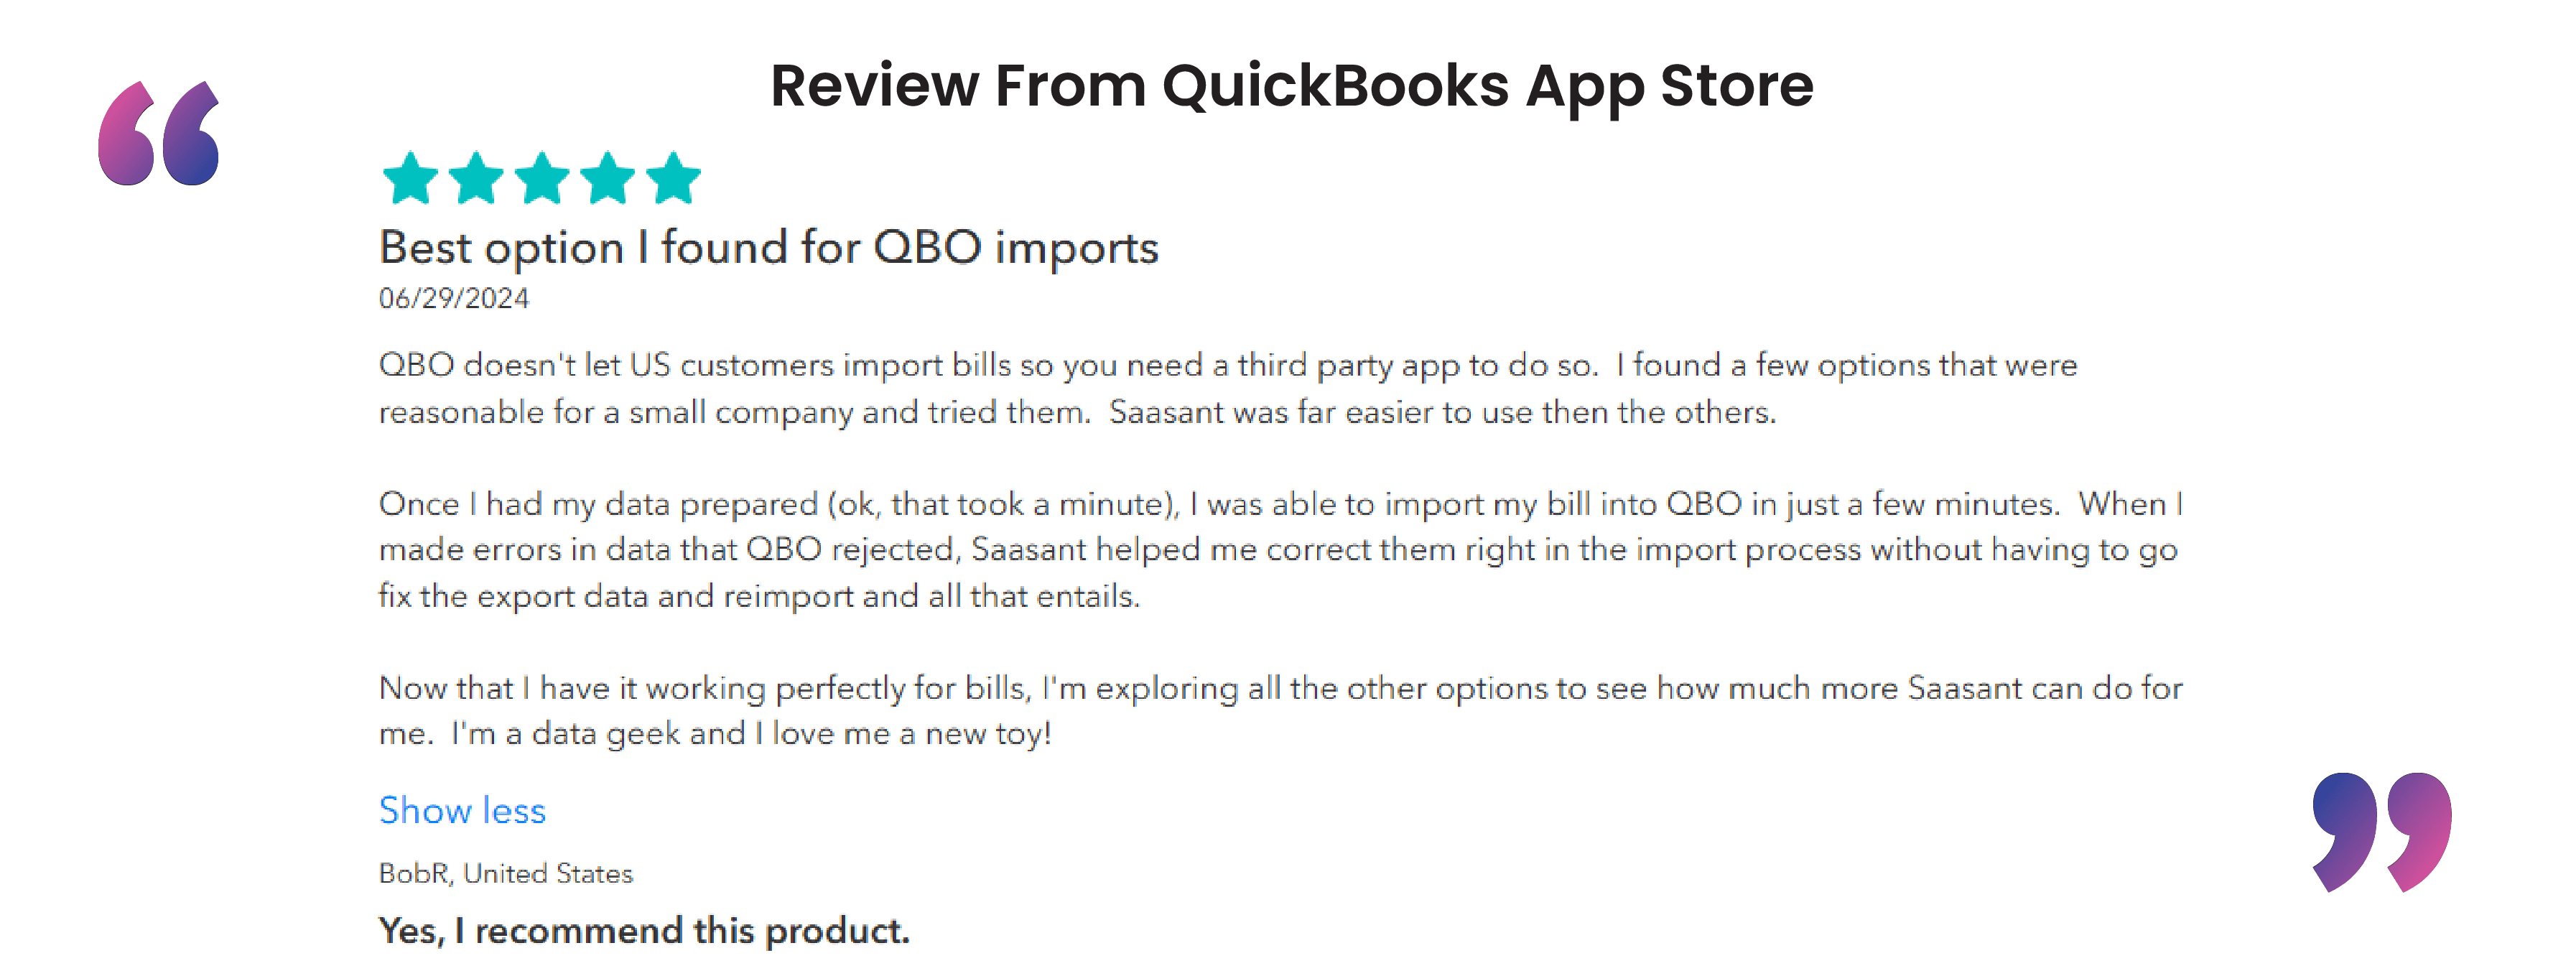
Fortunately, there is a CPA-recommended solution to import chart of accounts into QuickBooks Online- SaasAnt Transactions. You can import your chart of accounts to QuickBooks Online from XLS, XLSX, CSV, and IIF. It is an Accountant's Favorite and User's choice award-winning app with a 5-star rating from over 4000 users in the QuickBooks app store, SaasAnt Transactions saves time and minimizes errors.
Read on to learn how to import your chart of accounts into QuickBooks Online in the easiest way possible.
Import Chart of Accounts into QuickBooks Online: Quick Instructions
You can get started with a 30-day free trial immediately.
Integrate SaasAnt Transactions from the QuickBooks app store.
Upload the file
Review and Import.
Rollback (undo) if needed.
Contents
Import Chart of Accounts into QuickBooks Online: Quick Instructions
How to Import Chart of Accounts into QuickBooks Online: Step-by-Step Guide
Benefits of Importing Chart of Accounts into QuickBooks Online using SaasAnt Transactions
FAQs
How to Import Chart of Accounts into QuickBooks Online: Step-by-Step Guide
Here are the straightforward steps to import your chart of accounts into QuickBooks Online. To begin, sign up for SaasAnt Transactions, which offers a 30-day free trial.
Step 1: Connect SaasAnt Transactions with QuickBooks
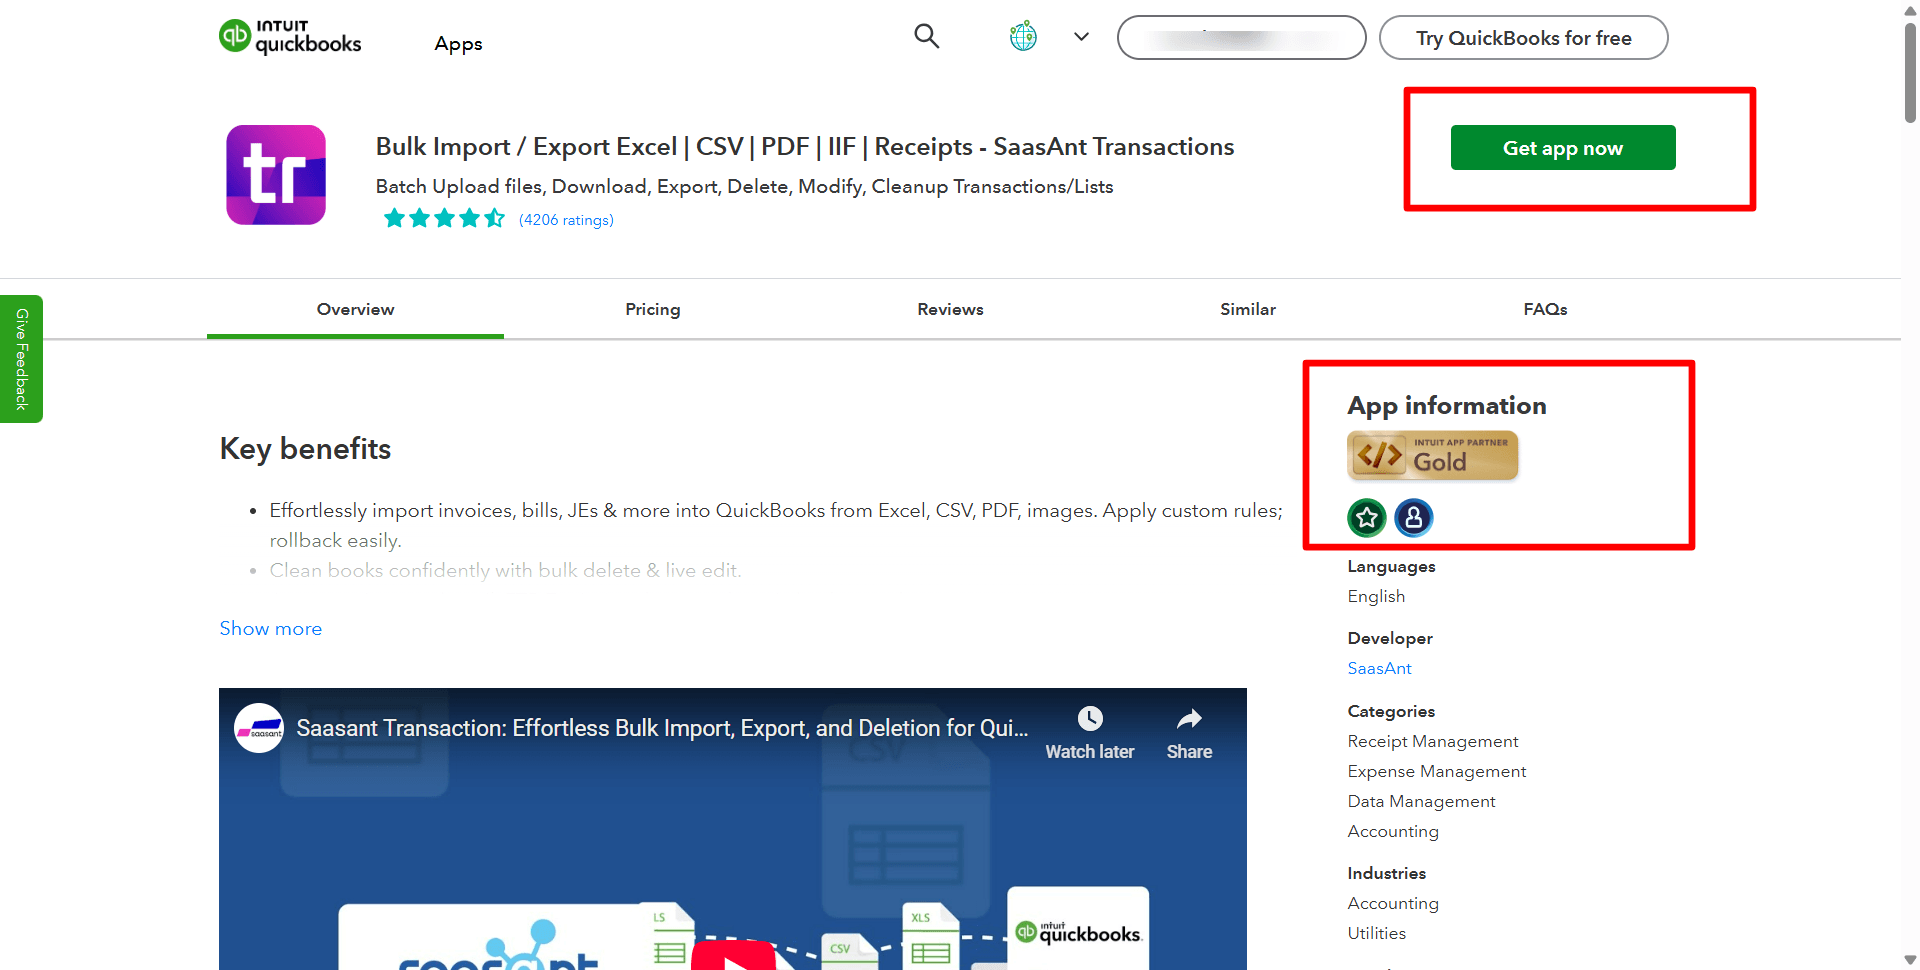
To get started, connect your QuickBooks account with SaasAnt Transactions. Visit the QuickBooks Apps Store and type "SaasAnt" in the search bar. You'll find the SaasAnt Transactions application there. Just click the "Get the App Now" button to proceed.
Step 2: Select Entity
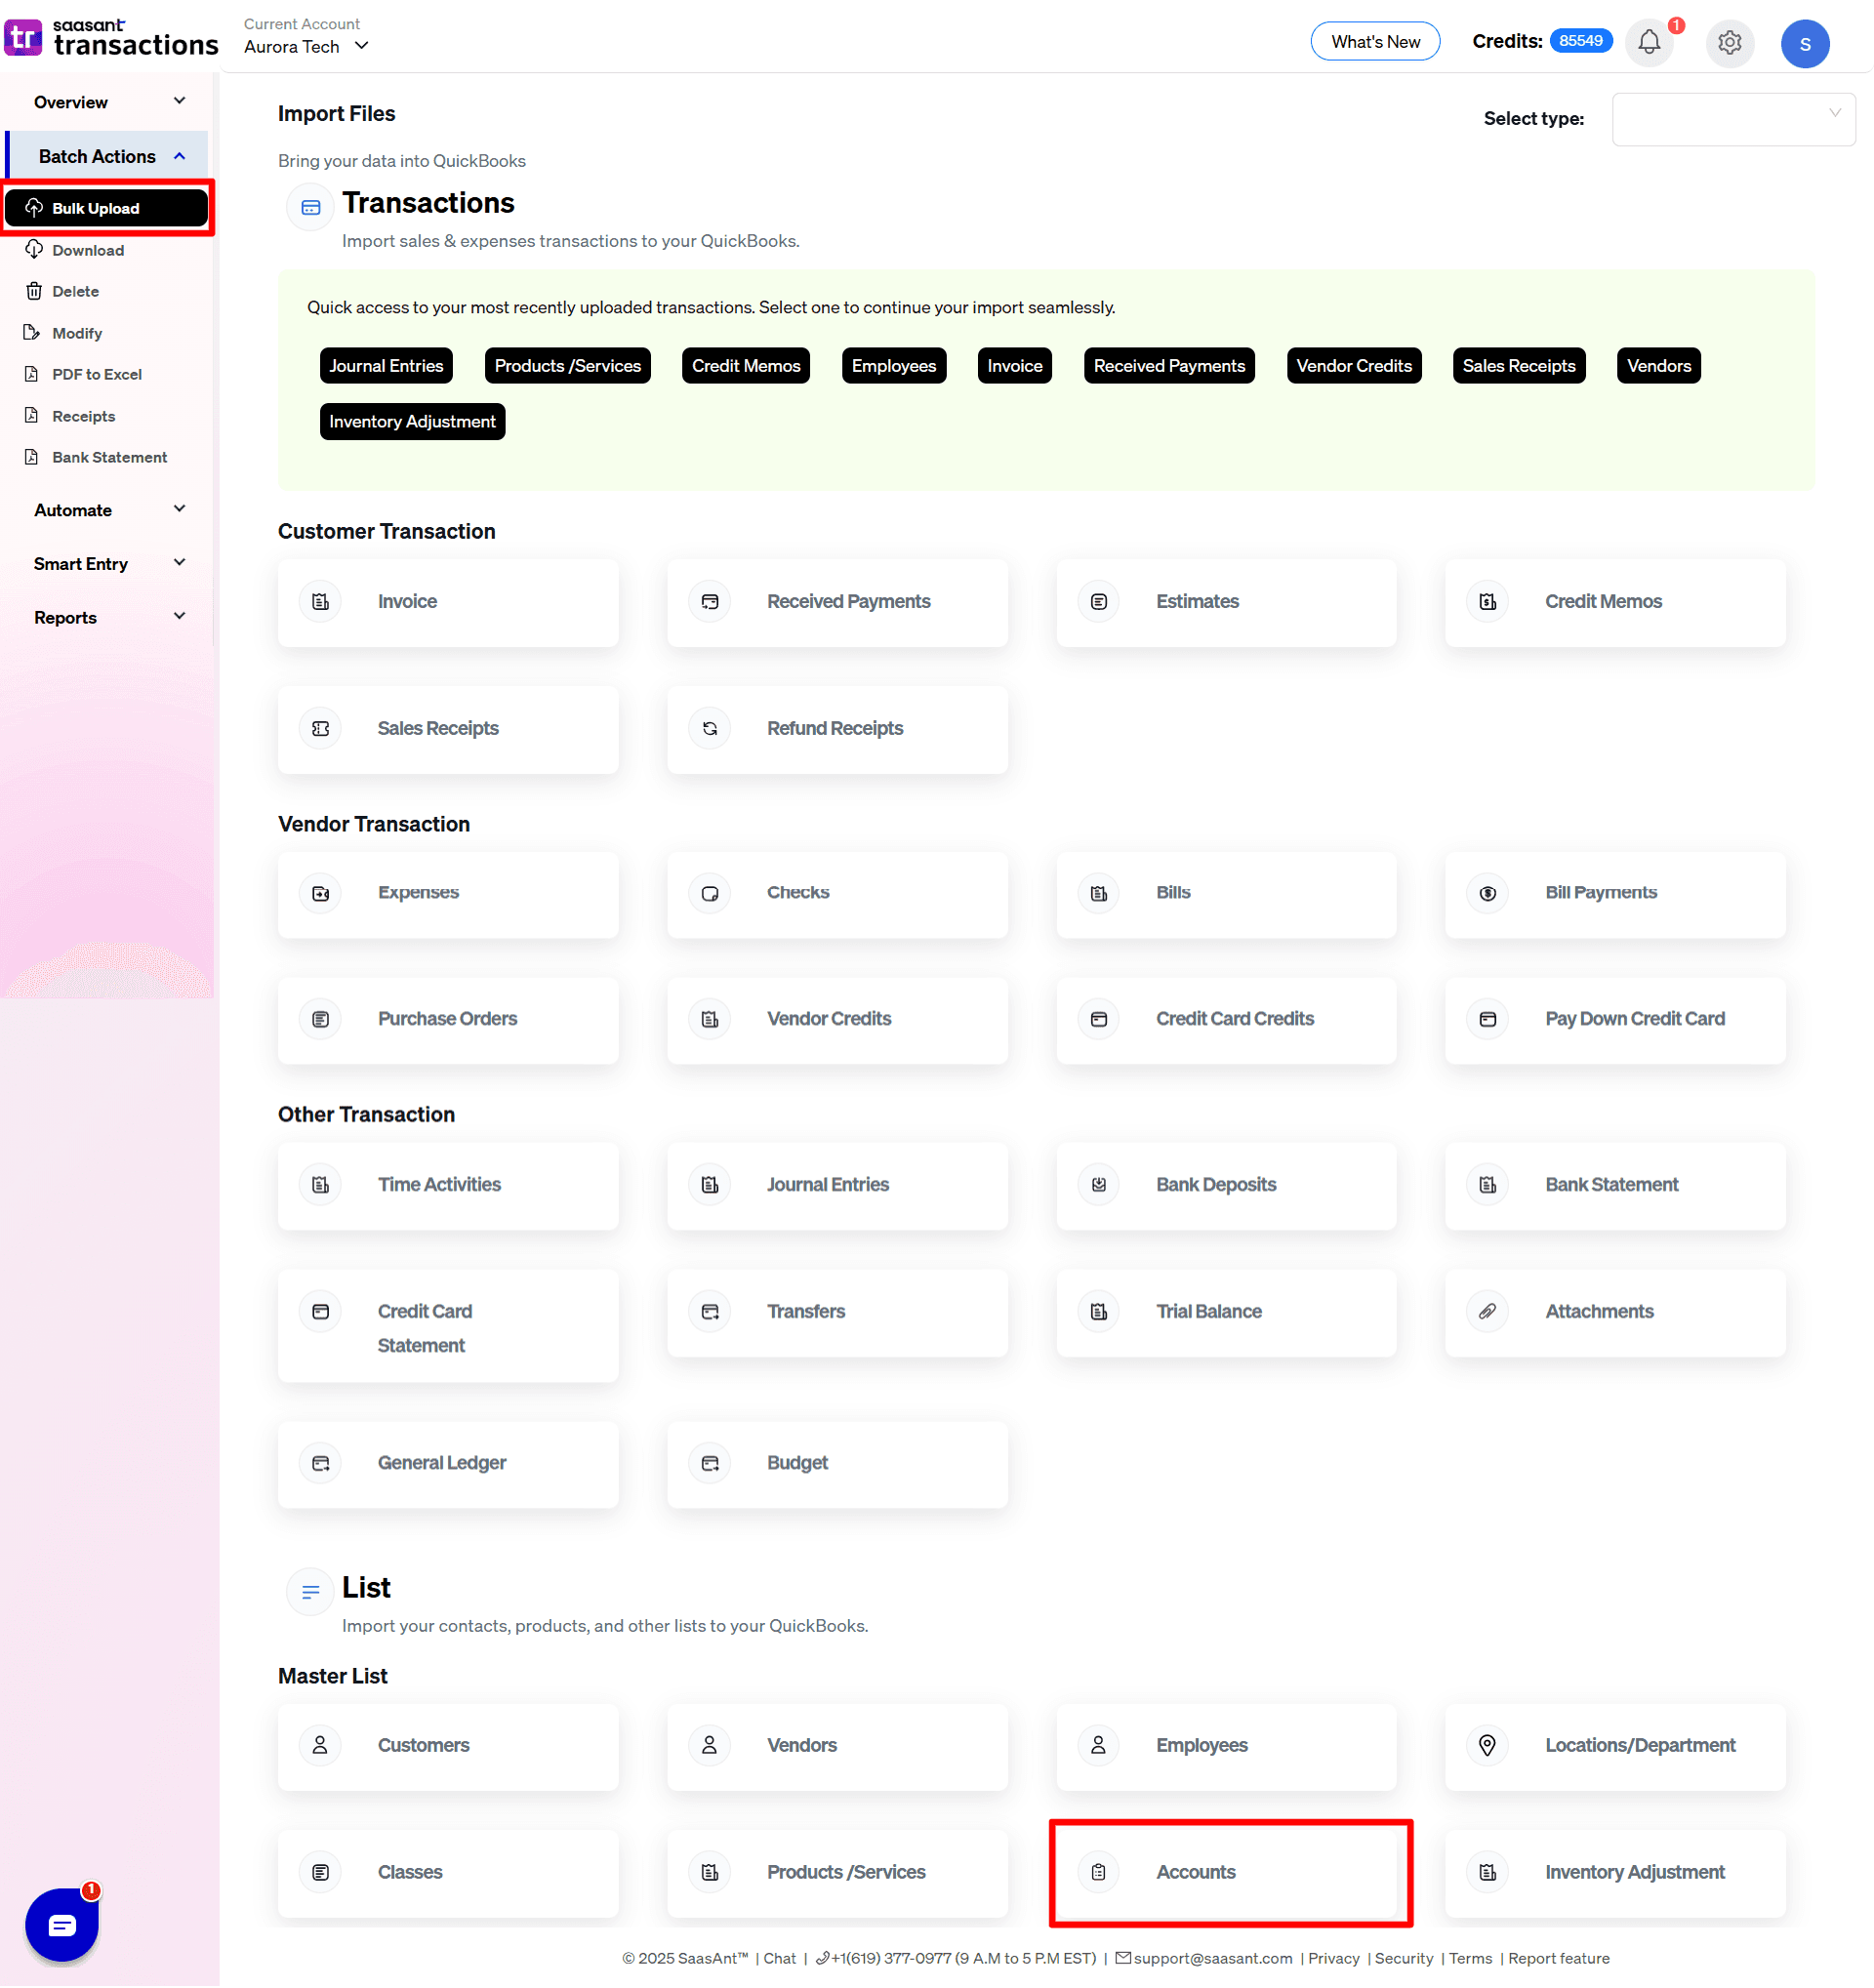
Click on Bulk Upload from the list on the left side of the screen. Select ‘Accounts’ under the ‘List’ category.
Step 3: Upload Your File
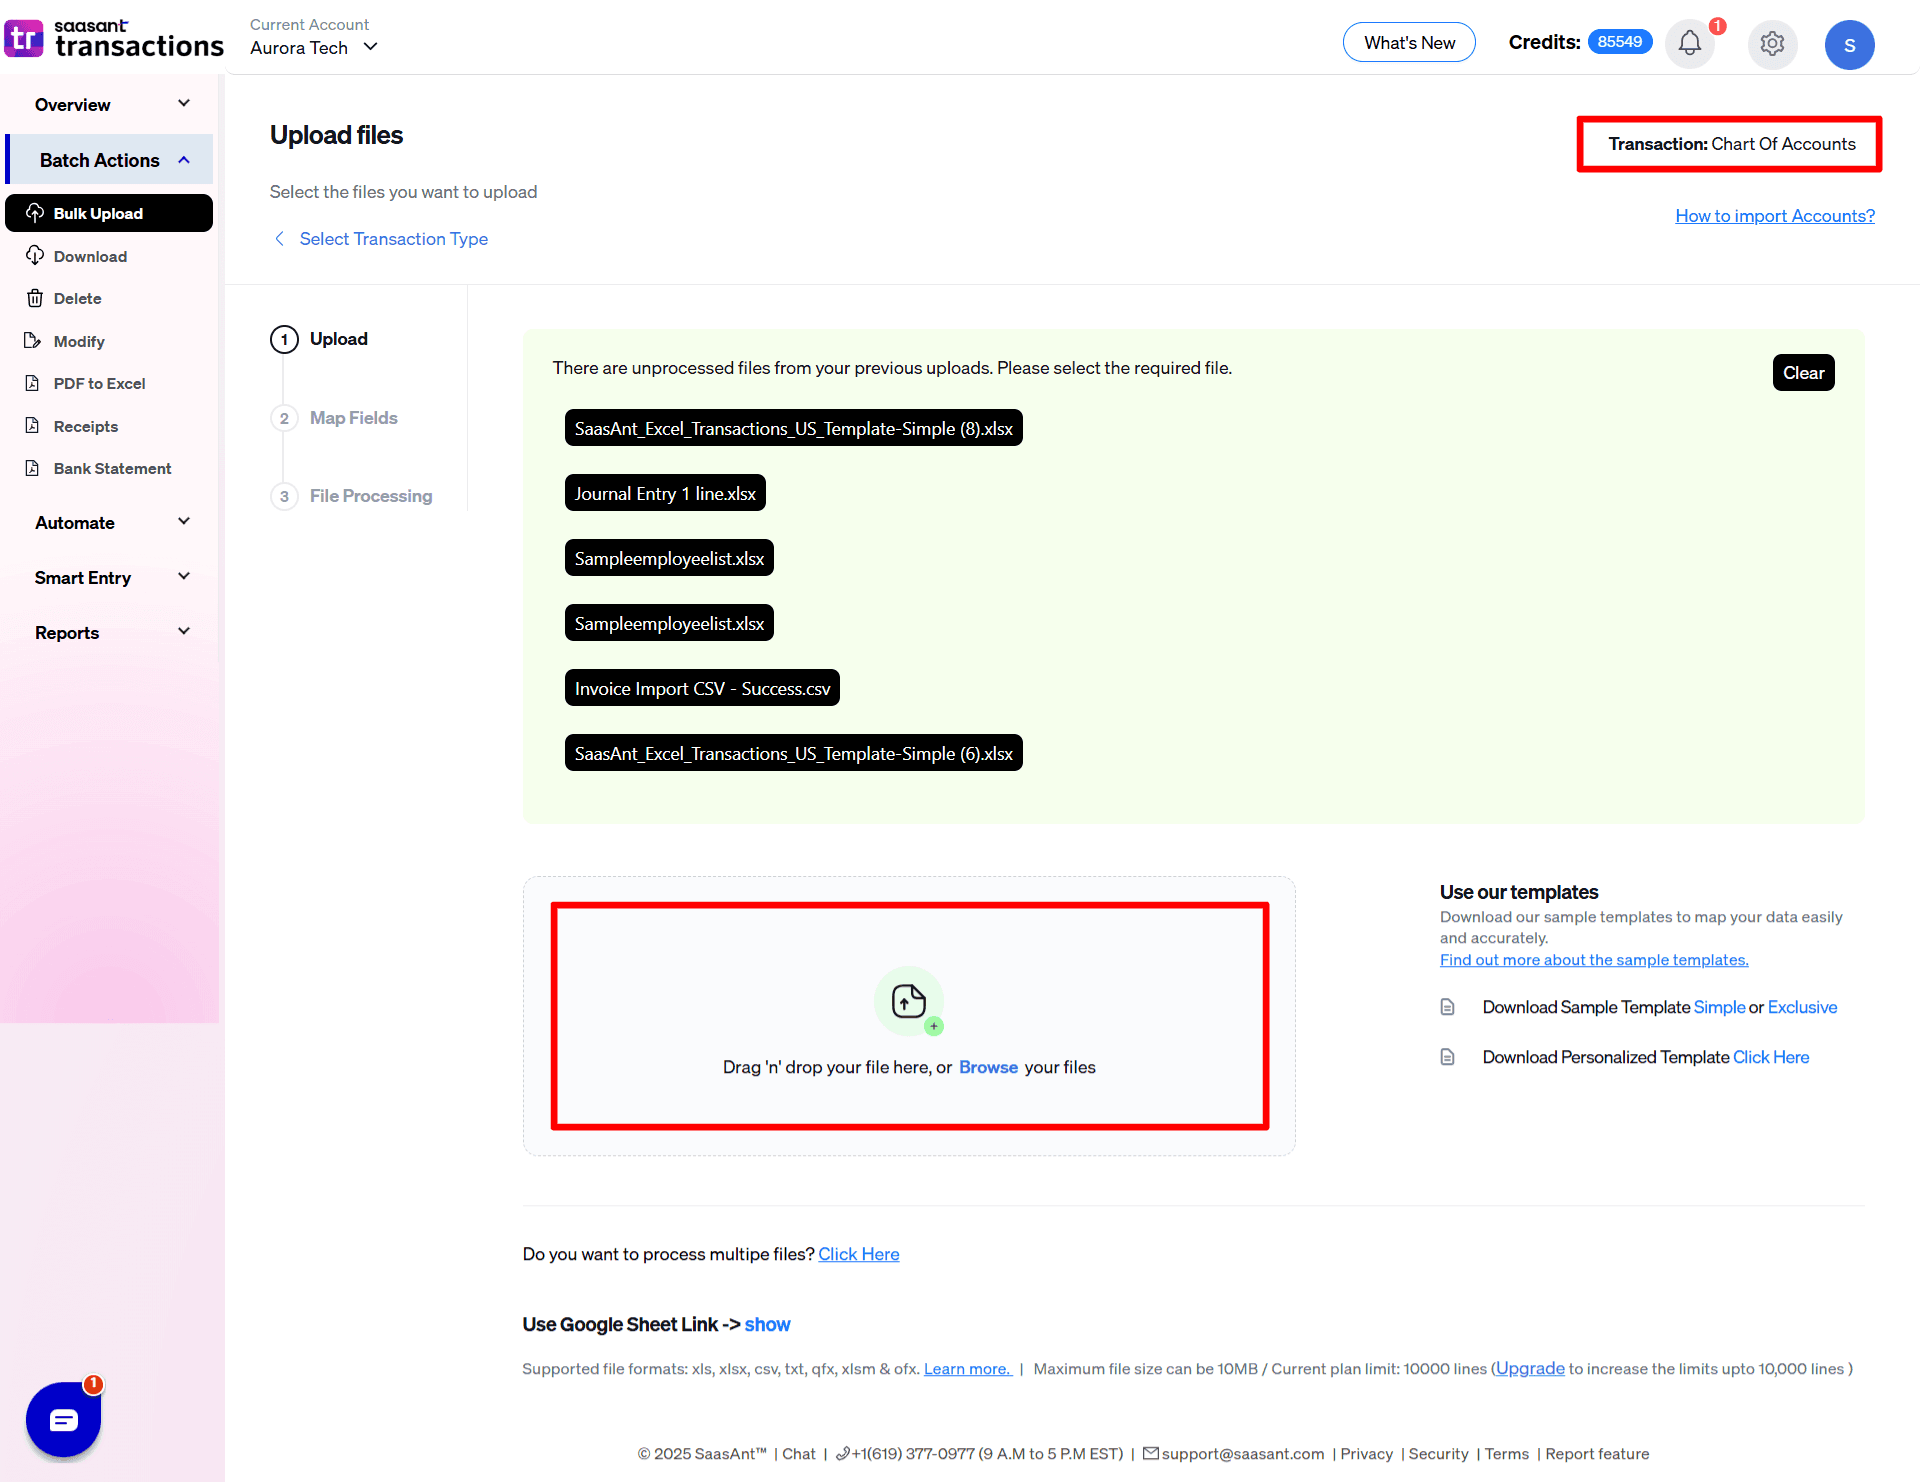
Next, click the Browse button to select the file you want to import from your computer. You can also drag and drop your file here.
You can upload different file formats, including XLS, XLSX, CSV, or IIF. Additionally, SaasAnt Transactions lets you convert PDF files into one of the supported formats.
Step 3: Mapping
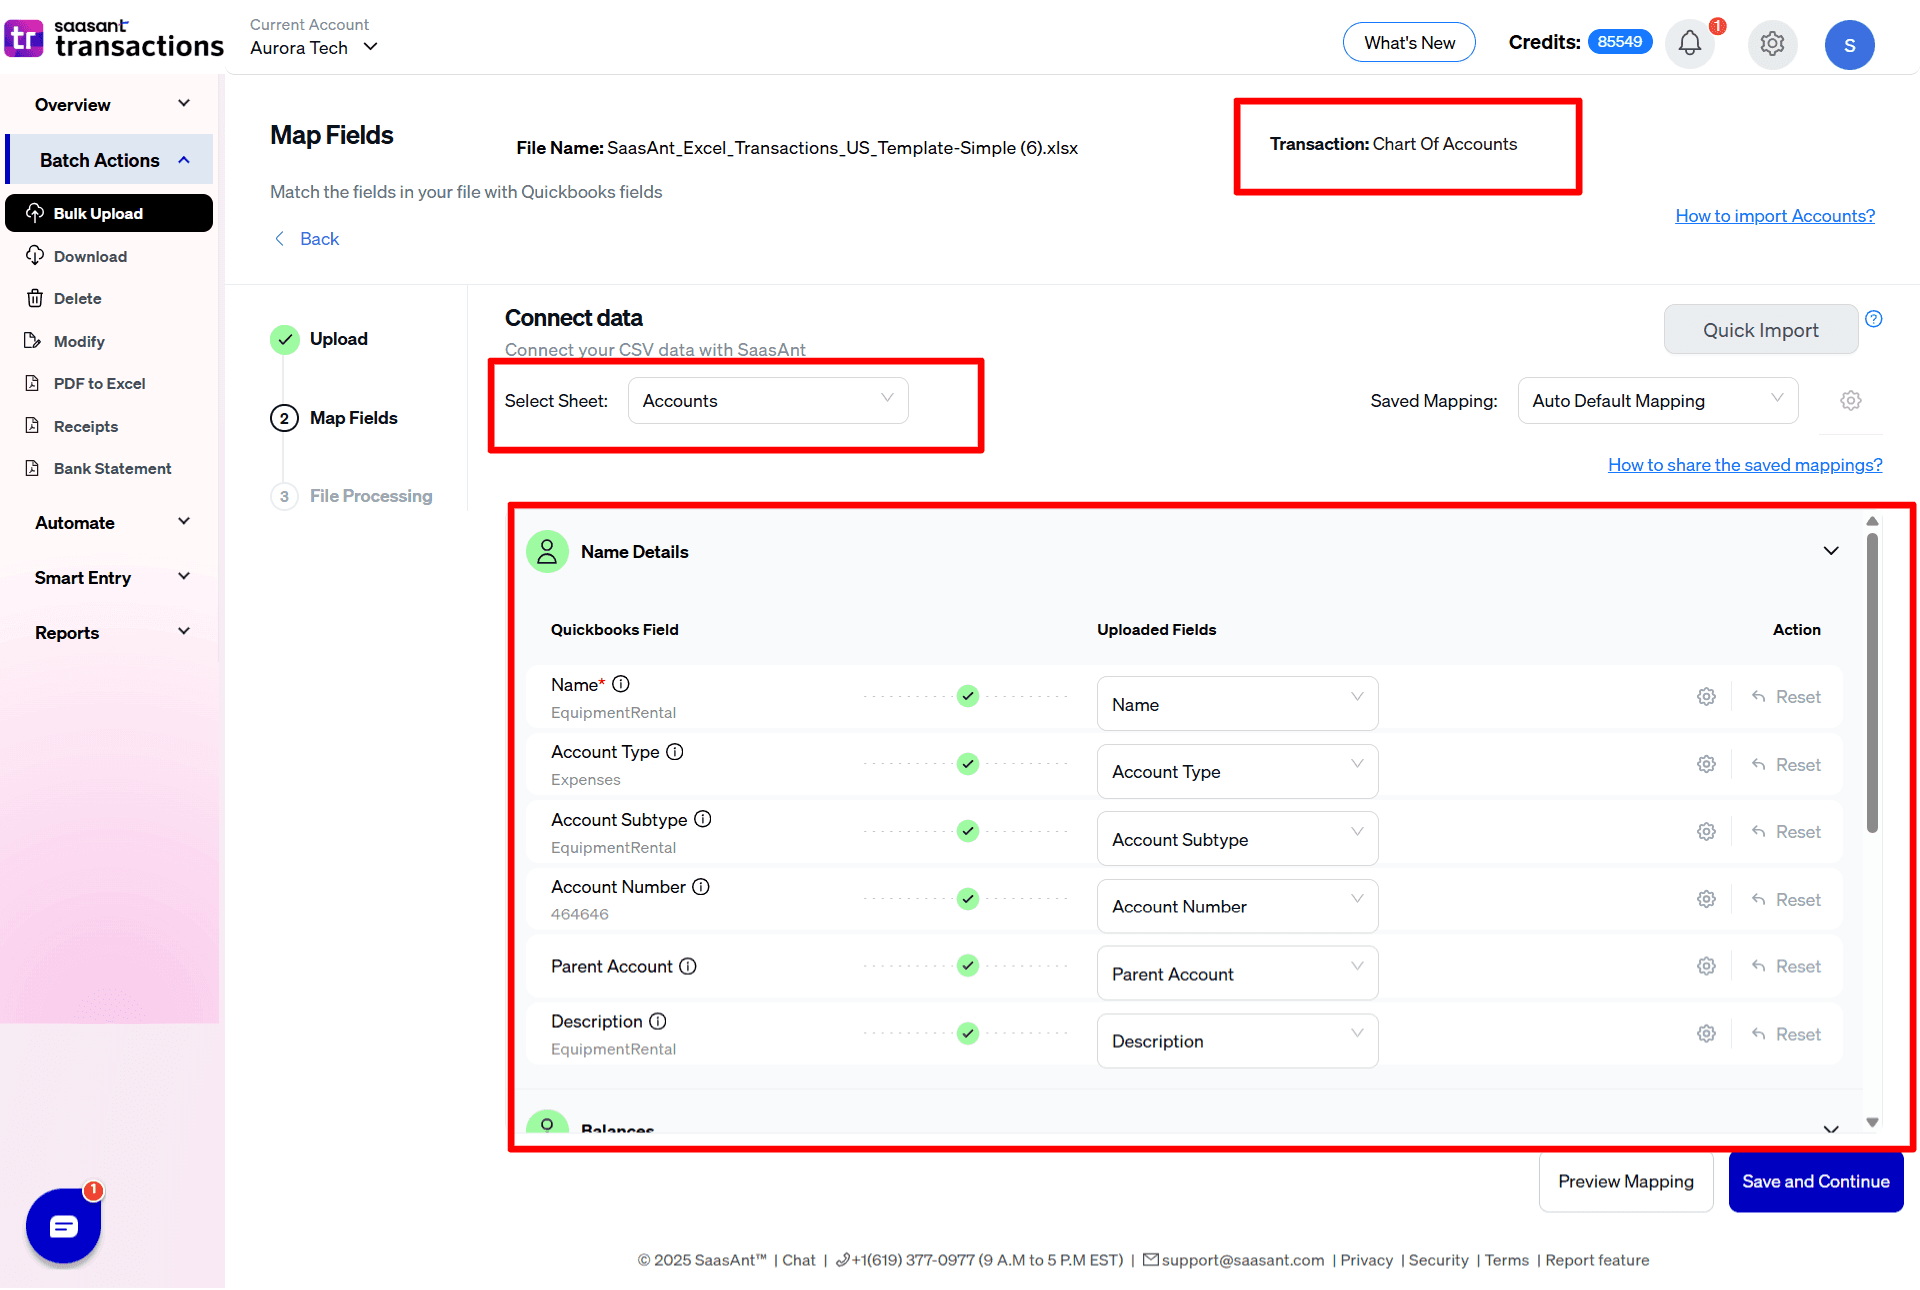
Mapping matches the fields in QuickBooks to those in the imported file. Select the correct sheet if there are multiple sheets in the same file.
For example, your Excel sheet could have ‘acc number,’ which supposedly means ‘Account Number’ in QuickBooks fields.
The Preview Mapping feature lets you see how the fields will be matched in QuickBooks. Once you are done mapping, click ‘save and continue.’
Note: If you have trouble mapping using the file you have uploaded, you can always go back to the file upload page, download the ‘Sample template’ on the right side of the screen, and format your existing file based on the sample template to make things even easier.
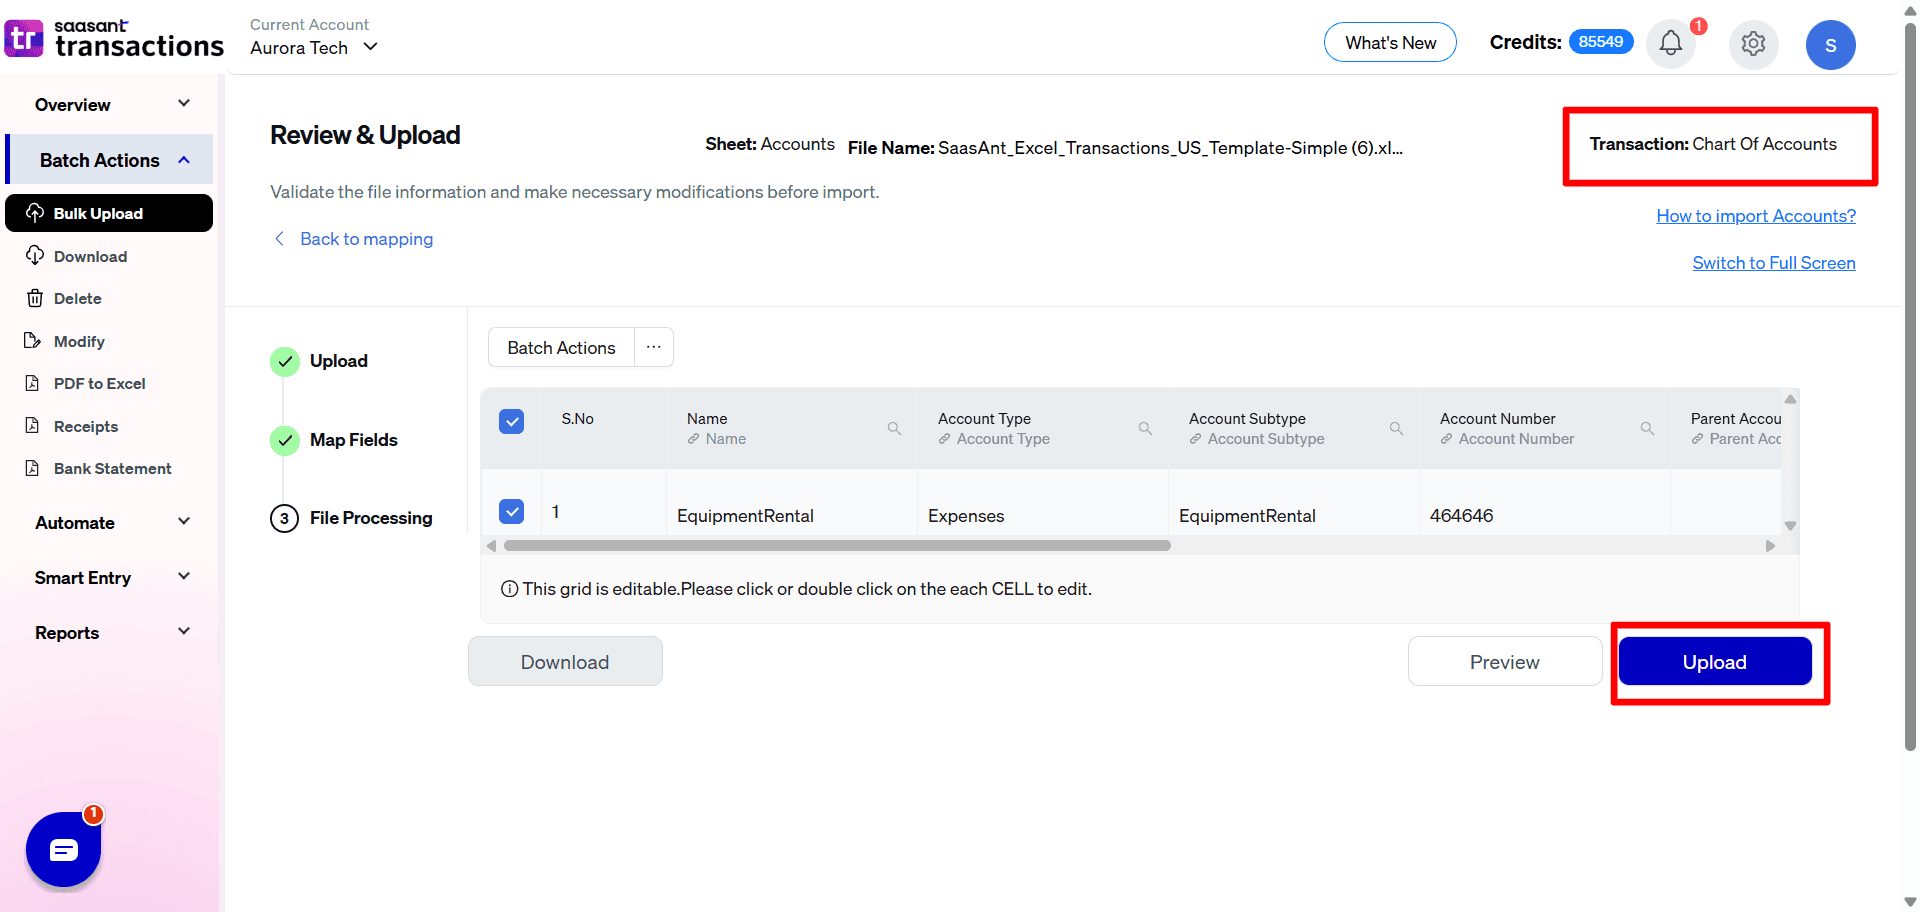
Step 4: Review Data Before Import
Review the data mapped to avoid mistakes and ensure the accurate alignment of all details. SaasAnt Transactions facilitates data review and corrections, helping you identify and resolve errors. Upon confirming the data accuracy, click ‘Upload’ to import your file into QuickBooks Online.
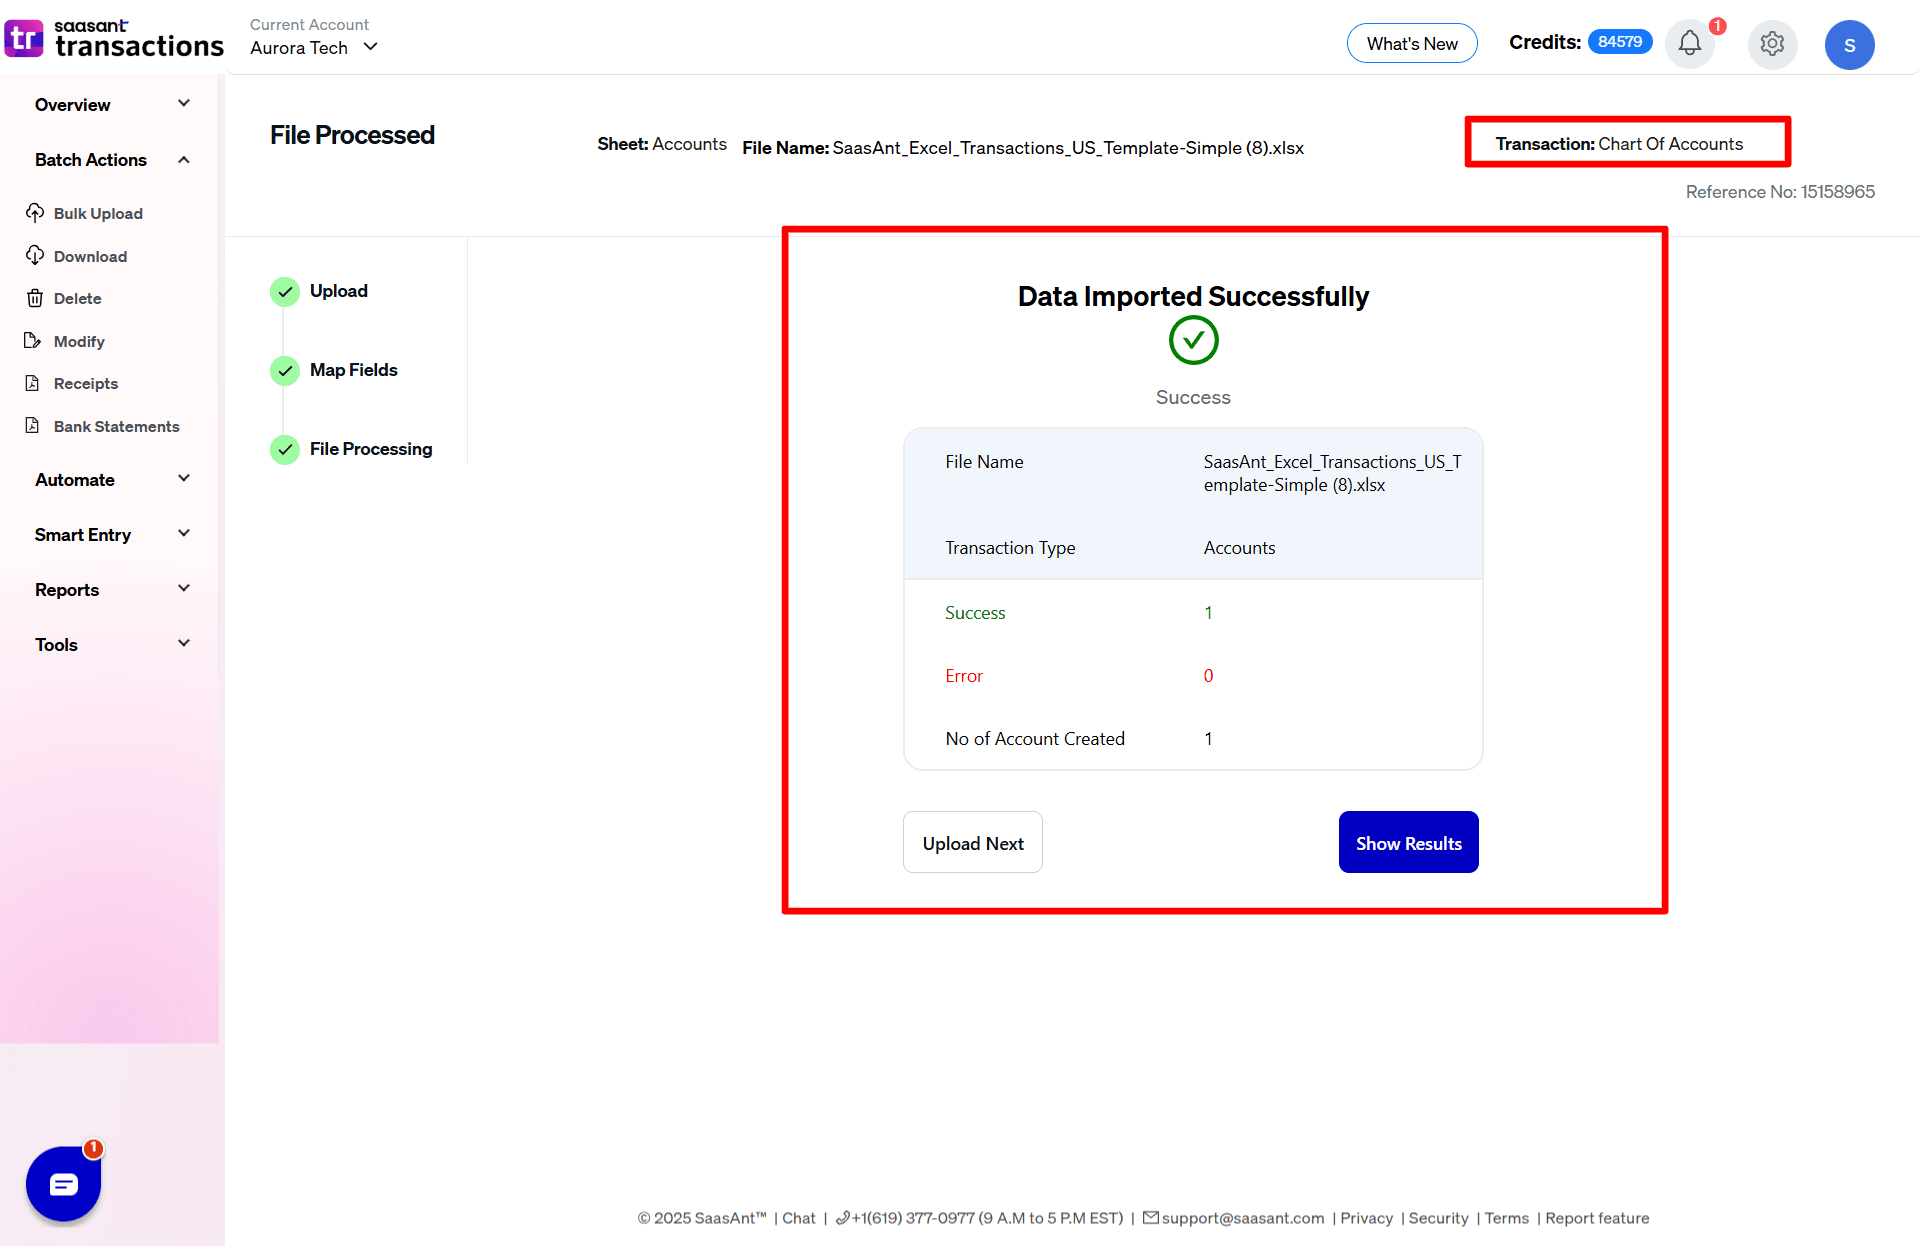
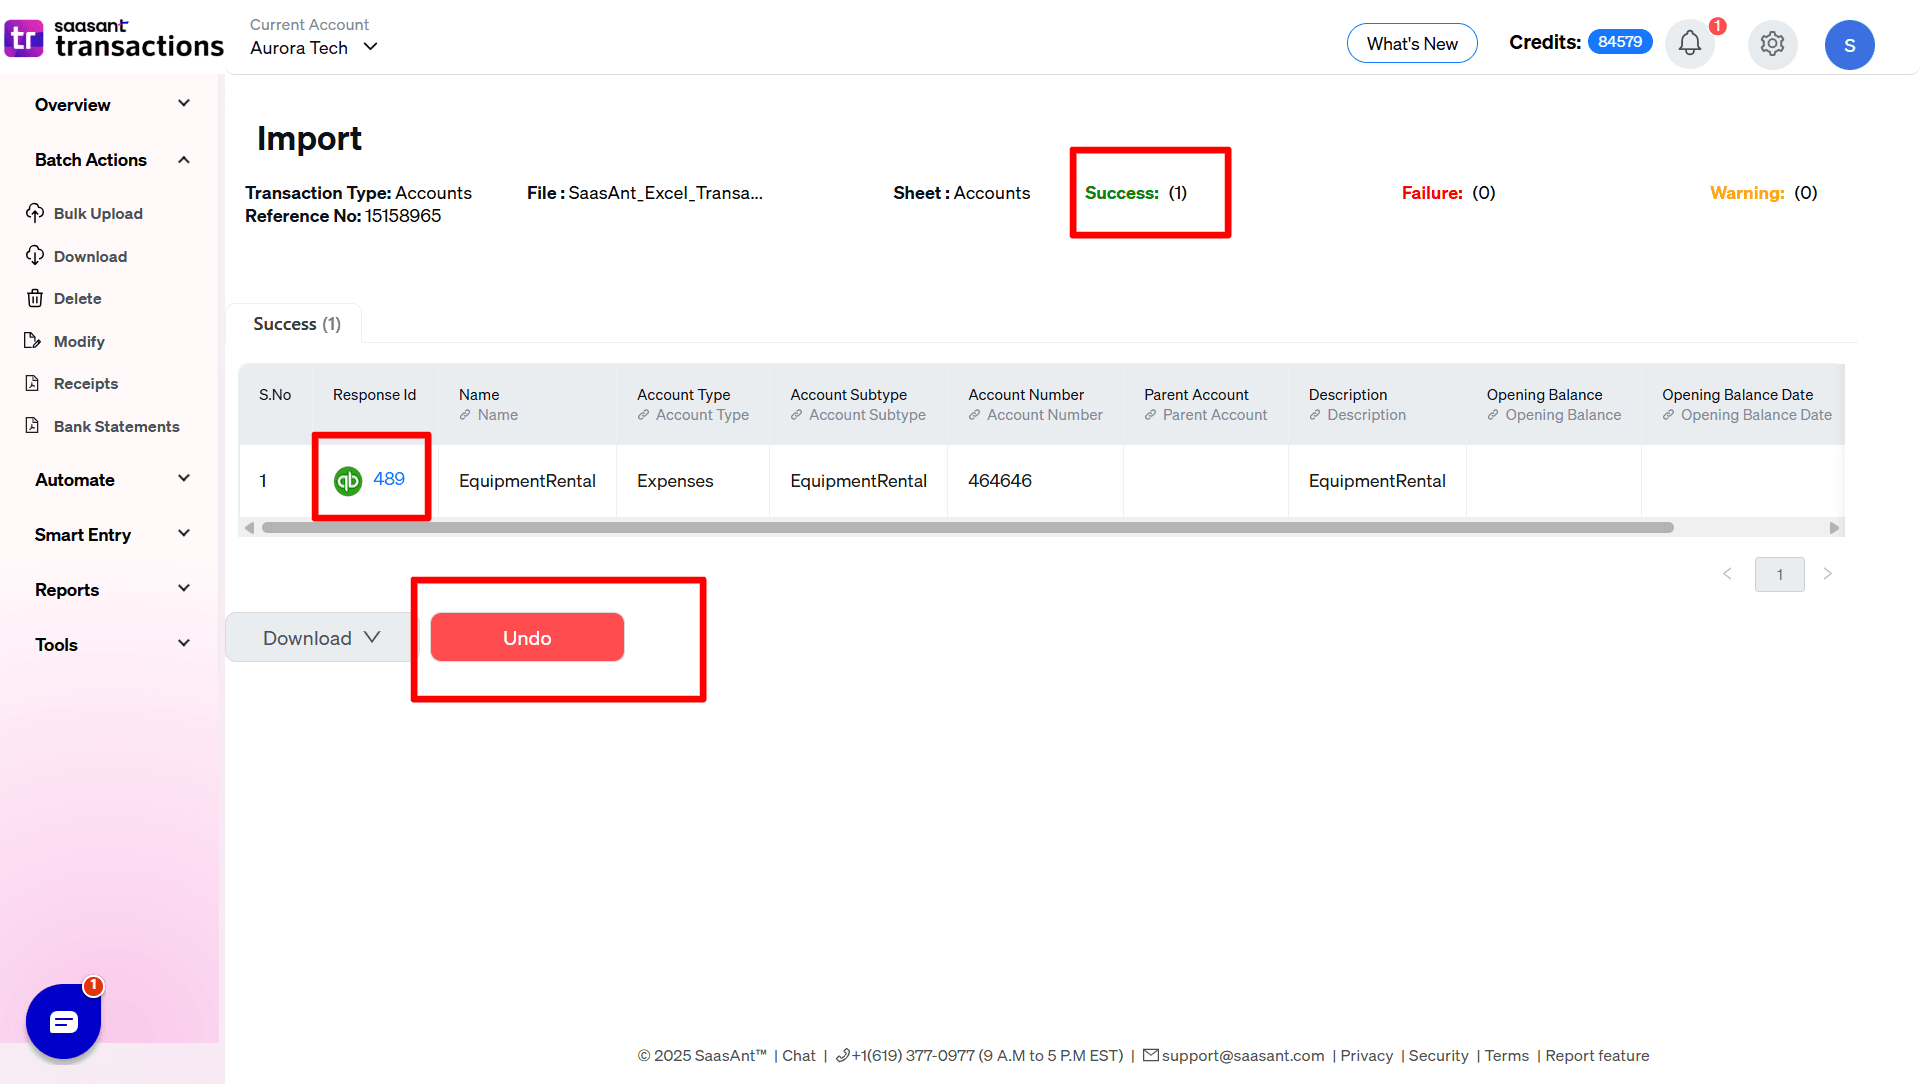
Step 6: Verifying the Imported File
Upon successful import, the uploaded transactions will appear with their reference number. Click on the reference number to verify whether that transaction has been uploaded into QuickBooks. You can also roll back (undo) the imported data if needed.
SaasAnt Transactions comes with innovative error resolution tools that help you if you encounter any issues. If there are errors, it’ll suggest ways to fix them, making the whole process effortless.
Note: SaasAnt Transactions also lets you bulk edit, delete, export, and modify your Chart of Accounts so that you can keep your accounts up-to-date.
Make It Even Easier with Automation
If you want to simplify the import process even further, consider automating the bulk upload of your financial statements. With SaasAnt Transactions, you can use scheduled Email, FTP/SFTP, or Zapier to automate this task. This approach can save time and reduce manual effort, making your workflow more efficient.
Benefits of Importing Chart of Accounts into QuickBooks Online using SaasAnt Transactions
1. Significant Time Savings
Using SaasAnt Transactions to import the chart of accounts, you can quickly upload multiple accounts at once, freeing up valuable time that can be better spent on strategic business activities or client relationships.
2. Reduced Risk of Errors
Importing your chart of accounts into QuickBooks Online through SaasAnt Transactions minimizes the chances of errors, ensuring that your financial data is accurate and reliable. This accuracy is crucial for making informed business decisions and maintaining compliance.
3. Easy Customization
SaasAnt Transactions allows you to customize how your data is mapped to QuickBooks fields, ensuring that your chart of accounts reflects your specific business structure. This flexibility helps you maintain clarity in your financial records.
4. Cost-Effective Solution
For small businesses and CPAs, managing costs is always a priority. SaasAnt Transactions offers a 30-day free trial, allowing you to test the service without any upfront investment. By reducing the time spent on data entry and minimizing errors, you can also lower your overall accounting costs, making it a wise financial choice.
5. Improved Financial Insights
By importing your Chart of Accounts into QuickBooks Online using SaasAnt Transactions, you can create a clearer picture of your business’s financial health. This improved organization allows for better tracking of income and expenses, leading to more insightful reporting and analysis that can guide your business decisions.
Start importing chart of accounts into QuickBooks Online Today
We've discussed all the essentials on how to import chart of accounts into QuickBooks Online with SaasAnt Transactions. This effective application overcomes QuickBooks' challenges with bulk data imports, providing a quick, error-free, and time-saving solution. Plus, you can start right away with a 30-day free trial, and there's no need to enter credit card information.
FAQs
How do I import a Chart of Accounts in QuickBooks Online?
You can easily import Chart of Accounts in QuickBooks online using SaasAnt Transactions. Just upload the file, map the fields to QuickBooks fields and import your chart of accounts in QuickBooks Online.
Is there a way to export a Chart of Accounts in QuickBooks Online?
You can integrate SaasAnt Transactions with QuickBooks Online to export the Chart of Accounts since QuickBooks provides no default way. Use the advanced search and filter option to download your Chart of Accounts CSV or XLSX format.
Can I edit multiple charts of accounts in QuickBooks?
Yes, you can bulk edit the chart of accounts in QuickBooks by integrating SaasAnt Transactions. Go to the SaasAnt Transactions dashboard -> export -> select the entity as accounts-> use the filter to search by date or reference number. A list of accounts matching the filter will be displayed. Select whether you want to download the file in XLSX or CSV format. Make changes to the downloaded file and use the modify feature to upload the modified file.
How do I bulk delete the Chart of Accounts in QuickBooks?
Connect SaasAnt Transactions with QuickBooks. Go to SaasAnt Transactions Dashboard -> delete -> select the required transaction entity as Accounts-> use date range filter or advanced filter to search -> delete to delete chart of accounts in QuickBooks Online.
Recommended reading: