How to Import a Customer List into QuickBooks Online
Efficiently managing customer information is vital for seamless business operations. Importing your customer list into QuickBooks Online (QBO) centralizes your data, making it easily accessible. This guide provides detailed steps to import your customer list into QBO, discusses the advantages of using SaasAnt for this process, and addresses common questions related to importing customer data.
Importing Customer List into QuickBooks Online

QuickBooks Online offers a built-in feature to import customer data. Here's how you can do it:
Prepare Your Data: Organize your customer information in an Excel or CSV file. Ensure the first row contains headers like "Name," "Email," "Phone," etc. Avoid blank rows or errors in the data.
Access the Import Feature:
Sign in to your QuickBooks Online account.
Click on the Settings (gear icon) in the upper right corner.
Under the Tools section, select Import Data.
Choose Customers.
Upload Your File:
Click Browse to select your Excel or CSV file.
Once selected, click Next.
Map Your Data:
QuickBooks will attempt to match the headers in your file to its fields. Verify that each mapping is correct.
If QuickBooks doesn't automatically recognize a header, use the dropdown menus to map your file's columns to the appropriate QuickBooks fields.
Click Next once all fields are mapped correctly.
Import Data:
Review the preview to ensure the information is accurate.
Click Import to bring the data into QuickBooks Online.
Limitations: While QuickBooks Online's native import function is useful, it has some constraints:
File Size and Row Limitations: Files must be under 2MB and contain fewer than 1,000 rows. Larger datasets require splitting into multiple files.
Sub-Customers: The import doesn't support sub-customers. You'll need to manually assign sub-customers after importing.
Duplicate Management: If the import file contains names that already exist in QuickBooks, it may create duplicates, requiring manual cleanup.
Enhancing the Import Process with SaasAnt
To overcome the limitations of QuickBooks Online's native import feature, consider using third-party tools like SaasAnt Transactions (Online). SaasAnt offers advanced functionalities that make importing customer lists more efficient and flexible.
Advantages of Using SaasAnt:
Bulk Imports Without Size Restrictions: SaasAnt allows importing large datasets without the file size and row limitations present in QuickBooks Online.
Support for Sub-Customers: You can import customers with sub-customers or jobs by structuring your data in a "Parent:Child" format. For example, "John Doe:Project A" indicates "Project A" is a sub-customer under "John Doe."
Custom Field Mapping: SaasAnt provides a flexible mapping interface, enabling you to map your file's columns to QuickBooks fields accurately, ensuring data consistency.
Automated Data Entry: With features like "Auto-create entities," SaasAnt can automatically create new customers during the import process, reducing manual data entry.
How to Import Customer List into QuickBooks Online: Step-by-step Guide
Connect SaasAnt to QuickBooks Online:
Install the SaasAnt Transactions (Online) app from the QuickBooks App Store.
Authorize the connection to your QuickBooks Online account.
Upload Your File:
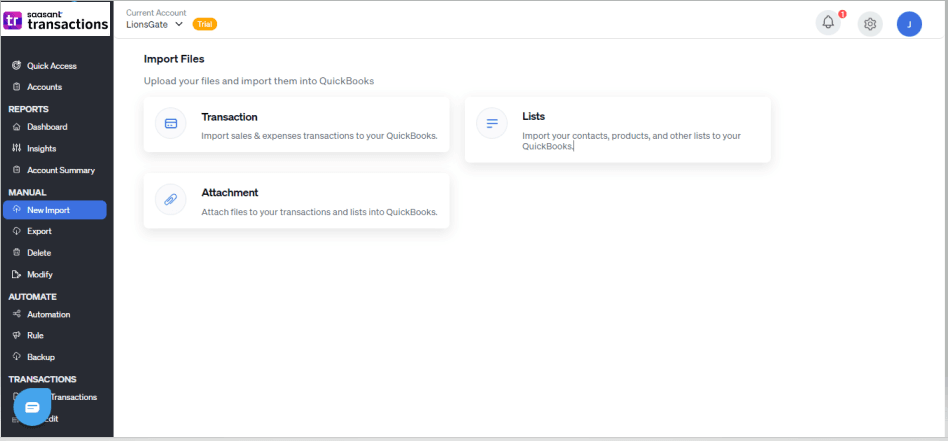
Open SaasAnt Transactions (Online).
Click on New Import.
Select Customers as the QuickBooks entity.
Upload your Excel or CSV file.
Map Your Data:
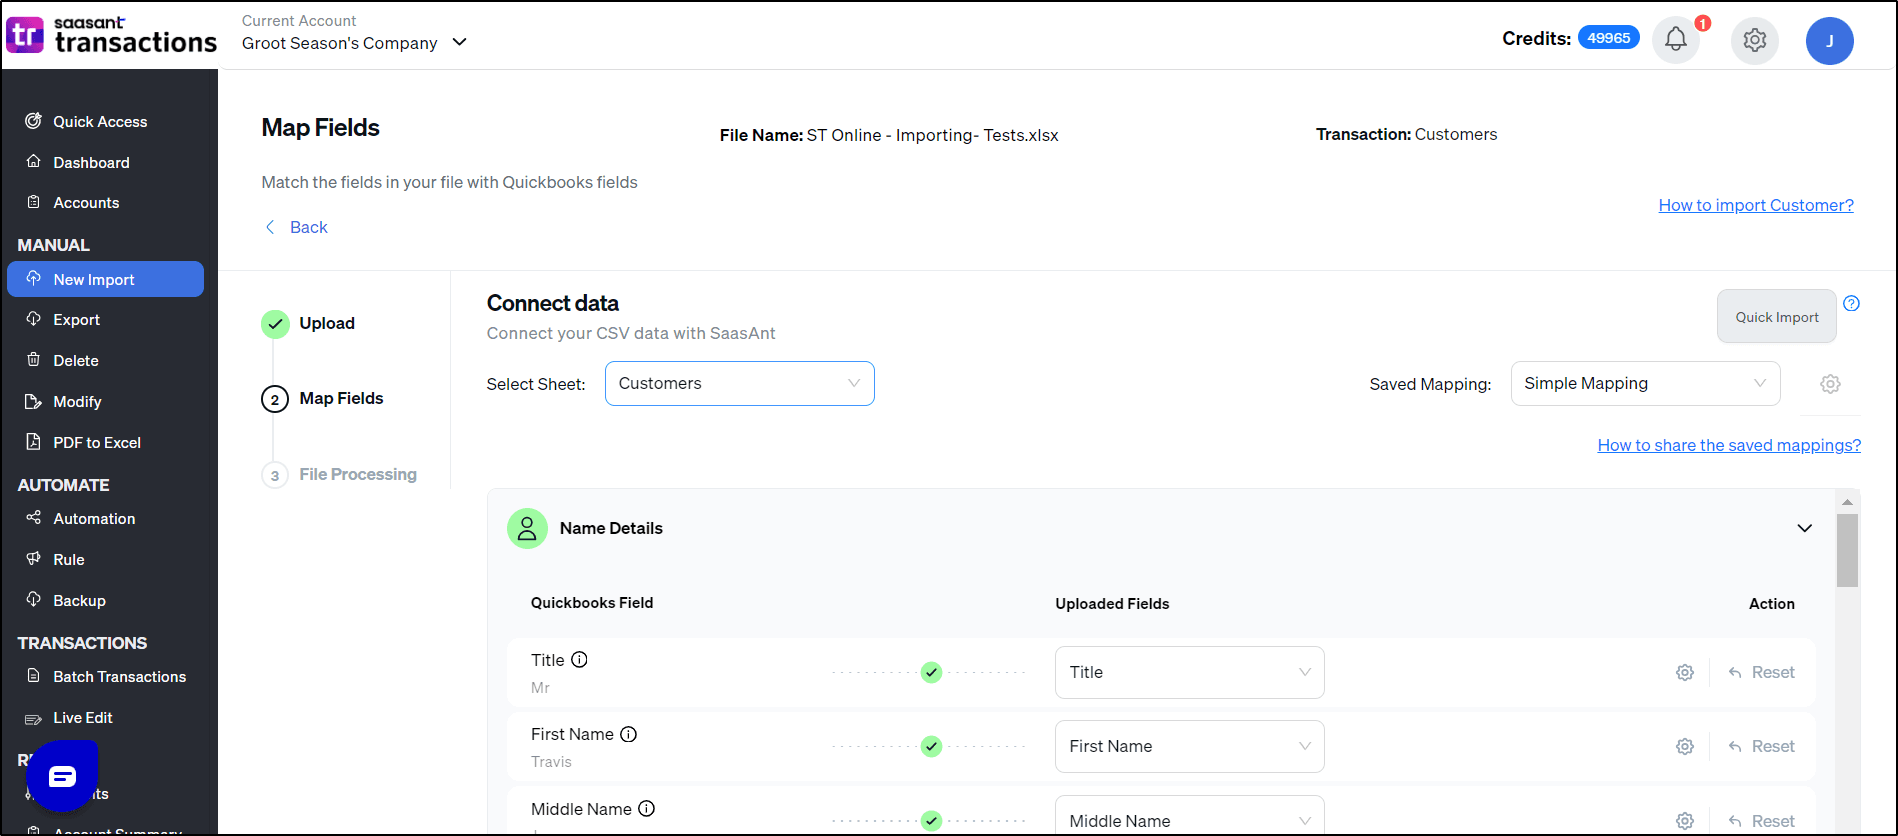
SaasAnt will display a mapping screen. Match your file's columns to QuickBooks fields.
Use the "Preview Mapping" feature to visualize how your data will appear in QuickBooks.
Configure Import Settings:
Enable the "Auto-create entities" option if you want SaasAnt to create new customers automatically.
Adjust other settings as needed to fit your import requirements.
Import Data:
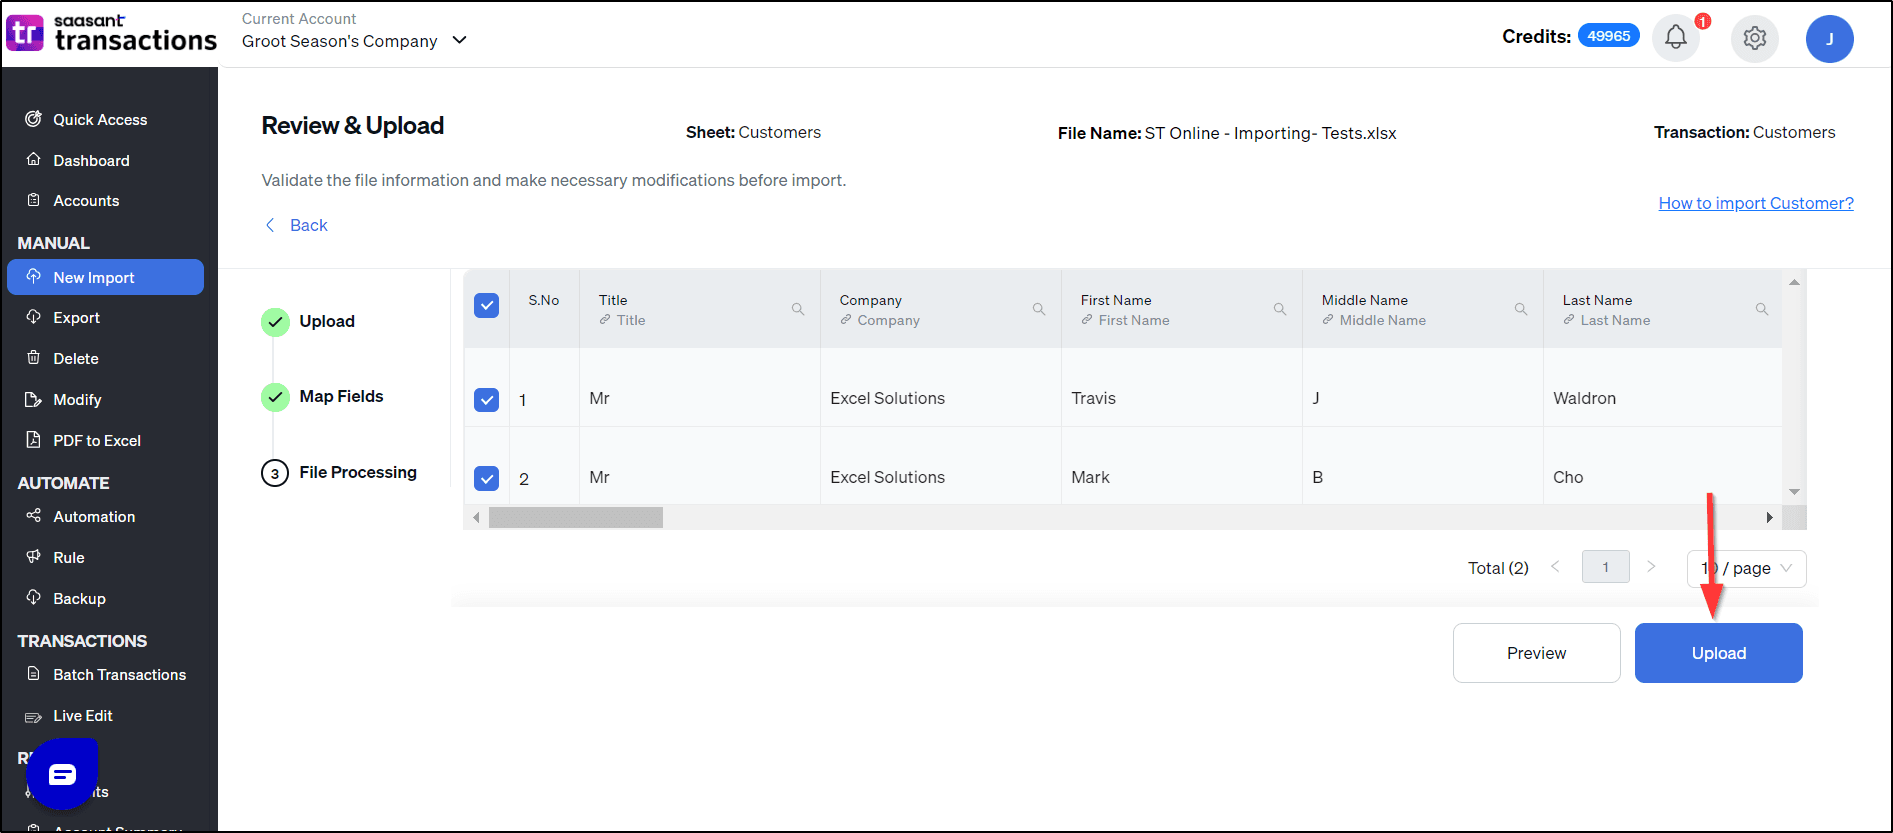
After configuring settings, click Import.
Review any alerts or messages to ensure all data is imported correctly.
Use Case: Suppose you have a customer list with multiple sub-customers or projects under main clients. Using SaasAnt, you can structure your data to reflect this hierarchy and import it seamlessly into QuickBooks Online, preserving the parent-child relationships without manual intervention.
Importing Customer List into QuickBooks Desktop
If you're using QuickBooks Desktop, the process differs slightly:
Prepare Your Data: Organize your customer information in an Excel or CSV file with appropriate headers.
Access the Import Feature:
Open QuickBooks Desktop.
Go to the File menu.
Select Utilities > Import > Excel Files.
Use the Import Wizard:
QuickBooks will prompt you to add or edit multiple list entries.
Follow the on-screen instructions to map your data fields and complete the import process.
Note: QuickBooks Desktop's import functionality may have its own set of limitations, such as handling sub-customers or specific data fields. Ensure your data is formatted correctly to match QuickBooks Desktop's requirements.
Frequently Asked Questions
Where can you go to import a customer list into QuickBooks Online?
To import a customer list:
Sign in to QuickBooks Online.
Click on the Settings (gear icon).
Under the Tools section, select Import Data.
Choose Customers to start the import process.
Can I import a customer list with sub-customers into QuickBooks Online?
QuickBooks Online's native import feature doesn't support importing sub-customers directly. However, with tools like SaasAnt Transactions (Online), you can import customers with sub-customers by structuring your data in a "Parent:Child" format.
What should I do if my customer list exceeds QuickBooks Online's import limitations?
If your customer list exceeds the 2MB or 1,000-row limit, consider using SaasAnt Transactions (Online), which can handle larger datasets without requiring you to split your files.
How can I avoid duplicate customer entries during import?
Before importing, ensure that your data doesn't contain duplicates. QuickBooks Online doesn't automatically detect duplicates during import, so it's essential to clean your data beforehand. Using tools like SaasAnt can provide more control, allowing you to set preferences for handling duplicates.
Can I import additional customer details such as payment terms and shipping addresses?
QuickBooks Online's native import feature supports a limited number of fields. To import additional details like payment terms and shipping addresses, consider using SaasAnt Transactions (Online), which offer more comprehensive field mapping and support for additional data.
Is it possible to update existing customer information through import?
Yes, you can update existing customer information by importing a file with the updated details. Ensure that the customer names in your file match exactly with those in QuickBooks Online to overwrite the existing data. Using SaasAnt can provide more advanced options for updating existing records.
Recommended reading: