Import Vendors into QuickBooks Online - How to
Importing vendors in QuickBooks Online can feel overwhelming, especially when dealing with multiple records. But with applications like SaasAnt Transactions, you can simplify this process and effortlessly import all your vendor data. SaasAnt Transactions allows you to automate bulk imports, ensuring you never miss a vendor and keeping everything organized in one place.
This blog will further walk you through how to import QuickBooks Vendors in QuickBooks Online using SaasAnt Transactions.
Import Vendor List into QuickBooks Online - Quick Instructions
Log in to SaasAnt Transactions and connect it with your QuickBooks Online account.
Click 'New Import,' select 'Vendors,' and upload your file (XLS, CSV, etc.).
Select the sheet and map file fields to QuickBooks fields.
Check for errors and make corrections.
Click 'Upload' to import vendor details.
Check the list of imported vendors in QuickBooks and resolve any errors.
Prepare Your Vendor Data for Import
Before you hit the import button, ensure your vendor data is clean and formatted correctly. Ensure you have all your vendor information in an Excel format. You’ll need to ensure that your Excel spreadsheet includes key information like
Vendor Name,
Address,
Email, and
Phone Number.
If you’ve been using a spreadsheet to track vendors, double-check it for duplicates or outdated information. A clean file will reduce errors and save you time when importing.
How to Import Vendor List into QuickBooks Online - Step-by-Step Guide
Follow the below-given steps to import vendors into QuickBooks Online using SaasAnt Transactions.
Step 1: Log into SaasAnt Transactions
Log into SaasAnt Transactions through the QuickBooks App Store and connect it to your QuickBooks Online account. This certified, secure tool ensures your data stays safe and organized throughout the import process.
Step 2: Upload Your File
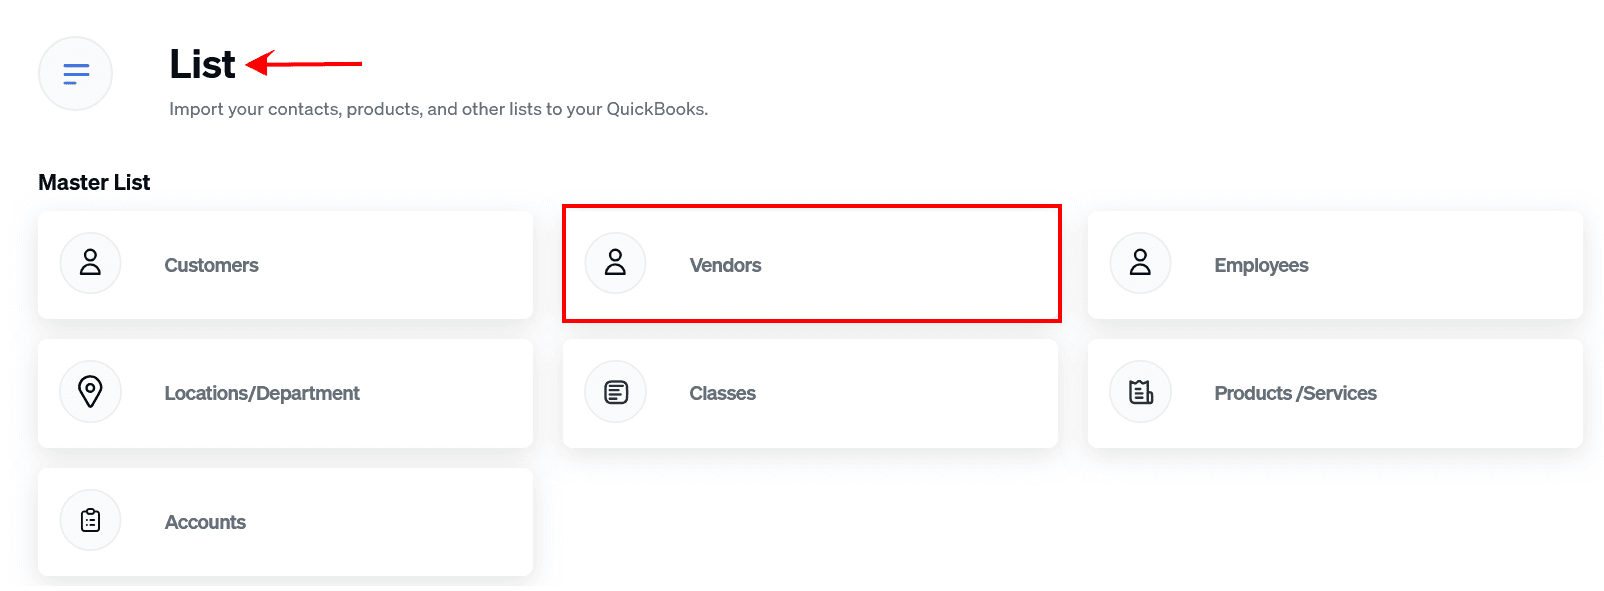
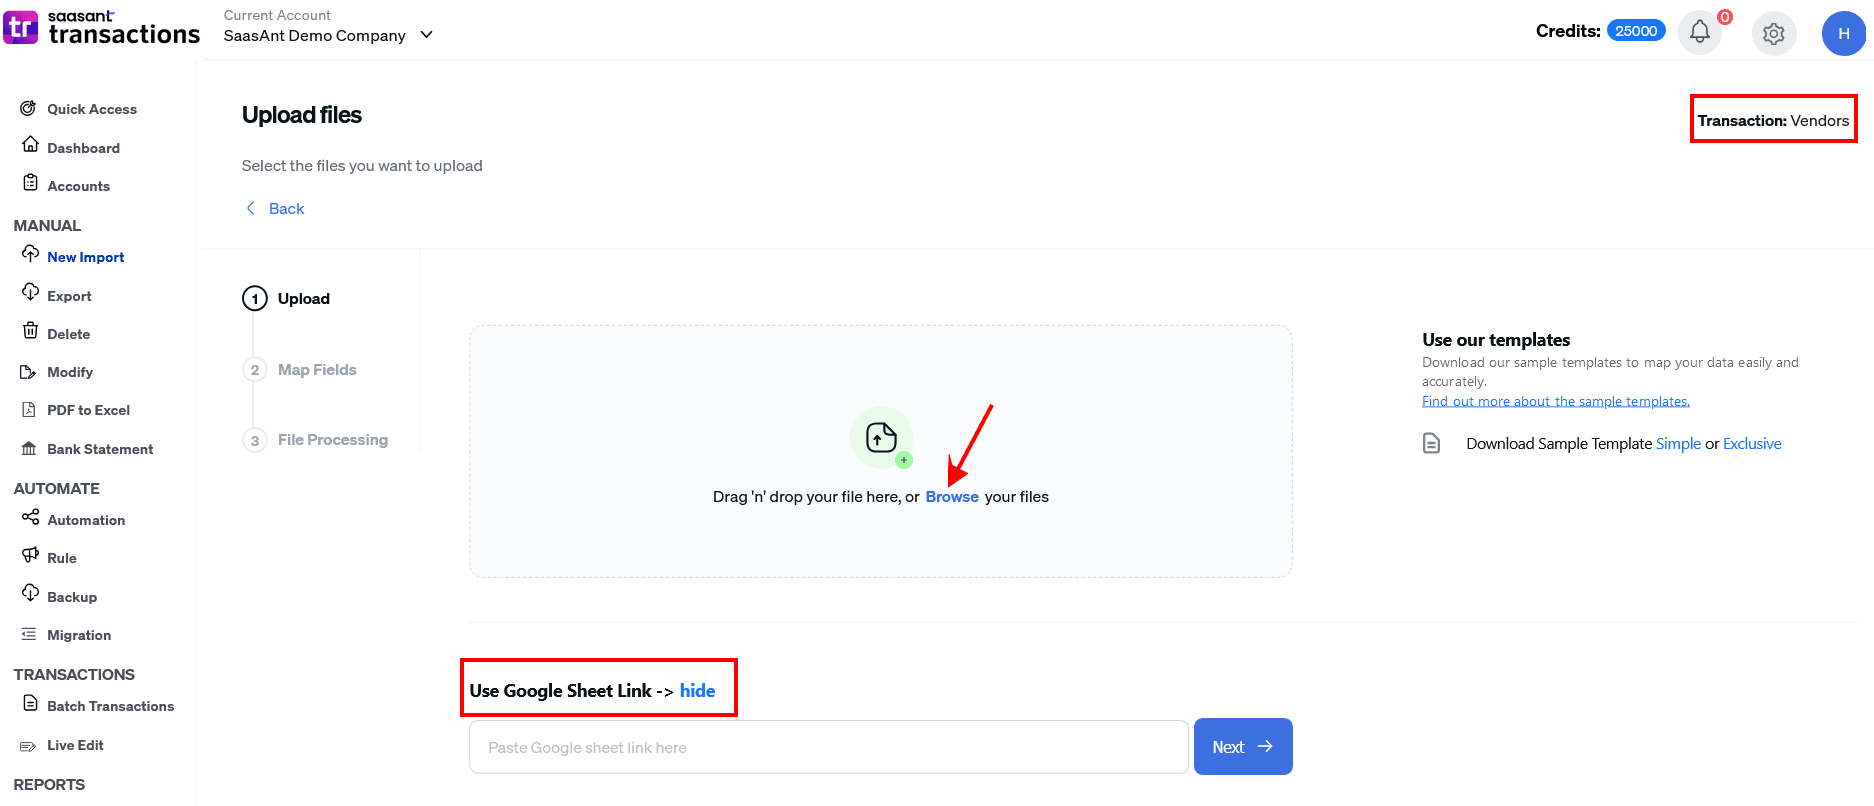
Next, go to the SaasAnt Transactions dashboard and click 'New Import.' From the options, scroll down and find ‘Lists’ and then choose ' Vendors.'
Now, select the file you want to upload. SaasAnt Transactions supports various formats, including Excel, XLS, XLSX, CSV, or IIF.
You can also use a Google Sheets link to import the data directly.
Note: You can import all vendor details, including contact information, payment terms, and more.
Step 3: Mapping Your Data
Select the one containing your vendor details if your file contains multiple sheets.
In this step, you’ll map the fields from your file to the corresponding QuickBooks fields.
For example, QuickBooks may require fields like 'Vendor Name,' 'Email,' and 'Phone Number.' If these fields are labeled differently in your file, such as 'Supplier Name' or 'Contact Number,' make sure to map them accordingly.
You can also use SaasAnt Transactions’ import template to simplify mapping. The preview mapping feature allows you to check the alignment before completing the import.
Step 4: Review Your Data Before Importing
Before finalizing the import, take a moment to review the mapped data. SaasAnt Transactions gives you a preview to identify any errors or mismatches in the fields quickly. Make any necessary corrections to ensure everything is aligned correctly.
Step 5: Complete the Import
Once you’ve reviewed and confirmed everything looks good, click the 'Upload' button to import your vendor details into QuickBooks Online.
Step 6: Verify the Imported Vendor Details
After the import is complete, a list of the imported vendor details will appear in QuickBooks Online, each linked to its reference number. Click on any reference number to verify that the vendor has been successfully added to your QuickBooks account.
If the import had any issues, SaasAnt Transactions would provide an error report and suggest ways to fix them. You can also roll back (undo) the imported data if needed.
Note: For bulk imports, you can automate the process using email, FTP/SFTP, or Zapier with SaasAnt Transactions.
Benefits of Importing Vendors into QuickBooks Online
You’re probably having multiple tasks daily, so having a simple way to manage your vendors is key. Importing vendors into QuickBooks Online lets you quickly transfer important data, avoiding manual entry that’s prone to mistakes. No more copying and pasting information one line at a time!
By importing vendor data, you ensure that QuickBooks is up-to-date with accurate and consistent records, making it easier to manage payments, reconcile accounts, and keep everything organized. Plus, QuickBooks Online’s cloud-based nature means your data is accessible from anywhere, on any device, whether at the office or working from home.
Conclusion
Whether handling a handful of vendors or managing hundreds, importing your data makes everything run smoothly. And with SaasAnt Transactions Online, you can automate this process and save even more time.
FAQ’s
Can I import vendor data from other accounting software into QuickBooks Online?
Yes, you can! QuickBooks Online allows you to import vendor data from CSV or Excel files, which makes it easy to migrate from other accounting software. SaasAnt Transactions simplifies this even further by automating the import process.
What file formats does QuickBooks Online support for vendor imports?
QuickBooks Online supports CSV and Excel files for vendor imports. Ensure your vendor data is formatted correctly to avoid errors during the import.
How can I fix duplicate vendors during the import process?
QuickBooks Online will alert you if there are duplicates in your vendor list. Before completing the import, you can merge the records or remove the duplicates.
Read also: