Import Journal Entries into QuickBooks Online: Step by Step Guide

Learn how to import journal entries into QuickBooks Online efficiently. This guide will walk you through the process, ensuring your financial records are managed seamlessly.
Import Journal Entries into QuickBooks Online: Quick Instructions
For users seeking a quick start, follow these straightforward steps:
Log in to your QuickBooks Online account.
Navigate to the 'Apps' tab and find 'SaasAnt Transactions.'
Connect SaasAnt Transactions with your QuickBooks Online account.
Click 'New Import' to start the journal entry import process.
Upload your journal entry file (supports various formats, including Excel, CSV, and IIF).
Map the fields in your file correctly with QuickBooks fields in the mapping screen.
Review the mapping and initiate the import.
Validate the imported data in QuickBooks Online to ensure accuracy.
Import Journal Entries into QuickBooks Online: Step-by-Step Guide
Managing financial records is crucial for any business. Handling journal entries, whether you're transitioning to QuickBooks Online, dealing with numerous entries, or managing complex financial data, can be time-consuming and prone to errors. This is where a Saasant's accounting automation solution comes into play, simplifying the process of uploading journal entries into QuickBooks Online. It eliminates errors, saves time, and allows efficient handling of journal entries in various formats.
Step 1: Preparing Your Journal Entry Data for Import
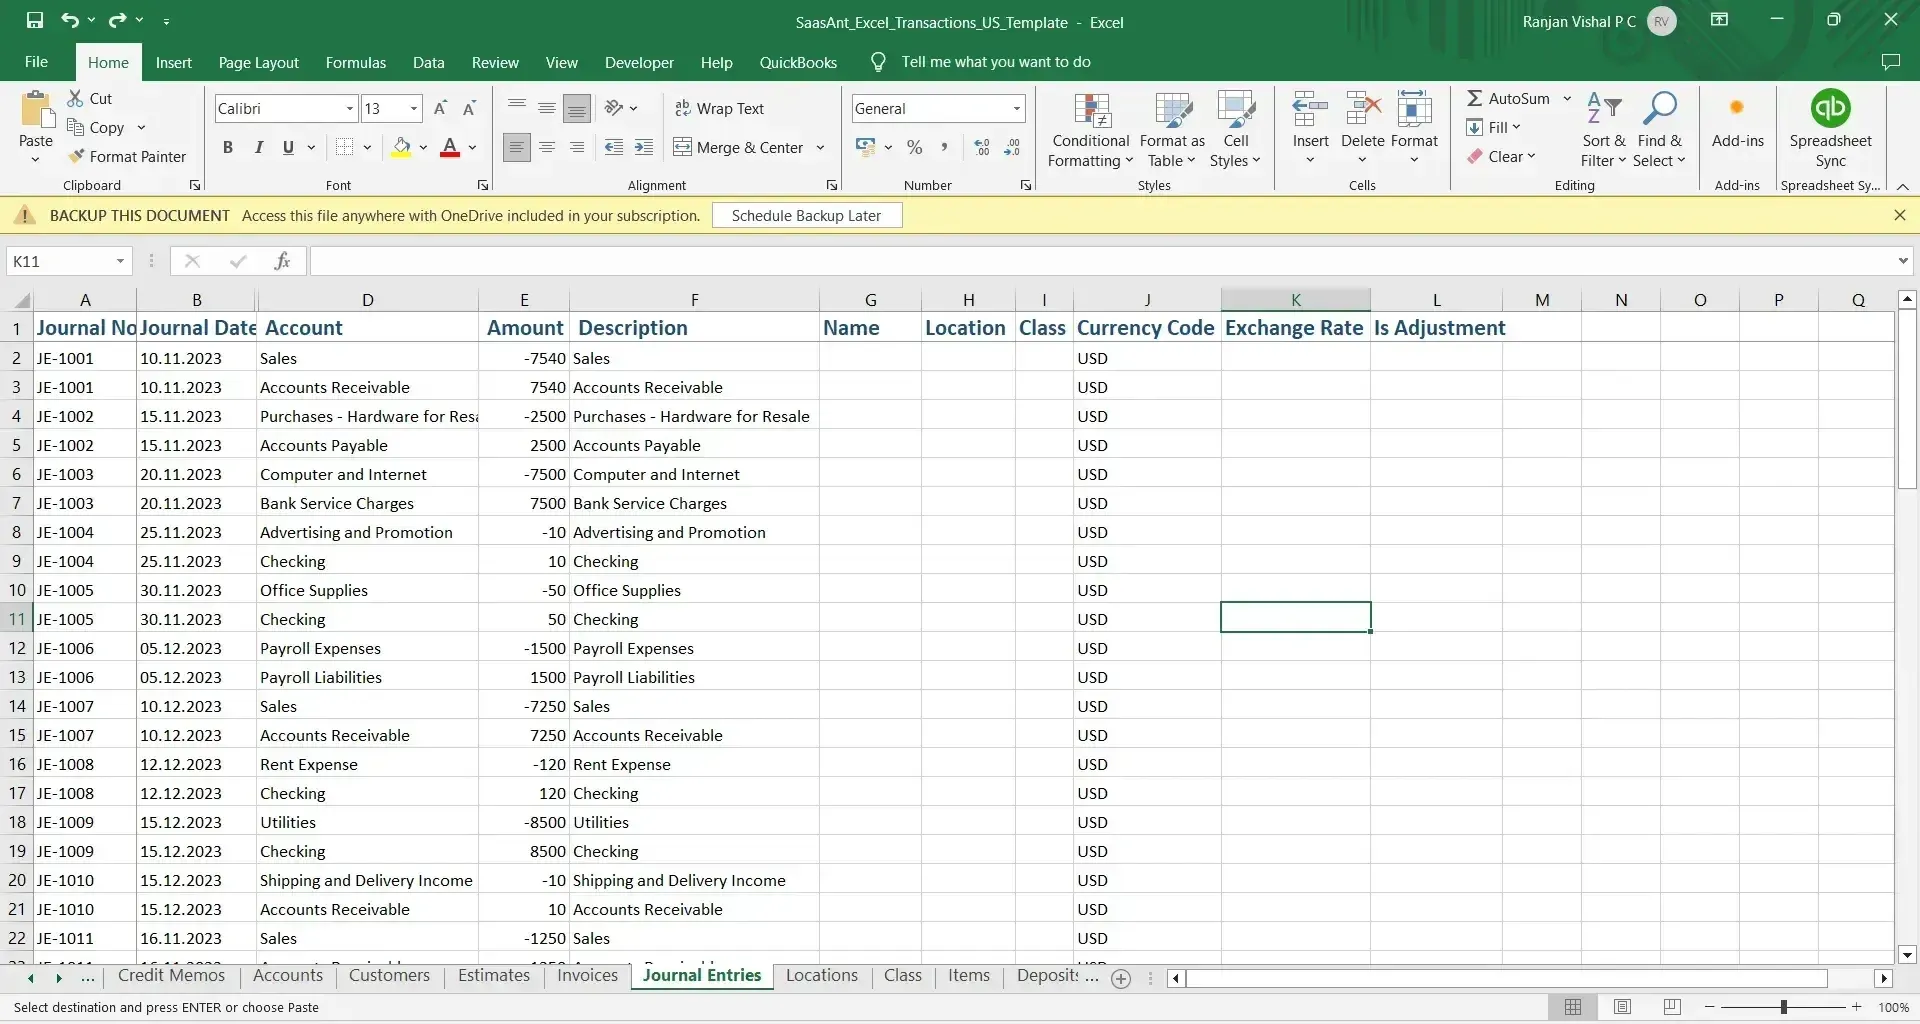
Before you begin, ensure your journal entry data is well-organized and in a supported format, such as Excel or CSV. Utilizing a sample template can ensure your data fields are correctly aligned, minimizing issues during the import process.
Step 2: Setting Up the Import Tool via QuickBooks App Store
Find and Install:
In your QuickBooks Online account, navigate to the Apps menu. Search for “SaasAnt Transactions” and click Get App Now. Follow the prompts to securely connect it with your QBO account.Sign In:
Log into SaasAnt Transactions using your Intuit credentials. This secure, certified connection ensures your data remains safe.
Step 3: Uploading Your Journal Entry File
Now that you're within the application, it's time to upload your journal entry file. Here's how:
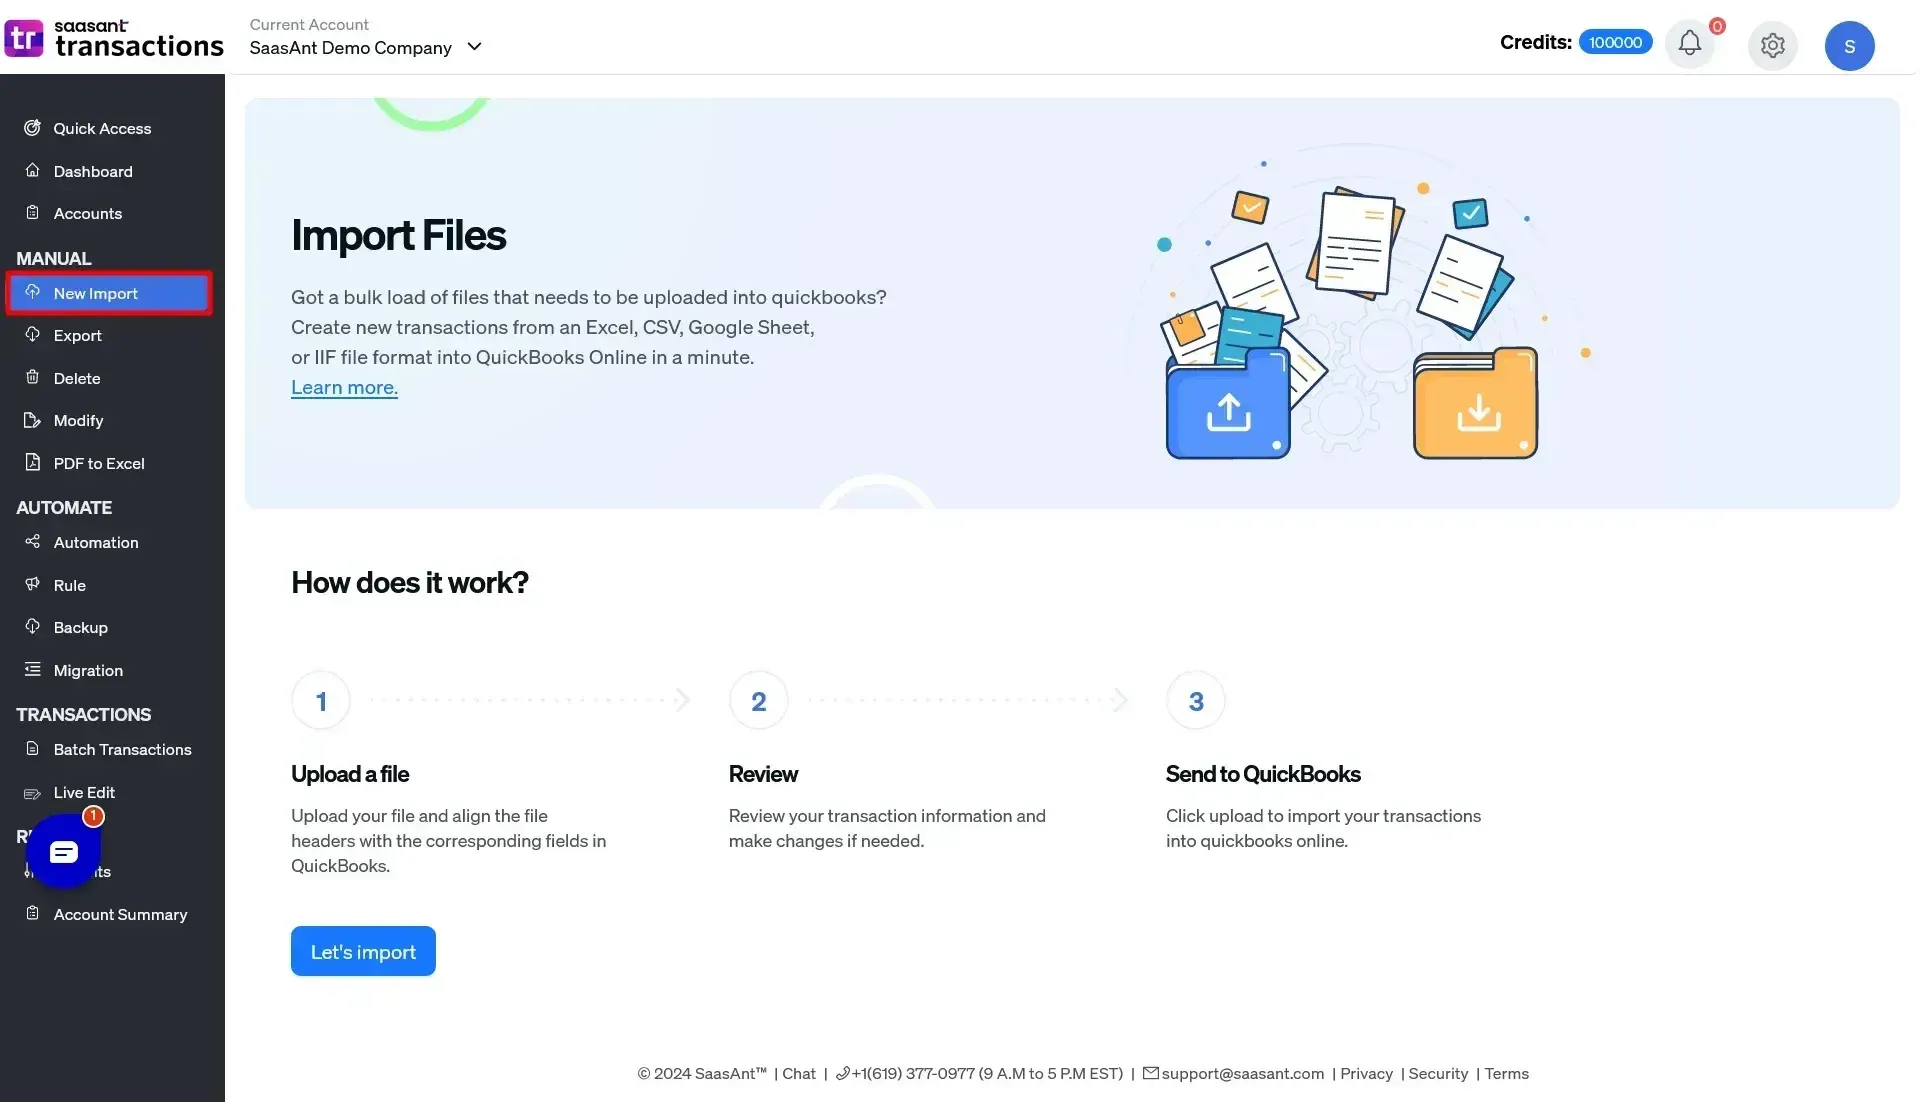
Initiate New Import: Click ‘New Import’ to start the process.
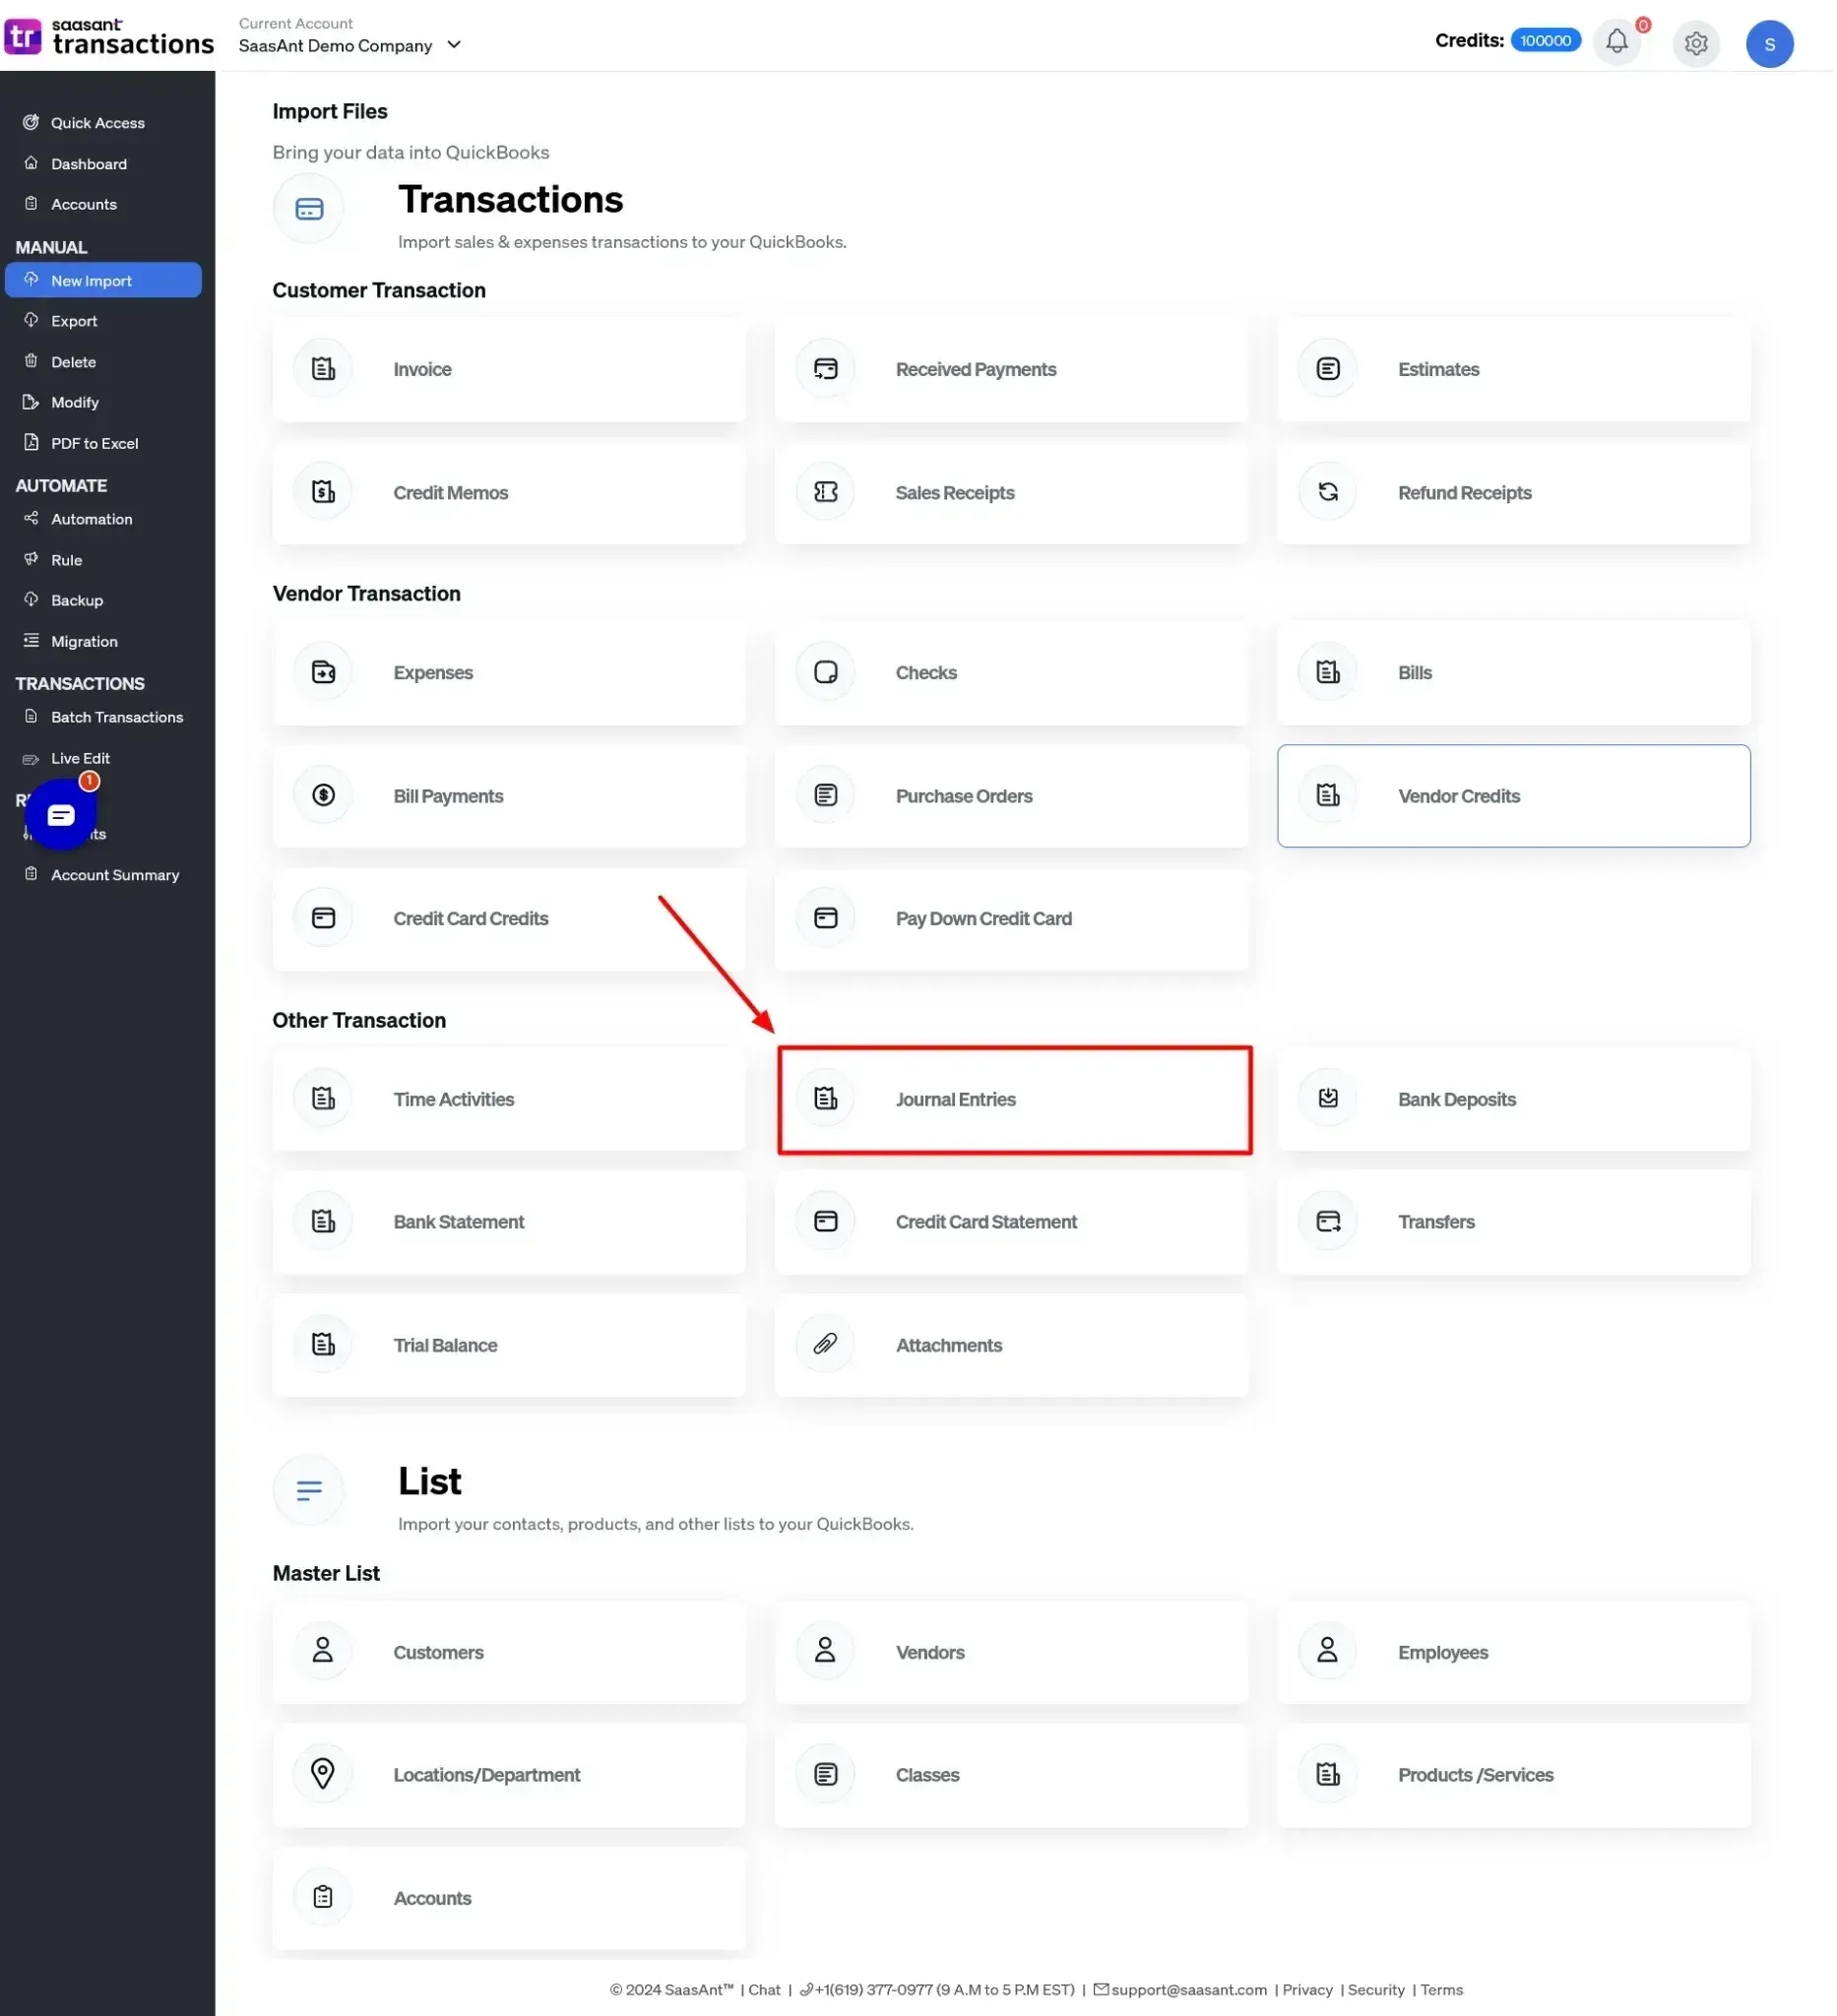
Selecting the Transaction Type: Choose ‘Journal Entry’ as the transaction type to proceed.
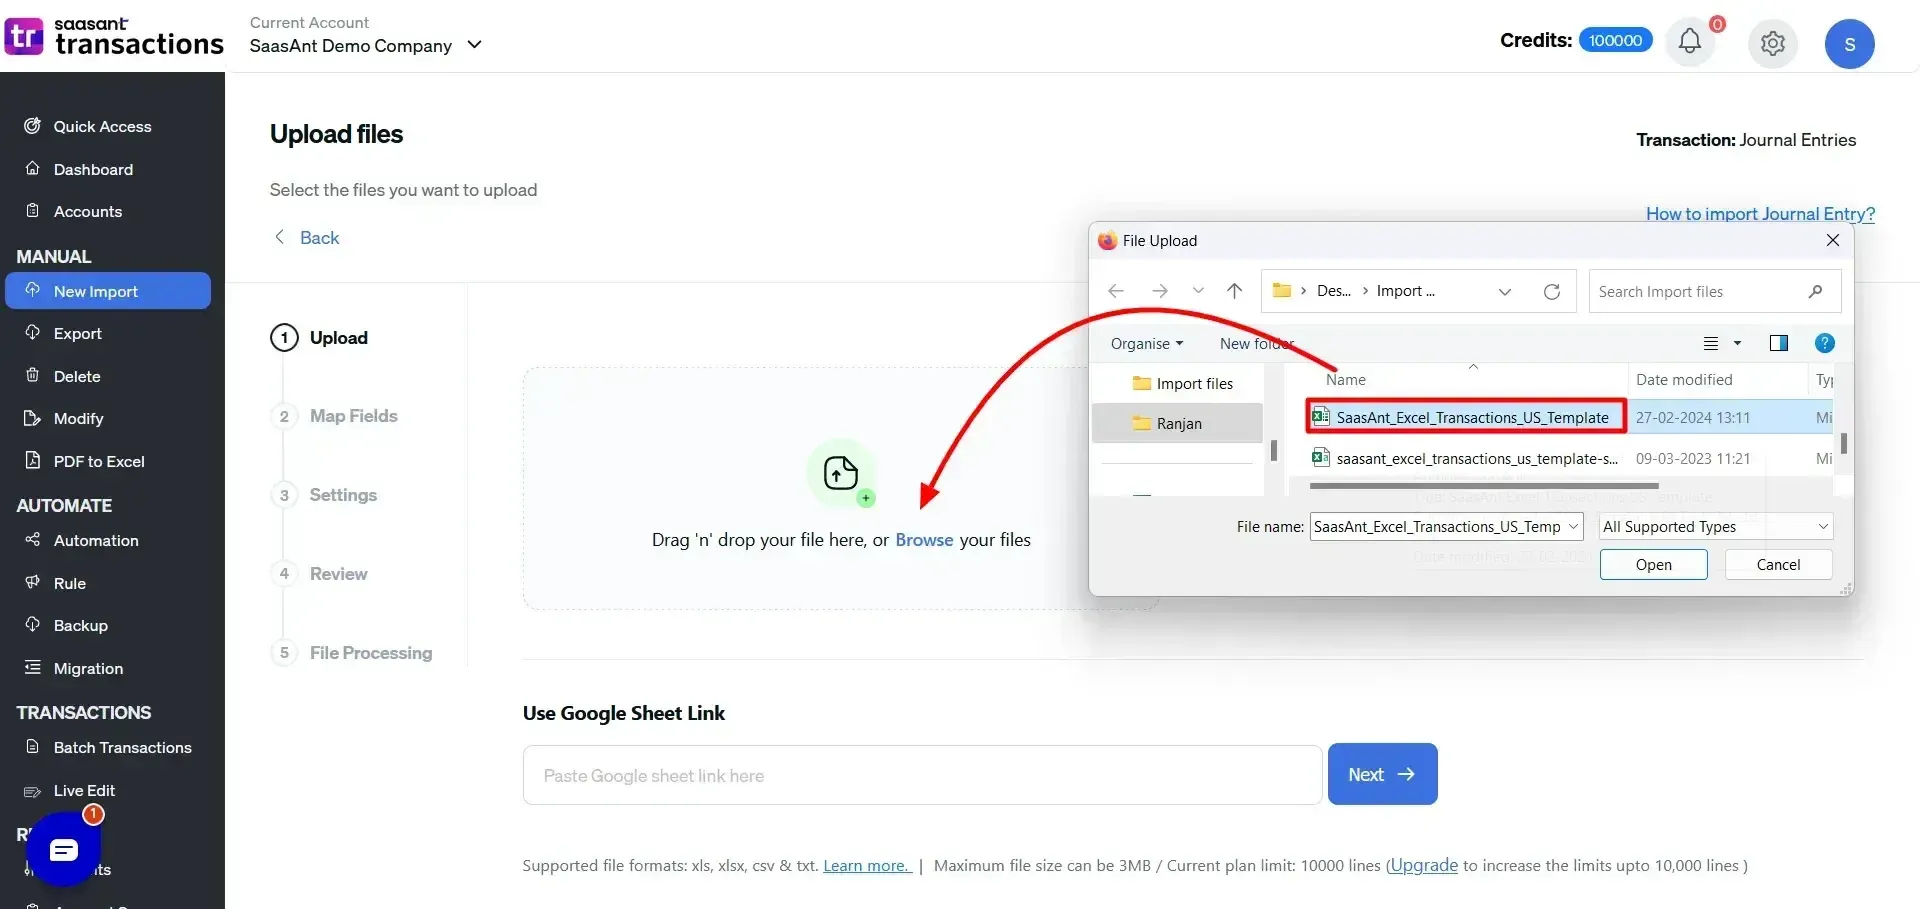
Uploading the File: Use the ‘Browse’ option to upload your file. Ensure it's in a supported format (Excel or CSV) for a smooth process.
Step 4: Successfully Mapping Your Journal Entry Data Fields
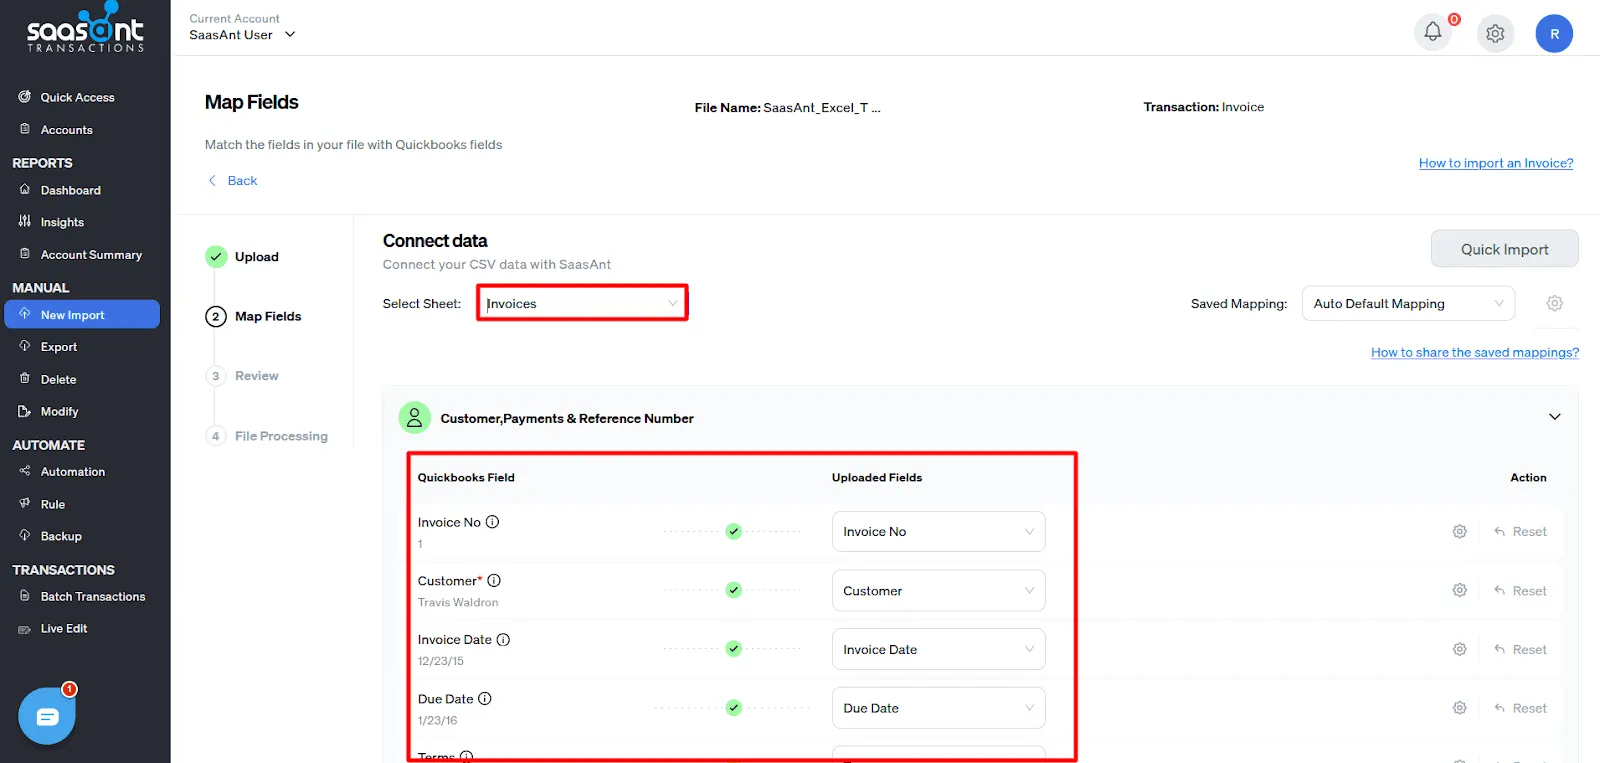
Mapping your data fields is crucial. Align the details from your files, such as journal entry numbers and account details, with the corresponding fields in QuickBooks Online. Use the 'Preview Mapping' feature to review your data alignment before finalizing the import.
Step 5: Reviewing Your Data Before Final Import
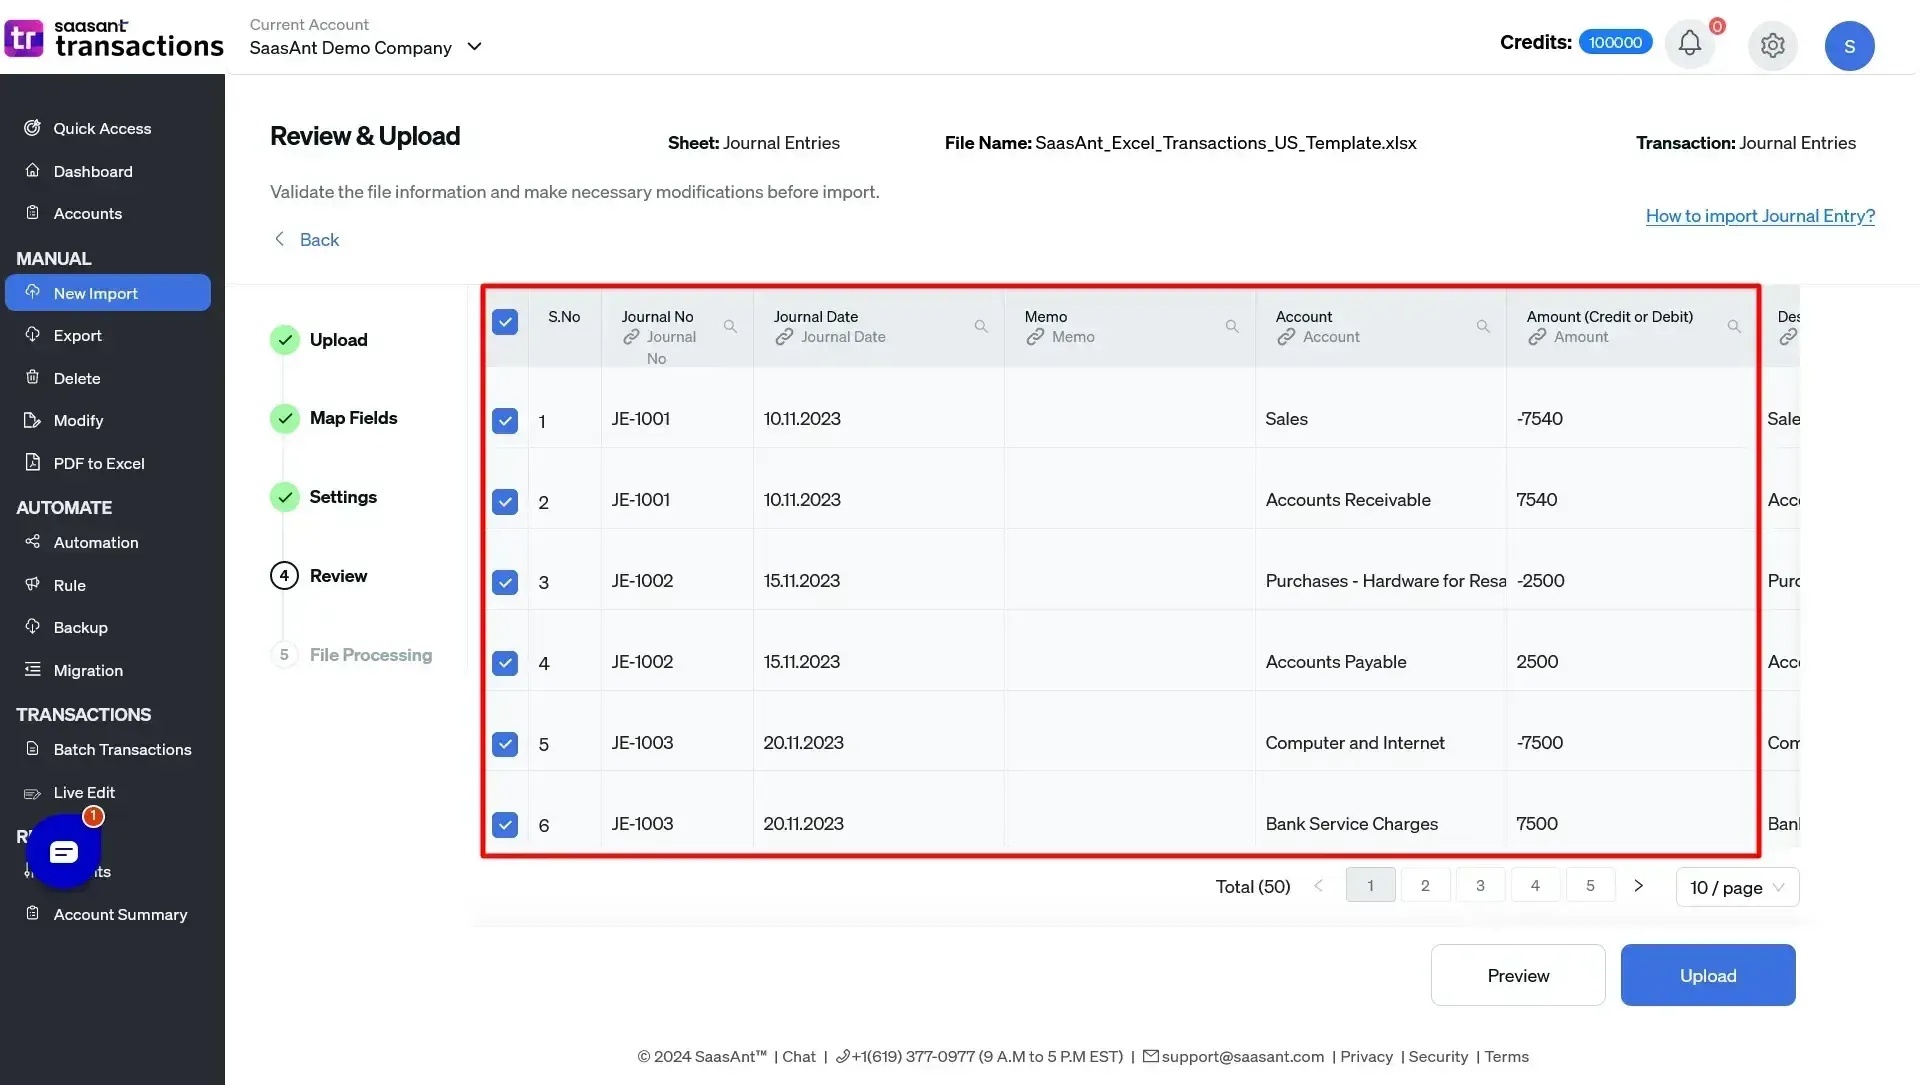
Double-check your mapped data to catch any mistakes. After reviewing, click the ‘Upload’ button to import your journal entry data into QuickBooks Online.
Step 6: Verifying the Imported Journal Entries
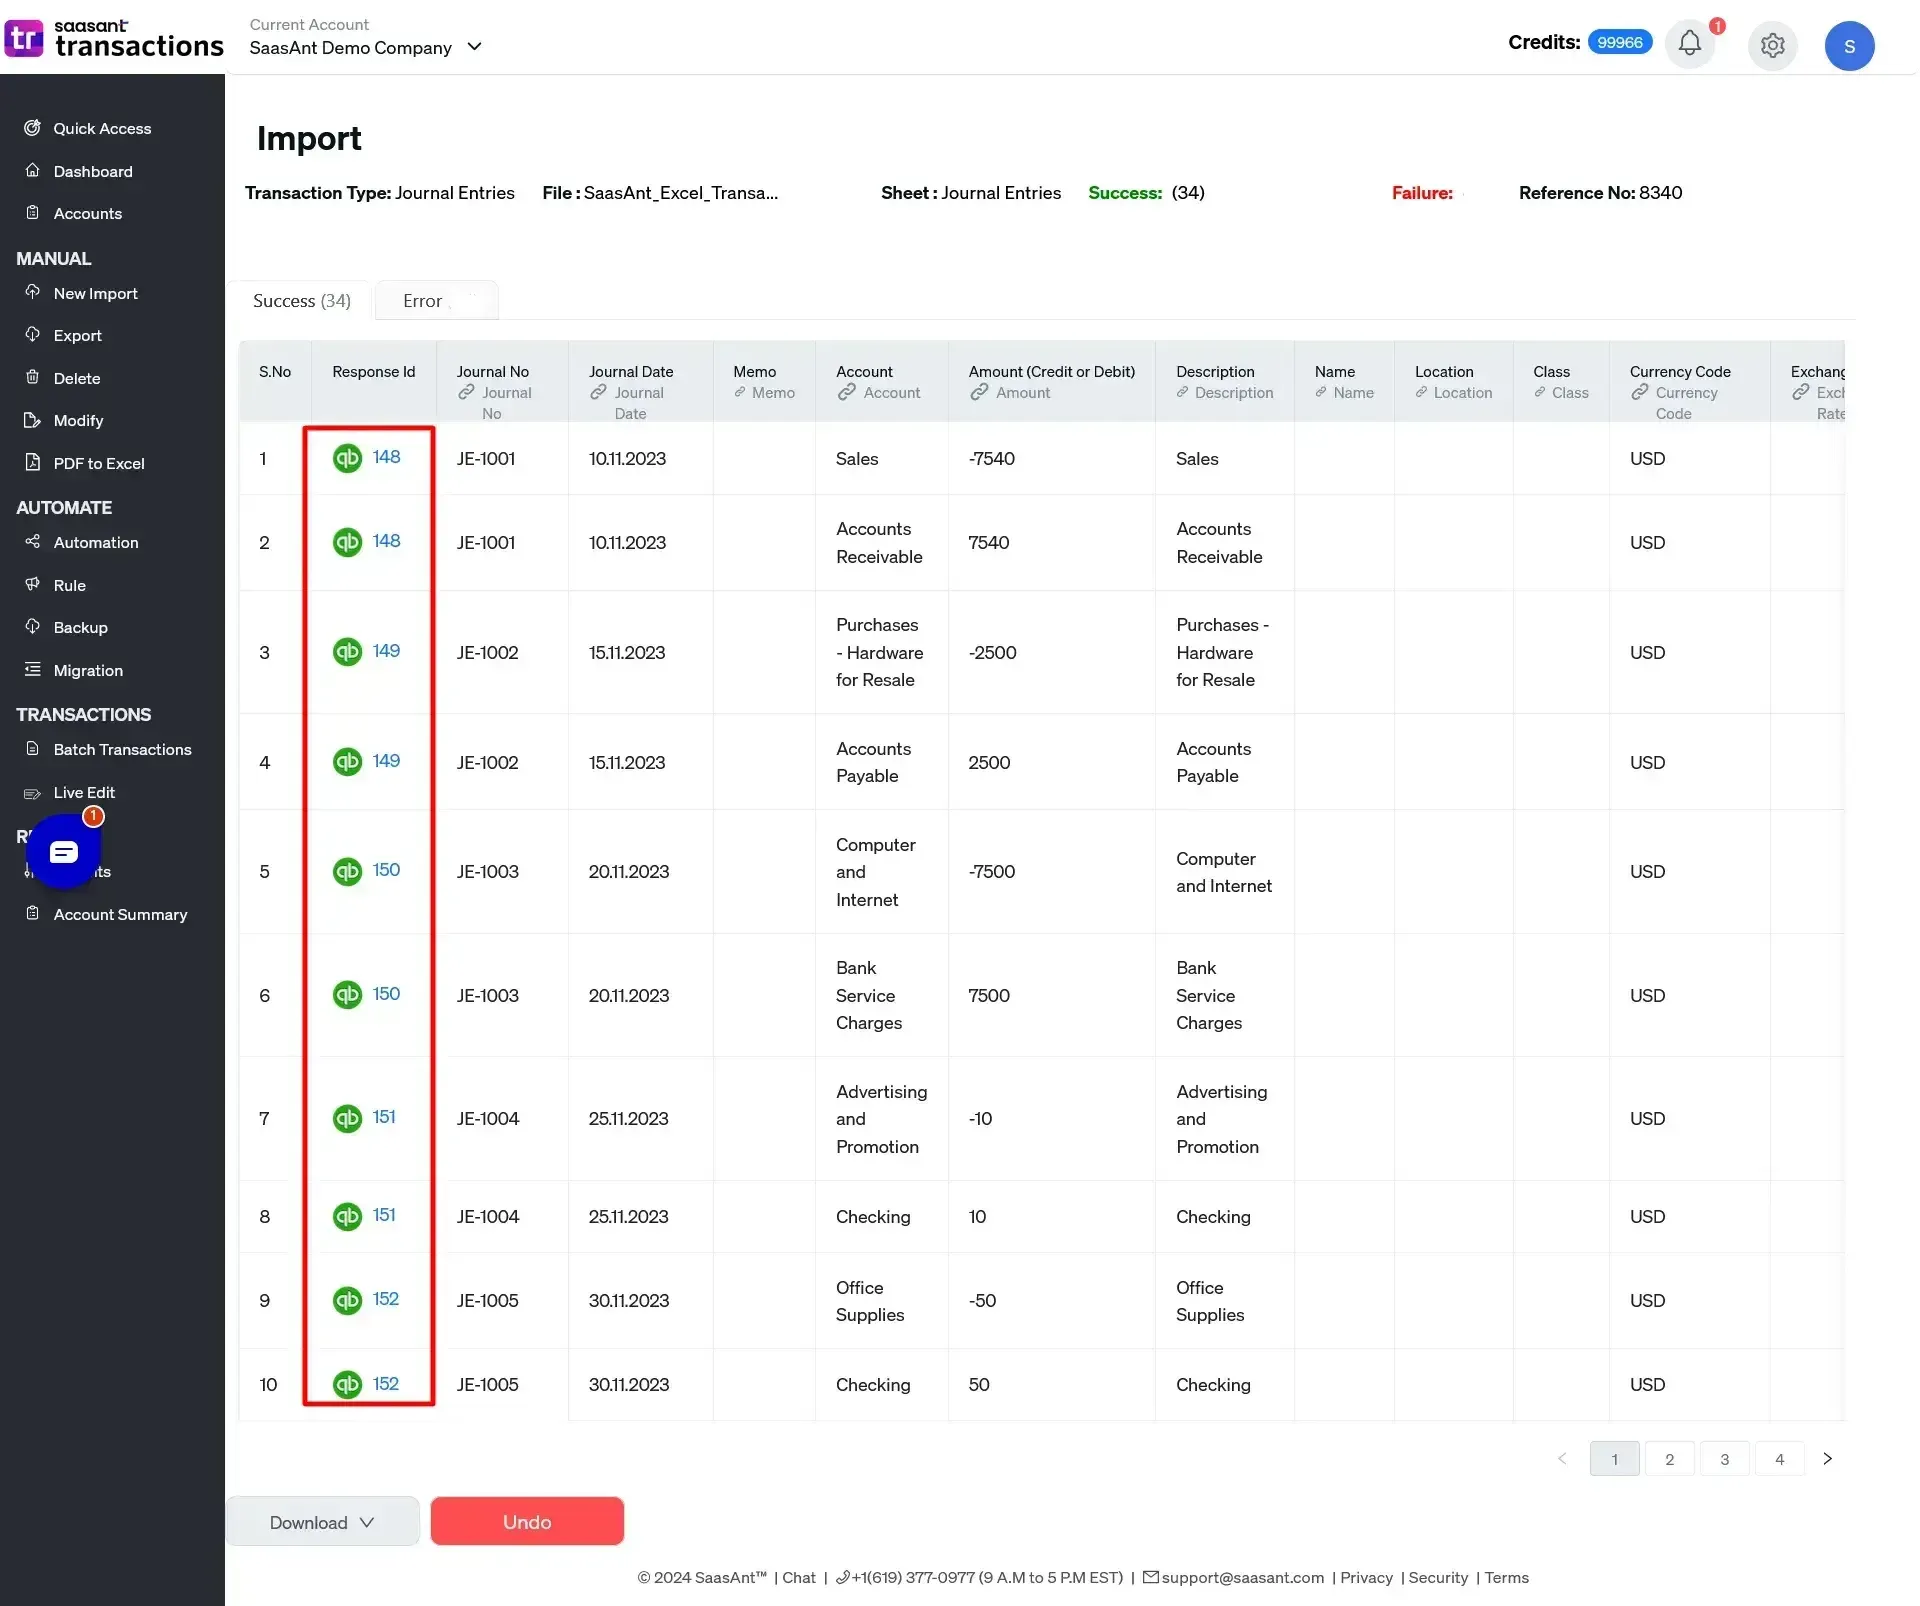
After completing the import, verify that all your journal entries have been imported correctly. Click on the ‘Number with QuickBooks' icon to navigate to the imported data in your QuickBooks account. Ensure everything is accurately displayed.
Conclusion: Simplifying Your Journal Entry Imports into QuickBooks Online
Importing journal entries into QuickBooks Online is simple and efficient with the right tool. Automate the process to save time and reduce errors by scheduling imports via email, Zapier, or FTP. Expert onboarding support is available to help you get started quickly and efficiently. Enhance your financial record-keeping today.
FAQs
How to import journal entries into QuickBooks Online?
To import journal entries into QuickBooks Online, use an import tool. Upload your journal entry file, map the data fields correctly, and complete the import. This process ensures accuracy and efficiency, saving time and reducing errors.
Can I import journal entries into QuickBooks Online?
Yes, you can import journal entries into QuickBooks Online using the right import tool, supporting various file formats like Excel, CSV, and IIF.
How can I migrate journal entry data when switching to a new company set up in QuickBooks?
Export journal entries from your existing setup as XLS or CSV files and import them into your new QuickBooks Online account using the import tool.
Is it possible to import data from other software into QuickBooks Online?
Yes, you can import data from other software into QuickBooks Online using the import tool, ensuring a smooth data transfer.
Is there a limit to the number of journal entries I can import?
The import tool can handle a substantial volume of journal entries, but for optimal performance, split large files into manageable batches.
Can I import journal entries from an Excel file into QuickBooks Online?
Yes, you can import journal entries using an Excel file. Ensure the file is in CSV format and follow the mapping instructions provided in our guide for a seamless import.
What file formats does QuickBooks Online support for importing journal entries?
QuickBooks Online supports CSV files for importing journal entries. Ensure your file is in the correct format to avoid compatibility issues.
Recommended reading: