How to Edit Chart of Accounts in QuickBooks Online
As a small business owner, bookkeeper, or accountant, you could be searching for how to edit chart of accounts in QuickBooks Online to organize chart of accounts or modify accounts. You could be using the default method to edit chart of accounts in QuickBooks Online, which won’t let you edit the detail type on chart of accounts and sometimes the Save and Close button does nothing. This would leave you frustrated and with time wasted that could have been better spent on something useful.
Fortunately, there is a CPA-recommended solution to fix this.
SaasAnt Transactions is a QuickBooks add-on with a 5-star rating from over 4000 users and lets you edit multiple accounts simultaneously, making the process more efficient. This article will walk you through both methods—direct editing in QuickBooks and using SaasAnt Transactions providing clear, step-by-step instructions for each approach.
Contents
How to Edit Chart of Accounts in QuickBooks Online - One by One?
How to Bulk Edit Chart of Accounts in QuickBooks: Quick Instructions
How to Edit Chart of Accounts in QuickBooks Online: Step-by-Step Guide
Conclusion
FAQ
How to Edit Chart of Accounts in QuickBooks Online - One by One?
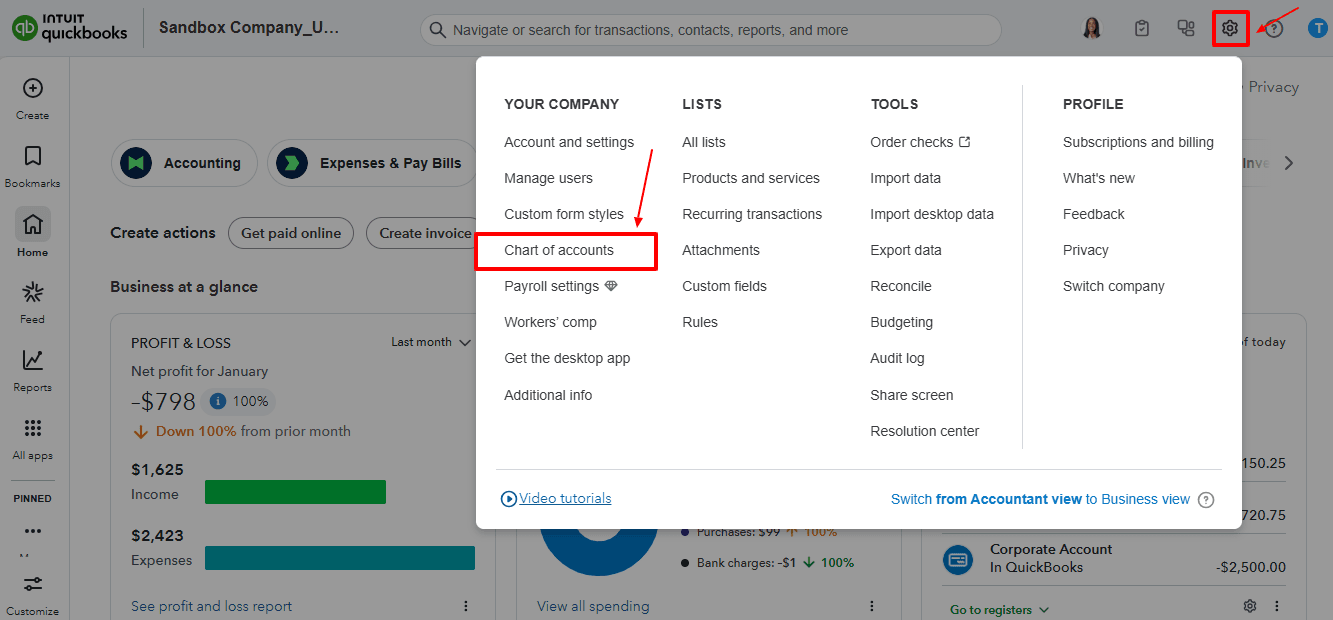
Step 1: Click on the gear icon located in the upper right corner of the screen. Select "Chart of Accounts" under the "Your Company" section.
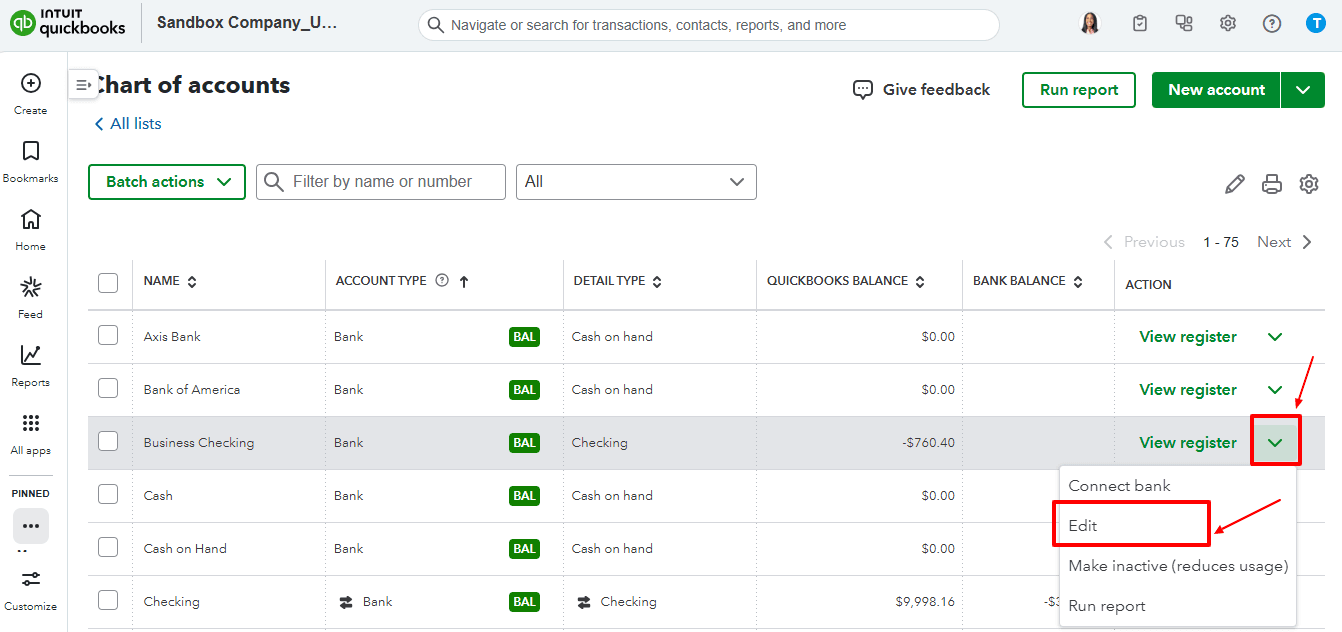
Step 2: Click on the "View Register" dropdown and then select the "Edit" button. Make the necessary changes to the account details.
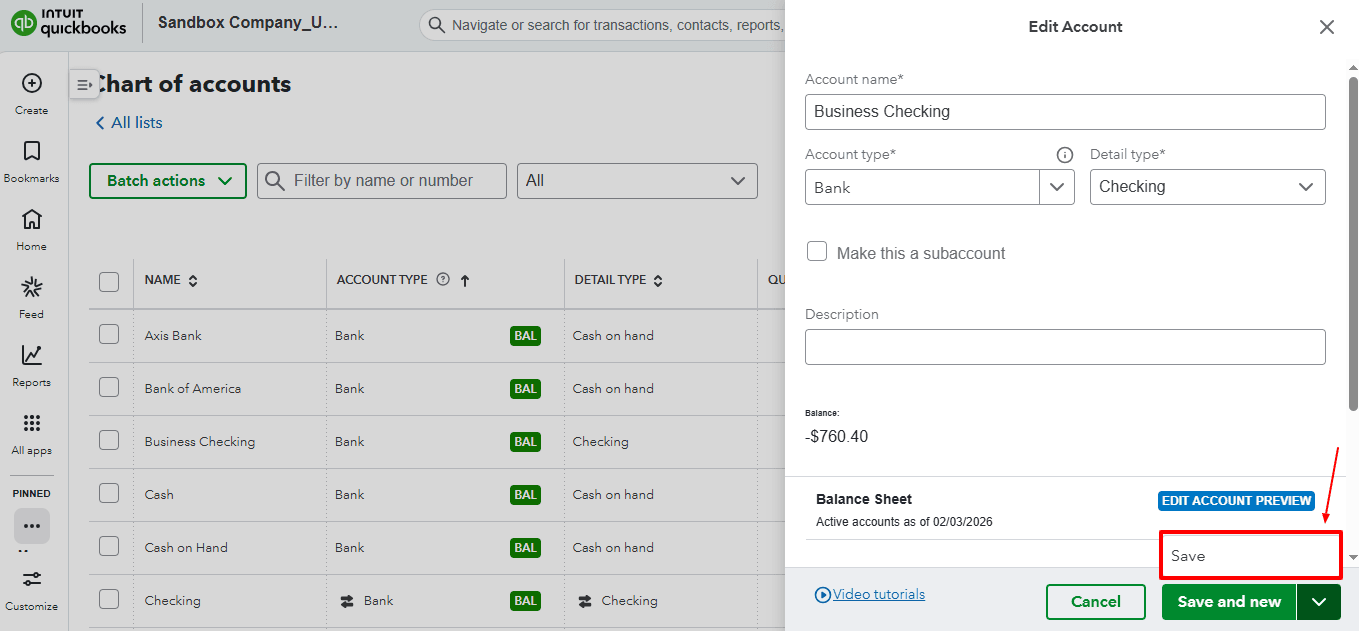
Step 3: Click on the "Save" button to apply your changes.
How to Bulk Edit Chart of Accounts in QuickBooks: Quick Instructions
Connect SaasAnt Transactions with QuickBooks
Select entity as Accounts and use advanced filter to search
Download Accounts
Bulk edit and upload using Modify
Rollback (if needed)
How to Edit Chart of Accounts in QuickBooks Online: Step-by-Step Guide
Here are the steps to bulk edit the Chart of Accounts.
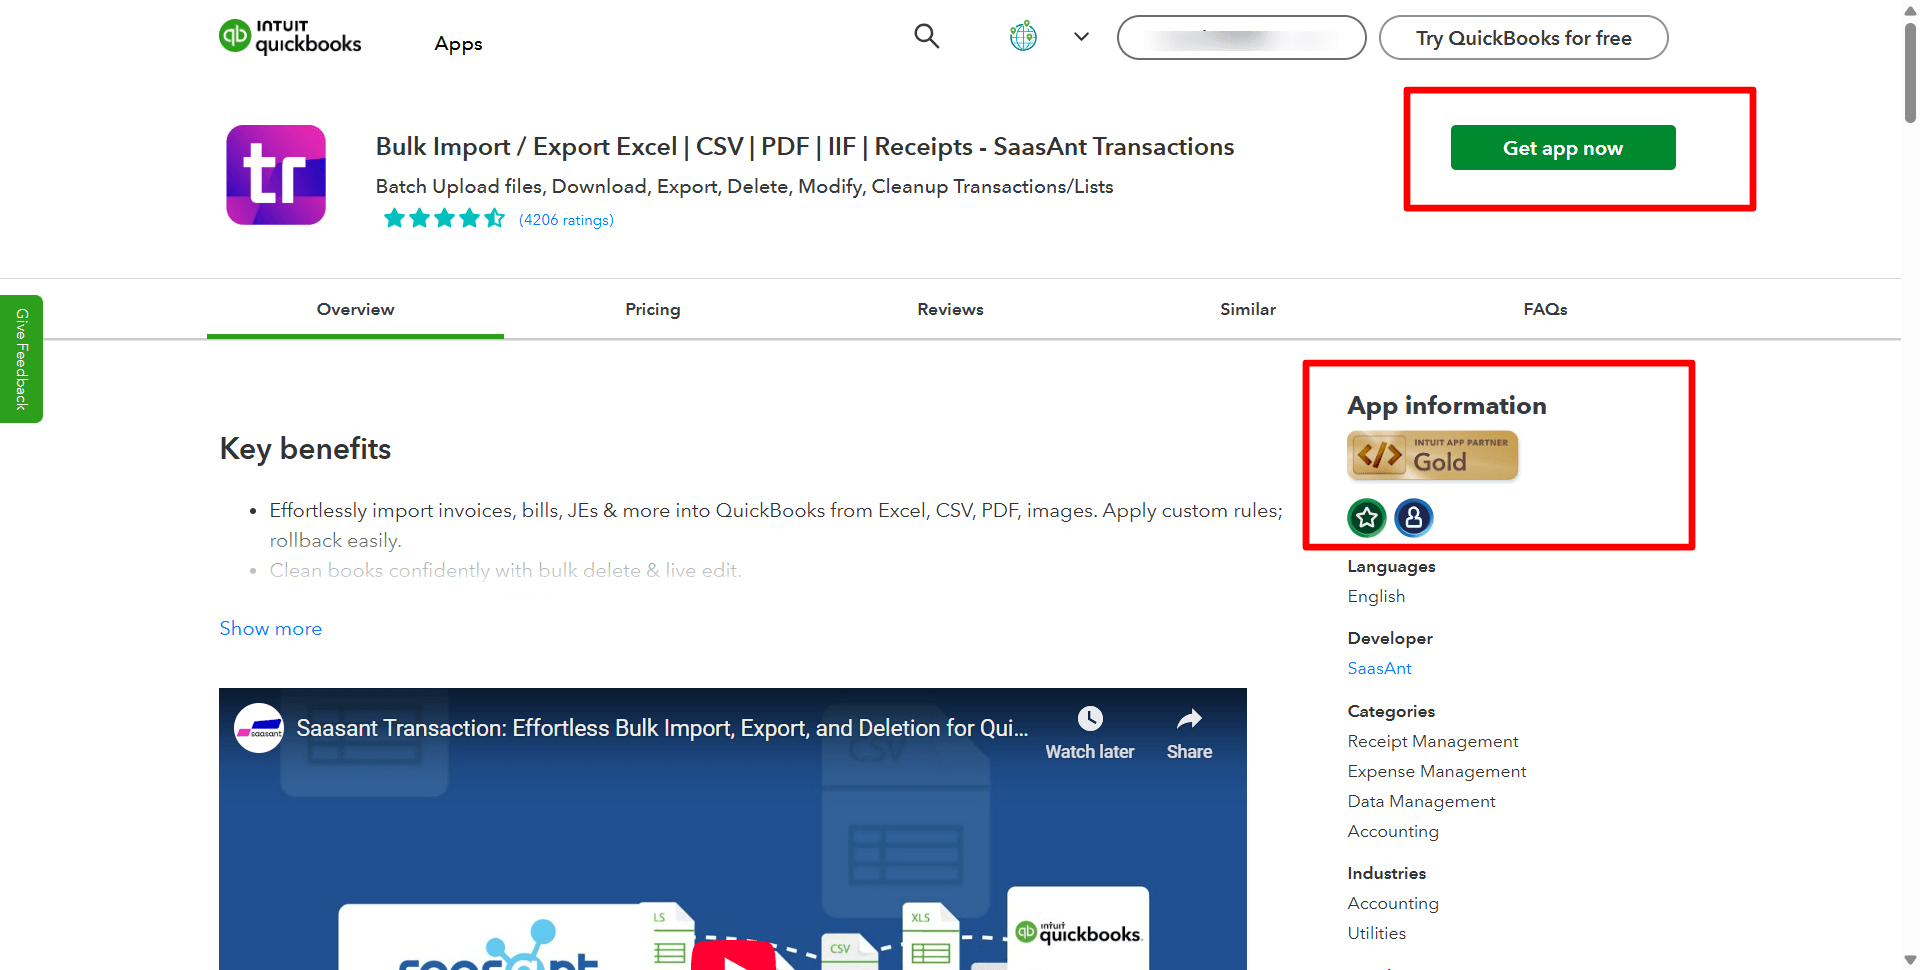
Step 1: Connect with SaasAnt Transactions
Find SaasAnt Transactions in the QuickBooks App Store and connect it to your QuickBooks account. SaasAnt Transactions is a certified, secure app that keeps your data safe and well-managed.
Step 2: Entity Selection
Go to SaasAnt Transactions Dashboard -> Download.
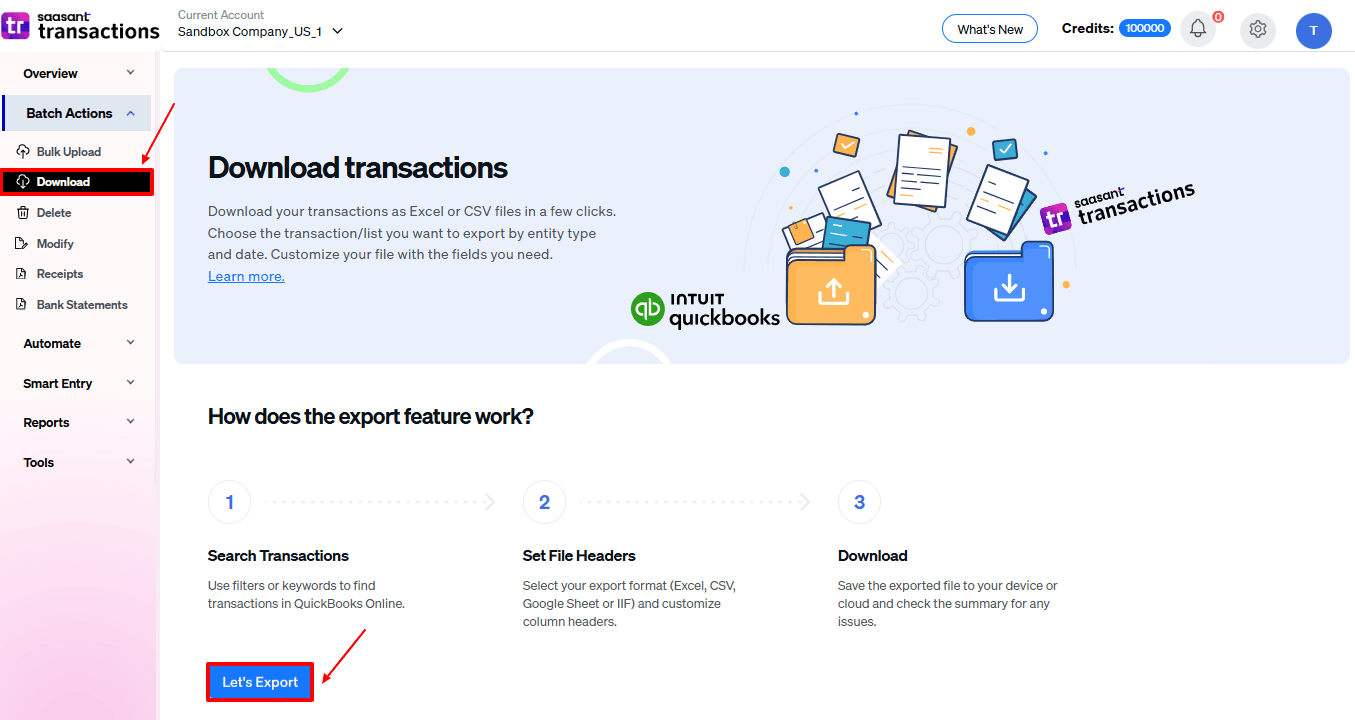
Select "Accounts" in the Transaction List drop-down menu.
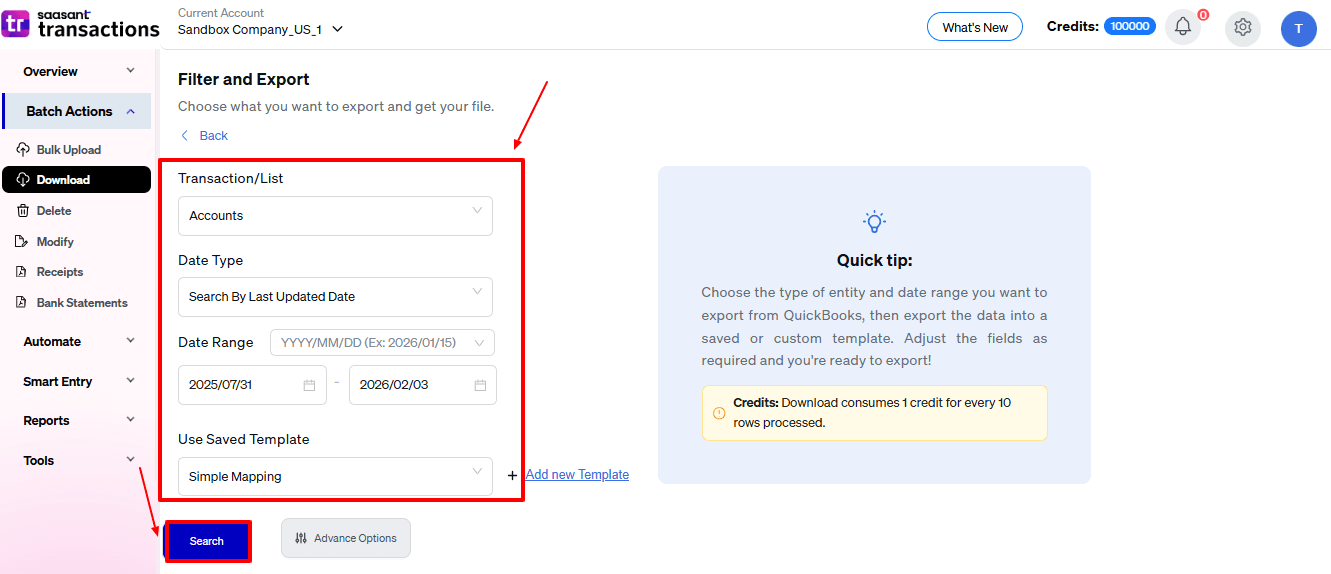
Step 3: Advanced Filter
Choose a date type, such as search by transaction date, created date, or last updated date. Select the date range and mapping template and click on search.
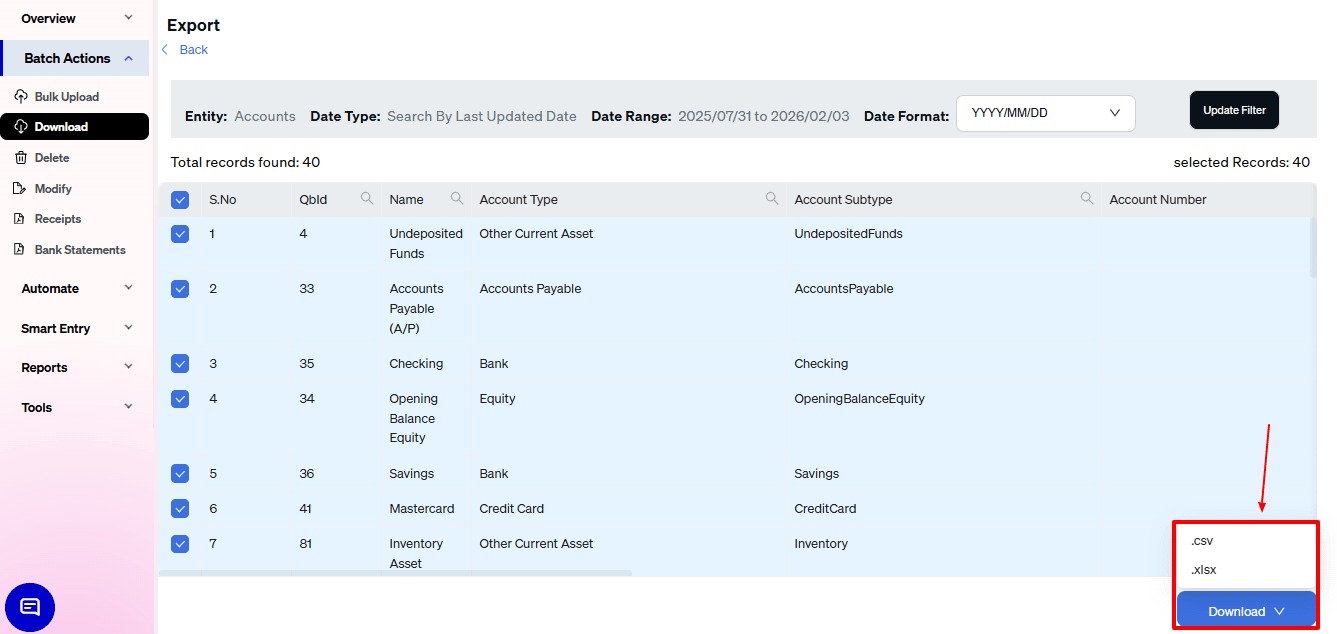
Step 4: Select Download Format
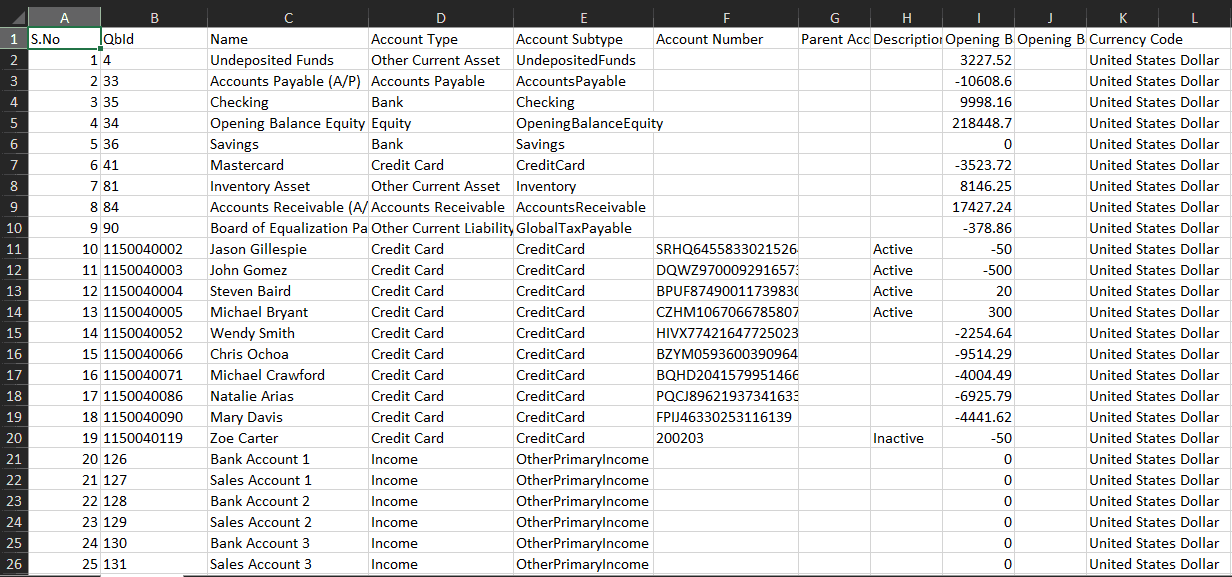
A list of Accounts for the chosen date type and range will be displayed. Click Download and select whether you want to download the file in .XLSX or .CSV format. You can also uncheck the checkbox of a particular Estimate if you don’t want that specific transaction in the downloaded file.
Step 5: Download
Check your downloads folder to view the downloaded file and make the necessary changes.
Step 6: Modify
Go to SaasAnt Transactions Dashboard -> Modify ->
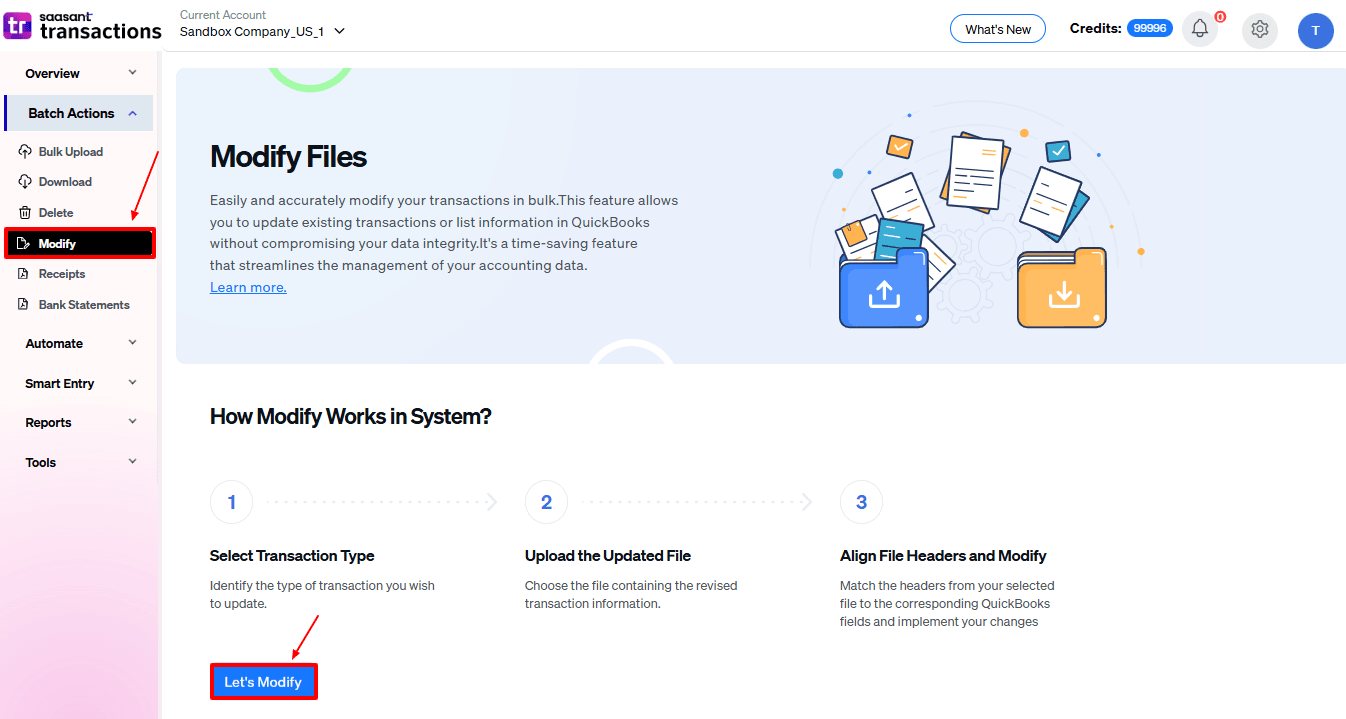
Select Accounts from Customer Transactions.

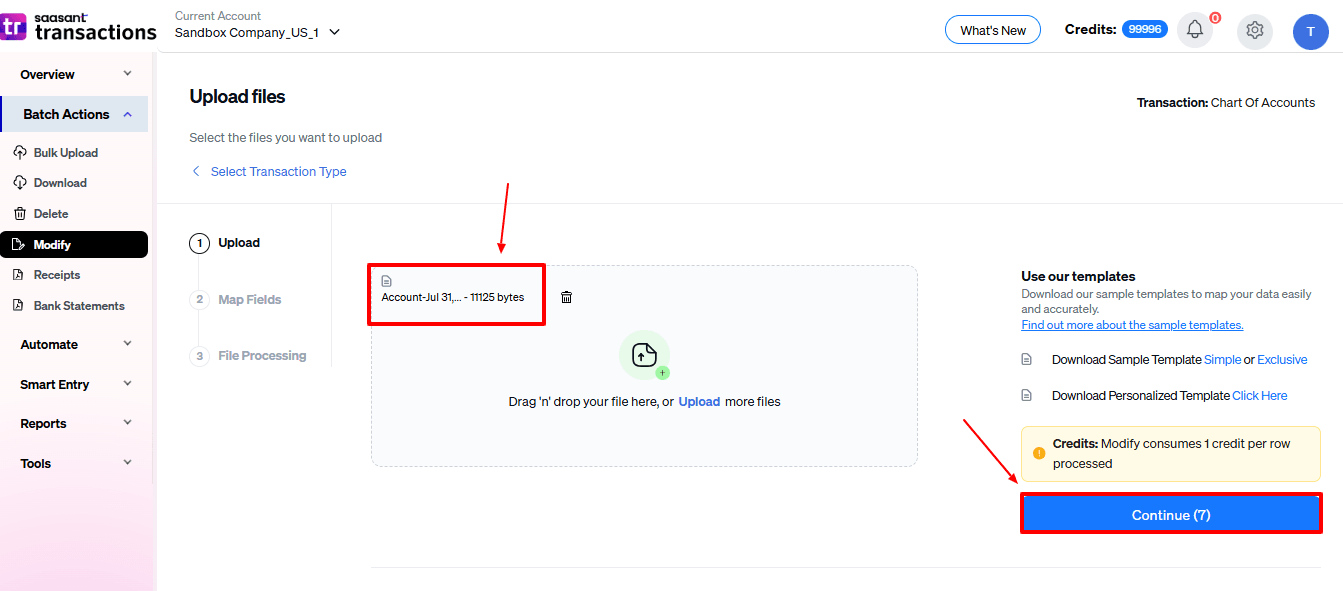
Step 7: File Uploading
Upload the file to which you have made changes or enter the Google Sheet link.
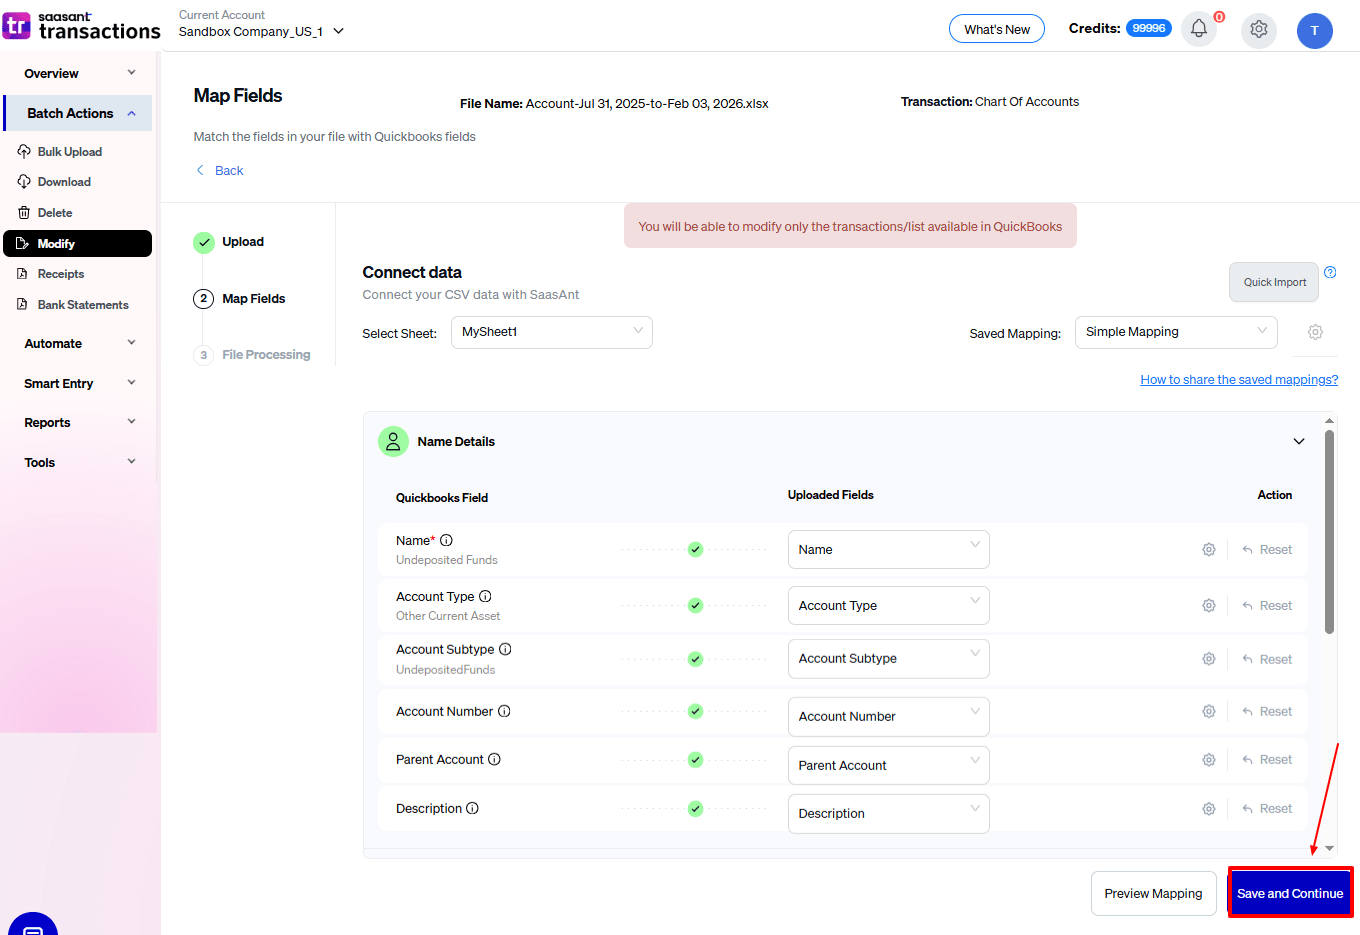
Step 8: Mapping
Mapping matches the fields in QuickBooks to those in the imported file.
For example, when you select a QuickBooks entity as Estimates, QuickBooks attributes for the Estimates, such as the bill number, will appear on the left. If your file lists the Bill Number under S.No, you must map it correctly.
Preview Mapping shows you how the fields would be mapped in QuickBooks.
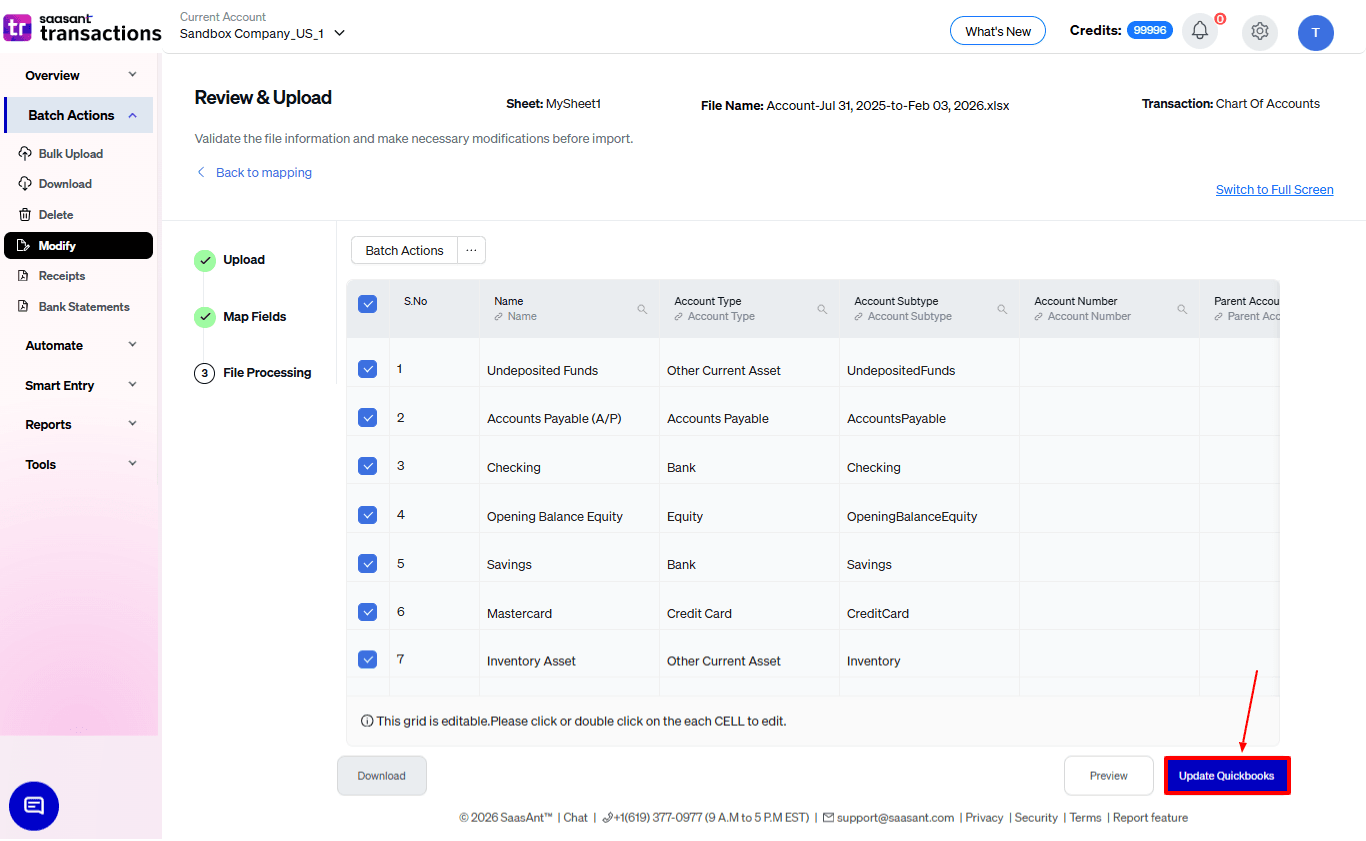
Step 9: Review and Update
Review the data mapped to avoid mistakes and ensure the accurate alignment of all details. SaasAnt Transactions facilitates data review and corrections, helping you identify and resolve errors. Click on Update QuickBooks.
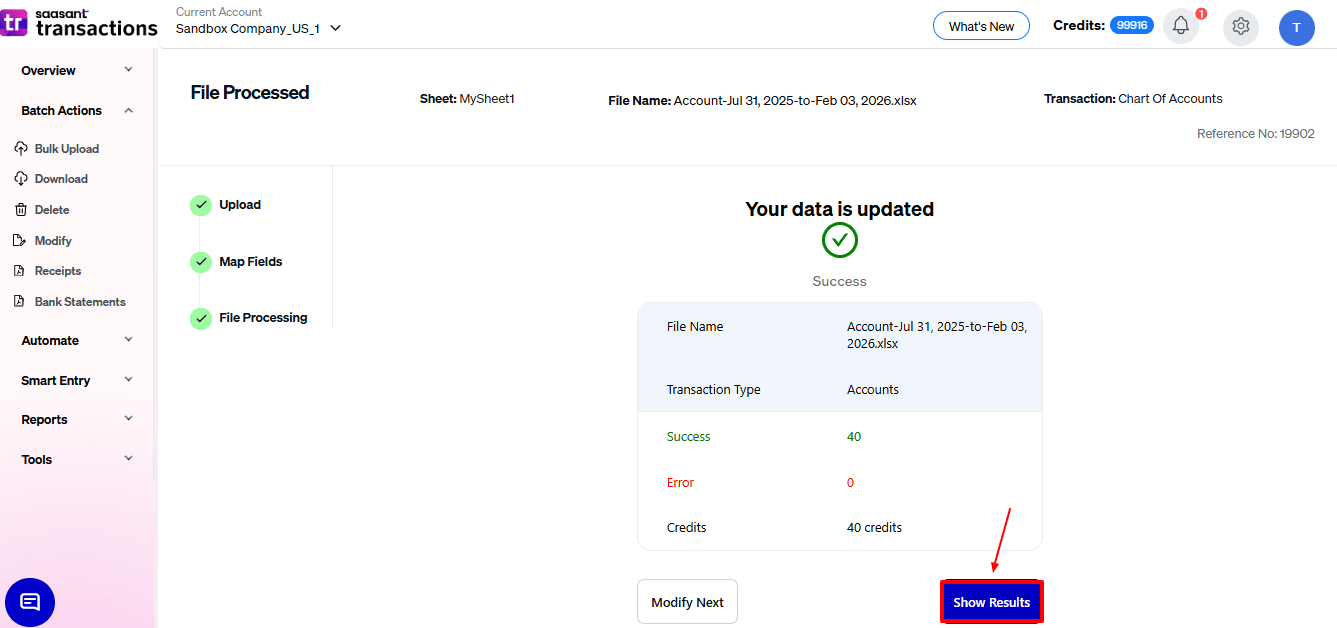
Step 10: Rollback (if needed)
Once the data is uploaded, click on Show Results. Upon successful import, the list of Accounts uploaded will appear with their reference number.
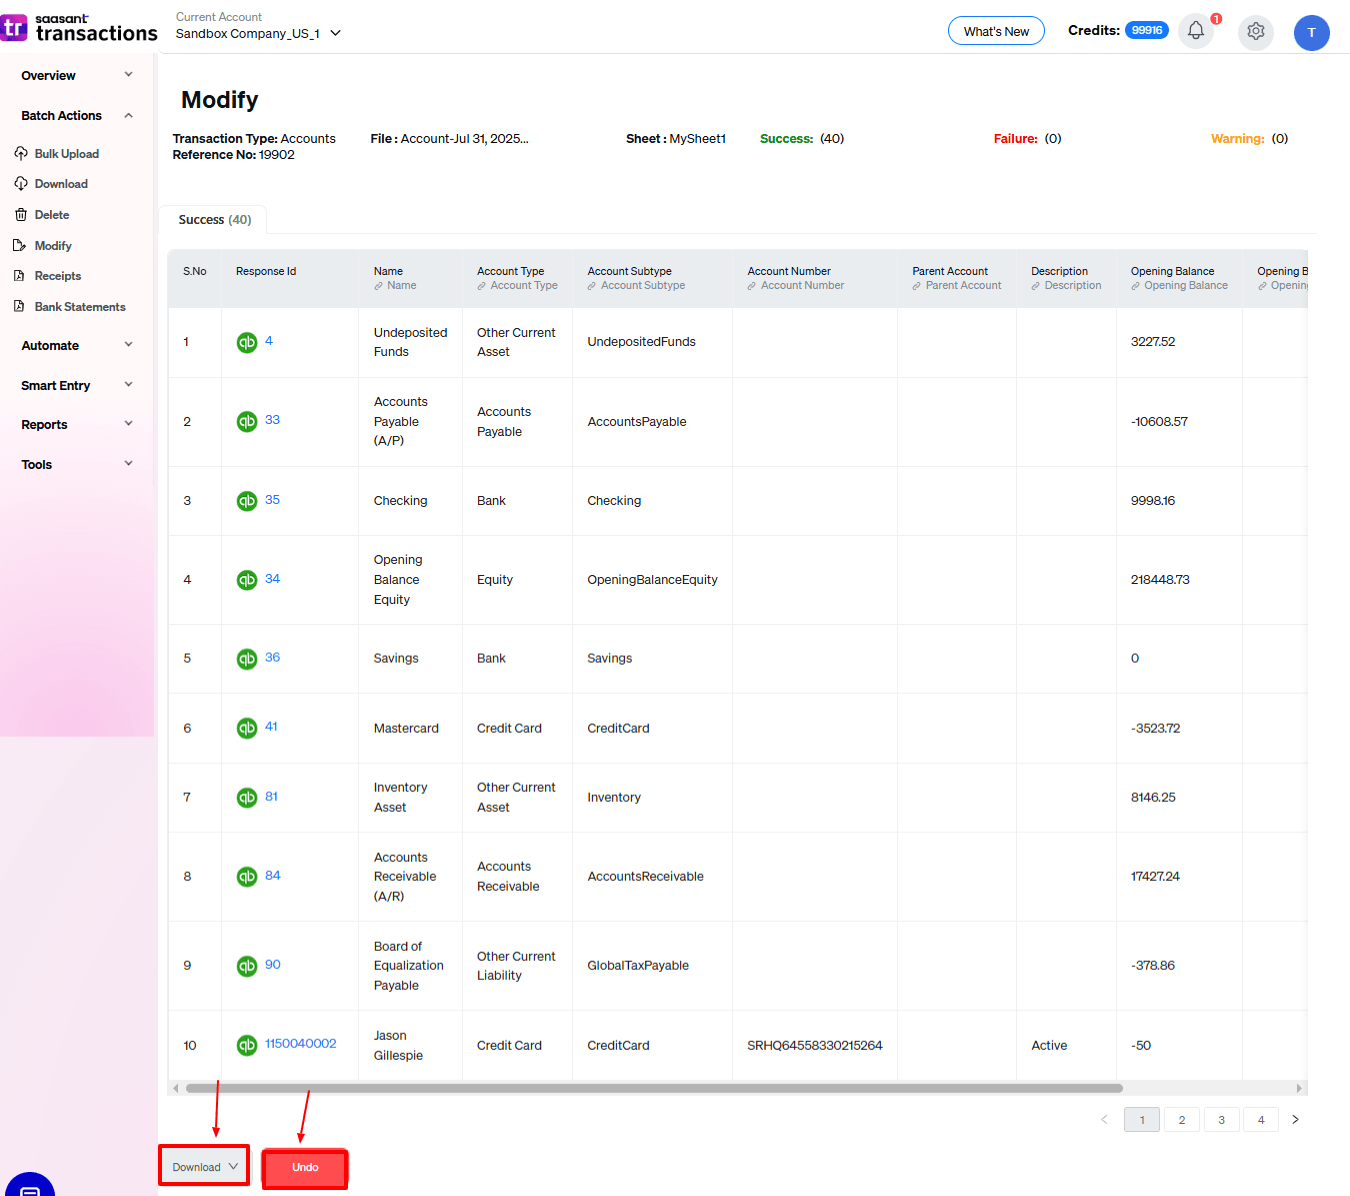
Click on the reference number to verify if that particular Estimate has been uploaded into QuickBooks.
You can also delete the uploaded Accounts by clicking the delete button.
Video Tutorial for How to Edit the Chart of Accounts in QuickBooks Online:
Live Editing Chart of Accounts
If you are looking for a way to skip downloading and just edit live, SaasAnt Transactions has got you covered.
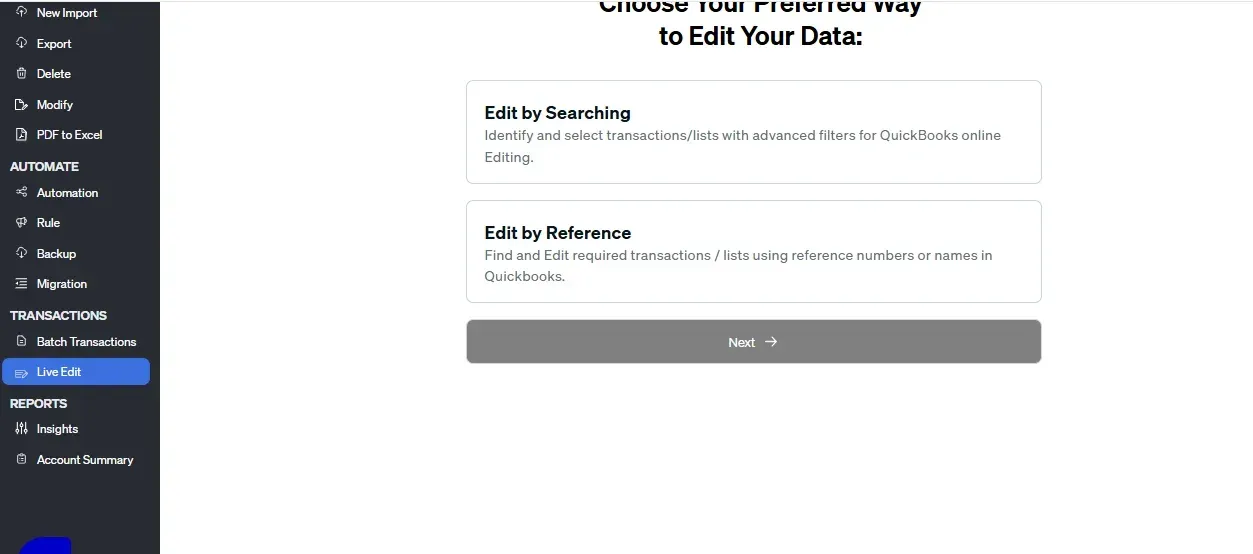
Step 1: Edit by Searching/Reference Number
Go to SaasAnt Transactions Dashboard -> Live Edit -> Select edit by searching if you want to search using date range or edit by reference if you know the reference numbers.
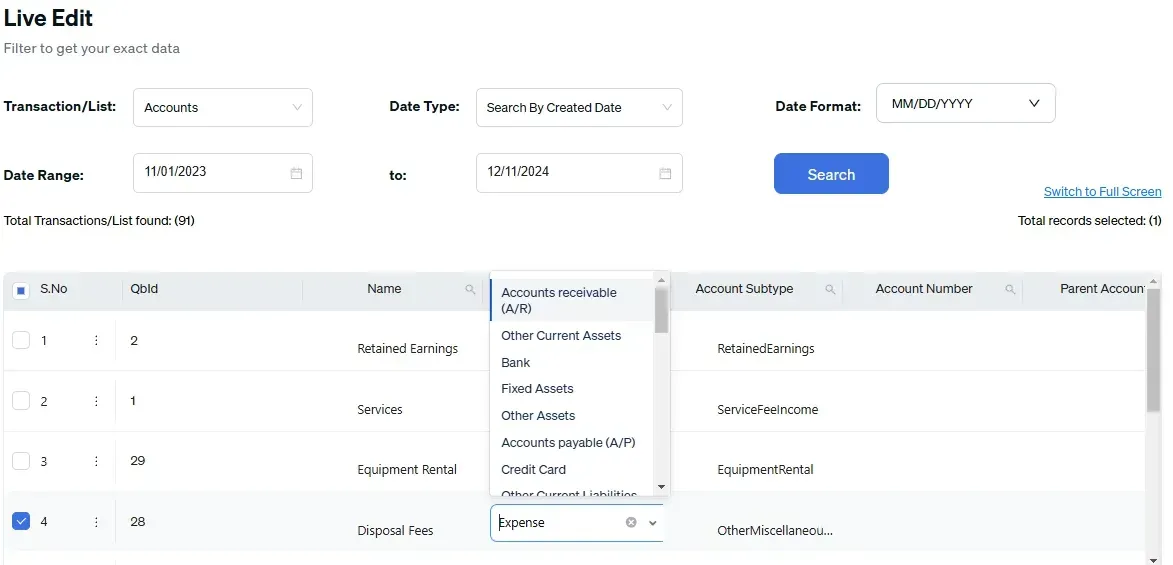
Step 2: Entity Selection
Once you select the QuickBooks entity as Accounts and enter the date range or reference number, you will get the list of Estimates created for the specified condition. Select the Accounts you wish to edit, make the necessary changes, and submit.
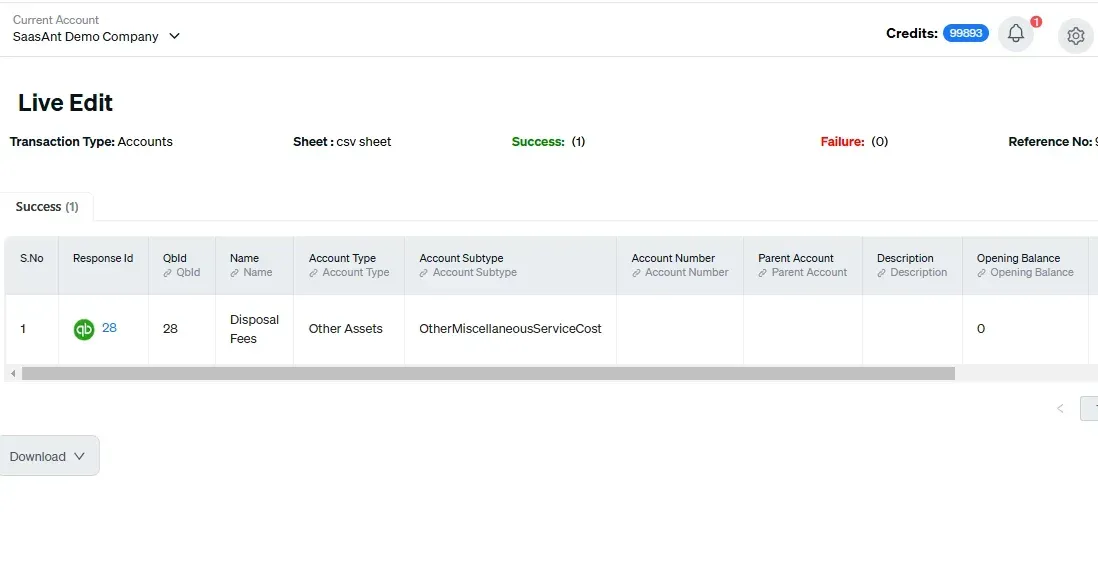
Step 3: Upload and Check
Once the data is uploaded, click on Show Results. Upon successful import, uploaded data will appear with their reference number. Click on the reference number to verify if that data has been uploaded into QuickBooks.
Conclusion
This article has given steps for direct editing and using SaasAnt Transactions for bulk editing as well. By understanding the difference between the manual editing process, which requires changes to be made one at a time, and the bulk editing capabilities offered by SaasAnt Transactions, you can choose the method that best fits your needs.
While the direct editing approach can be time-consuming, SaasAnt Transactions provides a more efficient way to manage multiple edits simultaneously. Plus, you can explore its features with a 30-day free trial no credit card required—making it easier to find the right solution for your business.
FAQ
How do I delete and edit the chart of accounts in QuickBooks Online?
You cannot delete the chart of accounts directly in QuickBooks Online. You can integrate SaasAnt Transactions with QuickBooks to delete chart of accounts in QBO. Go to SaasAnt Transactions dashboard -> delete -> select the required transaction entity as accounts -> use date range filter or advanced filter to search -> delete. You can also bulk edit using the export and modify feature in SaasAnt Transactions.
Can a chart of accounts be modified?
Yes you can modify the chart of accounts in QuickBooks using SaasAnt Transactions. Export the accounts using precise filters and download it as CSV or XLSX file. Make changes to the downloaded file and upload the modified file.
How to export multiple accounts from QuickBooks?
You can export multiple chart of accounts from QuickBooks using SaasAnt Transactions. Integrate SaasAnt Transactions with QuickBooks -> select the entity as accounts to export -> search for estimates based on the created date or transaction date -> enter a date range or use the advanced filter. Select whether you want to download it in XLSX or CSV format.
How to bulk import accounts in QuickBooks?
Integrate SaasAnt Transactions with QuickBooks. Go to SaasAnt Transactions dashboard -> New Import -> Select the required entity as Accounts -> Browse and select the file -> Map the fields in the file to QuickBooks fields -> Upload the file to import chart of accounts into QuickBooks.
How to create chart of accounts in QuickBooks Online?
To create chart of accounts in QuickBooks Online, go to Settings -> chart of accounts -> new -> enter the account details -> save and close. This method is okay as long as you only have to create a couple of accounts. SaasAnt Transactions makes this process much easier with bulk import feature where you can just upload the file and import chart of accounts into QuickBooks Online.
Recommended reading: