How to Import PDF Invoices into QuickBooks Desktop
Manually handling PDF invoices in QuickBooks Desktop can be tedious and prone to mistakes. Whether you're handling vendor bills or sales invoices, the process of copying and pasting data from PDFs takes a lot of time. With SaasAnt Transactions Desktop, you can convert your PDF invoices to Excel and import them straight into QuickBooks Desktop, eliminating the need for manual data entry. This guide will walk you through the process step by step, enabling you to streamline your workflow.
A finance manager frequently receives supplier invoices in PDF format. Manually entering each line into QuickBooks Desktop used to take hours and often led to data inconsistencies. By using SaasAnt Transactions to convert PDFs to Excel and import them in bulk, the manager now completes the task in minutes with full accuracy.
This blog is ideal for accountants, bookkeepers, small business owners, and finance managers who use QuickBooks Desktop and want to automate PDF invoice imports, reduce manual data entry, and ensure accurate financial records.
Contents
How to Import PDF Invoices into QuickBooks Desktop: Step-By-Step Guide
Wrap Up
Frequently Asked Questions
How to Import PDF Invoices into QuickBooks Desktop: Step-By-Step Guide
Follow the steps below to import the PDF invoices in QuickBooks Desktop using SaasAnt Transactions Desktop.
Step 1: Install and Connect SaasAnt Transactions
Download the latest SaasAnt Transactions Desktop version.
Run SaasAntTransactions-Setup.exe as an administrator.
Accept the license agreement and complete the installation.
Open the app, go to Subscription > Register.
Enter the license key from your confirmation email.
Keep your internet connection active.
Step 2: Launch SaasAnt Transactions Desktop
Start by opening the SaasAnt Transactions Desktop app on your system.
Ensure that QuickBooks Desktop is open and connected to your company file before proceeding.
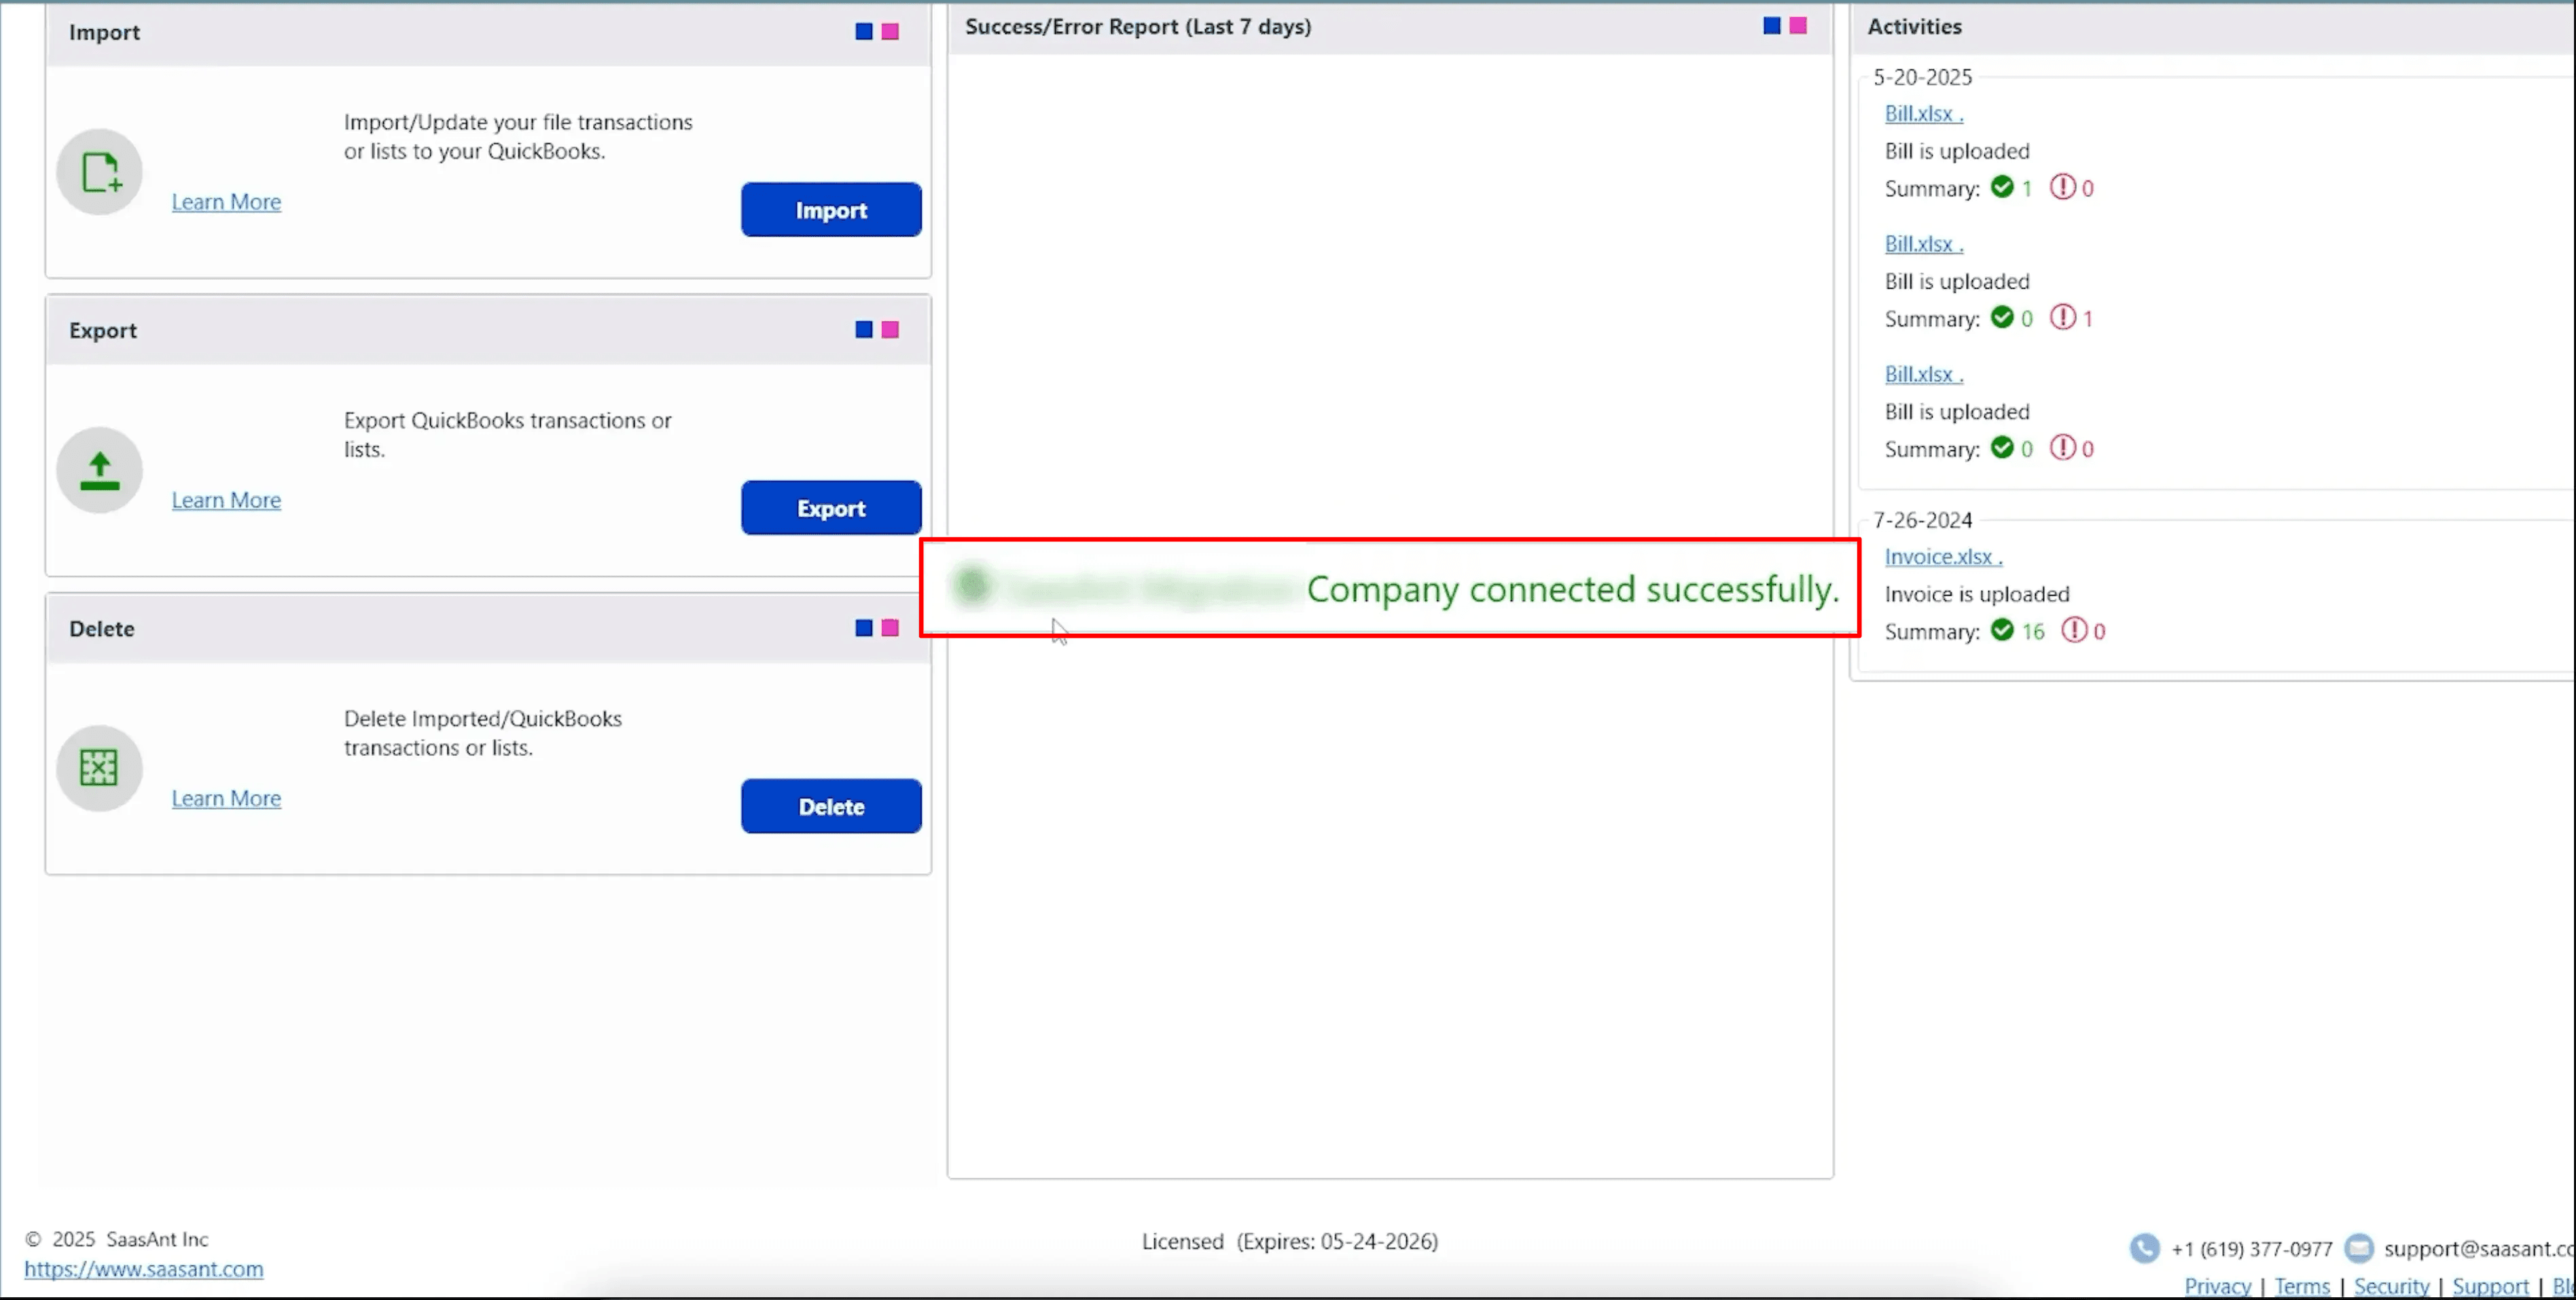
Step 3: Connect to QuickBooks Desktop
To access, you need to connect SaasAnt Transactions Desktop with QuickBooks Desktop. Here's how:
Go to the ‘File’ menu in the top-left corner of SaasAnt Transactions Desktop.
Click ‘Connect to QuickBooks’ from the dropdown.
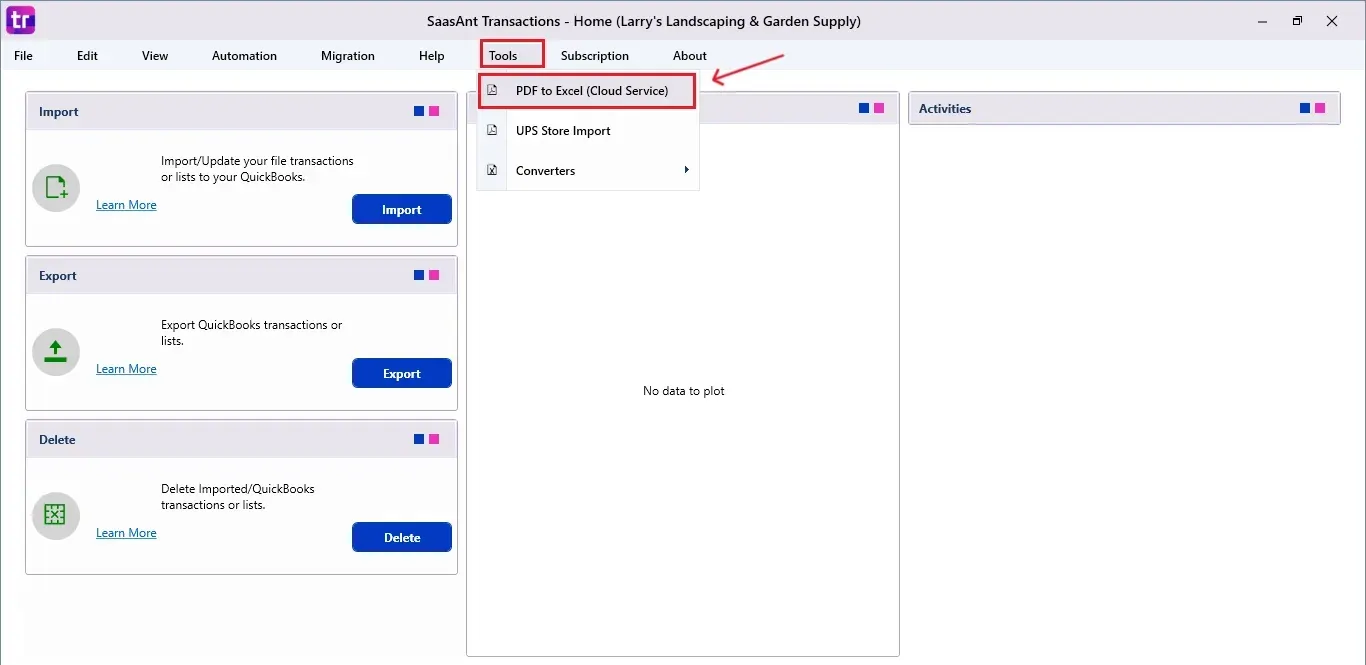
Step 4: Convert PDF to Excel
On the SaasAnt dashboard:
On top of the SaasAnt Transactions dashboard, you can see the menu bar with various options.
Select “Tools,” and select “PDF to Excel (Cloud Service)” under the dropdown.
The Dashboard appears as shown in the image below.
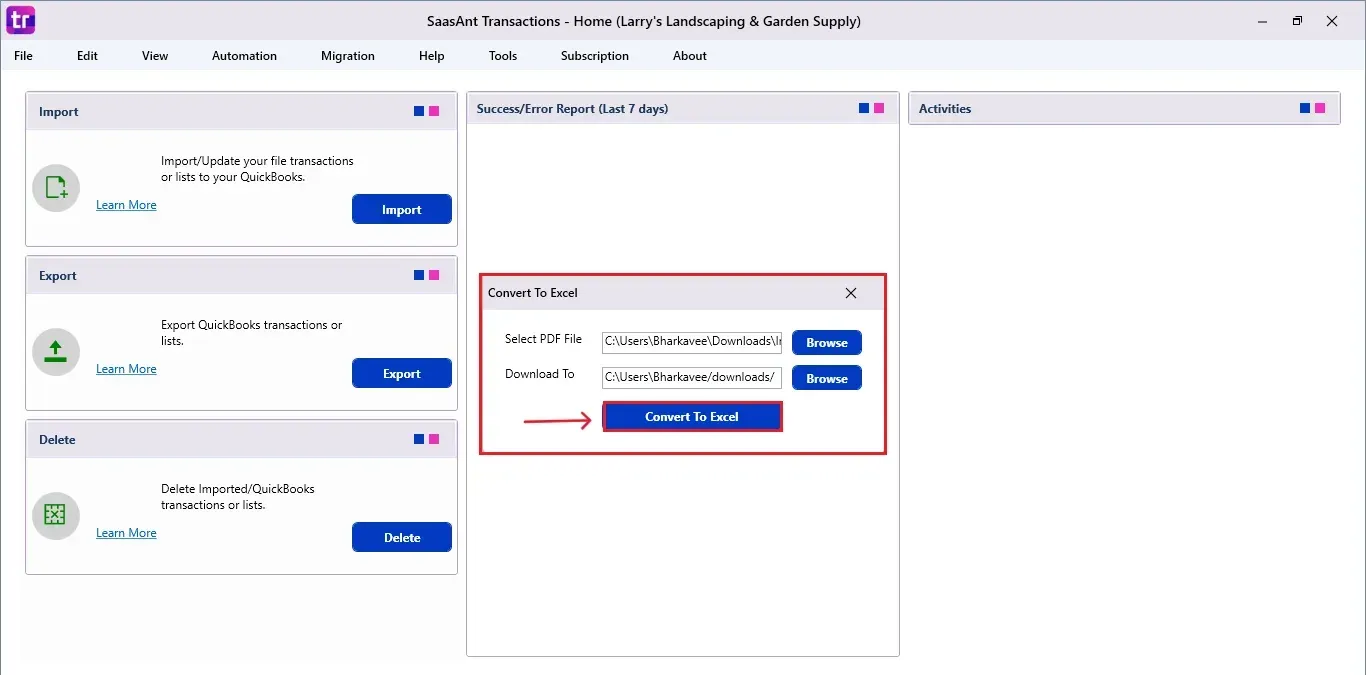
A popup will appear:
Select the PDF file to be converted from your desktop.
Choose the location on your desktop where the converted Excel file should be saved.
Click Convert to Excel.
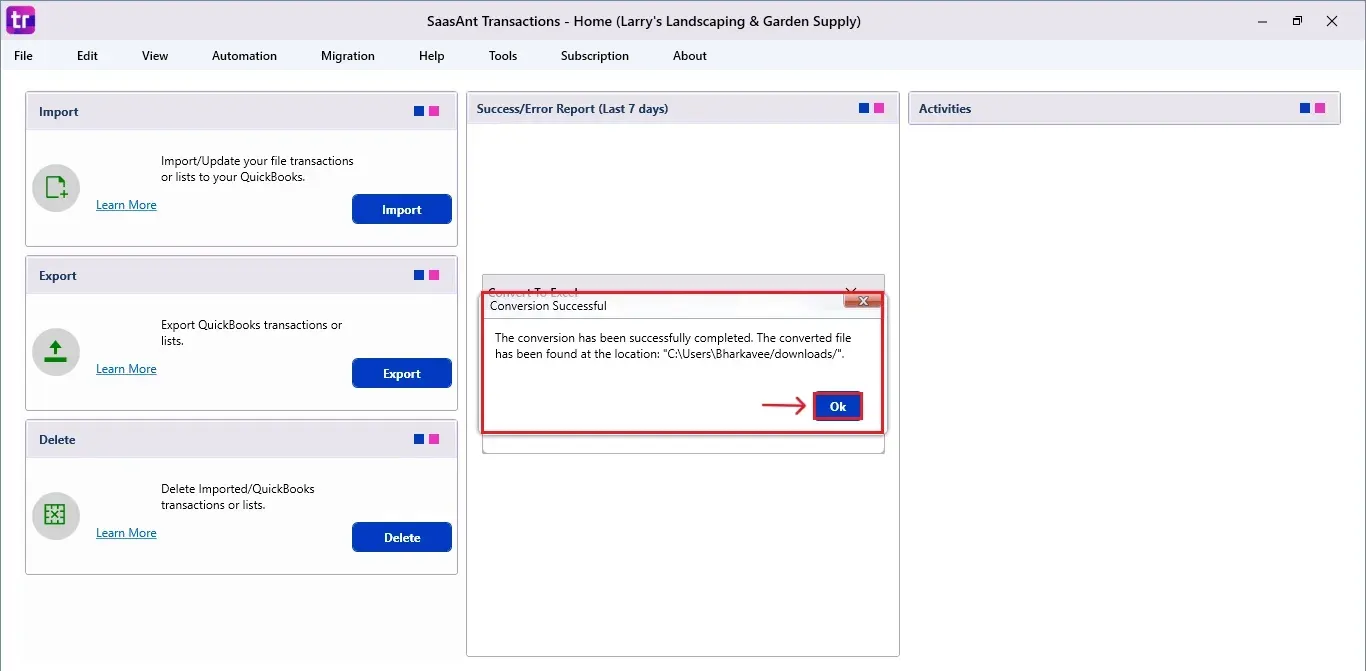
Once the file is converted, a pop-up will confirm that the conversion is complete.
You can now proceed to import the converted Excel invoice file into QuickBooks Desktop.
Step 5: Import Invoices
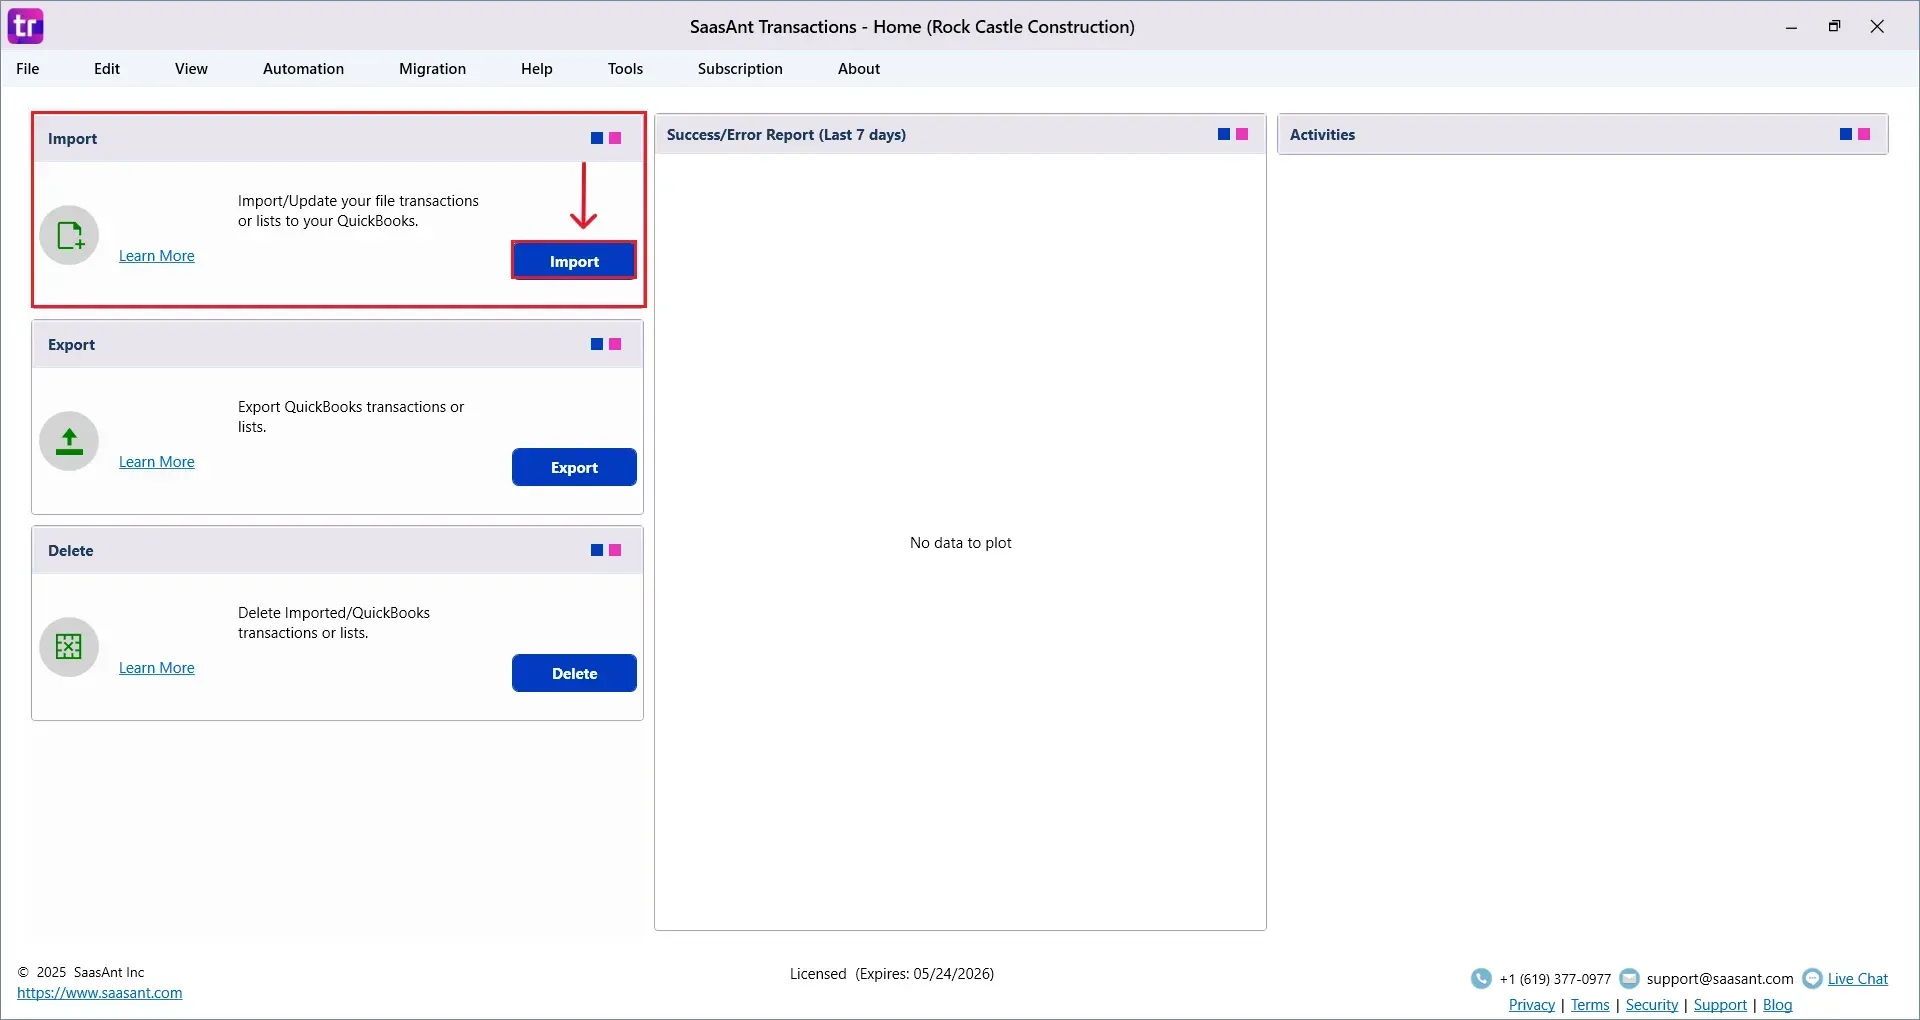
On the top left side of the SaasAnt Transactions dashboard, you can see the menu bar with various options.
Select “Edit,” and select “Import” under the edit dropdown.
The Dashboard appears as shown in the image below.
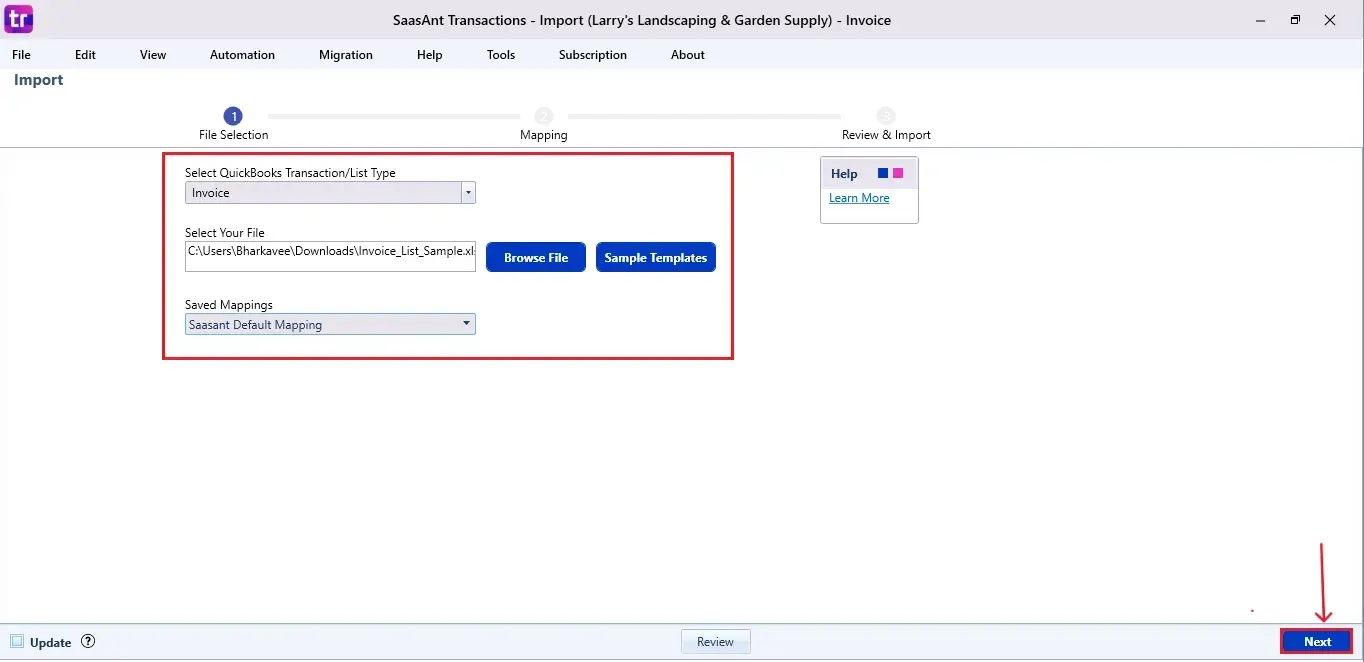
Select “Invoices” from the SaasAnt Transaction Type dropdown and upload your Excel or CSV file.
Select “SaasAnt Default Mapping” under the Saved Mapping dropdown.
Step 6: Mapping Fields
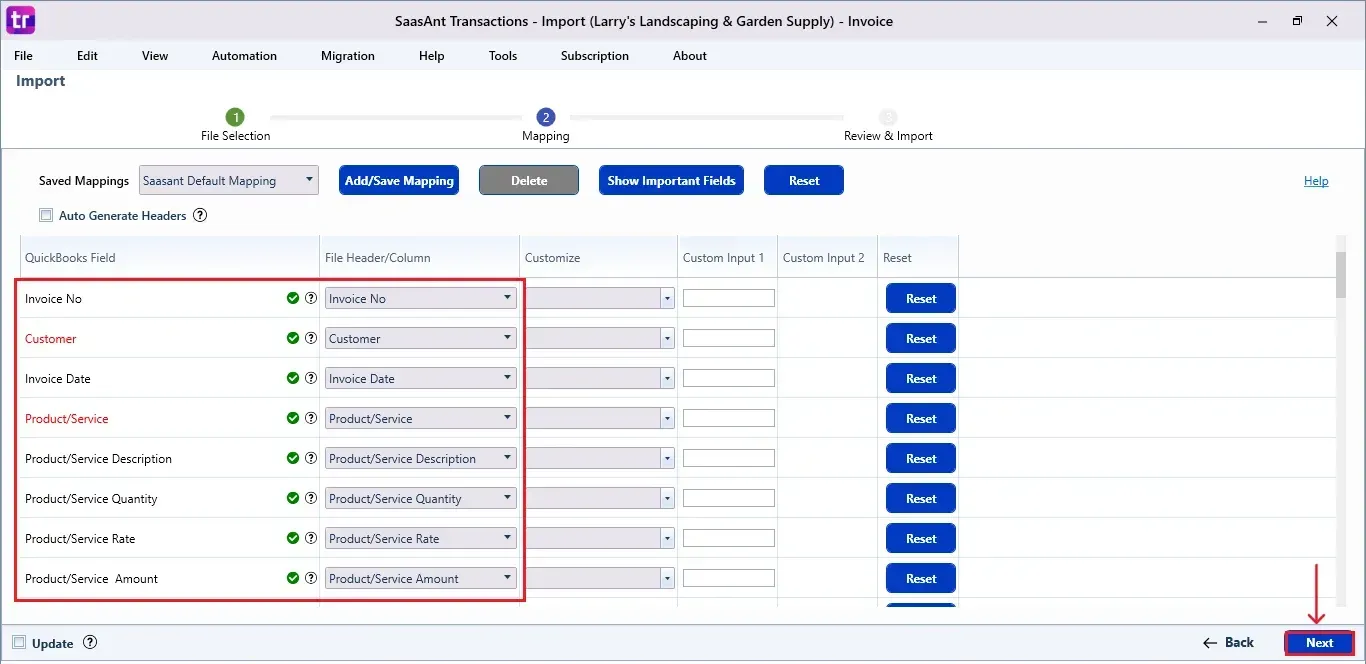
Ensures the mapping of essential fields, including Invoice number, customer, Invoice date, etc.
Select “Next” at the bottom right of the dashboard.
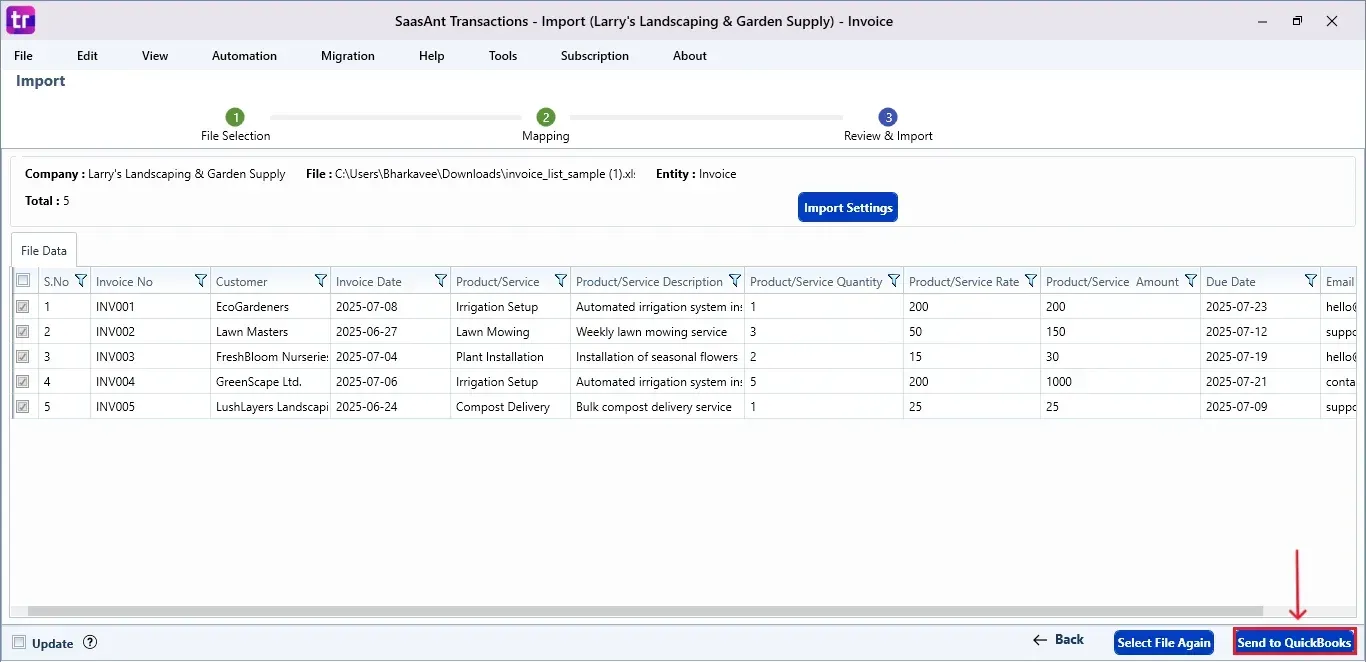
Step 7: Review and Import the Data
Click the “Send to QuickBooks” option at the bottom right of the dashboard, as shown in the image below.
SaasAnt will now push the invoices into your connected QuickBooks Desktop account.
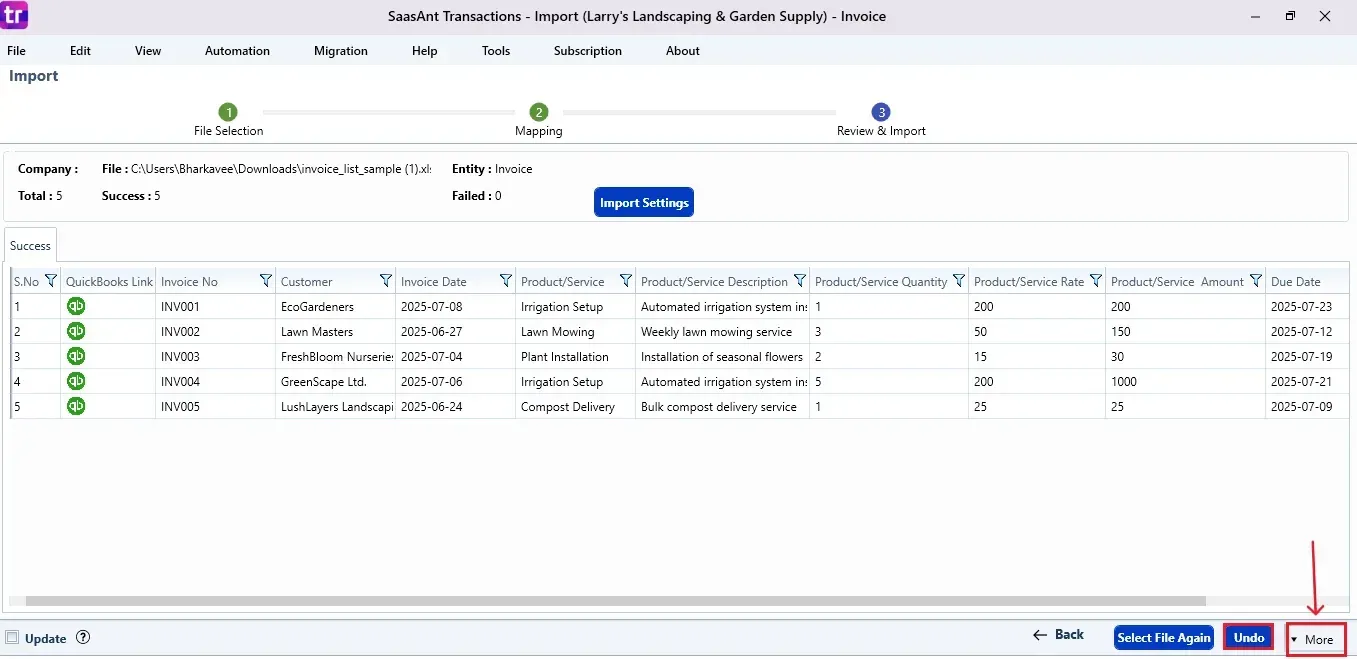
The invoices are reflected in the dashboard.
At the bottom right, click the “More” dropdown and select the option to download your invoices for reference.
Additionally, next to the download option, you can see “Undo”, which allows you to roll back your “Invoices”.
Step 8: Verify in QuickBooks Desktop
Open QuickBooks Desktop, go to the “Customers” menu, and select “Customer Centre”.
Search for the customer name you imported.
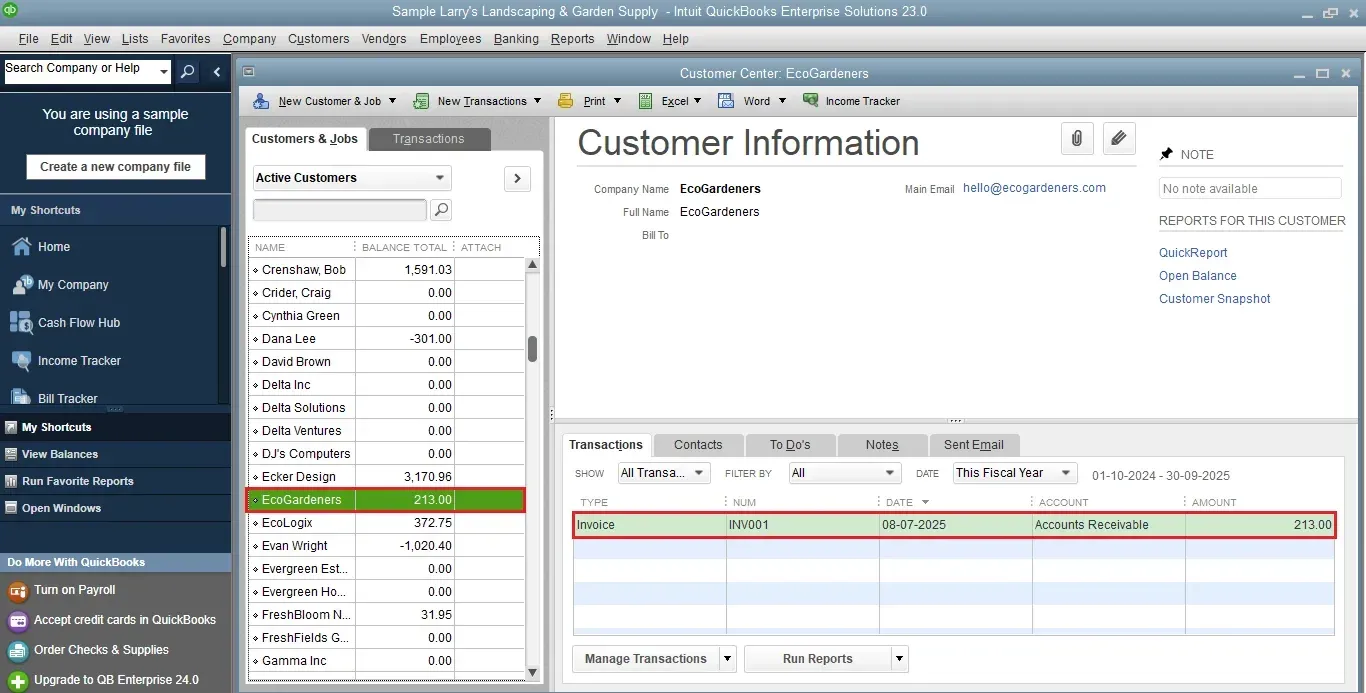
This final step ensures that your data is accurate and appropriately reconciled within QuickBooks.
Wrap Up
Importing PDF invoices into QuickBooks Desktop can be easy. Using SaasAnt Transactions Desktop’s PDF-to-Excel feature and its direct import function, you can turn a manual task into an automated, accurate, and repeatable process. Whether you are an accountant, bookkeeper, or small business owner, this solution saves you time every month and ensures your financial data is correct and up-to-date.
By leveraging trustworthy platforms like QuickBooks for your accounting processes and SaasAnt for transaction management and automation, you can enhance the overall workflow, minimize errors, save time, and acquire greater financial insight.
If you have inquiries regarding our products, features, trial, or pricing, or if you require a personalized demo, contact our team today. We are ready to help you find the ideal solution for your QuickBooks workflow.
Frequently Asked Questions
1) Can I import PDF invoices directly into QuickBooks Desktop?
Not directly. You must first convert the PDF to Excel with SaasAnt Transactions, and then import the Excel file into QuickBooks Desktop.
2) What kind of PDF invoices can be converted?
Standard PDF invoices with well-organized tables are perfect for conversion. Handwritten or scanned image PDFs might not convert correctly.
3) Is the PDF-to-Excel conversion accurate?
Yes, SaasAnt's cloud service extracts structured invoice data and converts it into a compatible Excel format for QuickBooks.
4) Will imported invoices appear in the Customer Centre?
Once invoices are imported, they appear under the corresponding customer in the Customer Centre of QuickBooks Desktop.
Tags
Read also
How to Import Invoices into QuickBooks Desktop
How To Delete An Invoice In QuickBooks Desktop
How To Edit Invoice In QuickBooks Desktop
How to Import CSV file into QuickBooks Desktop