How to Import Bank Transactions to QuickBooks Desktop
Entering bank transactions manually into QuickBooks Desktop can be time-consuming and prone to errors. Whether you're managing daily transactions or month-end reconciliations, being accurate is essential. SaasAnt Transactions Desktop simplifies this task. In just a few steps, you can upload bank data in bulk, map the fields, and import it straight into QuickBooks.
This blog will guide you through the entire process, enabling you to save time, minimize errors, and keep your records up to date.
A freelance bookkeeper managing multiple accounts used to spend hours manually entering bank transactions into QuickBooks Desktop. Now, with SaasAnt Transactions Desktop, it only takes a few minutes. This has improved accuracy, lessened manual work, and enabled quicker turnaround, allowing for more efficient management of additional clients.
This blog is ideal for accountants, bookkeepers, small business owners, and QuickBooks Desktop users who want to automate bank transaction imports, reduce errors, streamline workflows, and maintain accurate financial data.
Contents
How to Import Bank Transactions into QuickBooks Desktop: Step-By-Step Guide
Wrap Up
Frequently Asked Questions
How to Import Bank Transactions into QuickBooks Desktop: Step-By-Step Guide
Follow the steps below to import the bank transactions in QuickBooks Desktop using SaasAnt Transactions Desktop.
Step 1: Install and Connect SaasAnt Transactions
Download the latest SaasAnt Transactions Desktop version.
Run SaasAntTransactions-Setup.exe as an administrator.
Accept the license agreement and complete the installation.
Open the app, go to Subscription > Register.
Enter the license key from your confirmation email.
Keep your internet connection active.
Step 2: Launch SaasAnt Transactions Desktop
Start by opening the SaasAnt Transactions Desktop app on your system.
Ensure that QuickBooks Desktop is open and connected to your company file before proceeding.
Step 3: Connect to QuickBooks Desktop
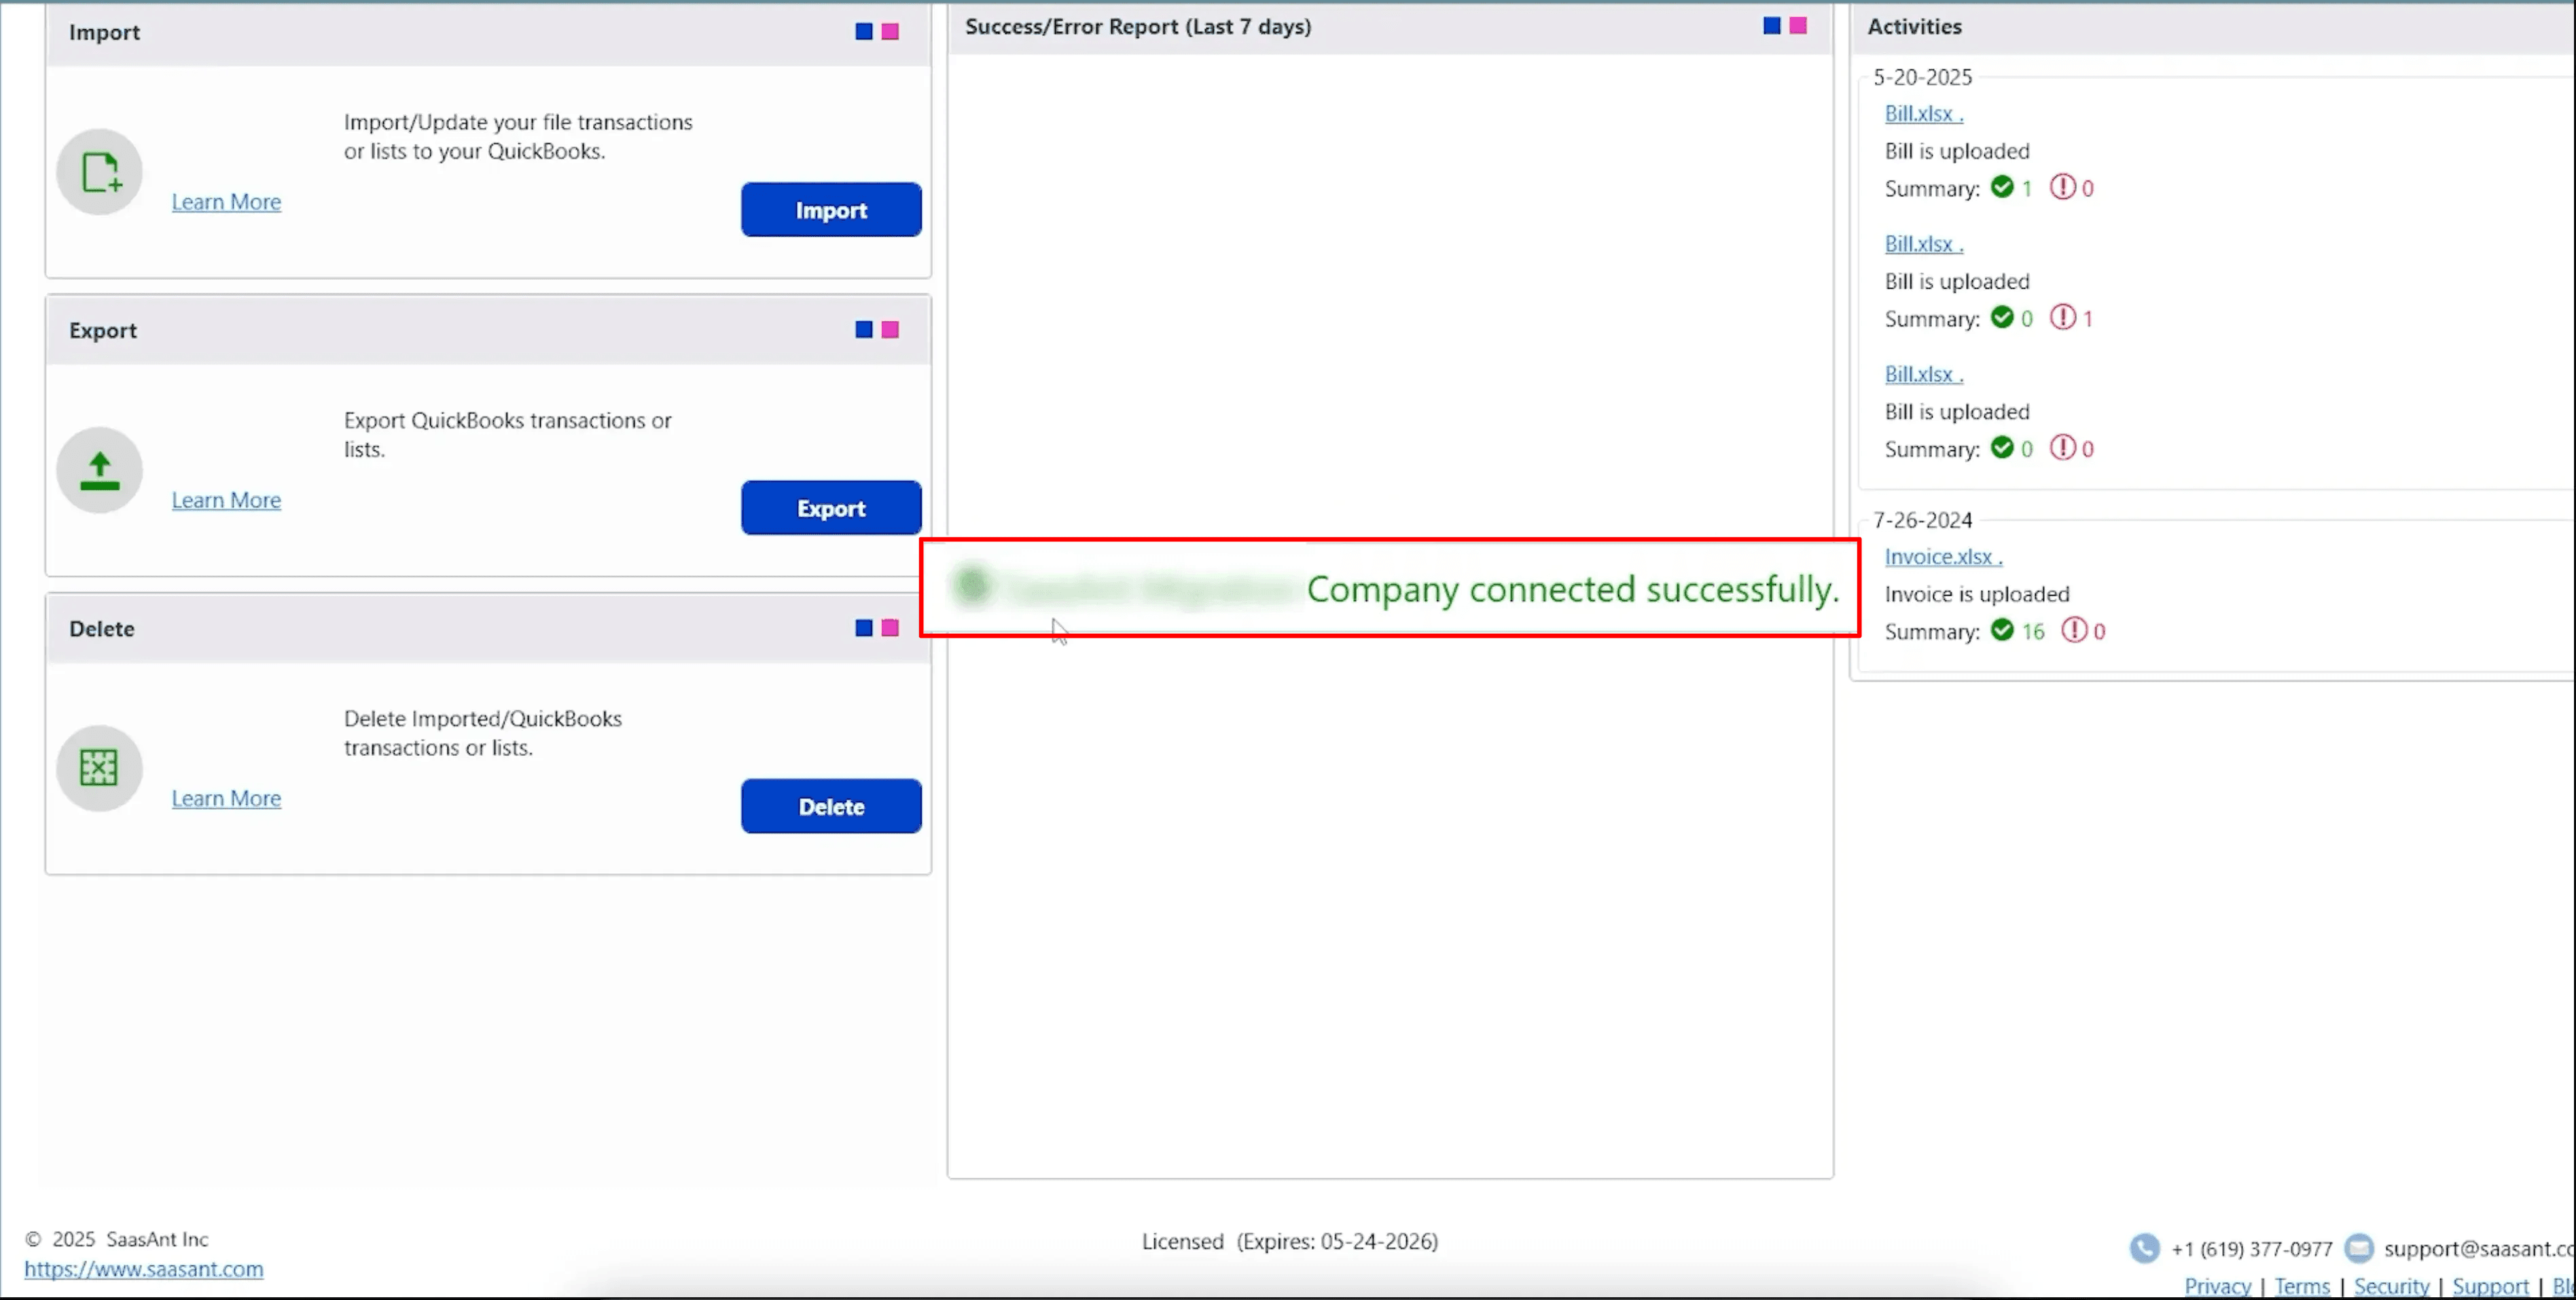
To access, you need to connect the SaasAnt Transactions Desktop with QuickBooks Desktop. Here's how:
Go to the ‘File’ menu in the top-left corner of SaasAnt Transactions Desktop.
Click ‘Connect to QuickBooks’ from the dropdown.
Step 4: Open SaasAnt Transactions
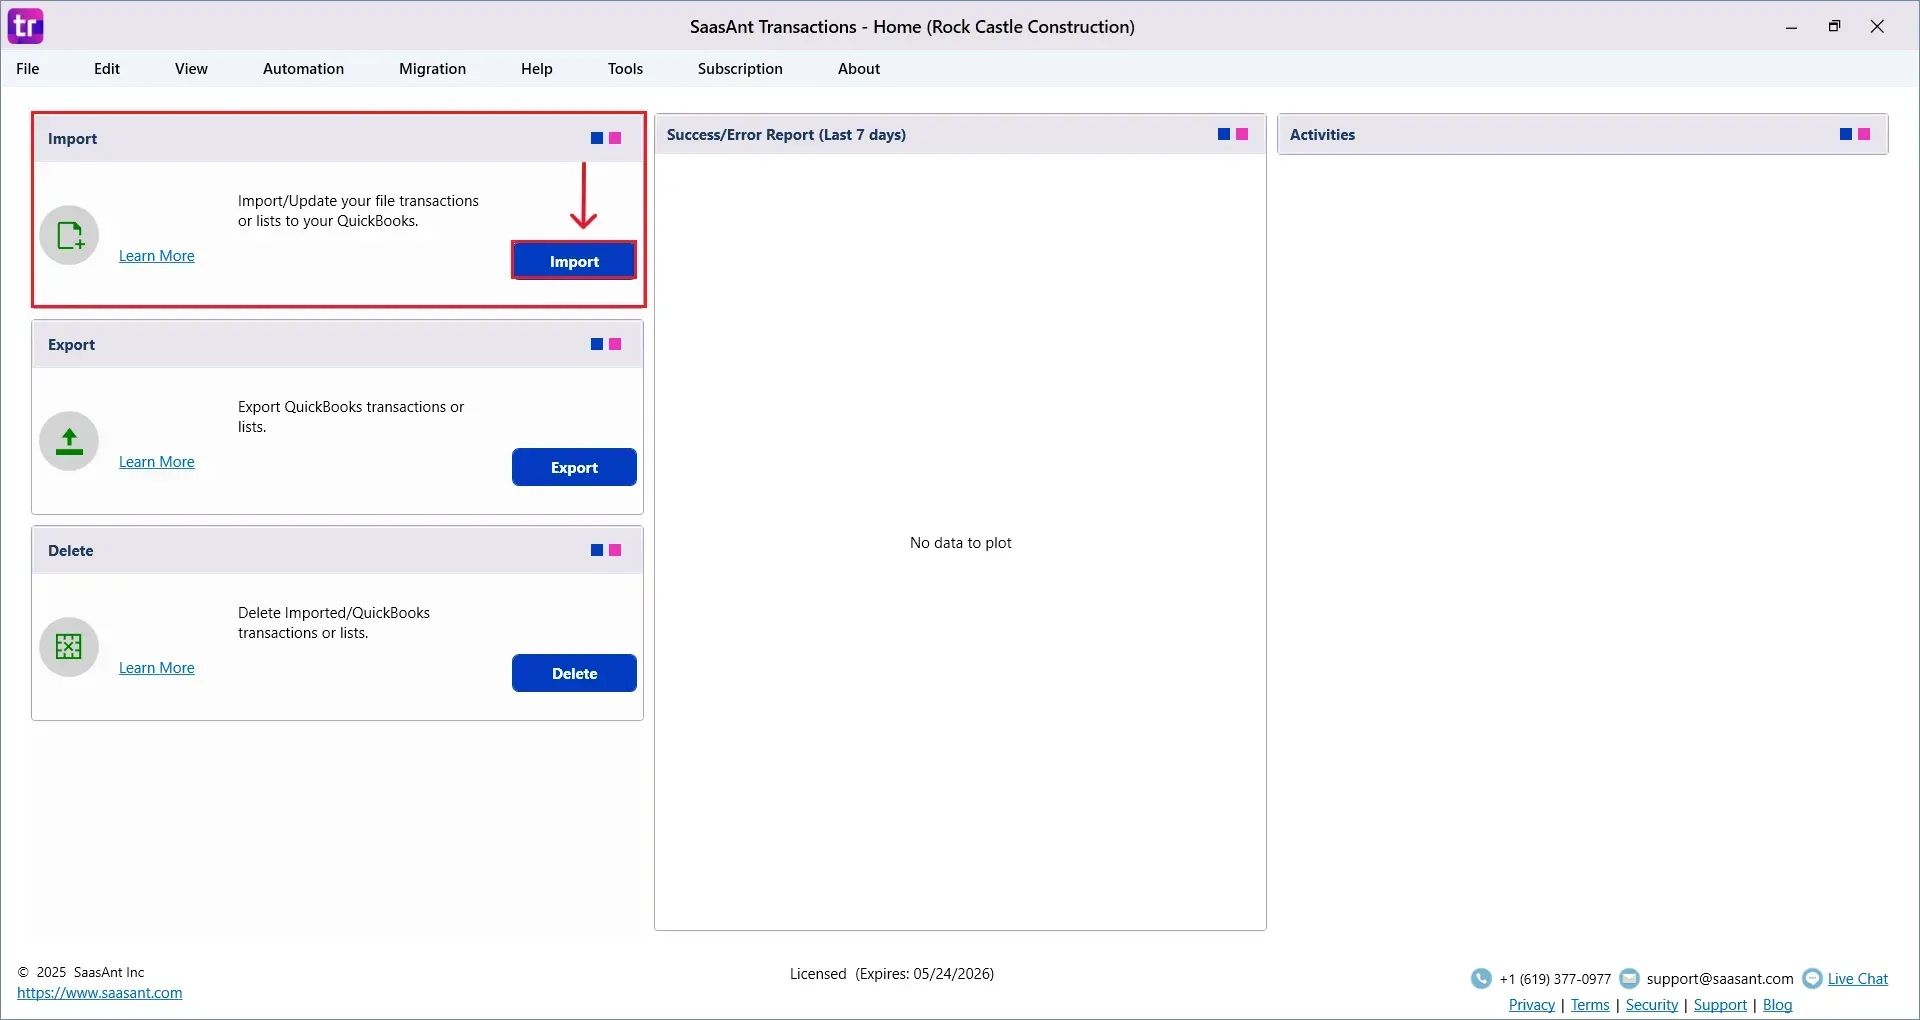
On the SaasAnt dashboard:
On the top left side of the SaasAnt Transactions dashboard, you can see the menu bar with various options.
Select “Import” under the edit dropdown.
The Dashboard appears as shown in the image below.
Select “Bank Statement” from the SaasAnt Transaction Type dropdown and upload your Excel or CSV file.

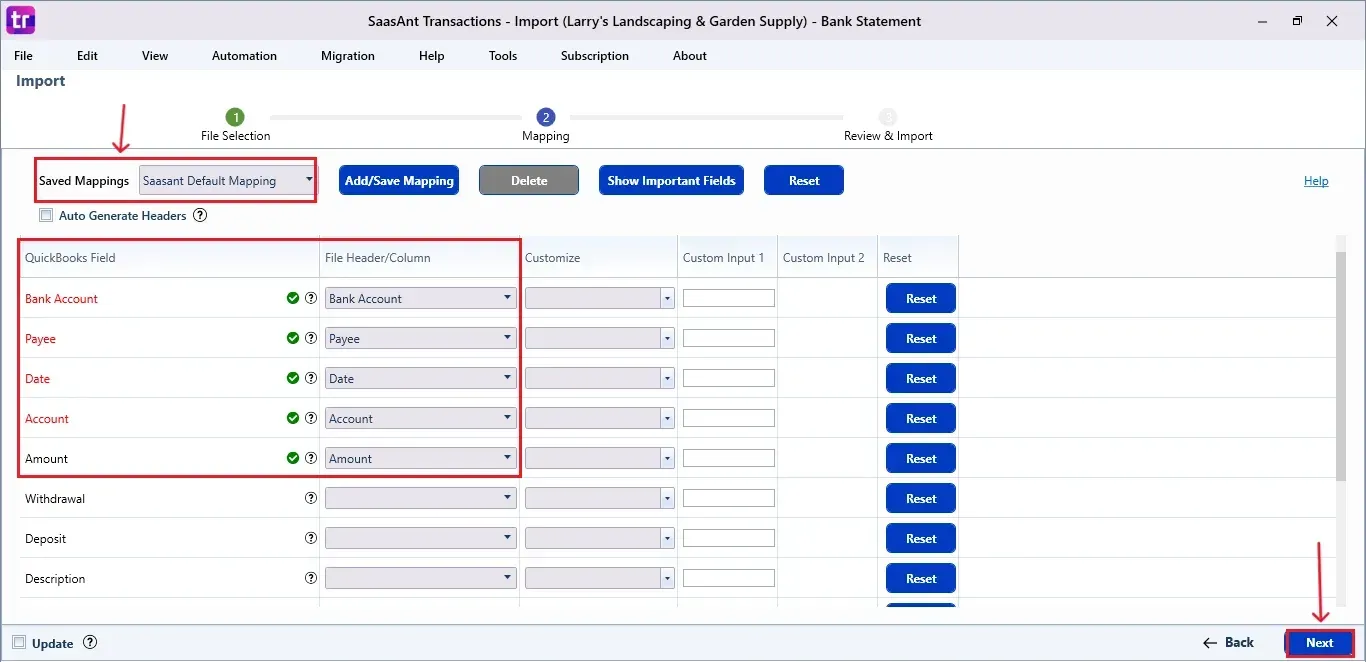
Step 5: Mapping Fields
Select “SaasAnt Default Mapping” under the Saved Mapping dropdown.
Ensures the mapping of essential fields, including bank account, payee, date, etc.
Select “Next” at the bottom right of the dashboard.
Step 6: Review and Import the Data
Click the “Send to QuickBooks” option at the bottom right of the dashboard, as shown in the image below.
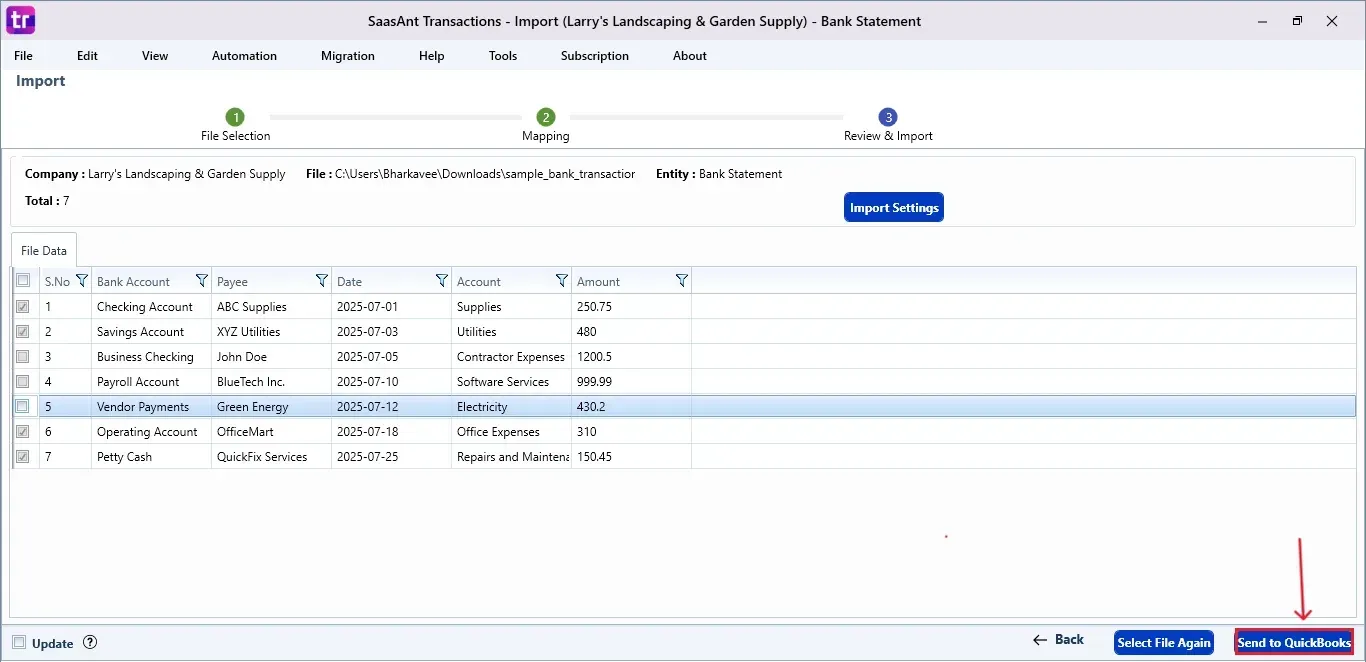
SaasAnt will now push the Bank Transactions into your connected QuickBooks Desktop account.
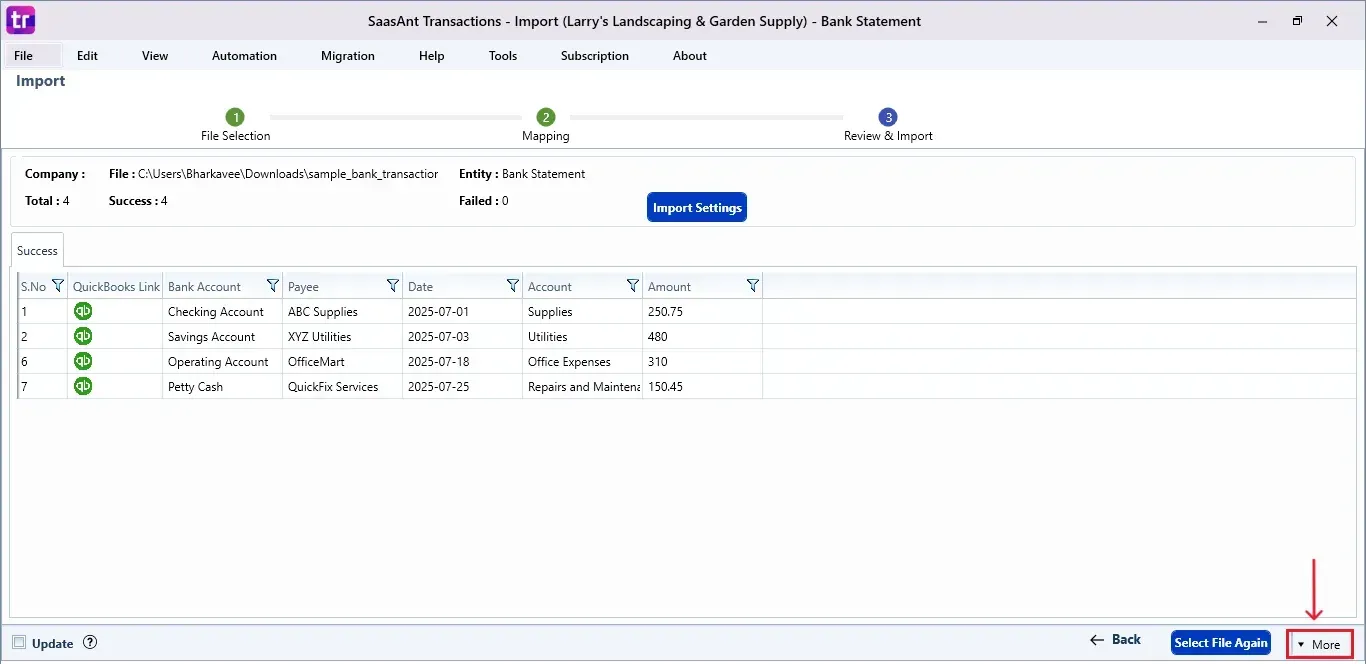
The Bank Transactions are reflected in the dashboard.
At the bottom right, click the “More” dropdown and select the option to download your Bank Transactions for reference.
Additionally, next to the download option, you can see “Undo”, which allows you to roll back your “Bank Transactions”.
Step 7: Verify in QuickBooks Desktop
Open QuickBooks Desktop, go to the “Vendors” menu, and select “Vendor Centre”.
Search for the Bank Transactions name you imported.
This final step ensures that your data is accurate and appropriately reconciled within QuickBooks.
Wrap Up
Importing bank transactions into QuickBooks Desktop can be quick and easy. SaasAnt Transactions Desktop allows you to automate the complete process from connecting your QuickBooks file to field mapping and delivering accurate data in seconds. Whether you're a single bookkeeper or handling multiple accounts, SaasAnt optimizes your workflow, improves accuracy, and saves you time.
By leveraging trustworthy platforms like QuickBooks for your accounting processes and SaasAnt for transaction management and automation, you can enhance the overall workflow, minimize errors, save time, and acquire greater financial insight.
If you have inquiries regarding our products, features, trial, or pricing, or if you require a personalized demo, contact our team today. We are ready to help you find the ideal solution for your QuickBooks workflow.
Frequently Asked Questions
1) Can I undo a bank transaction import if something goes wrong?
Yes, SaasAnt offers an "Undo" option to roll back imported transactions.
2) Is it possible to map custom fields during import?
Definitely. SaasAnt allows you to create custom field mappings or save your preferred mapping format for upcoming imports.
3) Do I need to open QuickBooks Desktop while importing transactions?
Make sure your company file is open in QuickBooks Desktop and connected before you begin the import in SaasAnt.
4) Is there a free trial available for SaasAnt Transactions Desktop?
Yes, SaasAnt offers a free trial. Visit the official website to sign up and get started.
Tags
Read also
How to Import Credit Card Transactions into QuickBooks Desktop
Import Chart of Accounts into QuickBooks Desktop
How to Upload Bank Statements to QuickBooks Online: A Comprehensive Guide
Understanding QuickBooks Migration: From Desktop to Online