The Ultimate Stripe and Xero Integration Guide

Stripe and Xero offer robust solutions for managing online payments and accounting. PayTraQer enhances this functionality by connecting these platforms with various payment processors, including Stripe. This integration facilitates an automated flow of financial data between Stripe and Xero, simplifying the reconciliation process and improving financial accuracy.
Integrating Stripe with Xero through PayTraQer offers multiple advantages. It automates financial data entry like sales, refunds, and expenses, minimising manual errors and saving valuable time. This integration ensures that financial records are up-to-date and reflect the actual business performance for businesses dealing with a high volume of transactions. Additionally, the support for multiple currencies makes it an excellent choice for international companies, ensuring that all transactions are accurately recorded and reconciled, no matter the currency involved.
Contents
Setting Up the Integration of Stripe with Xero
Prerequisites
Step-by-Step Guide to Connect Stripe to Xero
How to Sync Stripe Transactions to Xero
Reconciling Transactions in Xero with PayTraQer
Overview of the Reconciliation Process
Handling Complex Transactions with PayTraQer
Setting Up the Integration of Stripe with Xero
Prerequisites
Before you start the integration process, make sure you have:
An Active Xero Account with master administrator access.
An Active Stripe Account for processing payments.
Step-by-Step Guide to Connect Stripe to Xero
Access PayTraQer through Xero
Log into your Xero account.
Navigate to the Xero App Store and search for PayTraQer.
Click the 'Get this app' button to be redirected to the PayTraQer application. You can also use the direct link: PayTraQer Login.
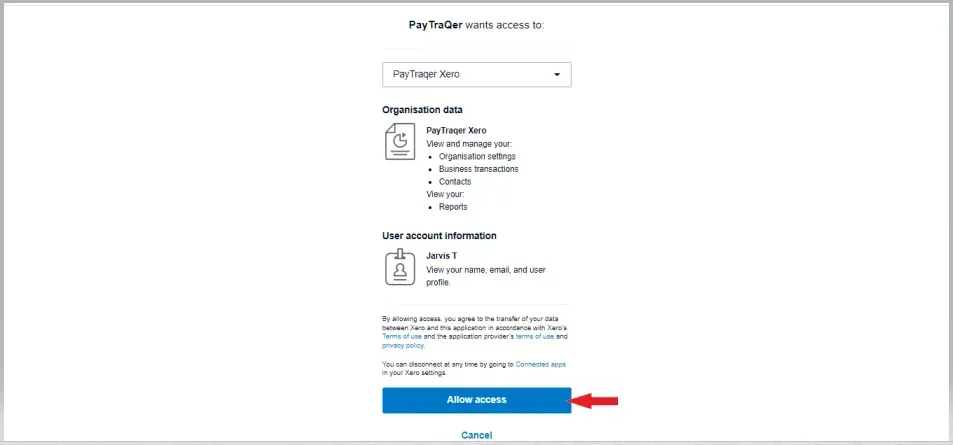
Sign Up and Connect Xero
Sign up for PayTraQer using your credentials. (15 days free trail available)
A screen from Xero will appear requesting access permissions. Click the 'Connect' button to establish the connection. You should receive a success message once the connection is established.
Connect Your Stripe Account
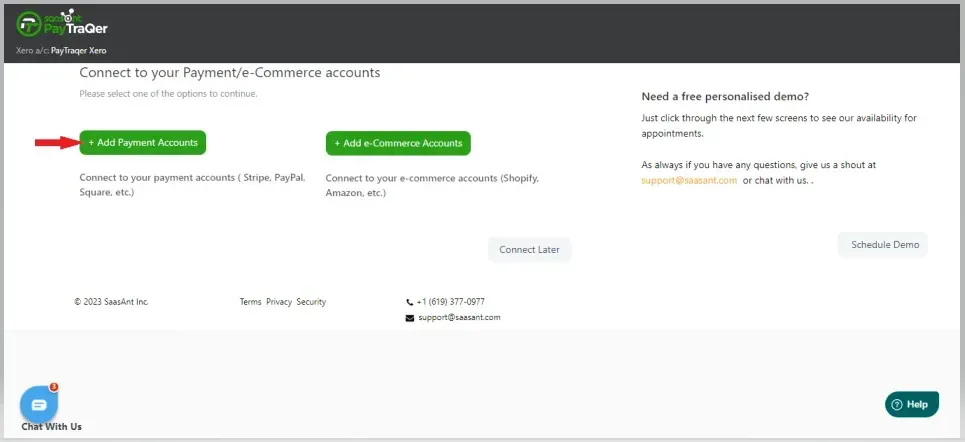
After connecting your Xero company, the next step is to link your Stripe payment processor.
Click on the 'Add Payment Accounts Gateway' button.
Choose the Stripe tile from the 'Connect to Stripe' screen and log in with your credentials.
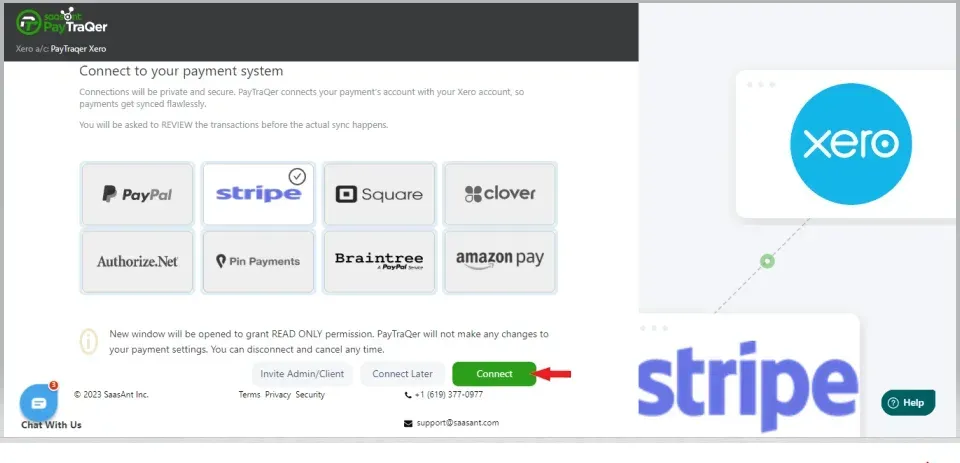
Confirm the connection when Stripe is successfully linked to PayTraQer.
Configure Quickstart Settings
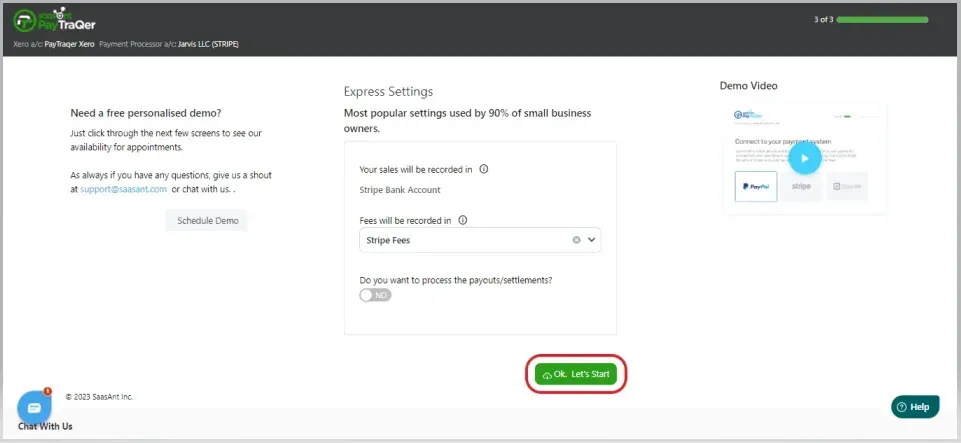
Once Stripe is connected, you'll need to configure the integration settings.
You can opt for the default 'Express Settings' recommended by pro-advisors for a seamless integration or choose 'Detailed Settings' to customise the settings based on your preferences, managing Sales, Products, Fees, and Payouts.
After configuring your settings, you will be directed to the dashboard.
Test and Finalize
Conduct a transaction test to ensure the data flows correctly between Stripe, PayTraQer, and Xero.
Check Xero for the correct categorisation and recording of the transaction data.
Support and Additional Resources
If you encounter any issues or require further customisation, support is available via email at support@saasant.com.
SaasAnt also offers personalised free demos, which can be scheduled to gain better clarity on using the PayTraQer integration effectively.
How to Sync Stripe Transactions to Xero
Once Stripe's integration with Xero via PayTraQer is established, managing the import and synchronisation of transactions is crucial for maintaining accurate financial records. PayTraQer provides flexible syncing options that cater to different business needs.
Automating Data Sync
Sync Modes: PayTraQer offers two primary modes of syncing transactions from Stripe to Xero: manual and automatic sync.
Automatic Sync: This mode is ideal for businesses seeking real-time data integration. Once enabled, all Stripe transactions (sales and payments) are synchronised with Xero, ensuring that financial data is always current without manual intervention. To activate this feature, navigate to the settings in PayTraQer and switch on the automatic sync toggle.
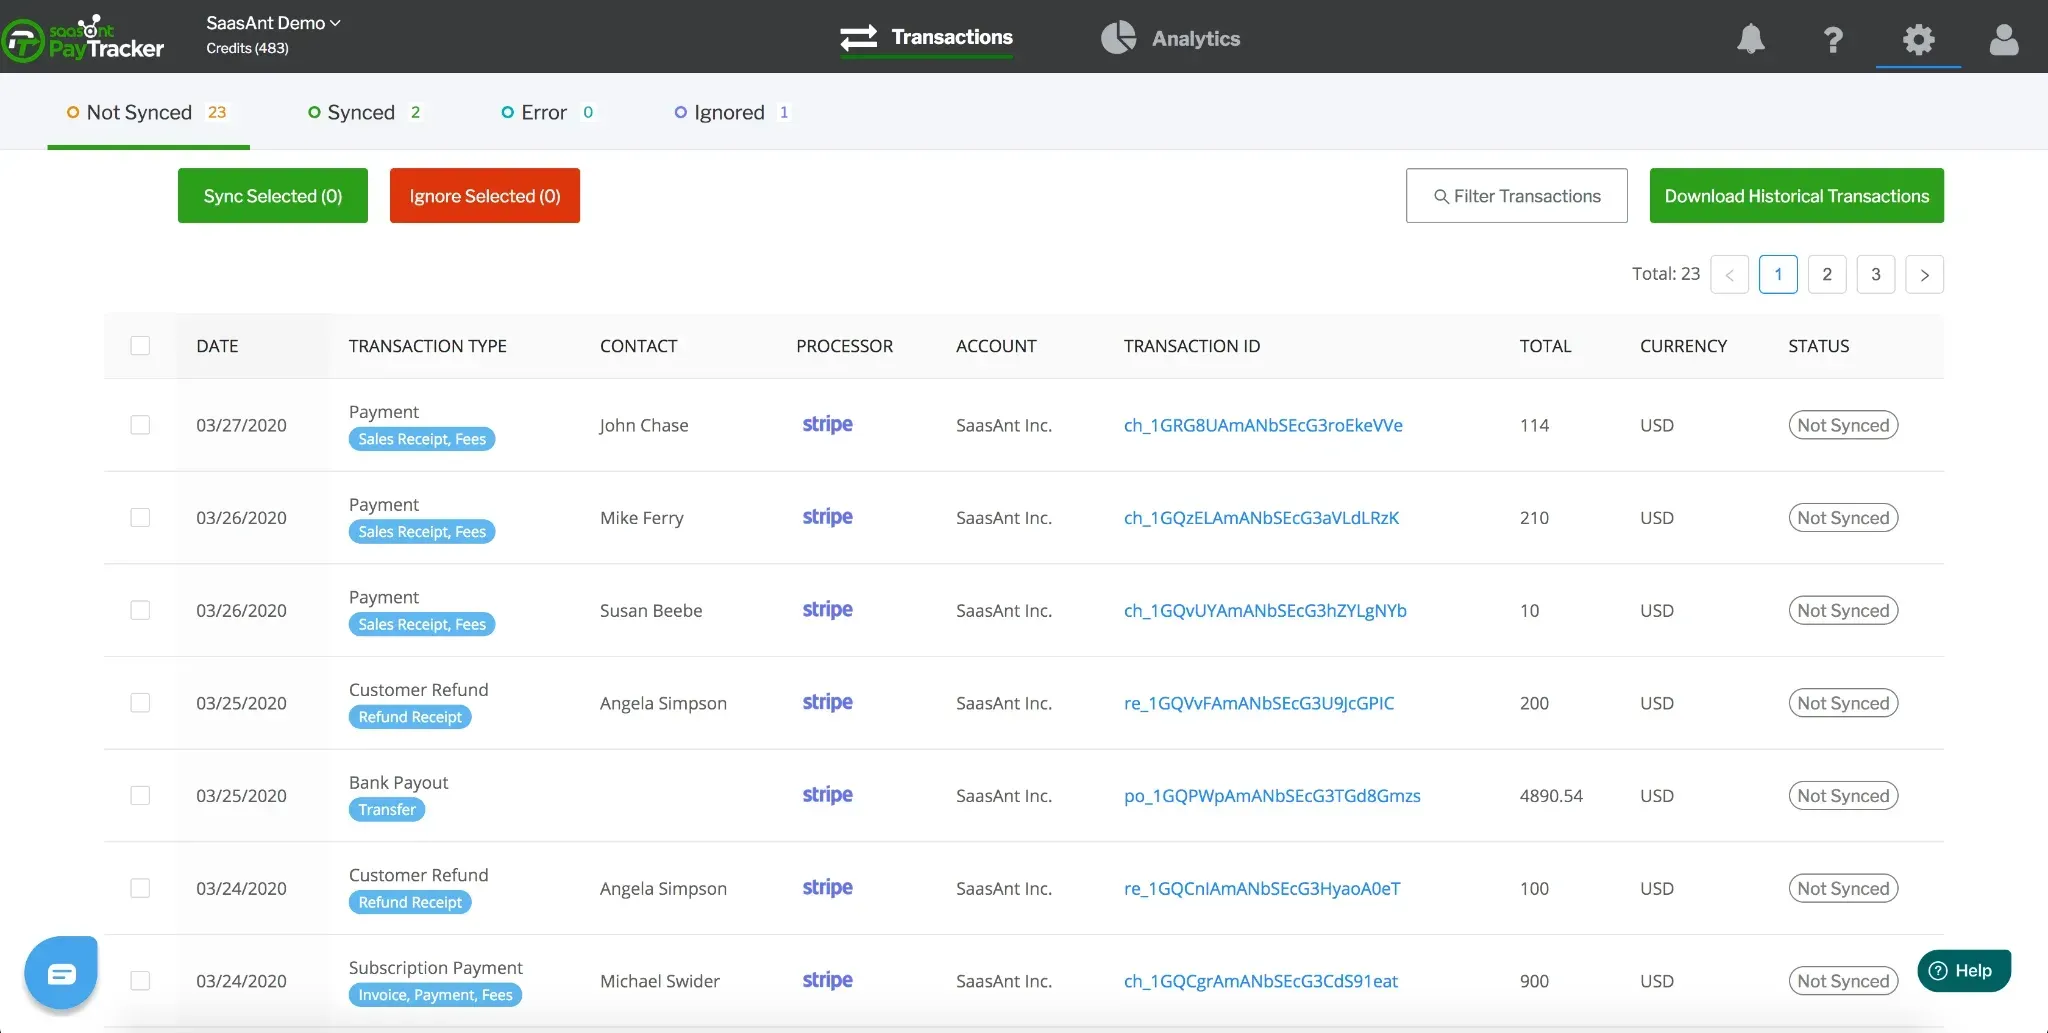
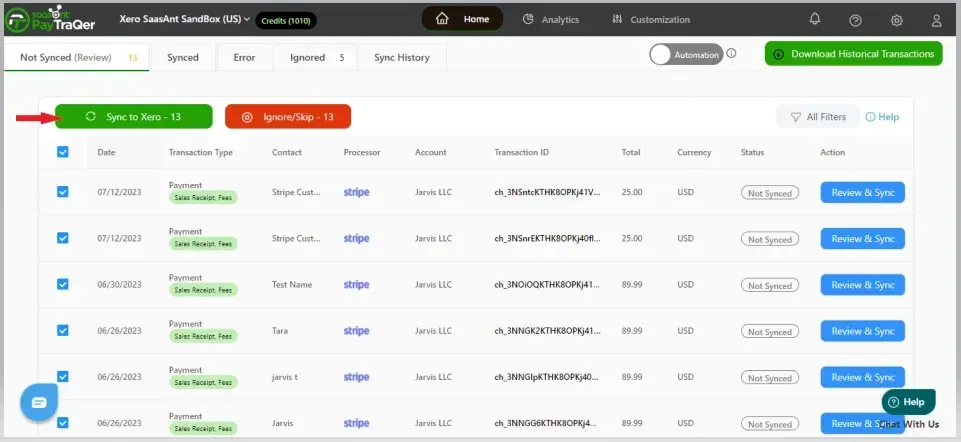
Manual Sync: For users who prefer more control over which transactions are recorded in Xero, the manual sync option allows for the individual review of each transaction. Transactions downloaded from Stripe appear in a grid view on PayTraQer, where you can select specific transactions and sync them to Xero by clicking the 'Sync to Xero' button.
Managing Transaction Types
Sales and Expenses: Syncing includes a detailed categorisation of sales and expenses, with each transaction type being meticulously recorded according to the settings defined during the setup process.
Historical Transactions: PayTraQer can download and sync historical Stripe transactions. It automatically downloads the past 30 days of transactions upon setup. For older transactions, users can specify a date range, download them, and sync them to Xero as needed.
Ignoring Transactions
If certain transactions do not need to be synced to Xero, PayTraQer provides an 'Ignore/Skip' option. Ignored transactions are stored under the Ignored tab and can be resumed and synced later by selecting the 'Resume Selection' button.
Review and Cleanup
Review Sync Status: Users can check the status of synced transactions by navigating to the Home button and selecting the appropriate tab in the horizontal navigation bar:
Not Synced Tab: Lists all transactions not synced to Xero.
Synced Tab: Shows all transactions that have been successfully synced.
Error Tab: Displays transactions that failed to sync due to errors.
Ignored Tab: Contains all transactions that have been intentionally skipped or ignored.
Undo Sync
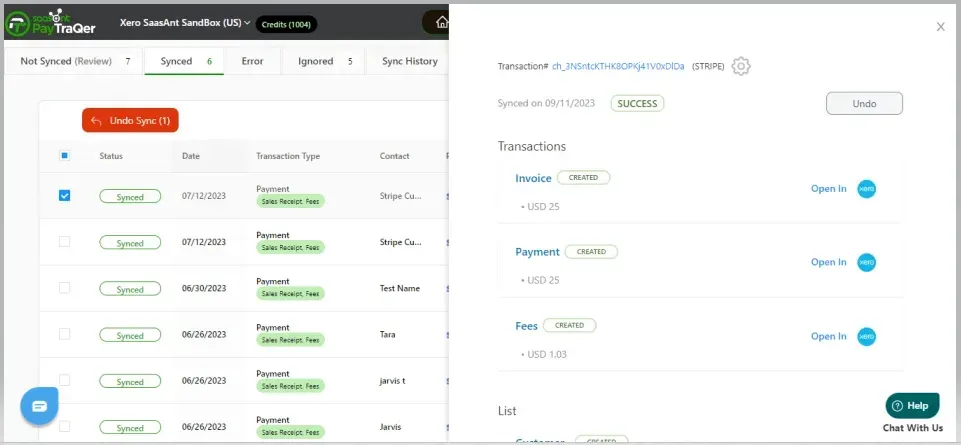
In cases where transactions have been mistakenly synced to Xero, PayTraQer allows these actions to be reversed. Users can select transactions from the 'Synced' tab and choose between 'Undo Transactions', which removes selected transactions while retaining attached customer and item details, or 'Undo All', which removes all details associated with the transactions from Xero.
This flexible approach ensures that businesses can manage their Stripe transactions in Xero precisely, adapting the integration to fit their operational requirements and ensuring their financial data remains accurate and reflects their actual business activities.
Reconciling Transactions in Xero with PayTraQer
Proper reconciliation is crucial for maintaining accurate financial records, especially when integrating systems like Stripe and Xero. PayTraQer simplifies this process by ensuring that all transactions recorded in Stripe are accurately reflected in Xero, making it easier to keep your accounting records consistent and up-to-date.
Overview of the Reconciliation Process
Reconciliation involves matching transactions recorded in Stripe to those entered in Xero to ensure no discrepancies. PayTraQer automates much of this process, but understanding the workflow can help you manage and verify the accuracy effectively.
Automatic Reconciliation with PayTraQer
Auto-Sync Feature: PayTraQer’s automatic sync feature ensures that sales and payment transactions from Stripe are instantly reflected in Xero. This minimises the need for manual data entry and reduces the potential for errors.
Real-Time Updates: With automatic synchronisation enabled, transactions are updated in Xero in real time. This feature is handy for businesses that handle daily transactions, ensuring their financial data is always current.
Manual Reconciliation Steps
While PayTraQer automates most of the reconciliation process, certain situations might require manual intervention:
Review Transactions: Regularly review transactions in Xero to ensure they match the records in Stripe. PayTraQer provides tools to filter and view transactions based on their sync status—synced, not synced, or errored.
Resolve Discrepancies: If discrepancies arise (e.g., due to refunds, chargebacks, or unrecognised transactions), manually adjust the entries in Xero to match Stripe records. PayTraQer’s dashboard allows users to access detailed information about each transaction, making identifying and resolving differences easier.
Error Handling: Transactions that fail to sync automatically are flagged in the Error tab on PayTraQer’s dashboard. Investigate the cause of these errors, correct them, and resync the transactions.
Ignored Transactions: Sometimes, transactions may be intentionally ignored (for instance, duplicate entries or non-revenue items). These can be managed through the Ignored tab, which can be reviewed and synced later.
Best Practices for Effective Reconciliation
Regular Checks: Schedule regular reconciliation sessions to ensure your Xero records align with your Stripe account. This practice helps identify issues early and keep your financial reports accurate.
Leverage PayTraQer’s Features: Utilize PayTraQer’s detailed settings and customisation options to tailor the reconciliation process to your business needs. This includes setting rules for how different types of transactions are handled during the sync process.
Training and Support: Ensure team members handling financial transactions are trained on using PayTraQer and understand the basics of reconciliation. Utilise PayTraQer’s support resources for any complex issues that arise.
Handling Complex Transactions with PayTraQer
PayTraQer simplifies managing complex transactions such as multi-currency operations, refunds, and chargebacks in Xero, ensuring accurate financial records.
Multi-Currency Transactions
Currency Configuration: Ensure all operational currencies are set up in Stripe and Xero. PayTraQer recognises and processes these currencies automatically.
Exchange Rates: Stripe's exchange rates are used for conversions in Xero, maintaining accurate financial reporting.
Reconciliation: Follow standard reconciliation processes, paying attention to exchange rate changes.
Refunds and Chargebacks
Recording Refunds: PayTraQer automatically creates a corresponding negative invoice in Xero when a refund is issued in Stripe.
Managing Chargebacks: Chargebacks are recorded as expenses in Xero, keeping them distinct from regular transactions for more precise tracking.
Advanced Customizations
Custom Mapping: Customize how transactions are categorised in Xero, such as separating payment gateway fees.
Automated Rules: Set rules for recurring scenarios like discounts or promotional transactions to ensure they're correctly accounted for.
Best Practices
Regular Audits: Periodically audit transactions to ensure accuracy, especially for complex ones.
Stay Updated: Keep informed of updates from PayTraQer and Xero that might impact transaction processing.
Educate Your Team: Ensure team members are trained on PayTraQer’s handling of complex transactions.
Utilise Support: Use PayTraQer’s support for guidance on complex transaction issues.
By leveraging PayTraQer’s advanced features, businesses can manage complex transactions efficiently, ensuring robust and compliant financial processes.
As we wrap up this comprehensive guide to integrating Stripe with Xero using PayTraQer, it's clear that this powerful tool can significantly enhance your financial operations. The integration simplifies the accounting process, ensures accuracy, saves time, and improves financial reporting across various business contexts.
Also read: